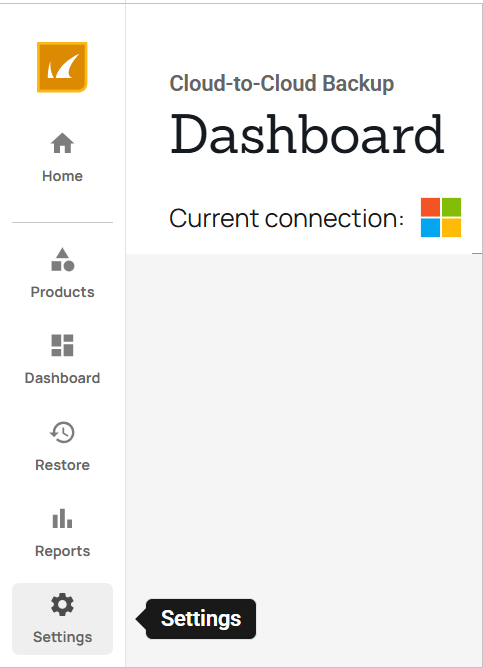
Use the Settings page on the side navigation menu to manage users and sites, configure Barracuda Cloud-to-Cloud Backup users, and allow support access.
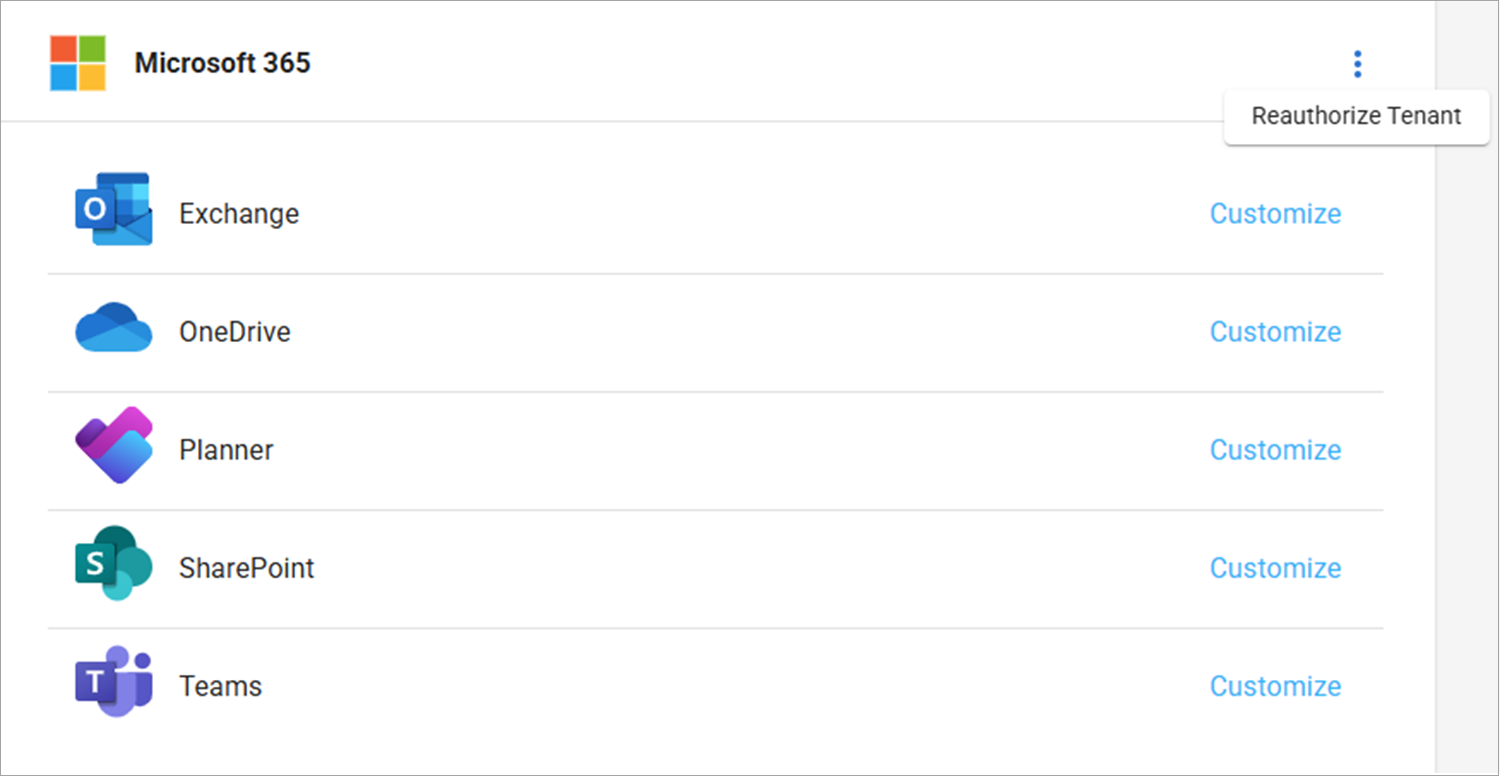
Reauthorization
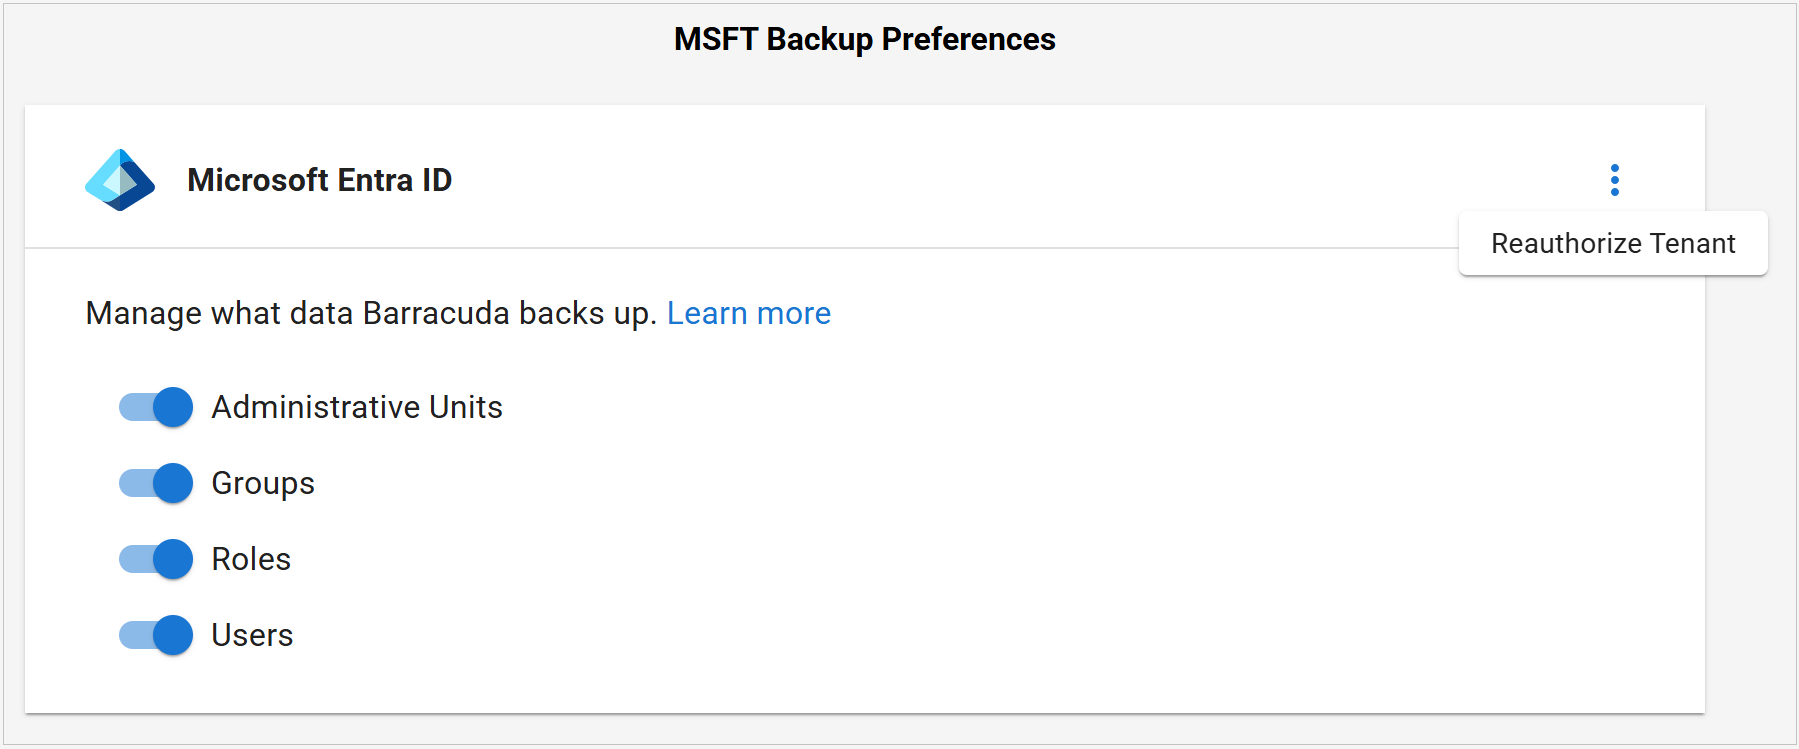
To reauthenticate your connection, click the ellipsis (3 dots) to the right of the Microsoft 365 or Entra ID section, and click Reauthorize Tenant.
Note
If you choose not to renew your Entra ID Backup Premium subscription and previously had an Entra ID Backup subscription, your account will automatically switch to the Entra ID Backup subscription, however this process is not seamless. To avoid any interruptions in your backups, you will need to reauthenticate your Entra ID connections. Go to the Products page and click Authenticate to reauthorize your connections.
Customization
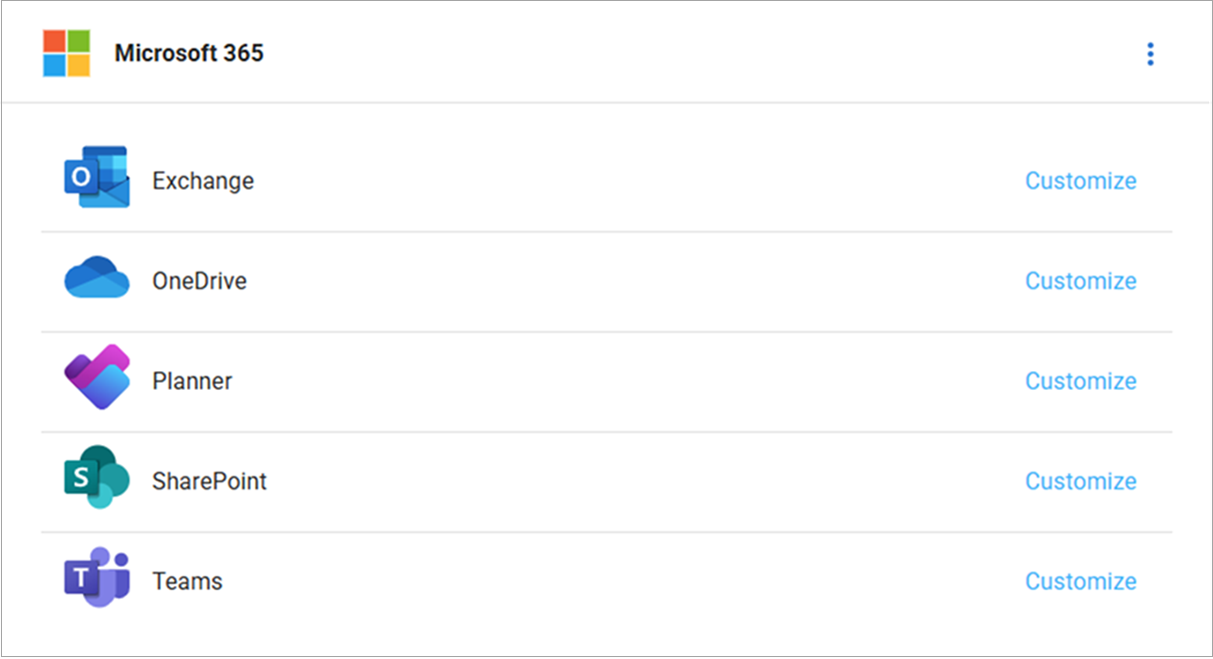
Add additional Microsoft 365 tenants, change the default backup behavior, and add and remove users/groups, sites, or Teams to Microsoft 365 data sources.
To add or remove users/groups, sites, or Teams in your organization, click Customize next to the data source you want. You can:
Change the default backup behavior.
Include/exclude users/groups, sites, and Teams to back up.
Exchange and OneDrive
By default, all Exchange and OneDrive users are automatically backed up. You can change the default behavior by clicking the Change button under the Default backup behavior section.
Select from the following, and then click Save Changes.
Automatically back up users – All new and existing users will be backed up by default. Specific users can be excluded from backups by adding them to the exclude list.
Do not automatically back up users – All new and existing users will not be automatically backed up. Specific users can be added to backups by adding them to the include list.
Note that changing the default behavior will reset any users that you have added manually to the include or exclude list.
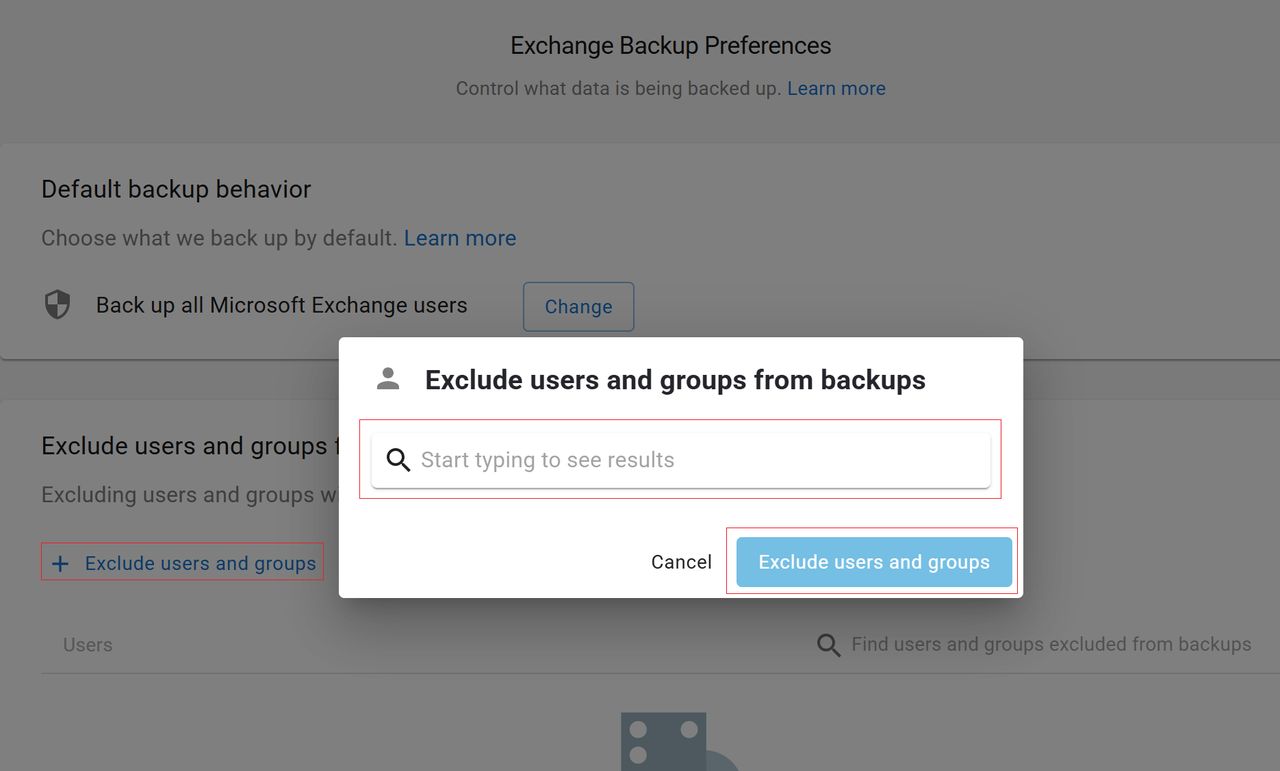
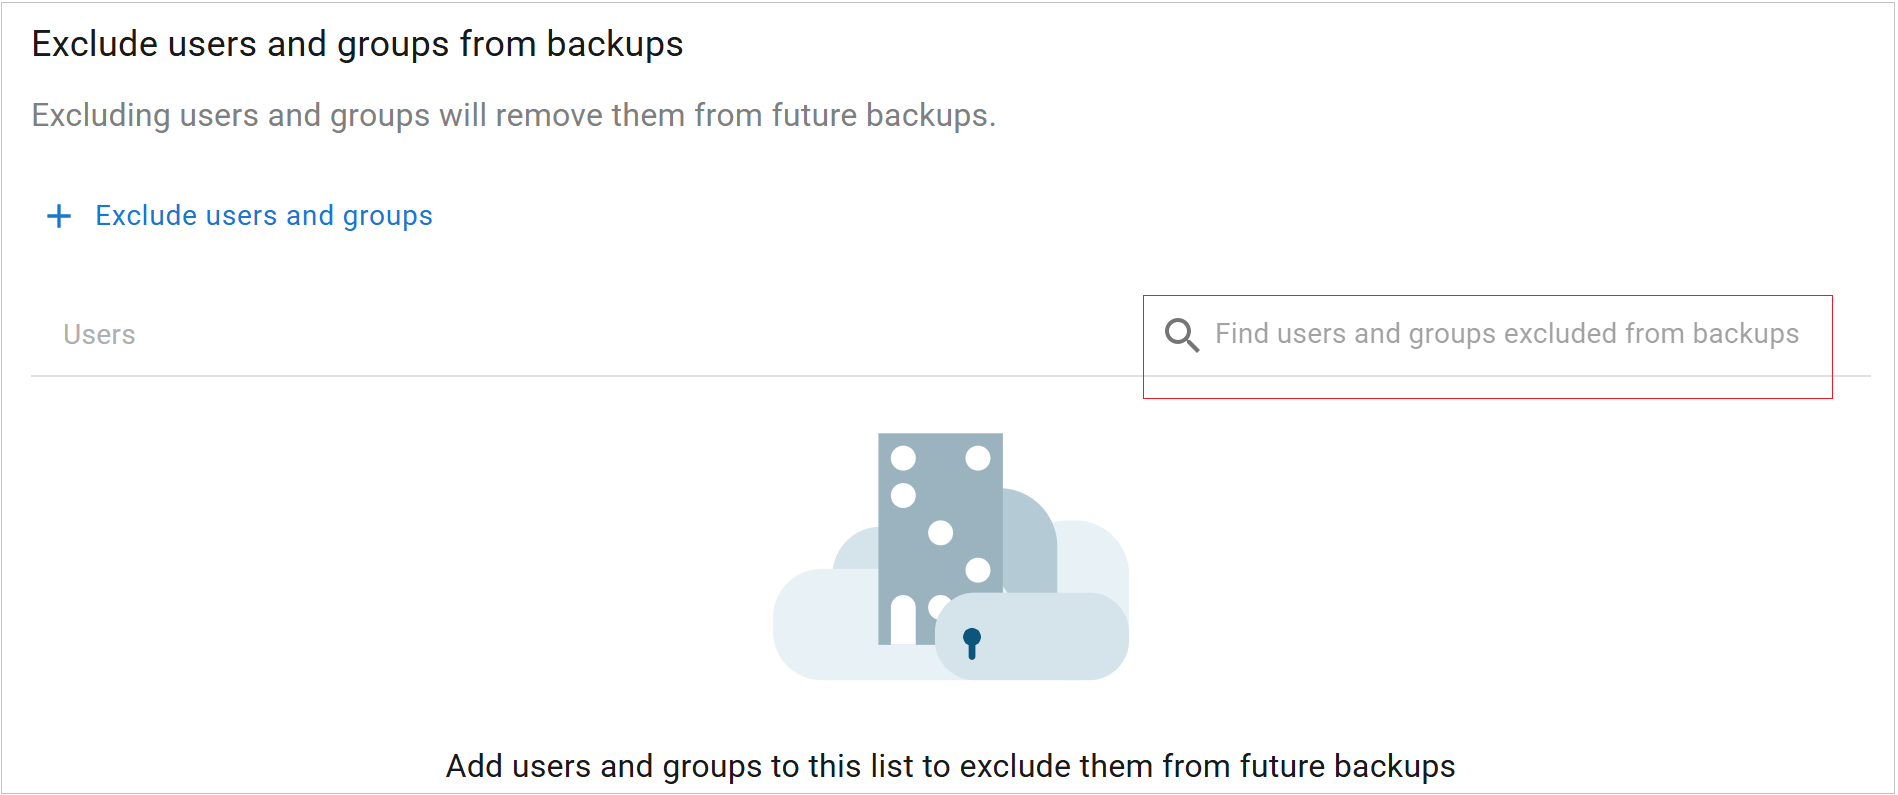
Exclude Users and Groups
If your default backup behavior is set to Automatically back up users, you can exclude users and groups from future backups.
The following types of groups can be selected:
Click Exclude users and groups.
In the search bar, start typing in an email address or group name to see the results.
Select the user(s) and group(s) to exclude and click the Exclude users and groups button in the popup window.
Note that nested groups are also supported. For example, if Admins-securityGroups includes a backupadmins-securityGroup subgroup, both are added to the exclude list.
The users and groups are now in the exclude list and will be excluded from future backups. This will be reflected in the next backup schedule automatically.
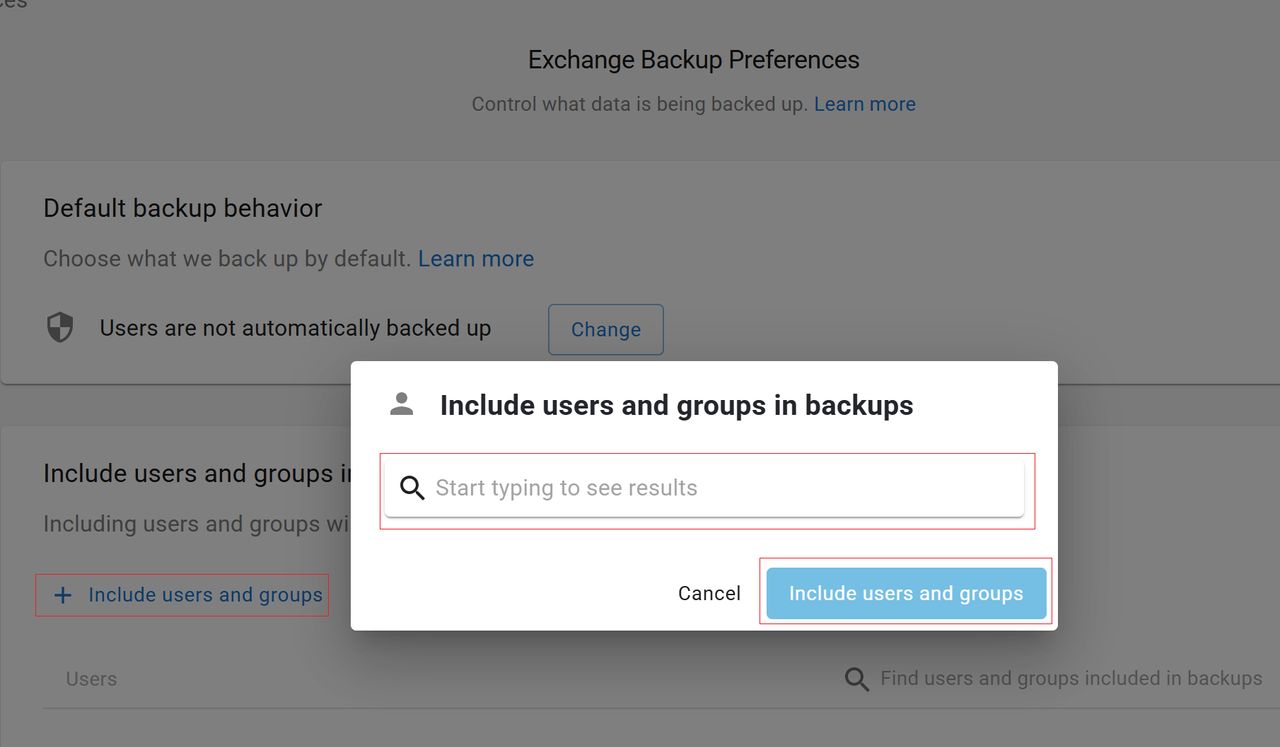
Include Users and Groups
If your default backup behavior is set to Do not automatically back up users, you can include users and groups for future backups.
The following types of groups can be selected:
Click Include users and groups.
In the search bar, start typing in an email address or group name to see the results.
Select the user(s) and group(s) to include and click the Include users and groups button in the popup window.
Note that nested groups are also supported. For example, if Admins-securityGroups includes a backupadmins-securityGroup subgroup, both are added to the include list.
The users and groups are now in the include list and will be included in the next backup schedule automatically.
Remove Users and Groups
To remove a user/group from your include or exclude list, click the Delete icon next to the email address/group you want to remove.

The user/group will now be removed from the exclude/include list. This will be reflected in the next backup schedule automatically.
Search Users and Groups
To search for users and groups in your include or exclude list, type in the name of the user or group name in the search bar.
By default, all Planner plans shared with your teams or groups are automatically backed up. You can change the default behavior by clicking the Change button under the Default backup behavior section.
Select from the following, and the click Save Changes.
Automatically back up plans shared with teams or groups – All new and existing Planner plans that are shared with teams or groups will be backed up by default. Specific teams or groups can be excluded from backups by adding them to the exclude list.
Do not automatically back up plans shared with teams or groups – All new and existing Planner plans that are shared with teams or groups will not be automatically backed up. Specific teams or groups can be added to backups by adding them to the include list.
Note that changing the default behavior will reset any teams and groups that you have added manually to the include or exclude list.
Exclude Teams/Groups
If your default backup behavior is set to Automatically back up plans shared with teams and groups, you can exclude teams and groups from future backups.
Click Exclude Teams and Groups.
In the search bar, start typing in a Team/Group name to see the results.
Select the Team(s) to exclude and click the Exclude teams button in the popup window.
The teams/groups are now in the exclude list and will be excluded from future backups. This will be reflected in the next backup schedule automatically.
Include Teams/Groups
If your default backup behavior is set to Do not automatically back up plans shared with teams and groups, you can include teams for future backups.
Click Include Teams and Groups.
In the search bar, start typing in a team/group name to see the results.
Select the team(s) to include and click the Include teams button in the popup window.
The teams/groups are now in the include list and will be included in the next backup schedule automatically.
Remove Teams/Groups
To remove a team/group from your include or exclude list, click the Delete icon next to the one you want to remove.
The team/group will now be removed from the exclude/include list. This will be reflected in the next backup schedule automatically.
Search Teams/Groups
To search for teams/groups in your include or exclude list, type in the name of the team/group in the search bar.
SharePoint
By default, all SharePoint sites are automatically backed up. You can change the default behavior by clicking the Change button under the Default backup behavior section.
Select from the following, and then click Save Changes.
Automatically back up sites – All new and existing sites will be backed up by default. Specific sites can be excluded from backups by adding them to the exclude list.
Do not automatically back up sites – All new and existing sites will not be automatically backed up. Specific sites can be added to backups by adding them to the include list.
Note that changing the default behavior will reset any sites that you have added manually to the include or exclude list.
Exclude Sites
If your default backup behavior is set to Automatically back up sites, you can exclude sites from future backups.
Click Exclude sites.
In the search bar, start typing in a site to see the results.
Select the site(s) to exclude and click the Exclude sites button in the popup window.
The sites are now in the exclude list and will be excluded from future backups. This will be reflected in the next backup schedule automatically.
Include Sites
If your default backup behavior is set to Do not automatically back up sites, you can include sites for future backups.
Click Include sites.
In the search bar, start typing in a site to see the results.
Select the site(s) to include and click the Include sites button in the popup window.
The sites are now in the include list and will be included in the next backup schedule automatically.
Remove Sites
To remove a site from your include or exclude list, click Delete next to the site you want to remove.
The site will now be removed from the exclude/include list. This will be reflected in the next backup schedule automatically.
Search Sites
To search for sites in your include or exclude list, type in the name of the site in the search bar.
Teams
By default, all Teams are automatically backed up. You can change the default behavior by clicking the Change button under the Default backup behavior section.
Select from the following, and then click Save Changes.
Automatically back up teams – All new and existing teams will be backed up by default. Specific teams can be excluded from backups by adding them to the exclude list.
Do not automatically back up teams – All new and existing teams will not be automatically backed up. Specific teams can be added to backups by adding them to the include list.
Note that changing the default behavior will reset any users that you have added manually to the include or exclude list.
Exclude Teams
If your default backup behavior is set to Automatically back up teams, you can exclude teams from future backups.
Click Exclude teams.
In the search bar, start typing in a team to see the results.
Select the team(s) to exclude and click the Exclude teams button in the popup window.
The teams are now in the exclude list and will be excluded from future backups. This will be reflected in the next backup schedule automatically.
Include Teams
If your default backup behavior is set to Do not automatically back up teams, you can include teams for future backups.
Click Include Teams.
In the search bar, start typing in a team to see the results.
Select the team(s) to include and click the Include teams button in the popup window.
The teams are now in the include list and will be included in the next backup schedule automatically.
Remove Teams
To remove a team from your include or exclude list, click the Delete icon next to the team you want to remove.
The team will now be removed from the exclude/include list. This will be reflected in the next backup schedule automatically.
Search Teams
To search for teams in your include or exclude list, type in the name of team in the search bar.
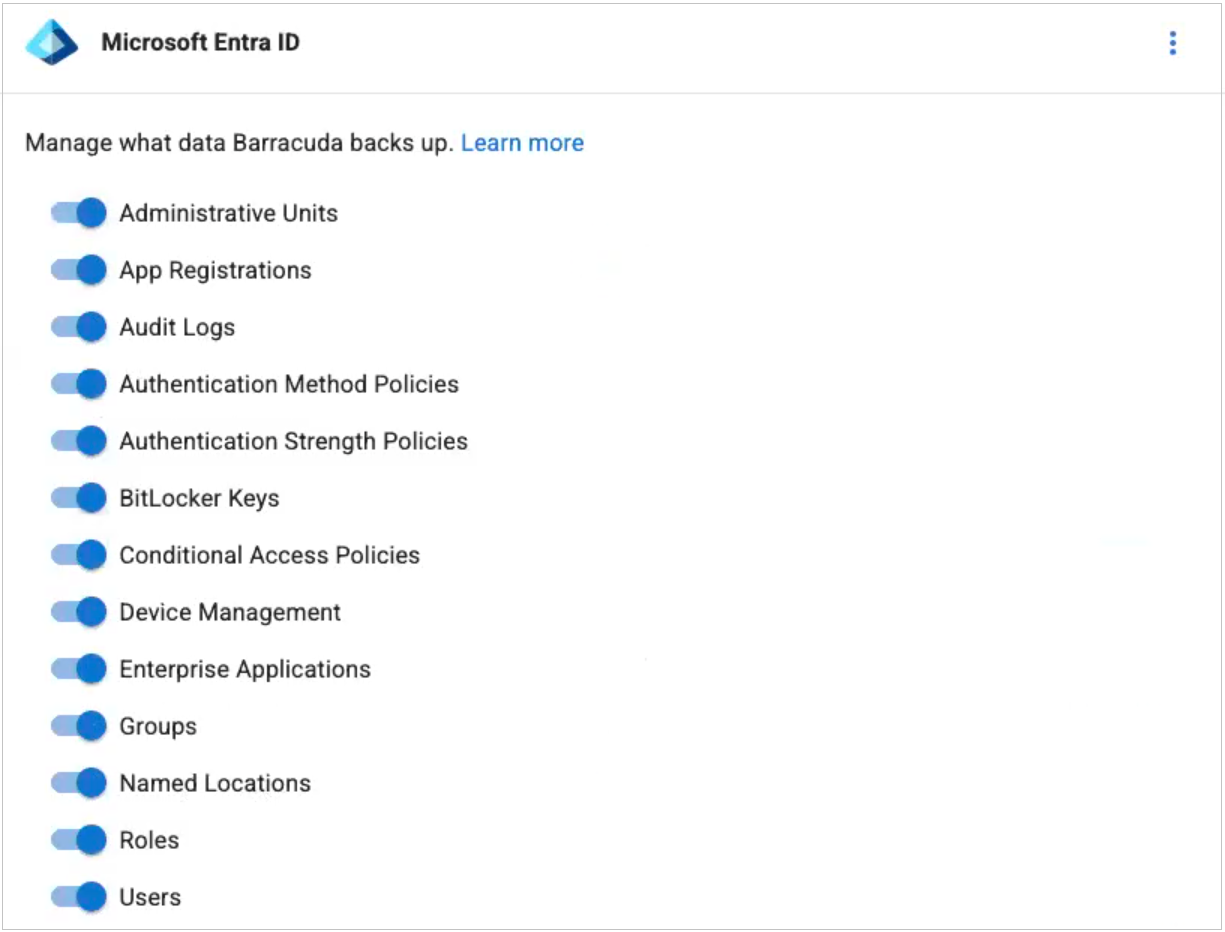
Easily manage your backup preferences by toggling the switch next to each Entra ID object to enable or disable backups.
Entra ID Backup

Entra ID Backup Premium
Users
Manage user access to the Barracuda Cloud-to-Cloud Backup user interface.
In the Users section, click Manage Users.

Add Users
On the User Management page, click + Add User. Enter the email address, select the user role(s), and click Add User.
If there are no email addresses available or you encounter an error while adding email addresses, you will first need to add the new users in Barracuda Cloud Control. See How to Add Users and Configure Product Entitlements and Permissions.
You must select the Cloud-to-Cloud Backup product entitlement in Barracuda Cloud Control to grant the user default access to the selected services.
Select from the following user roles:
Admin – Full access to Barracuda Cloud-to-Cloud Backup, including the Settings page.
Policies – Access is limited to creating and managing retention policies on the Retention page and viewing the Products page.
Backup – Access is limited to backing up users and viewing the Restore browser.
Backup users can only view backup jobs on the Dashboard and Reports pages.
On the Restore page, Backup users can start a new backup job, view backed up data, and use the search and filter functionalities.
Export – Access is limited to exporting data out of Barracuda Cloud-to-Cloud Backup. Note that the Restore role must also be assigned to allow access to the Restore page.
Restore – Access is limited to restoring data to the original/alternate location in the Restore browser. Note that the Export role must be assigned to have permission to export data.
Purge – Access is limited to viewing data and initiating purge actions from the Restore page and viewing the Products, Dashboard, and Reports pages.
Reporting – Access is limited to viewing certain pages.
Note that you cannot make changes to the current user. This is to ensure that an admin does not accidentally delete their own account, limit their own usage, or lock themselves out of their account.
User Roles Permissions Access to Cloud-to-Cloud Backup Pages
| Dashboard | Products | Restore | Policies | Reports | Settings |
|---|
Admin |  | | | | | |
Policies | | | | | | |
Backup | | | | | | |
Export | | | | | | |
Restore | | | | | | |
Purge | | | | | | |
Reporting | | | | | | |
Edit and Delete Users
Click the role to the right of the user to modify the user roles. Check or uncheck the role(s) for the user and then click anywhere on the screen. The user is now updated with the new role(s).

Click Delete to delete a user. To cancel the removal, click Undo.
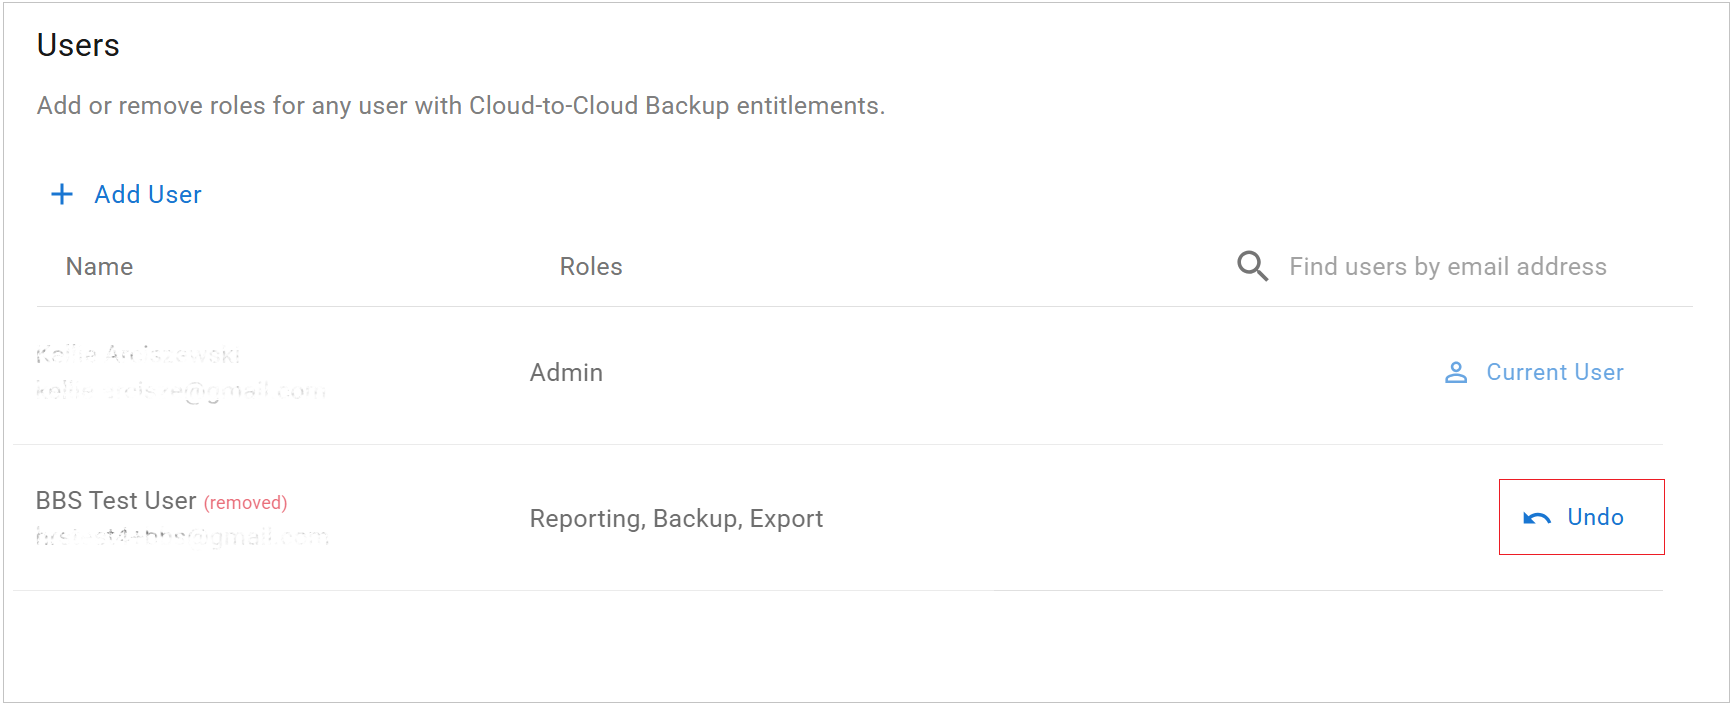
You can also use the search bar to find users by email address.
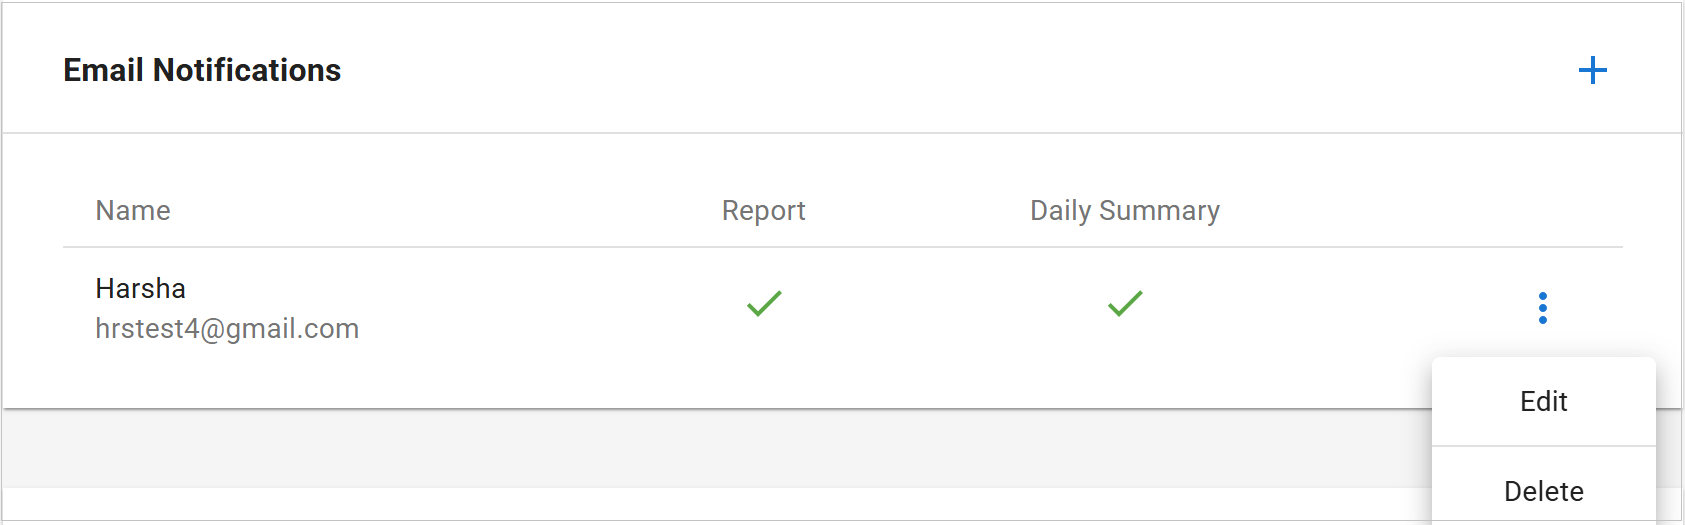
Email Notifications
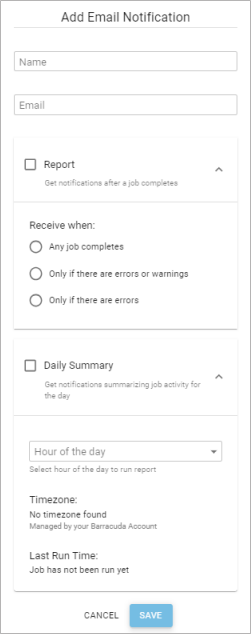
Add Email Notifications
Add email notification recipients to receive reports about your backups, restores, and exports.
Click the + sign at the top of the Email Notifications section. Enter the name, email address, and select the report type(s) and Daily Summary if necessary. Click Save.
@
Edit and Delete Email Notifications
Click the ellipsis (3 dots) to the right of the user to modify the options. Click Edit to edit details for an existing user or Delete to delete a user.
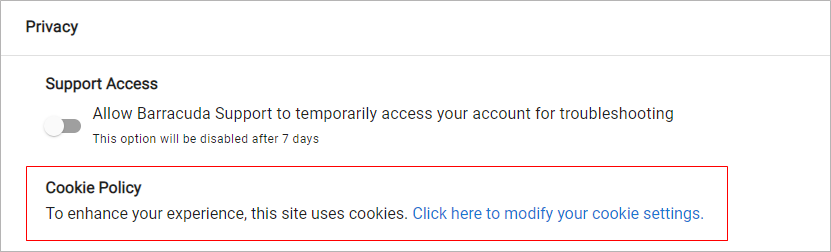
Privacy
Support Access
Barracuda Networks support access is disabled by default. Click the toggle to enable support access.
Note that you must enable support access to allow Barracuda Networks Technical Support to investigate your account.
Once troubleshooting is complete, click the toggle once again to disable support access. If you do not disable support access manually, support access is automatically disabled after 7 days.
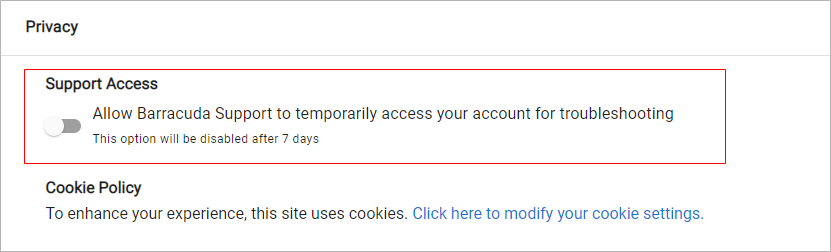
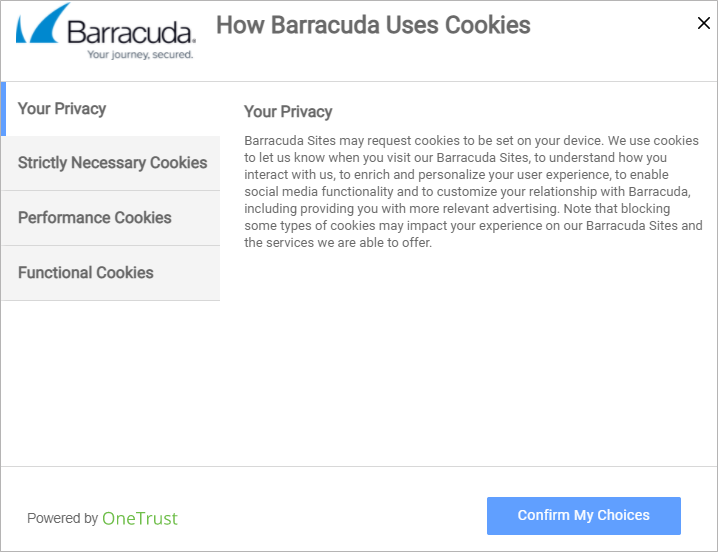
Cookie Policy
Manage your privacy settings by enabling or disabling cookies for compliance and privacy reasons. Click Click here to modify your cookie settings and update your cookies preferences in the pop-up window.