

Follow these steps to set up Barracuda Active DDoS Prevention.
A. Access the Barracuda Active DDoS Prevention Management Console
To access the Barracuda Active DDoS Prevention Management Console:
Log into the Barracuda Web Application Firewall and navigate to the BASIC > Dashboard page.
Scroll down to the DDoS Prevention Service pane.
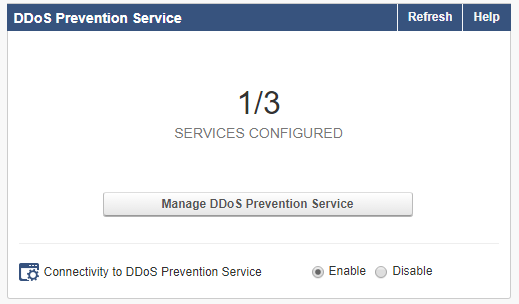
For Connectivity to DDoS Prevention Service, select Enable. When prompted, confirm that you want to enable the connection. When you receive the success message, click OK.
In the DDoS Prevention Service pane, click Manage DDoS Prevention Service.
The Web Application Firewall Services page of Barracuda Active DDoS Prevention displays.
B. Set Up DDoS Prevention
Before you begin:
On the Web Application Firewall Services page of Barracuda Active DDoS Prevention, find the service you want to protect and click Set Up DDoS Prevention.

To set up DDoS prevention on a service:
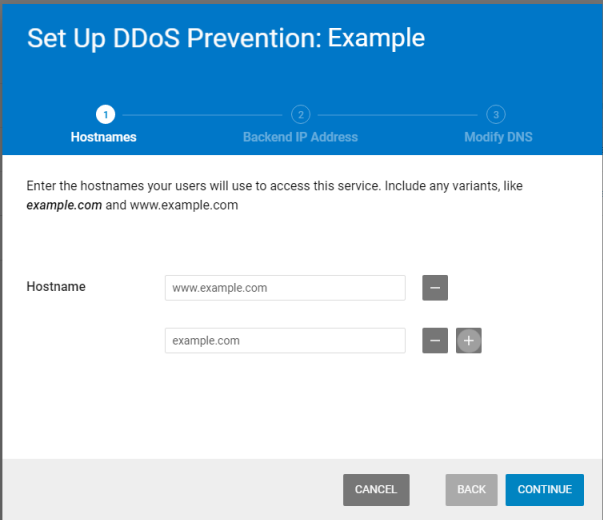
Hostnames: Enter all possible DNS domains your users will use to access this service, including different forms, like www.example.com and example.com. Click Continue.
Backend IP Address: Enter the Backend IP Address for your service. This is typically the Virtual IP Address defined for this service on your Web Application Firewall. Refer to Understanding Service Architecture with Barracuda Active DDoS Prevention for additional details.
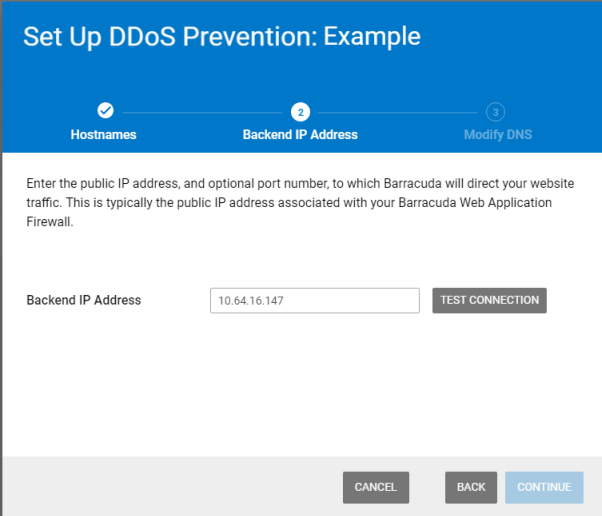
Click Test Connection to ensure that Barracuda can connect to the Backend IP Address you specified.
If the test is successful, click Continue.
If you see a warning, refer to Backend IP Address Errors for troubleshooting information.
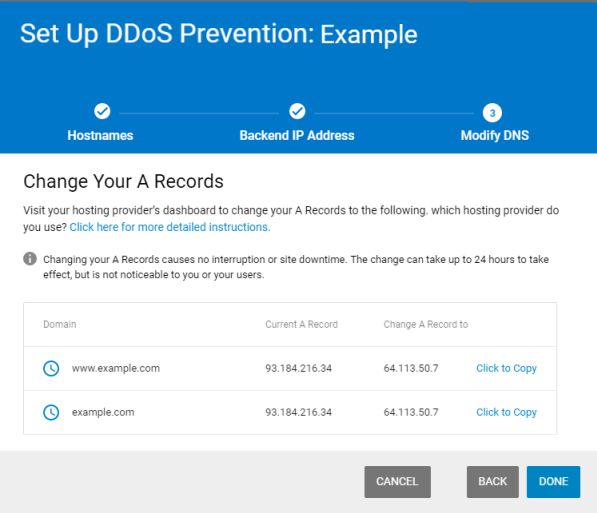
Modify DNS: Copy each line of information provided so you can change your DNS A records through your hosting provider. If you use the Click to Copy link, the new A record value is copied to your clipboard, so you can paste it directly into your service provider’s interface in the next step. Click Done.
C. Change A Records through your Domain Provider
Go to your domain provider’s DNS management portal to change the A records you obtained in the previous step. Changing your DNS A records to point to your service’s Service IP Address will redirect all of your web application traffic to Barracuda’s Cloud Scrubbing Centers.
Reach out to your domain provider directly with any questions.
You can also find the service IP Address in the Barracuda Active DDoS Prevention Management Console, by selecting Settings , then Basic .
D. Change Origin IP
Change your IP range so historical DNS lookups do not expose your origin IP, allowing an attacker to bypass Barracuda Active DDoS Prevention. In addition, be sure you do not expose your origin IP in other DNS records, such as your MX (mail server) records.
Once you change your DNS records, traffic will automatically flow to the Barracuda Cloud Scrubbing Center. Remember that DNS records are public domain, and there are many places where historical records are archived. These historical DNS records will likely contain your original IP from before you activated Barracuda Active DDoS Protection. Therefore, Barracuda Networks recommends that once you activate Barracuda Active DDoS Protection, you change your IP range so a historical DNS lookup does not expose your origin IP. This could allow an attacker to bypass the Barracuda Cloud Scrubbing Center and attack your network infrastructure directly.
If you are using the Barracuda Email Security Gateway, you can use its Cloud Protection Layer feature to prevent your MX records from being exposed. Refer to How to Set Up Your Cloud Protection Layer in the Barracuda Email Security Gateway documentation for more information.