It seems like your browser didn't download the required fonts. Please revise your security settings and try again.
Barracuda Intronis Backup
formerly ECHOplatform

Creating Physical Imaging Rapid Recovery Backups 

  • Last updated on


Before creating a Physical Imaging backup set, make sure that you are familiar with the backup type restrictions and recommendations.

To create a Physical Imaging Rapid Recovery backup, perform the following step

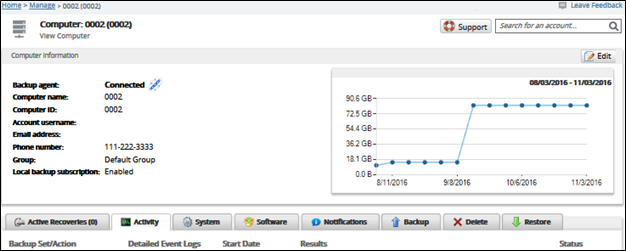
  1. Navigate to the Computer page. See Navigating to the Computer Page for instructions.
    The Computer page is displayed.
    create RR BU.png
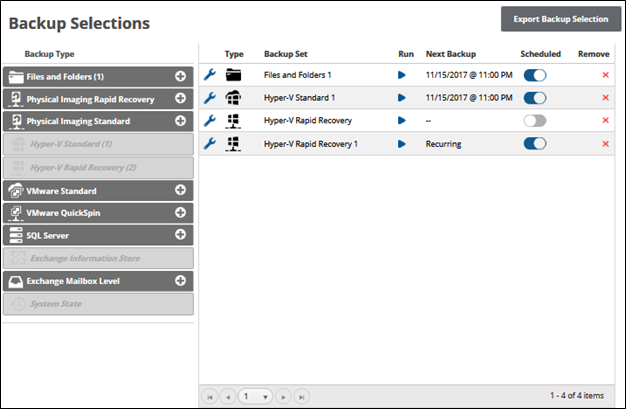
  2. Click the Backup tab.
    The Backup Selections page is displayed.
    create RR BU1.png
  3. In the Backup Type pane, click Physical Imaging Rapid Recovery.
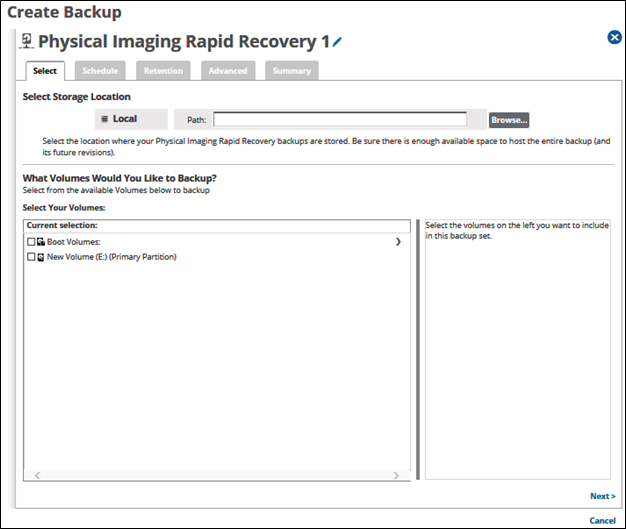
    The Select page is displayed.
    create RR BU2.png
  4. Click the Backup Name to provide a new name for the backup set or accept the default. See Changing Backup Set Names.
  5. At the Select Storage Location Path field, type or browse to the destination of the backup. See Browsing to a Folder.

    Requirements Requirements
    • Physical Imaging backups and their revisions must be stored locally. Valid local storage locations are:
    • Direct attached storage
    • Network attached storage
    • Removable storage

    The following local storage locations cannot be selected for backup:
    • Volumes with non-NTFS file systems


    Important! Because you are backing up the full volume, ensure that you have enough local storage space for a full backup of each selected volume (it should be roughly equal to the used size of the volume) and any incremental changes.


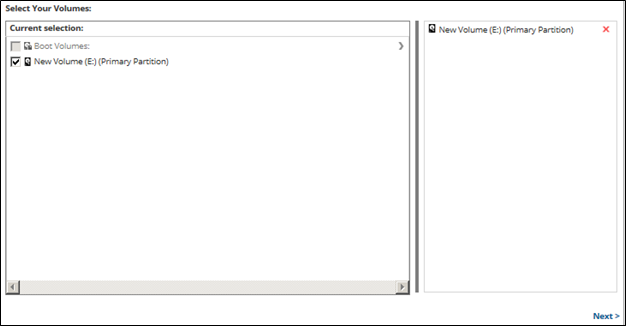
  6. In the Current Selection pane, select the volumes you would like to back up.
    Clicking the arrow icon arrow.png at the right of the items displays more volumes
    The selection is displayed in the far-right pane. Click the remove icon icon delete.png to remove any selections.

    create RR BU3.png

    Restrictions Restrictions: The following volume sets cannot be selected for backup:
    • Volumes with non-NTFS file systems (Unless the System volume is part of the Boot Volumes group.)
    • Remote volumes /mapped network drives
    • Volumes that are already included in a Physical Imaging backup set (grayed out).
    • Removable media.
    • Volumes that are encrypted and locked.
    • Local Only/Online and Local backup sets, and volumes that include the Local Vault location.


    The boot volumes group allows easy selection of any volume required to perform a restore of the physical system as a functional virtual machine or as VHD/X.

    Hovering over an available selection displays its capacity and spaced used, as shown below.


    create RR BU4.png
    Hovering over an unavailable volume, displays its status, as shown below.

    create RR BU5.png
    You cannot select removable media for backup. If attempted, the following error message is displayed.

    create RR BU6.png


  7. After selecting the volumes/revisions for backup, click Next.
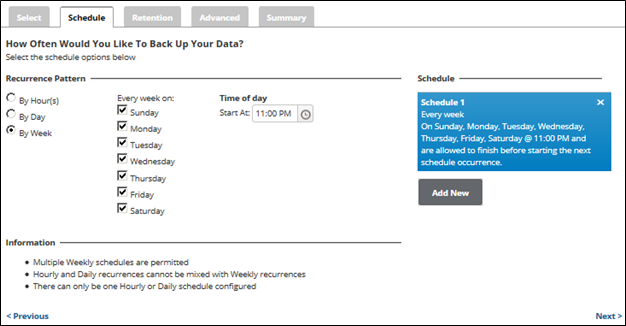
    The Schedule page is displayed.
    create RR BU7.png
  8. Accept or edit the default schedule. See Adding a New Daily or Weekly Schedule for more information.

    Notes:
    A once daily backup is the default schedule for a Physical Imaging Rapid Recovery backup set.
    Multiple weekly schedules are permitted (if they do not overlap).
    Hourly and daily recurrences cannot be mixed with weekly recurrences
    Only one daily or hourly schedule can be configured.


  9. After setting the schedule, click Next.
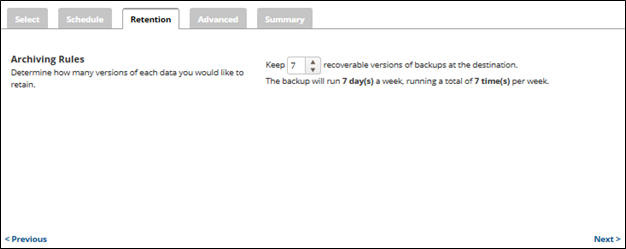
    The Retention page is displayed.
    create RR BU8.png
    Note: The default backup runs 7 days a week, retaining 7 versions of the backup.
  10. Select the number of versions you wish to archive, and then click Next.
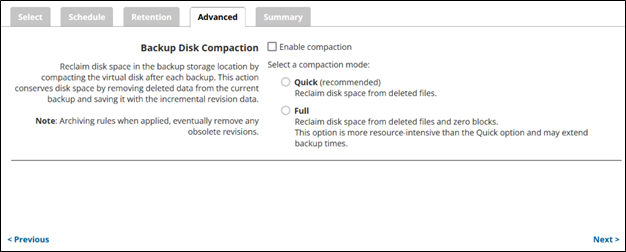
    The Advanced page is displayed.
    campus PI RR Advanced.png
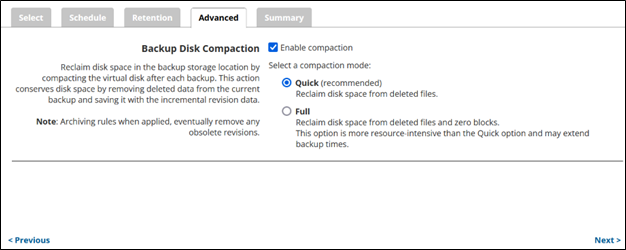
  11. Optionally select Enable compaction.
    The Enable compaction options are made available, as shown below.
    campus PI RR Advanced1.png

    Note: The Full option reclaims more disk space but takes longer than the Quick option to run the backup.
  12. Select the Quick (recommended) default option or the Full option and then click Next.
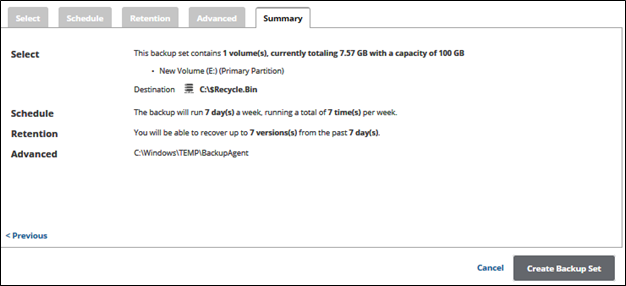
    The Summary page is displayed.

    create RR BU10.png
  13. After reviewing your selections, click Create Backup Set.
    If you did not change the default backup set name, a confirmation pop-up is displayed after clicking the Create Backup Set button, as shown in the example below.

    create RR BU11.png

    This feature allows you to create a unique name for the backup set. If you already changed the default backup set name, the pop-up is not displayed.

    Optionally, change the backup set name, press Enter, and then click Confirm.

    The schedule backup is displayed on the Backup Selections page.