Groups allow you to put computer accounts (subaccounts) into sets for policy purposes. You can apply notification and/or preferences templates to groups; this saves you from having to apply the same template to multiple computer accounts individually. This article will show you how to create groups and add computer accounts to them.
Creating a Group
- Log in to the management portal and go to the Manage tab.

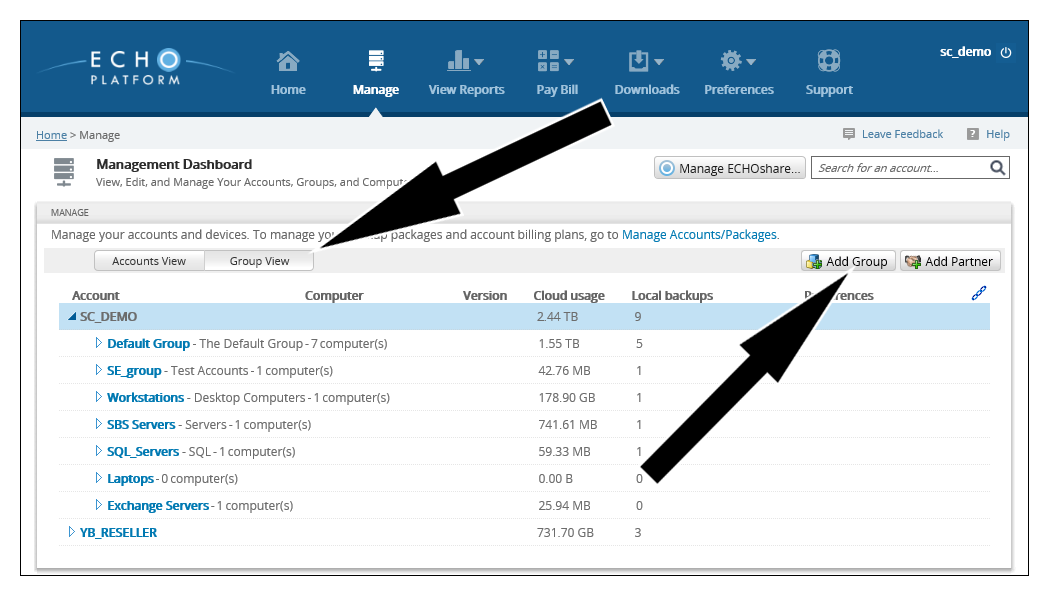
- Click on the Group View button, then Add Group in the upper-right.
- Give the group you wish to make a name and description, then select Create.
Adding Computer Accounts to a Group
Method One
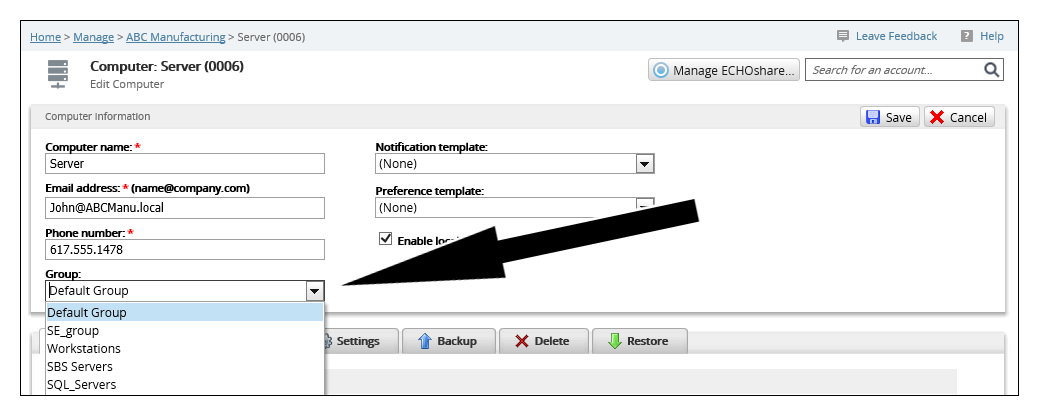
The first way to put a computer account into a group is by editing the computer account and picking the group from the Group drop-down menu.

Method Two
In the Group View from above, expand the group you want to move the computer account from. Then click and hold the computer account you want to move, dragging it to the group you want it to belong to.
