As a partner, you can create additional portal user accounts to provide role-based access for your staff. These accounts will allow your team to access the management portal with the permissions and access you specify.
Creating a Portal User Account
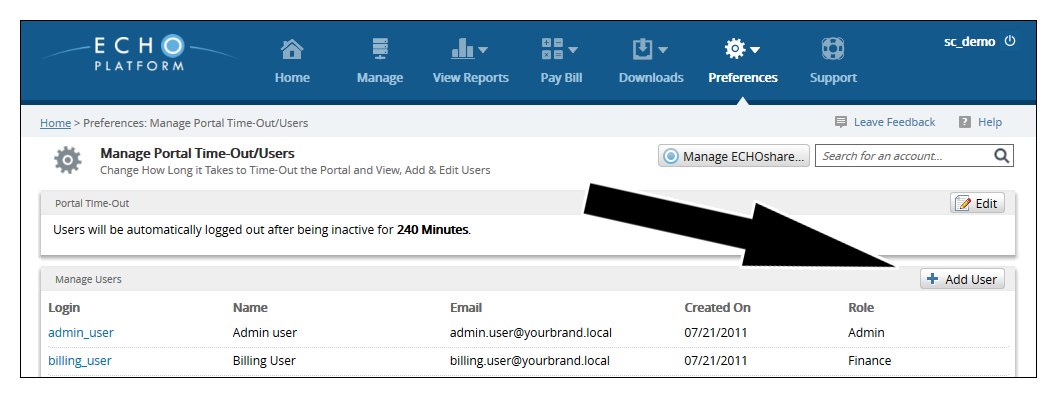
- Log in to the management portal and go to the Preferences tab. Under Preferences, go to Manage Portal Time-Out/Users.
- Click on the Add User button on the right side. This will bring up the New User window.

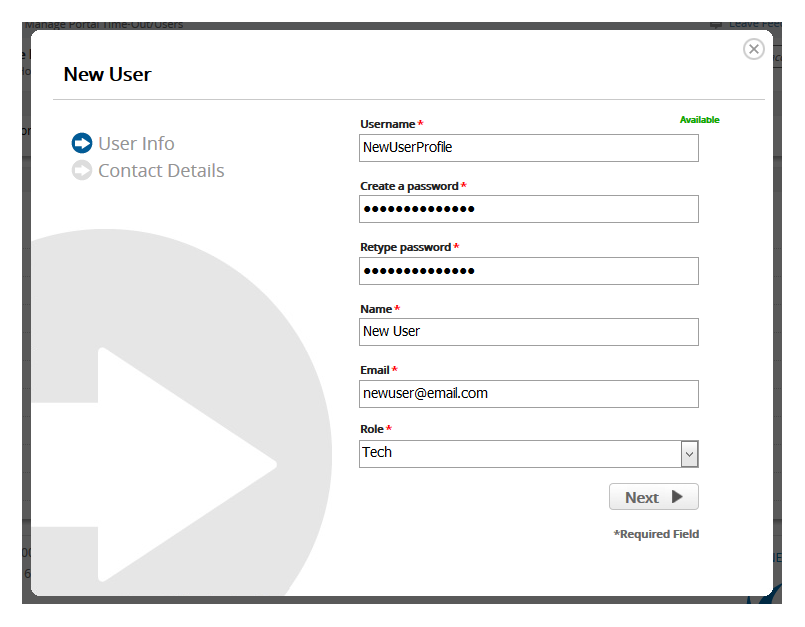
- Fill in the username, password, name, and email address for the portal user. Under the Role field, set the permission level for the portal user. Those roles are summarized below. Click Next when you have filled in the required fields.
- Admin - This user can do anything in the management portal.
- Tech - A Tech user can create, edit, or delete backup sets, computer accounts, and templates.
- Tech No Delete - This user is the same as a Tech one, however it lacks the ability to delete data, backup sets, computer accounts, or templates.
- Finance - A Finance user is primarily for viewing and paying bills.

- On the next page, fill in the contact details for the portal user. Hit Submit to finish creating the user.
Deleting a Portal User Account
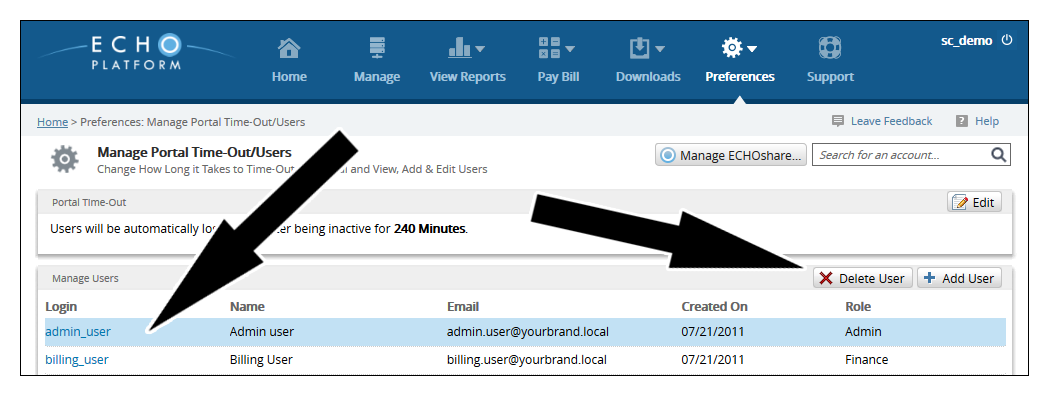
- Log in to the management portal and go to the Preferences tab. Under Preferences, go to the Manage Portal Time-Out/Users.
- Click in the row of a portal user to highlight it blue and hit the Delete User button.

- You will be prompted for a password in order to delete the user. Enter the password you used to log into the management portal, hit Submit, then Yes.
