You can use Before Actions and After Actions to perform an event when a backup job runs. Before Actions run when a backup job starts and After Actions run when a backup job finishes. This article will instruct you on how to create these actions in the software (they cannot be made in the management portal).
Each Before and After Action can be tied to a specific backup set and will run automatically when the backup set runs. An example of a use case for Before and After Actions is the following; suppose you have a database you need to backup and the database has to be taken offline before the backup set can run. You can create a Before Action that stops the database and an After Action that restarts the database after the backup is done. Now that we can see the utility of this feature, let's look at how to implement it.
Directions
- Open the Backup Monitor and go to the Backup Sets tab.

- From Backup Sets, select the backup set you want to add a Before or After Action to and hit the Edit button in the bottom-right.
- Click Next until you get to the third page. You should see Properties at the top.
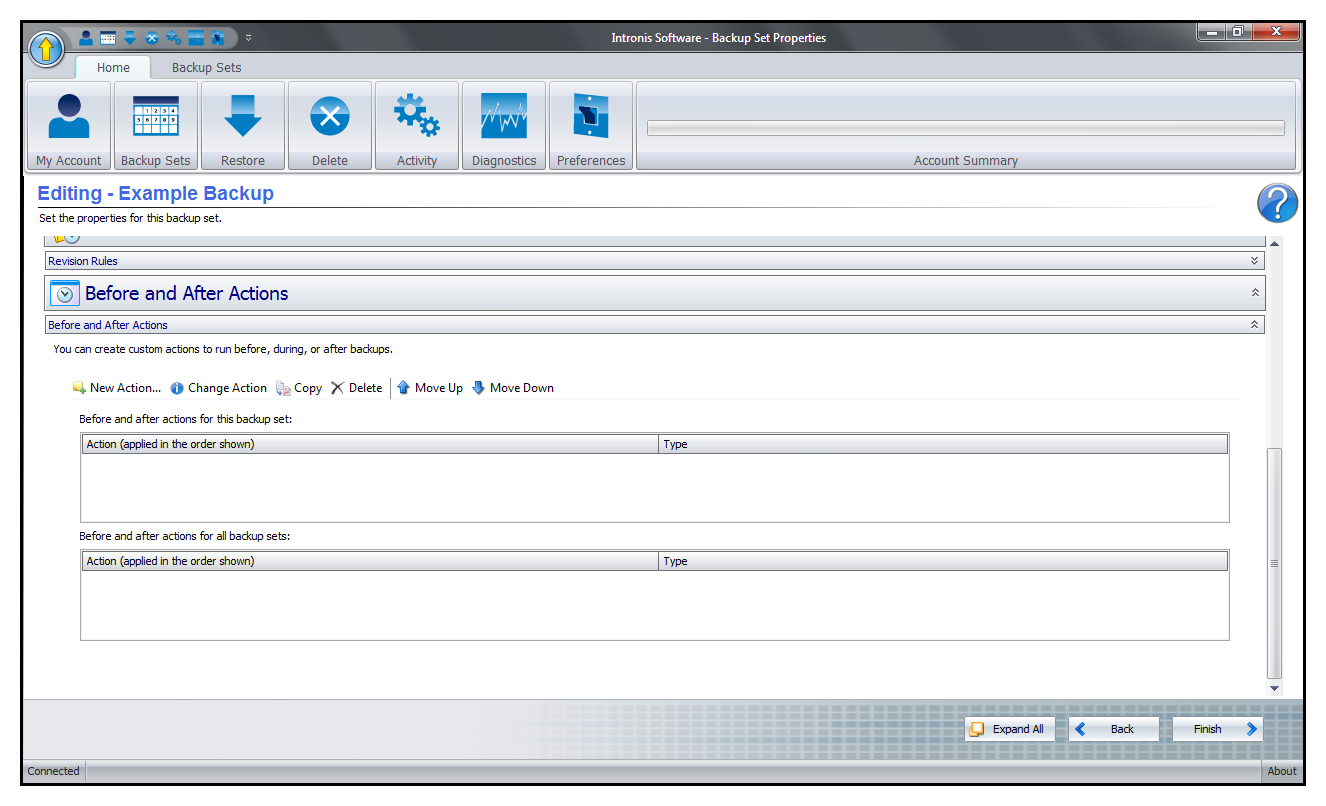
- Scroll down to the bottom of this page and expand the Before and After Actions subsection.
- Select New Action... to open the Create a New Action Wizard window.
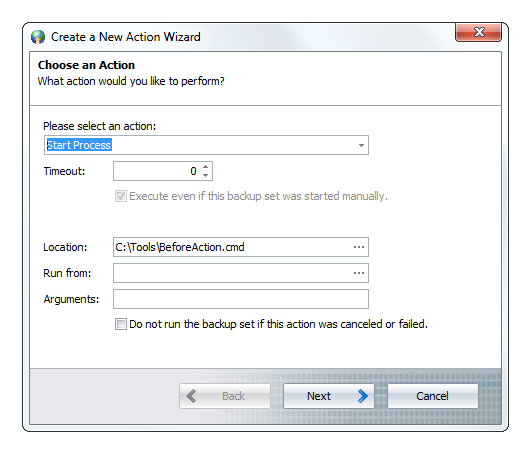
- Here you can choose what kind of action to add.

You have the option of adding the following types of actions:- Start Process - choose the location of a process which will be started when the action runs.
- Stop Process - choose the location of a process which will be stopped when the action runs.
- Start Service - choose a service from the drop-down list to start when the action runs.
- Stop Service - choose a service from the drop-down list to stop when the action runs.
- Pause Service - choose a service from the drop-down list to pause when the action runs.
- Continue Service - choose a service from the drop-down list to continue when the action runs.
- Start Backup Set - choose a backup set from the drop-down list to start when the action runs.
- Write Data to File - specify the location of a file that will be written to and enter the data that will be written. In addition to text, you can insert variables corresponding to different backup elements.
- Pause - this will pause the backup job for some length of time.
- Play Sound - select the path to an audio file that will play when the action runs.
All of the action types have the option to add a timeout value if the action does not respond. When you are finished customizing the action type, hit Next.
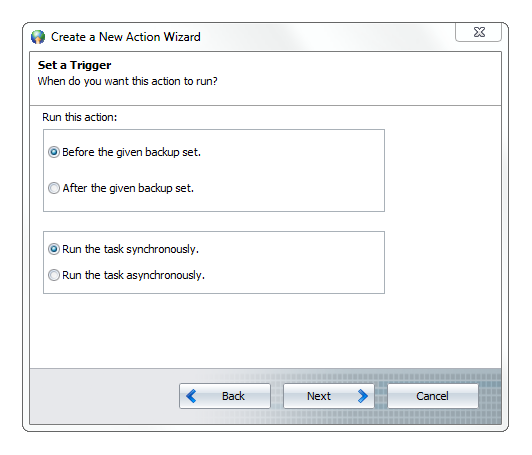
- Then, select a trigger for the action. Choose whether you want the action to happen before or after a backup job and whether the action will run synchronously or asynchronously to the backup job.
Actions that run asynchronously run in series with the backup job (i.e. the backup job will wait for a Before Action to finish before starting). Actions that run synchronously will run in parallel to the backup job (i.e. the backup job and the Before Action will both start at the same time).
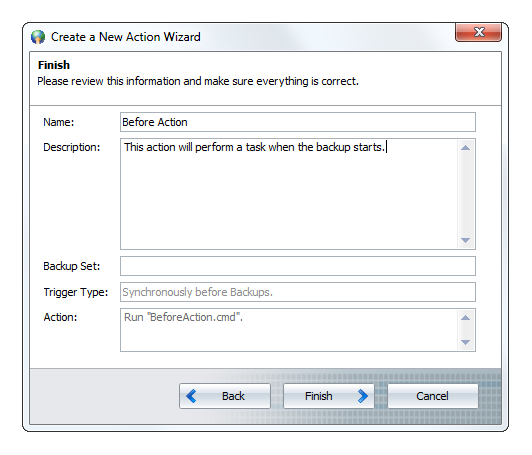
Click Next once you have set the trigger. - The final page is where you give a name and description to the action. When you are done, hit Finish to create the action. Click Finish again to save the backup set.

