

To restore files from a new view, perform the following steps.
At the Backup Monitor, open the Restore Your Data tab.
The Restore Your Data page is displayed.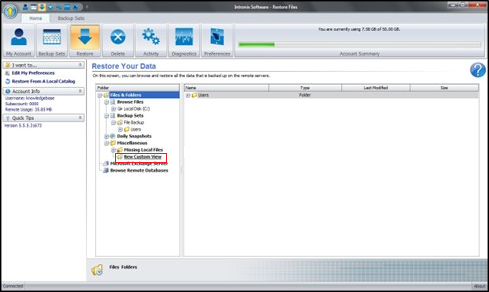
In the Miscellaneous section under Files and Folders, click New Custom View.
The Create a New View page is displayed.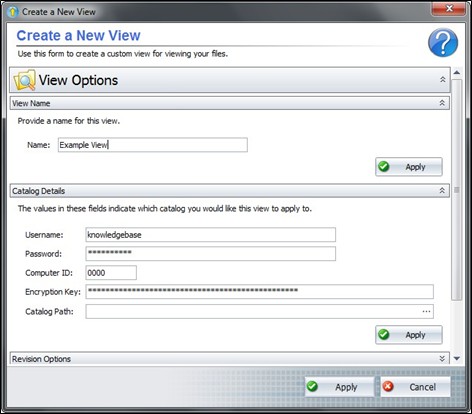
At the View Name field, type the name for the view you are creating and then click the section Apply button.
At Catalog Details, select which catalog would like this view to apply to.
Note: This option should not be used for normal restores; it is only suitable if you are restoring from a restore drive.
The Revision Options section is displayed.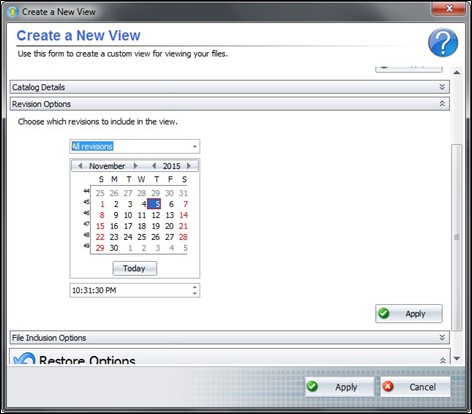
At Revision Options, create a snapshot like those from the Daily Snapshots section.
Select a date and time to be the cut-off point.
From the drop-down above the calendar, select whether you want to include older or newer revisions than the selected cut-off date.
Note: If you keep the drop-down option at All revisions, the view does not filter out versions by date.Click the section Apply button.
The File Inclusions Options section is displayed.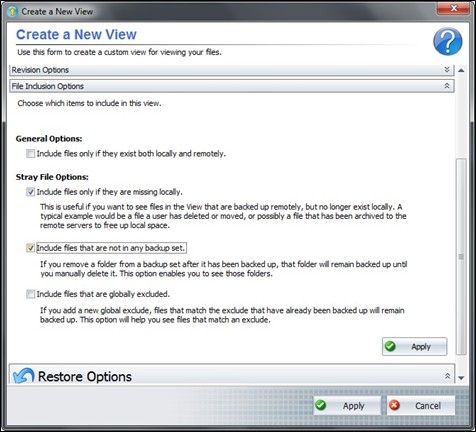
At the File Inclusion Option section, select which items to include in this view.
The General Options include files only if they exist both locally and remotely. If no stray file options are available, then all options are already enabled.
For best results select Include files only if they are missing locally and Include files that are not in any backup set.
The following Stray File Options table provides a description of the types of stray files available.
Stray File Option | Description |
Include files only if they are missing locally. | Examples for this option include:
|
Include files that are not in any backup set.
| Select this option to see folders removed from a backup set after being backed up. The removed folder remains backed up until manually deleted. Only the top-level stray folder directories or files that were previously backed up and removed from the definition of all backup sets are available for this view. Subfolder and subfile data for the previously backed-up folder are viewable and available for restoration but are not viewable or available for any other folder. |
Include files that are globally excluded.
| Select this option to see files that are globally excluded. If a new global exclude is added, files that match the exclude that are already backed up remain backed |
Click the section Apply button.
The Restore Options section is displayed.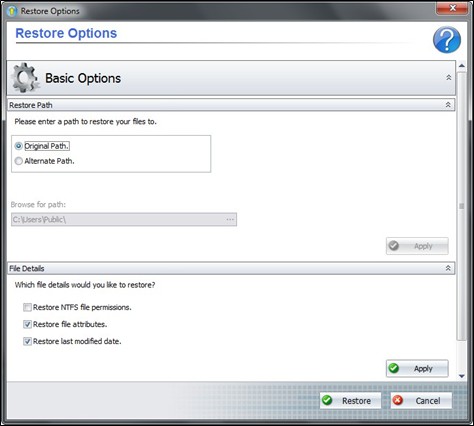
At the Restore Path, keep the Original Path or select an Alternate Path restore source folder.
Note: The Alternate Path option lets you point the software to a specific location housing the backup data. This option, much like the Catalog Details (above) is not useful for most restorations except those from a restore drive.At the File Details section, select the file details you would like restored.
Click the section Apply button.
The Restore button is displayed.Click the Restore button.