From the Users > Users List page an administrator can:
Search for users
Sort the user list
Reset a user password (if the user was added manually)
Add new users (based on how user accounts were initially set up)
Set an account as a domain owner
Log in as a user
Edit user settings
Delete users
User Roles
User roles determine Email Gateway Defense access privileges. For more information, see Roles and Permissions.
Administrator – An administrator can view and modify all aspects of all domains, and configure global and domain-level settings.
Domain administrator – A domain administrator can configure domain-level settings. Domain administrators can also perform the tasks of the help desk role, such as deliver messages, as well as manage users.
Help Desk – In the Help Desk role, users can deliver messages, view message headers, view domain-level settings, and view all domain settings and users for the assigned domains. Note that the Help Desk role cannot view message body on a user's account.
User – A user can configure user-level settings on their own account.
Search for Users
Enter all or part of a username or email address, and click Search to display all matching results.
Sort Users
Click the column titles to sort by user account, user type, or notification status.
Manually Add Users
You can manually add and update users one at a time or in bulk as a list in the Users > Users List page. Once a user is added manually, the User Type field displays as Manual. When you click Add/Update Users, the Users > Add/Update Users page displays where you can:
User Accounts – Enter each user email address for the domain on a separate line
Enable User Quarantine – When set to Yes, all email for all users in the User Accounts field which meet the configured block policy go to the user's quarantine account. When a user receives their first quarantined email in their quarantine inbox (Message Log), a second email is generated as the first quarantine notification, and goes to the user's email account. This email is only generated if there is a notification interval set and that recipient has received at least one message marked with the Action of Quarantine.
Notify New Users – When set to Yes, each user in the User Accounts field receives a welcome email when the account is created.
Once you add users, click Save Changes to add the users and return to the Users > Users List page.
Add Users via Directory Services
If the user accounts are set up through LDAP or Microsoft Entra ID authentication, you can automatically add users through synchronization:
Synchronize Now – To manually synchronize users on a domain, set Synchronize Automatically to No on the Domains > Domain Settings page, and click Synchronize Now whenever you want to sync users.
Synchronize Automatically – To automatically synchronize users on a domain, set Synchronize Automatically to Yes on the Domains > Domain Settings page. Email Gateway Defense automatically synchronizes your users to its database incrementally for recipient verification.
Assign User Role
You can assign the following user roles:
Domain Admin – A domain administrator can configure domain-level settings. Domain administrators can also perform the tasks of the help desk role, such as deliver messages, as well as manage users.
Help Desk – In the Help Desk role, users can deliver messages, view message headers, view domain-level settings, and view all domain settings and users for the assigned domains. Note that the Help Desk role cannot view message body on a user's account.
User – A user can configure user-level settings on their own account.
To assign a user role:
Go to the Users > Users List page, and click Edit in the Actions column to the right of an Enabled user.
In the Edit User page, select the User role from the drop-down menu.
Click Save.
Set an Account as Domain Administrator
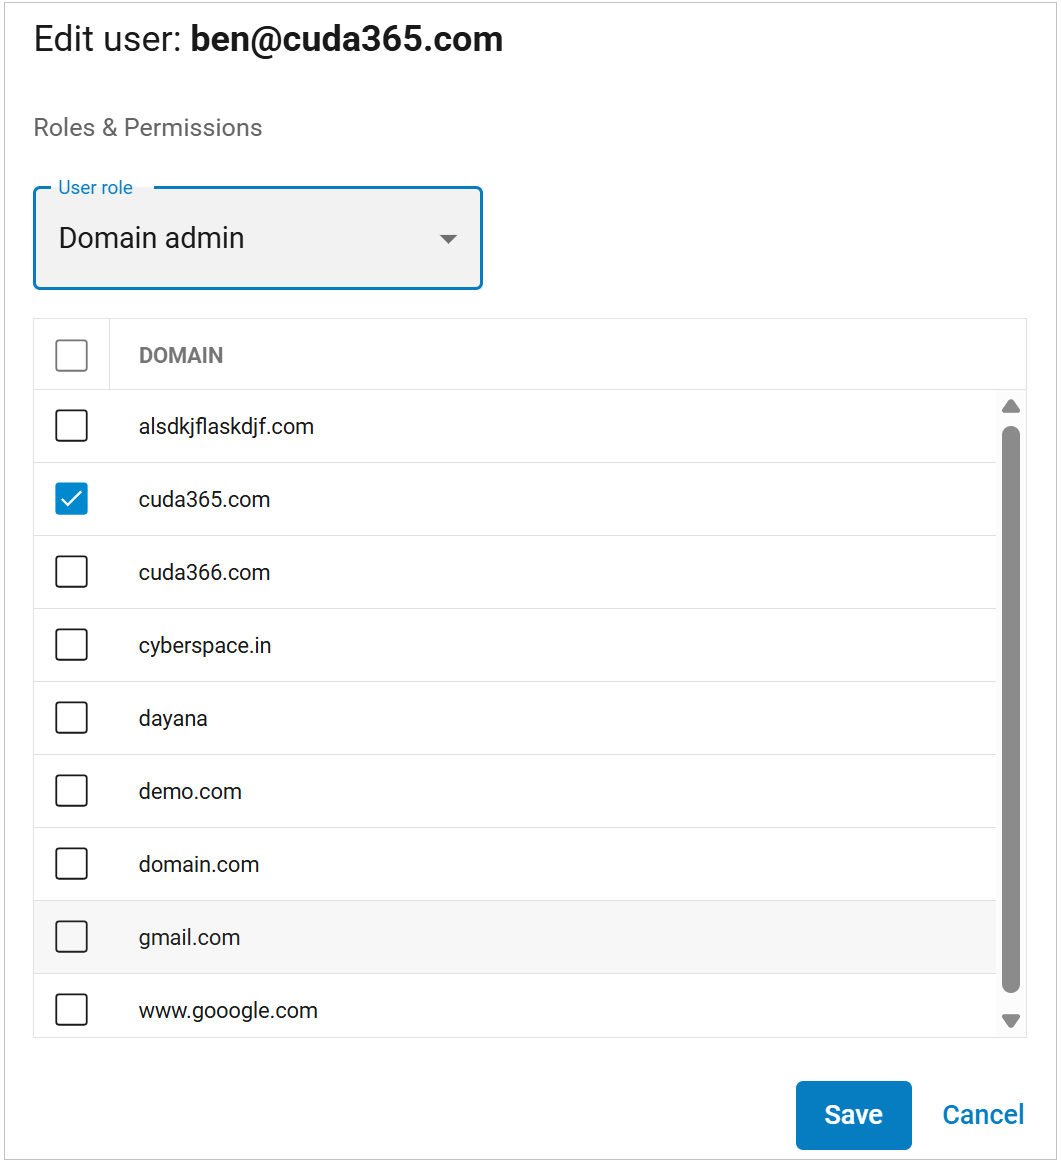
You can set an account as a domain owner, and select verified domains you want the user to manage to set up delegated administration:
Go to the Users > Users List page, and click Edit in the Actions column to the right of an Enabled user.
In the Edit User page, select the User role as either Domain admin or Help desk.
Click to select all available domains, or select individual domains:

Click Save.
Log in as a User
An administrator can click Log in as this user to:
View or change user settings
View and manage the domains the user manages
View, search, and manage the user's Message Log
Edit Users
You can edit the following user settings:
Click Edit to add or remove domain administration privileges;
Click Reset to reset the selected user's password; when clicked, an email is sent to the user with a link to reset their password.
Delete Users
You can select to delete a single user or click Bulk Delete to delete all users.
Default User Settings
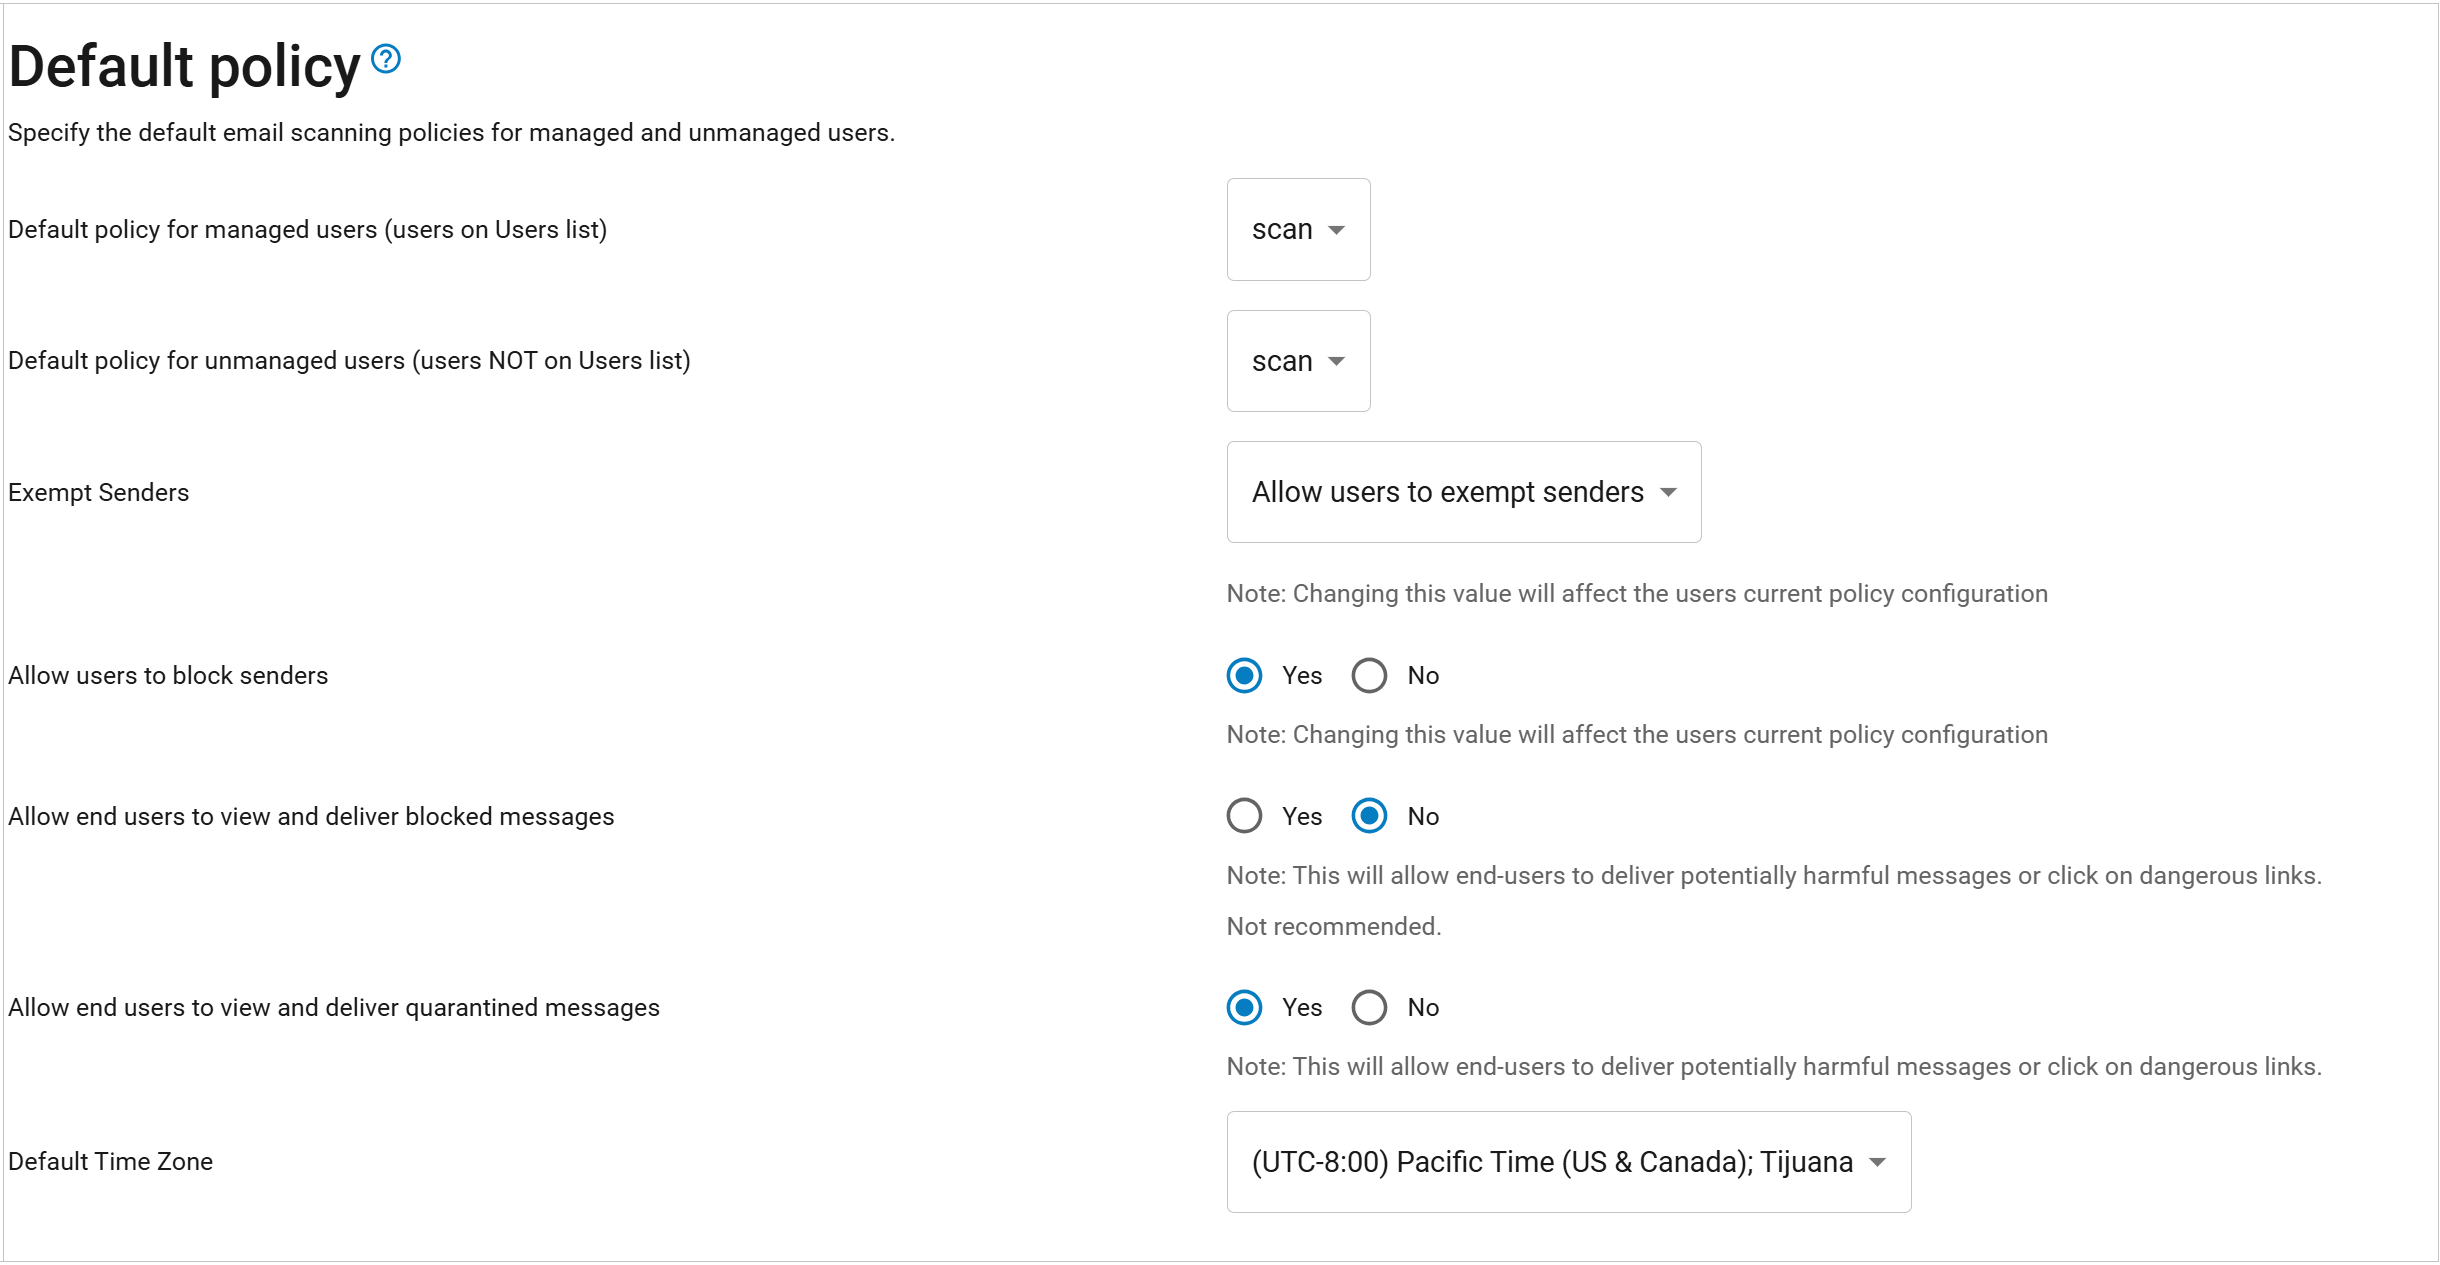
Set the default scan/block/allow policies for both managed users and unmanaged users on the Users > Default Policy page:
Managed Users – Users display on the Users > Users List page and are configured either manually or by synchronizing with your LDAP server.
Unmanaged Users – Senders and recipients of email for the configured domains not in the Users > Users List.
Select the Default Time Zone for all users from the drop-down menu.
User Actions
Users can view their quarantine inbox (Message Log) and set some account preferences, depending on what is enabled on their account via the Users > Default Policy page.

Available permissions for users include:
Quarantine Notification reports – Modify individual settings for quarantine notification reports from the Settings > Quarantine Notification page.
Manage quarantine inbox – Deliver or delete quarantined messages from the Message Log.
Password – Change their password.
Link accounts – Select to use the current account as an alias. From the Settings > Linked Accounts page, the user can add additional email addresses they have in the same domain for which quarantined email is to be forwarded to this account.
Sender policies – Specify whether to block, exempt, or quarantine messages coming from a specific email address or domain on the Settings > Sender Policy page.
View and deliver blocked messages – Specify whether users can view and deliver blocked messages from the Message Log.
View and deliver quarantined messages – Specify whether users can view and deliver quarantined messages from the Message Log.
Exempt/block senders – Specify whether users can exempt and/or block messages from a specific email address or domain on the Settings > Sender Policy page.
