

Activate Email Gateway Defense
Go to https://login.barracudanetworks.com and log in with your Barracuda Cloud Control credentials.
Navigate to Home > Admin > Email Protection.
Click Start a trial. Complete the form with your information and then start the trial.
Alternatively, if you have already purchased Email Gateway Defense, click Enter an Activation Key. You should have received an email with a product activation key. For more information, see How to Activate Products Using an Activation Key.On the Plan Details page, select the bundle for your trial and enter the number of Users who will be using Email Gateway Defense. Then click Continue.
Complete your Account Details, then click Continue.
Partners see a different option on this page. Make your selection, then continue with the process below.
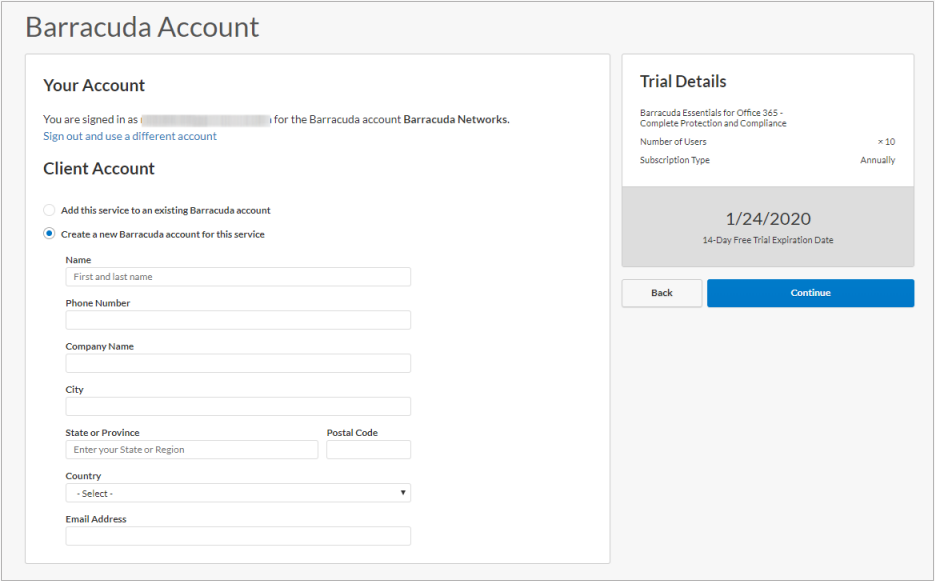
Select from the following Client Account options, then click Continue.
Add this service to an existing Barracuda account – Select the desired Account from the drop-down menu, and select your location from the Location of Use drop-down menu.
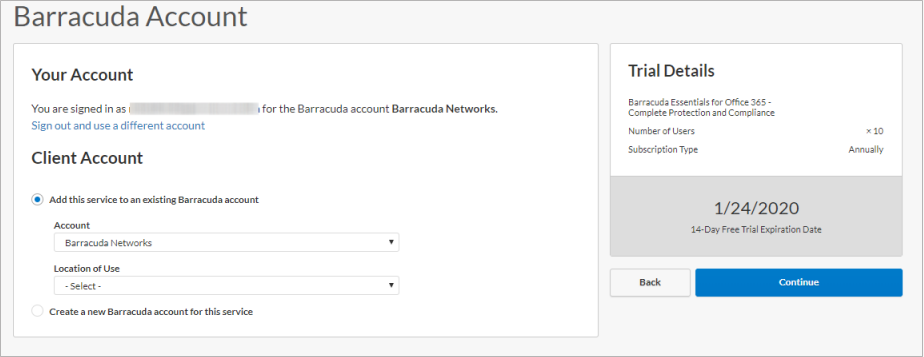
Create a new Barracuda account for this service – Enter the new account details.
In the Billing Details (Optional) page, enter your billing information to purchase the service, or leave the Billing Information section blank to start a free 14-day evaluation. Click Continue.
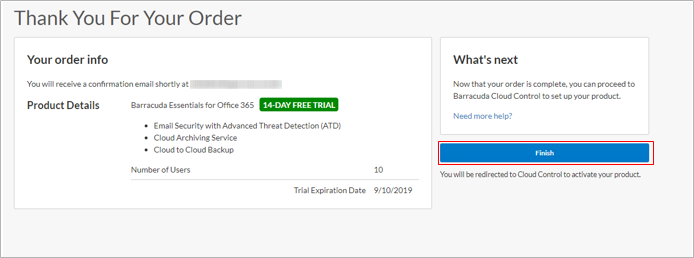
Once the setup process is complete, click Finish.
In the Billing Details (Optional) page, enter your billing information to purchase the service, or leave the Billing Information section blank to start a free 14-day evaluation. Click Continue.
Once the setup process is complete, click Finish.
Barracuda Cloud Control displays and your 14-day trial begins immediately.
Step 2 - Configure Microsoft 365 for Inbound and Outbound Mail or Microsoft 365 Inline Deployment