

Before you can start using Email Gateway Defense, you must complete the setup which includes steps to identify your email server, add MX records, and remove MX records. Each of the domains where you want to filter email must be verified by Email Gateway Defense for proof of ownership; Email Gateway Defense does not process email for a domain until the verification process is complete.
Follow this article on how to add the Email Gateway Defense MX records and remove your old MX records through your DNS hosting provider.
Add Email Gateway Defense MX Records
- Log into your DNS hosting account.
- Add the primary and backup MX records shown in the Add new MX records section of the Email Gateway Defense setup wizard. Instructions for your DNS hosting provider will vary; you can use search terms such as add, edit, manage, or MX records.
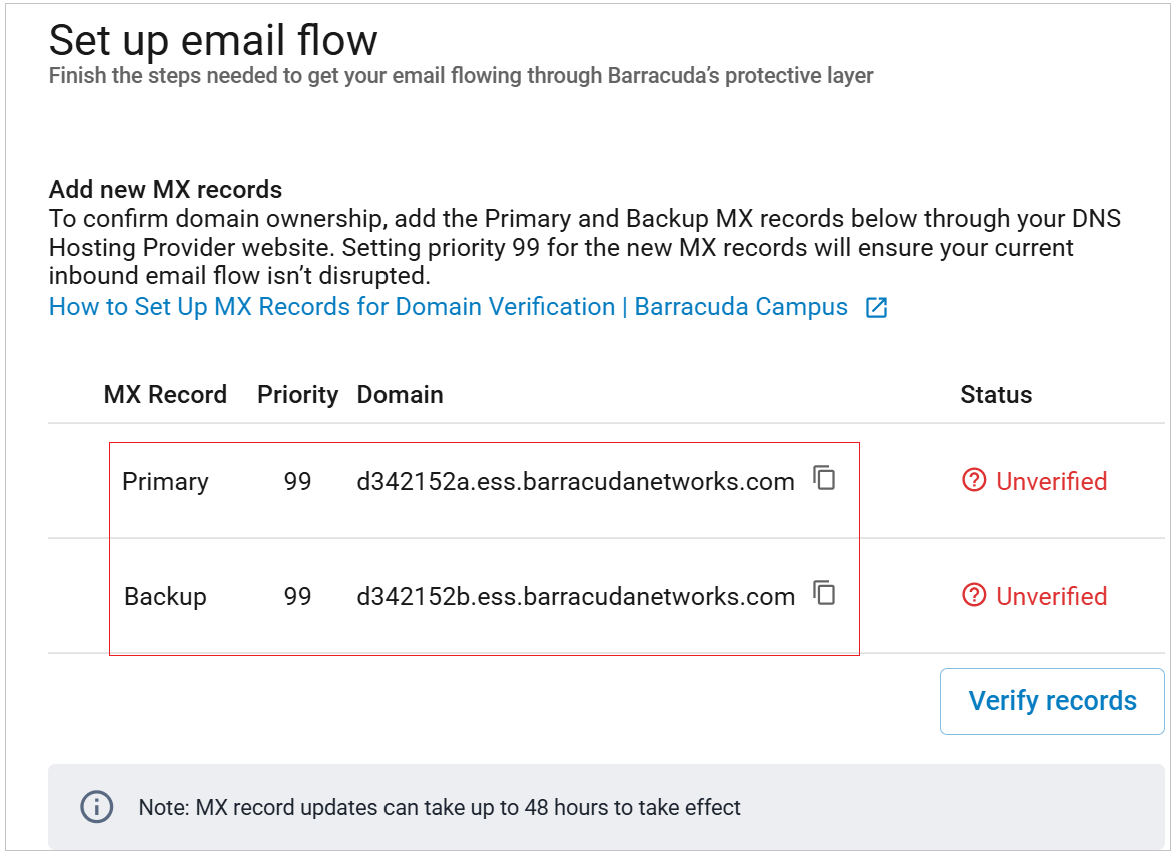
Add the MX records with a low priority, for example, 99. Adding the new MX records to your existing list should look similar to this:

- Verify that the new Email Gateway Defense MX records have been added by clicking on the Verify records button in the Email Gateway Defense setup wizard. Once this step is successful, you can move on to the next section.
Remove Old MX Records
After your domain is verified, it is important to remove your old MX records so that only the Email Gateway Defense MX records are listed. This is because spammers will normally deliver mail to all MX records listed for a domain; if you do not remove the old records, spammers will continue to deliver mail directly to your mail server.
- Log into your DNS hosting account.
Remove the existing MX records shown in the Remove old MX records section of the Email Gateway Defense setup wizard. Instructions for your DNS hosting provider will vary; you can use search terms such as add, edit, manage, or MX records.

- Verify that your non-Barracuda Networks MX records have been removed by clicking on the Verify update button in the Email Gateway Defense setup wizard.
Complete Email Gateway Defense Setup Wizard
After you have successfully completed all the steps in the Email Gateway Defense setup wizard, click the Complete setup button at the top right.