Use the steps in this article to deploy the Barracuda Email Protection Add-In for the Microsoft Outlook client or Outlook on the web.
Deploying the Barracuda Email Protection Add-In
Log into the Microsoft 365 Admin Center (admin.microsoft.com).
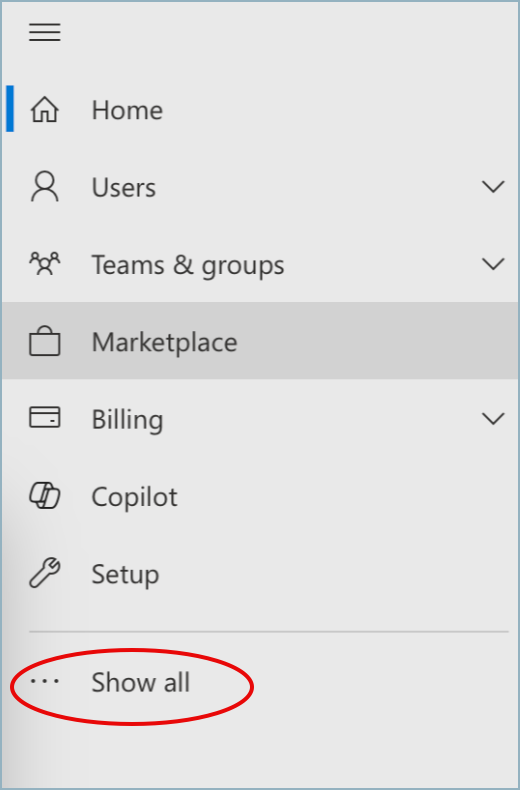
On the left navigation menu, click Show all.
Then click Settings and Integrated Apps.
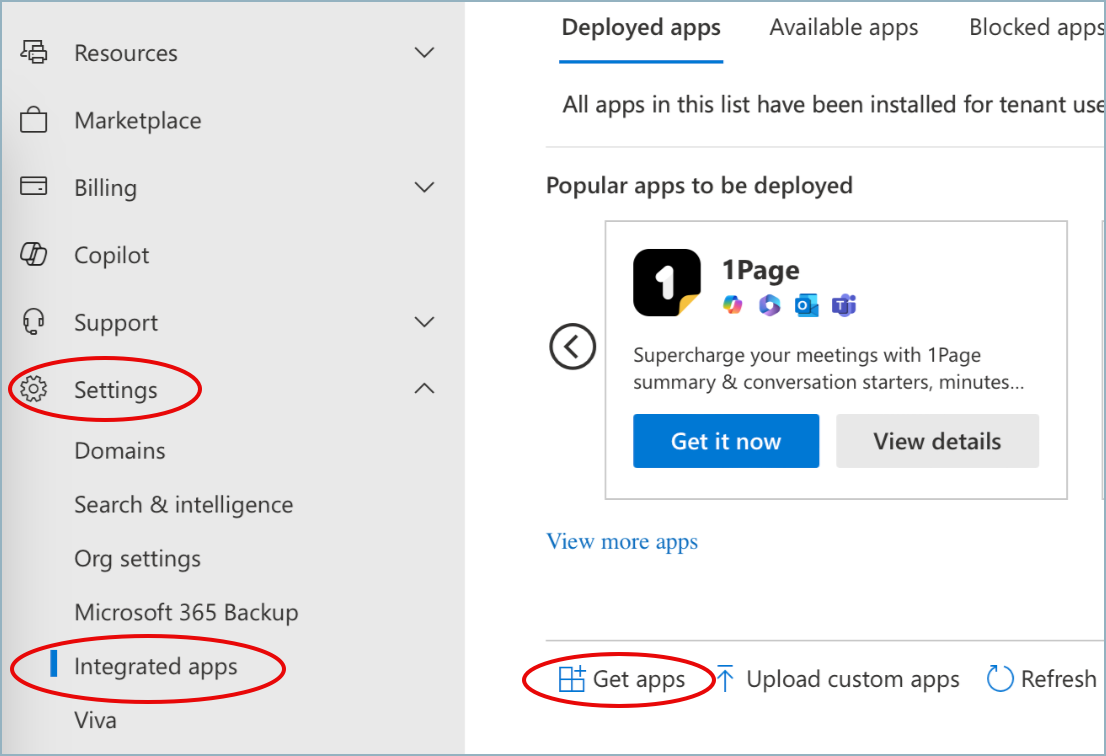
Click on Get apps and the Microsoft 365 AppSource opens.
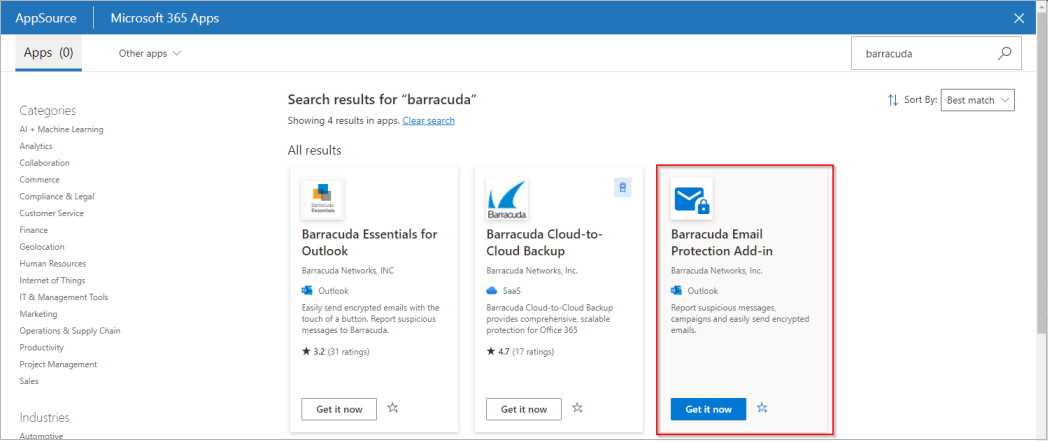
Search for "Barracuda" to limit the view to only apps from Barracuda Networks.
Find the Barracuda Email Protection Add-In and click Get it now.
A pop up window opens, requiring you to click Get it now a second time.
The app wizard opens. Choose the users that will receive the app.
Just me – Only you, the admin, will be able to see and use the Email Protection Add-In.
Entire organization – Everyone in your organization will have access to the app.
Specific users/groups – Select the users that will receive access. Start typing a user or group's email address and the field will populate with matches for you to select from.
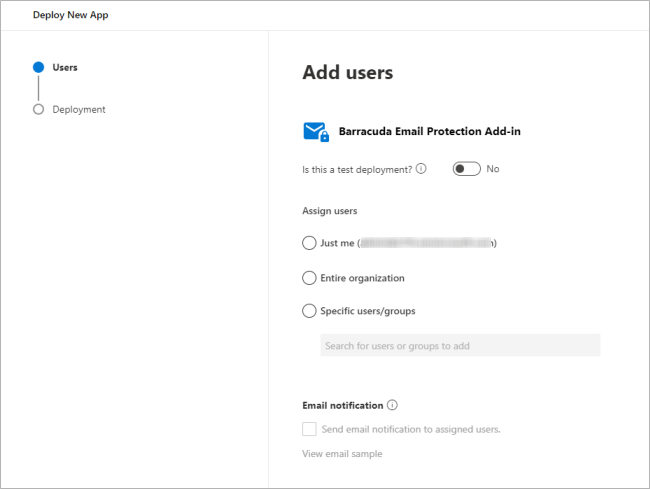
Click Next.
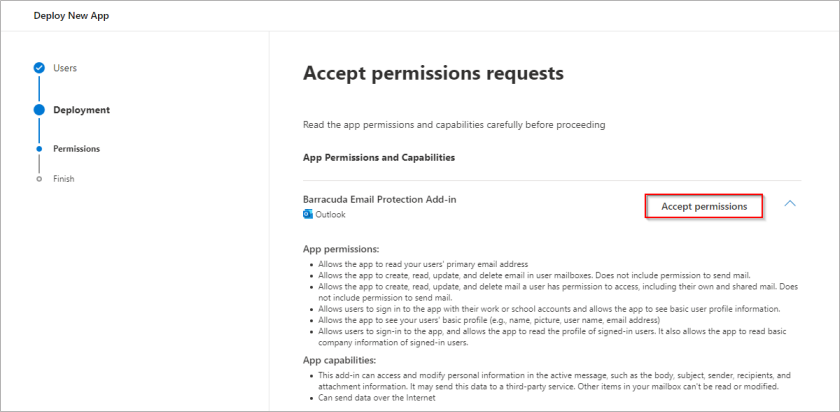
Click Accept Permissions to grant app permissions for the Email Protection Add-In.
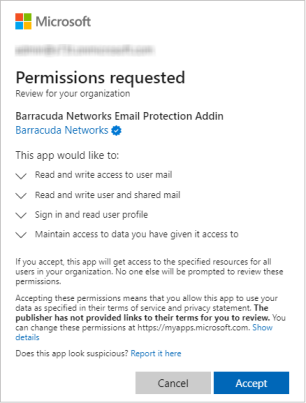
Sign in with your global admin credentials and click Accept.
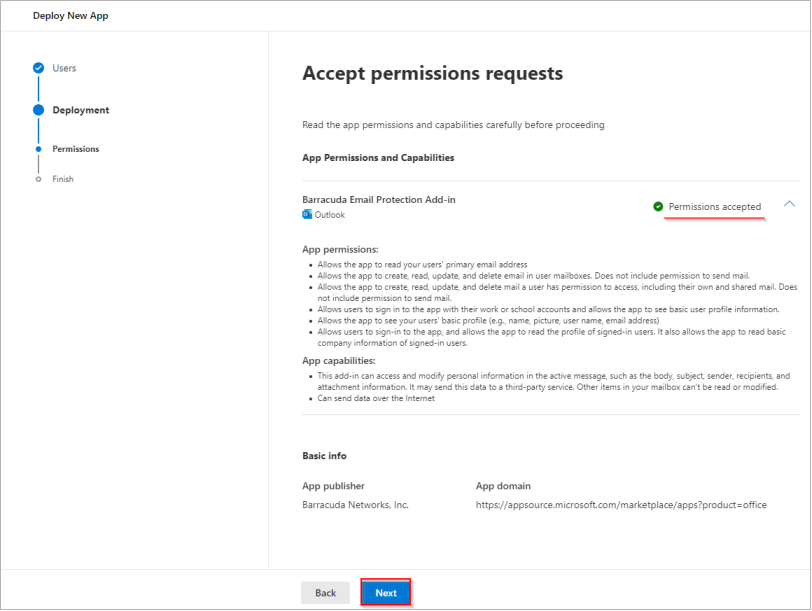
Verify that the permissions were accepted and click Next.
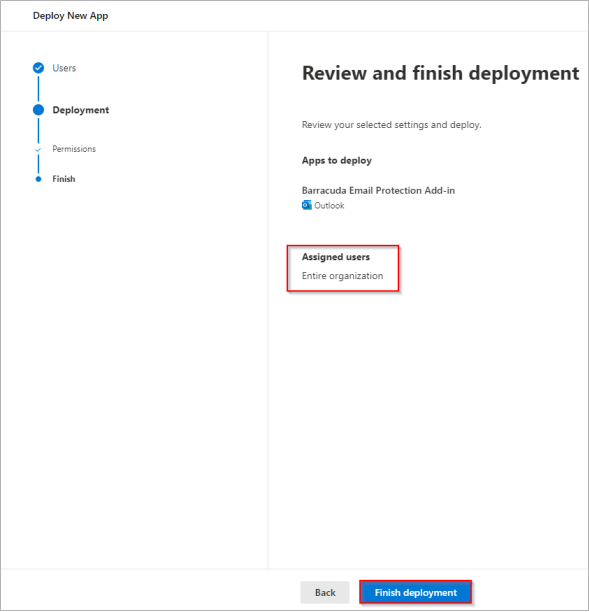
Verify the details and click Finish deployment.
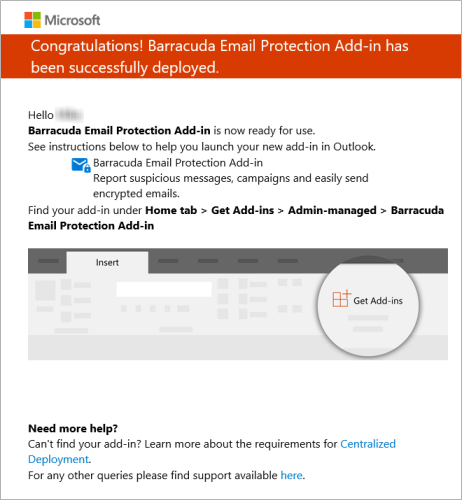
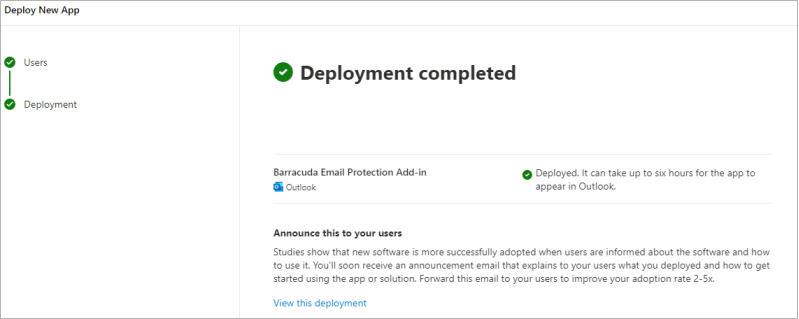
You will see a screen showing that the deployment completed successfully. Note that in some cases, it can take up to 24 hours for the Email Protection Add-In to appear.
Verify that the Email Protection Add-In appears in the Integrated Apps section.

After the Email Protection Add-In is deployed, you will receive an email from Microsoft. The Add-In is now visible in Outlook and Outlook on the web.
See Using the Barracuda Email Protection Add-In for more information on how to use the Add-In.