

This article addresses configuring Microsoft 365 with the Barracuda Email Security Gateway as your inbound and/or outbound mail gateway.
See also: Step 3 - Initial Configuration
You can specify the Barracuda Email Security Gateway as an inbound mail gateway through which all incoming mail for your domain passes before reaching your Microsoft 365 account. The Barracuda Email Security Gateway filters out spam and viruses, and then passes the mail on to the Microsoft 365 mail servers. Use the Inbound Configuration instructions below to configure.
You can likewise specify the Barracuda Email Security Gateway as the outbound mail gateway through which all mail is sent from your domain via your Microsoft 365 account to the recipient. As the outbound gateway, the Barracuda Email Security Gateway processes the mail by filtering out spam and viruses and applying any outbound policies (blocking, encrypting, etc.) before final delivery. By using the configuration described in Outbound Configuration below, you instruct the Microsoft 365 mail servers to pass all outgoing mail from your domain to the Barracuda Email Security Gateway.
Inbound Configuration
To restrict all mail sent to your organization to only that which is sent from the Barracuda Email Security Gateway:
- Create a connector for MS Exchange in Microsoft 365. You will need the IP address of the Barracuda Email Security Gateway. Once you configure the connector, any Internet mail that does not originate from this IP address range will be rejected by Microsoft 365.
Optionally add the requirement for TLS encryption. If you do so, then all mail from your partner organization sent from the IP address or address range you specify must be sent using TLS. Any mail that does not meet this restriction will be rejected.
For further details about configuring Microsoft 365 with connectors, see Set up connectors for secure mail flow with a partner organization in Microsoft documentation.
Inbound Configuration - Create Transport Rule to Bypass Spam Filtering
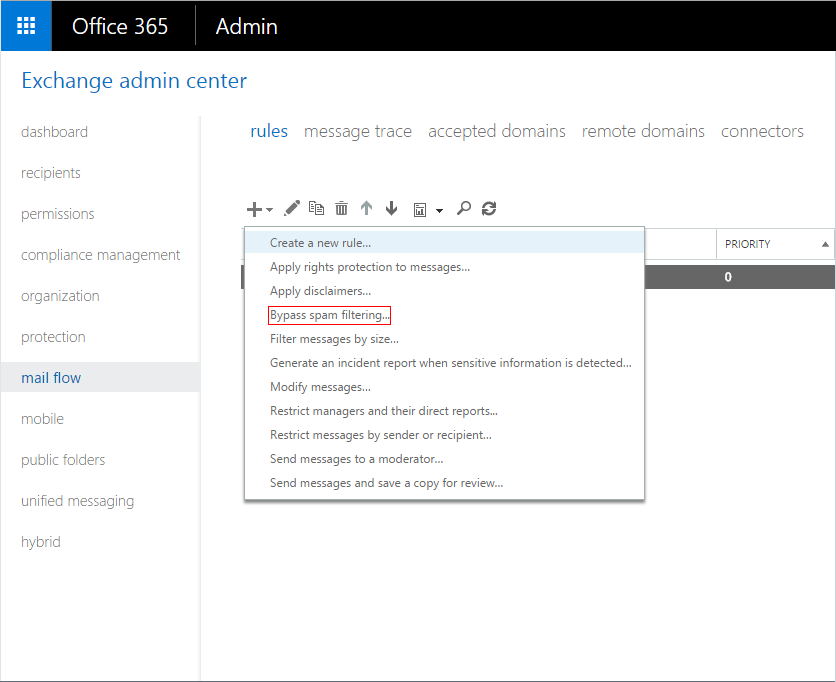
Log into the Microsoft 365 admin center, and go to Admin centers > Exchange.
- In the left pane, click mail flow, and click rules.
- Click the + symbol, and click Bypass spam filtering:
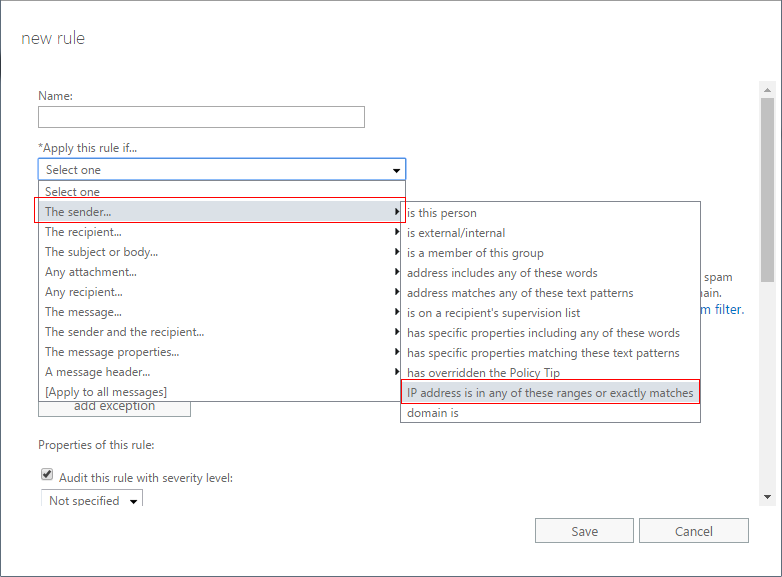
- In the new rule page, enter a Name to represent the rule.
- From the Apply this rule drop-down menu, select The sender > IP address is in any of these ranges or exactly matches:
- In the Specify IP address ranges page, enter the IP address/range for the Sender (your Barracuda Email Security Gateway).
- Click OK, and click Save to create the transport rule.
- Click the Edit icon for the rule, scroll to the Properties of this rule section, and in the Priority field, type 0.
Click Save.
Outbound Configuration From Microsoft 365 to the Barracuda Email Security Gateway
If you have more than one domain on your tenant (e.g., x.com and y.com ) and you only want to filter one of the domains (such as x.com, for example ), refer to How to Configure Microsoft 365 to Scan Only Selected Domains Outbound. The instructions in the section below describe how to filter for all domains for outbound mail.
If you have multiple outgoing account domains for Microsoft 365, you only need to make one send connector in Microsoft 365. You can use any one of the outbound smarthosts to make the send connector.
Each of your domains from which you want to be able to send email must be added to the Barracuda Email Security Gateway. Be sure to add all of your accepted Microsoft 365 domains to the Barracuda Email Security Gateway before configuring outgoing email in this section.
- Log into your Barracuda Email Security Gateway as admin. Go to the BASIC > Outbound page.
- Make a note of the Outbound SMTP Host IP address and associated port.
- Log into the Microsoft 365 Exchange admin center, and go to Admin centers > Exchange.
- In the left pane, click mail flow, and click connectors.
- Click the + symbol, and use the wizard to create a new connector.
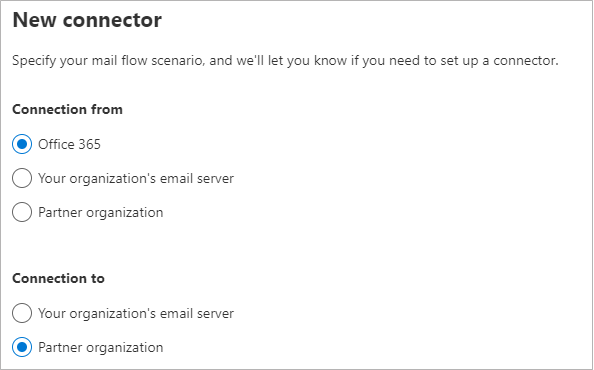
- From the From drop-down menu, select Microsoft 365, and from the To drop-down menu, select Partner organization.

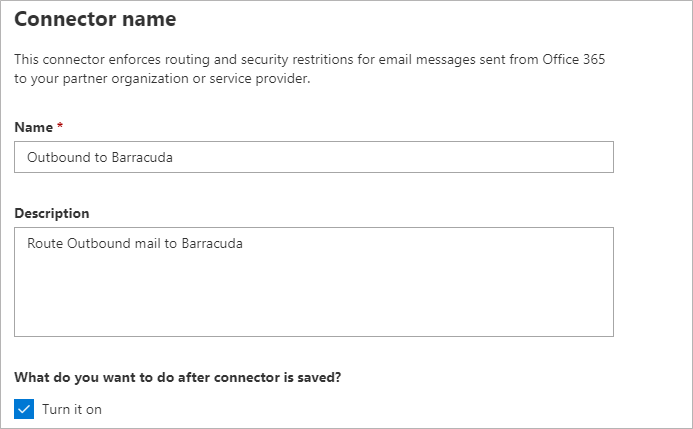
- Enter a Name and (optional) Description to identify the connector.

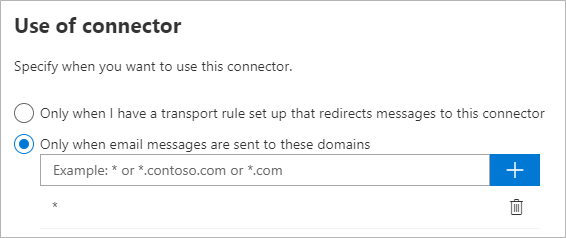
- Click Next. Select Only when email messages are sent to these domains, click the + symbol, and enter an asterisk ( * ) in the add domain field.
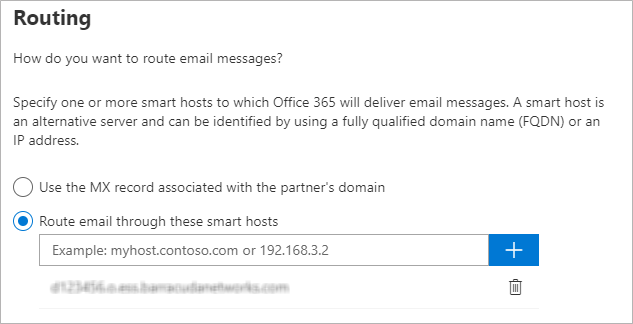
- Click OK, and click Next. Select Route email through these smart hosts, and click the + symbol.
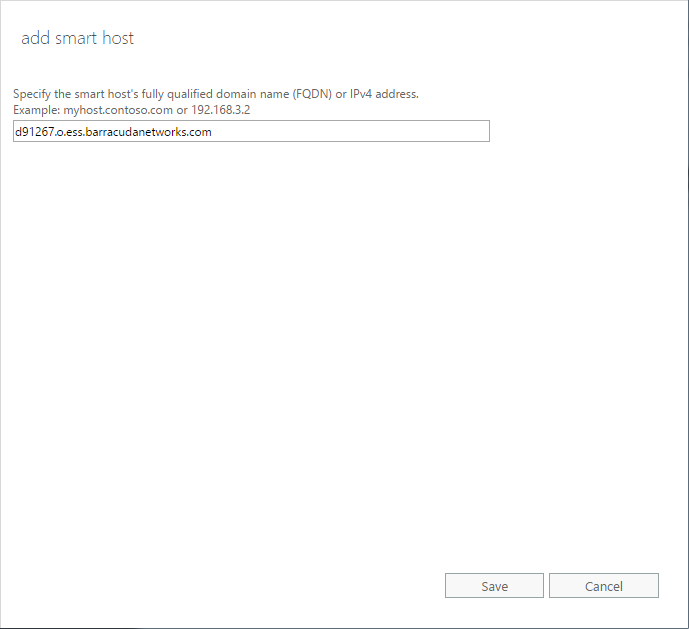
- Go to the Barracuda Email Security Gateway and navigate to the BASIC > IP Configuration page. Copy the Default Hostname and the Default Domain values from the Domain Configuration section of the page. Alternatively you can use the public IP address (which should be NAT'ed to the firewall). Enter the Default Hostname or IP address in the add smart host page:
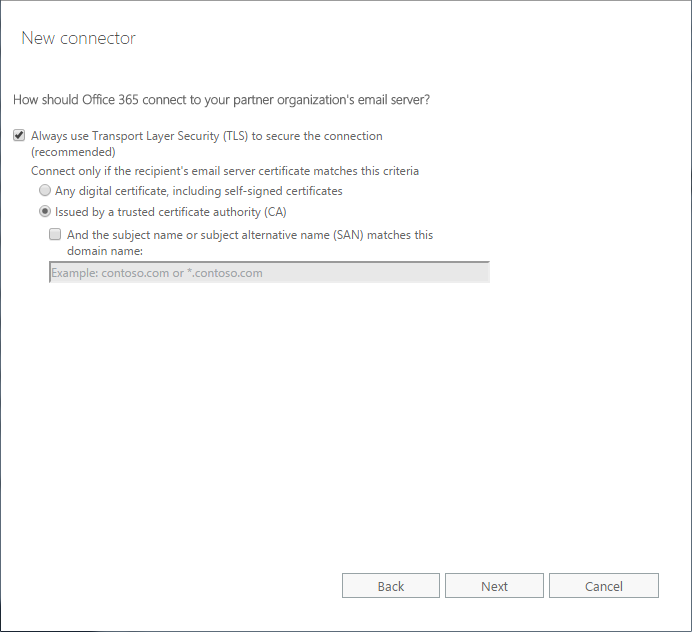
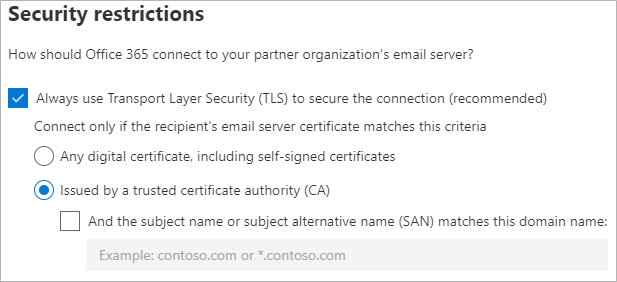
- Click Save , and click Next . Use the default setting, Always use Transport Layer Security (TLS) to secure the connection (recommended) > Issued by Trusted certificate authority (CA) :
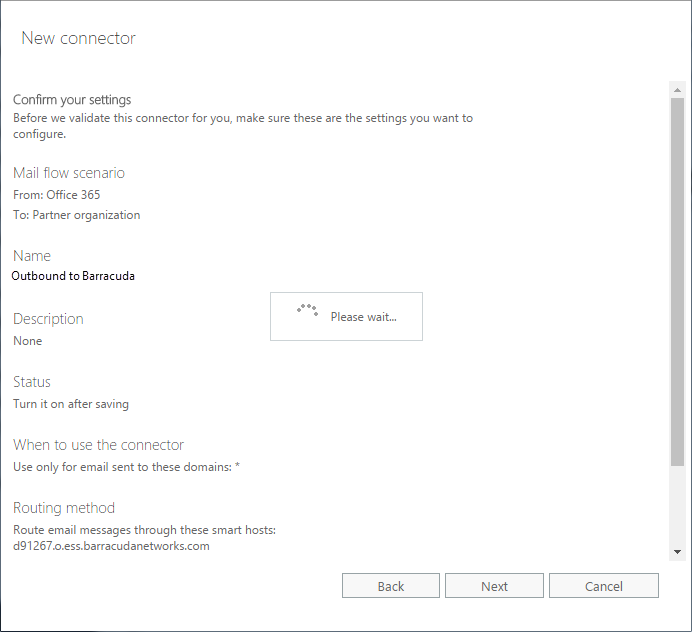
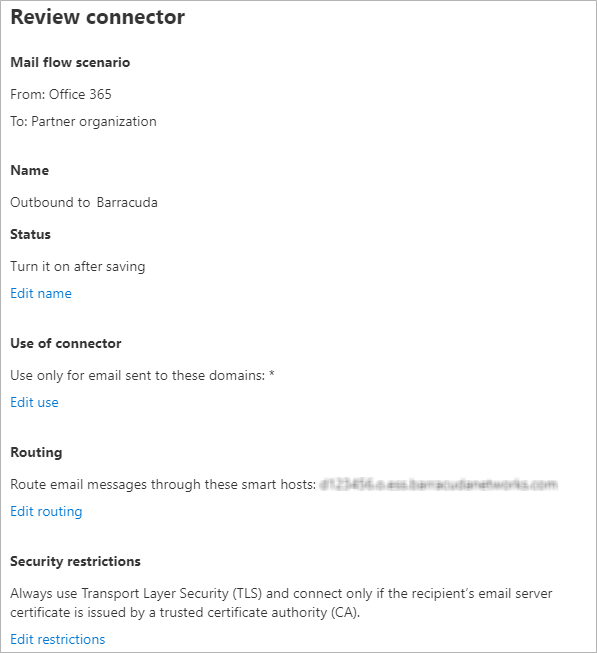
- Click Next. In the confirmation page, verify your settings and click Next. Microsoft 365 runs a test to verify your settings:
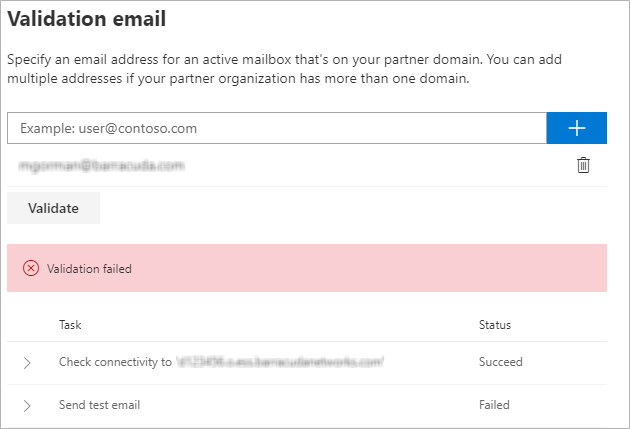
- When the verification page displays, enter a test email address, and click Validate. For this test, it is important to use an email address from outside your organization, such as a Gmail or Yahoo email address.
There are two parts of the validation:- Test Connectivity – If this test fails, contact Barracuda Networks Support.
- Send Test Email – If this test fails, there is no cause for concern. The test email comes from a Microsoft domain, not from your domain, so it is rejected. If you change your domain away from
onmicrosoft.com, the test should work. - Click Save. Your mail flow settings are added.
The Barracuda Email Security Gateway now accepts outbound traffic from Outlook 365.
Add a Connector
- Log into the Microsoft 365 Exchange Admin Center.
- In the left pane, click Mail flow, and click Connectors.
- Click the Add a connector button, and use the wizard to create a new connector.
- For Connection from, select Microsoft 365. For Connection to, select Partner organization.
- Enter a Name and (optional) Description to identify the connector:
- Click Next . Select Only when email messages are sent to these domains . Enter an asterisk ( * ) in the text box field and click the blue + .
- Click Next. Select Route email through these smart hosts.
- Go to the Barracuda Email Security Gateway and navigate to the BASIC > IP Configuration page. Copy the Default Hostname and the Default Domain values from the Domain Configuration section of the page (ex: MyESG.barracudanetworks.com). Alternatively you can use the public IP address (which should be NAT'ed to the firewall). Enter it in the Routing page.
- Click Next . Use the default settings for the Security restrictions : Always use Transport Layer Security (TLS) to secure the connection (recommended) > Issued by Trusted certificate authority (CA) .
- Enter an external email address to validate the connector. For this test, it is important to use an email address from outside your organization, like a Gmail or Yahoo email address. There are two parts of the validation:
- Test Connectivity – If this test fails, contact Barracuda Networks Technical Support.
- Send Test Email – If this test fails, there is no cause for concern. The test email comes from a Microsoft domain, not from your domain, so it is rejected. If you changed your domain away from
onmicrosoft.com, the test should work. Note that you might still receive the email even if the test failed.
- Click Next. If the test email failed, you will need to confirm that you wish to continue without successful validation by clicking Yes in the pop-up dialog box. Click Next.
Verify your settings, and then click Create connector to complete the process.
The Barracuda Email Security Gateway now accepts outbound traffic from Microsoft Outlook 365.