

You can deploy the Barracuda Load Balancer ADC in a flat network (i.e., your management IP address and VIP address both reside in the same network) on Amazon Web Services (AWS). Complete the steps in this guide to configure, launch, and license your Barracuda Load Balancer ADC instance. Then log into the Barracuda Load Balancer ADC to verify your configuration and change your password before you start creating services.
Requirements
Before you deploy the Barracuda Load Balance ADC on Amazon Web Services, ensure that you have completed the following:
- Set up an Amazon Virtual Private Cloud (VPC) for the Barracuda Load Balancer ADC.
- If you want to use the Bring Your Own Licensing (BYOL) model, get the Barracuda Load Balancer ADC license. See Bring Your Own License (BYOL) .
Step 1. Create a Security Group
Create a security group with rules that specify the protocols, ports, and source IP ranges permitted to reach the instance. Multiple security groups can be created with different rules and assigned to each instance. For more information on security groups, refer to the AWS article Amazon EC2 Security Groups.
- Log into the Amazon EC2 Management Console.
- From the EC2 dashboard, select Security Groups under NETWORK & SECURITY.
- Click Create Security Group.
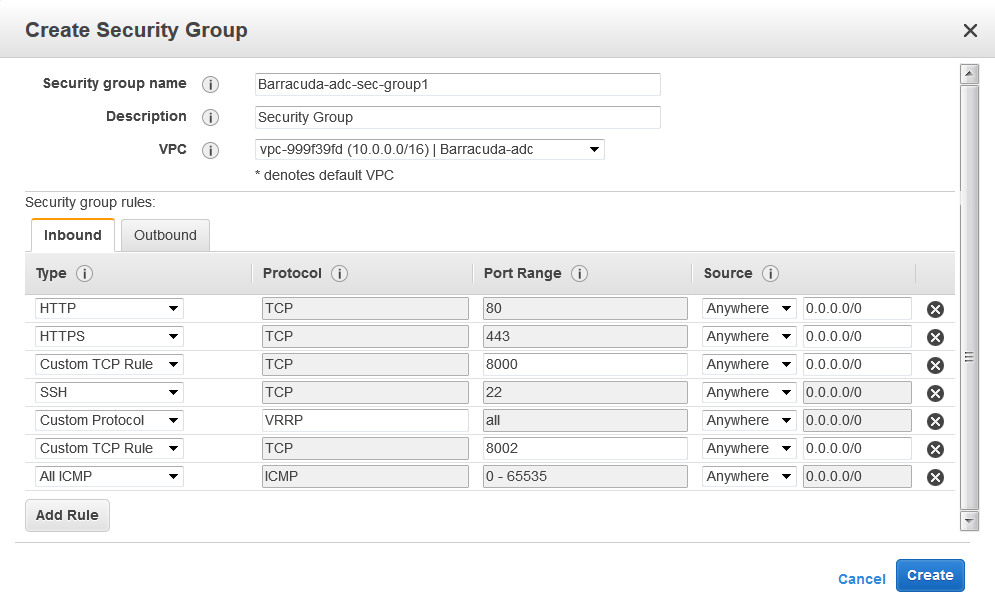
- In the Create Security Group window, do the following:
- Security group name: Enter a name to identify the security group.
- Description:Specify the description for the security group.
- VPC: Select a VPC ID from the list.
- Under Security group rules, specify the inbound and outbound traffic to be allowed for the instance.
Add ports 8000 and 443 in the inbound rule of the security group associated with the Barracuda Load Balancer ADC.
Add inbound rules to open the ports through which you configure the services on this instance.
- Add an outbound rule to ensure that all ports are open irrespective of the service type:
- TYPE: All Traffic
- Protocol: All
- Port Range: All
- Destination: 0.0.0.0/0
If you are configuring Layer 4 services, add an inbound rule to ensure that all ports are open:
- TYPE: All Traffic
- Protocol: All
- Port Range: All
- Source: 0.0.0.0/0
- After adding the inbound and outbound rules, click Create.
- The created group appears in the security group table.
Step 2. Create a Network Interface
Create a minimum of two network interfaces (one for MGMT access and the other for creating services). Ensure that you create the network interfaces in the subnet where you want to deploy the Barracuda Load Balancer ADC. The number of interfaces that can be attached to the Barracuda Load Balancer ADC depends on the instance type that you selected on Amazon Web Services. For information about instance types, see Licensing Options and Models.
- Log into the Amazon EC2 Management Console.
- From the EC2 dashboard, select Network Interfaces under NETWORK & SECURITY.
- Click Create Network Interface.
- In the Create Network Interface window, provide the following information for the network interface:
- Description – Enter a name for the interface.
- Subnet – Select the subnet of the VPC where you want to create the instance.
- Private IP – It is recommended that you enter a static primary private IP address.
- Security Groups – Select the security group that you created.
- Click Yes, Create.
Step 3. Disable Source/Dest. check
You must also disable the Source/Dest. check in the interfaces that you created for the Barracuda Load Balancer ADC instance and configured servers. When this check is enabled, it breaks the Layer 4 services.
- Log into the AWS EC2 Management Console.
- From the EC2 dashboard, select Network Interfaces under NETWORK & SECURITY.
- Right click the interface and select Change Source/Dest. Check.
- In the Change Source/Dest. Check window, set Source/dest. check to Disabled and then click Save.
Step 4. (Optional) Assign Multiple Private IP Address(es) to the Network Interface of the Instance
Depending on the Barracuda Load Balancer ADC instance type, you can add multiple secondary IP addresses on the interfaces that are used to create services on the Barracuda Load Balancer ADC. Do not add secondary IP addresses on the interface that is used for management access of the Barracuda Load Balancer ADC. For more information on multiple IP addresses, refer to the Amazon EC2 article Multiple IP Addresses.
To assign a secondary private IP address:
- Log into the Amazon EC2 Management Console.
- From the EC2 dashboard, select Network Interfaces under NETWORK & SECURITY.
- Identify the interface needing a secondary private IP address assignment, and right-click the network interface attached to the instance.
- Select Manage Private IP Addresses.
- In the Manage Private IP Addresses window:
- Click Assign a secondary private address.
- In the Address field, enter an IP address that is within the subnet range for the instance. It is recommended that you use the static IP address instead of auto-assign.
- (Optional) To allow the secondary private IP address to be reassigned if it is already assigned to another network interface, select Allow reassignment.
- Click Yes, Update.
- Click Close.
Step 5. Deploy the Barracuda Load Balancer ADC on Amazon Web Services
In the Amazon VPC that you configured, launch an Amazon EC2 instance with the Barracuda Load Balancer ADC AMI image. The Amazon Launch Instance wizard guides you through the following steps:
Log into the AWS Management Console and open the EC2 Management Console.
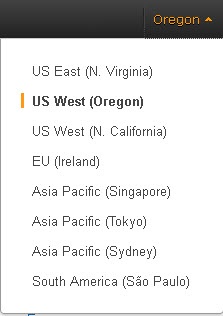
- In the top right corner of the page, select the region for the instance. This is important because some Amazon EC2 resources can be shared between regions.
- Click Launch Instance.

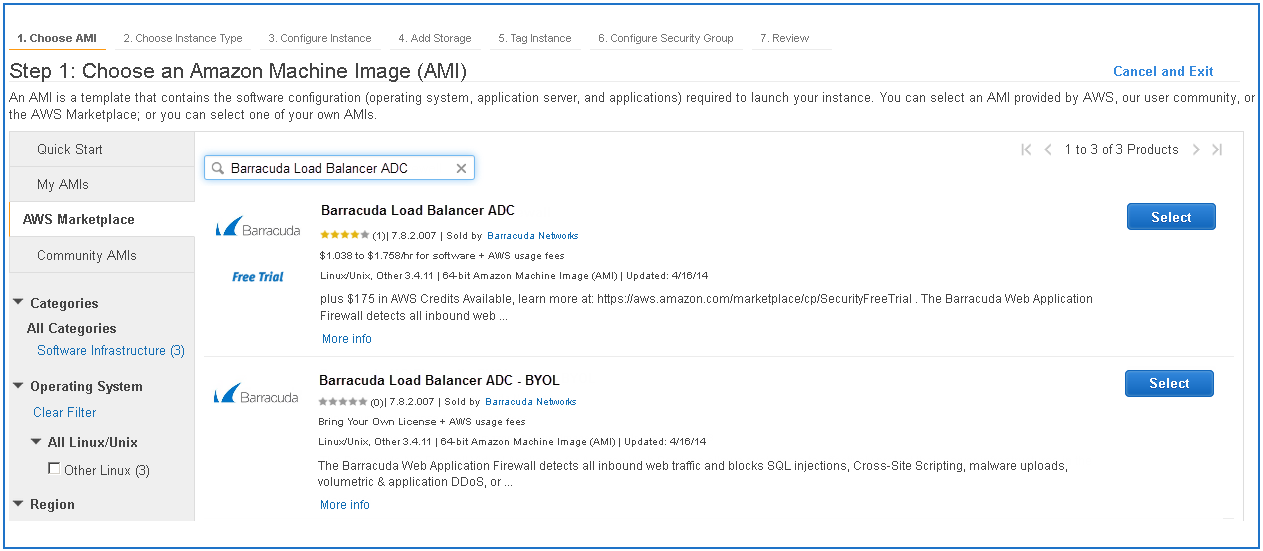
On the Step 1: Choose an Amazon Machine Image (AMI) page, select AWS Marketplace and then search for and select the Barracuda Load Balancer ADC AMI.
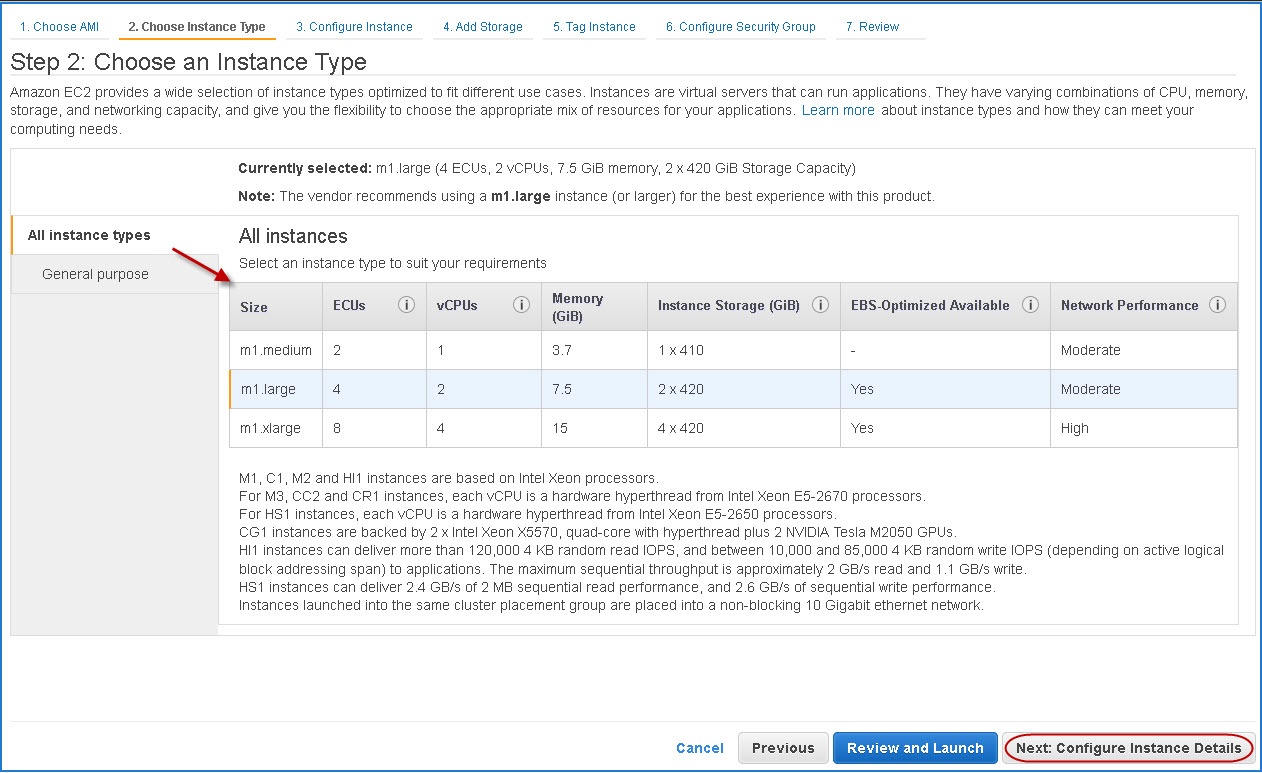
On the Step 2: Choose an Instance Type page, select an instance type from the All Instance types or General purpose table and then click Next: Configure Instance Details to continue.
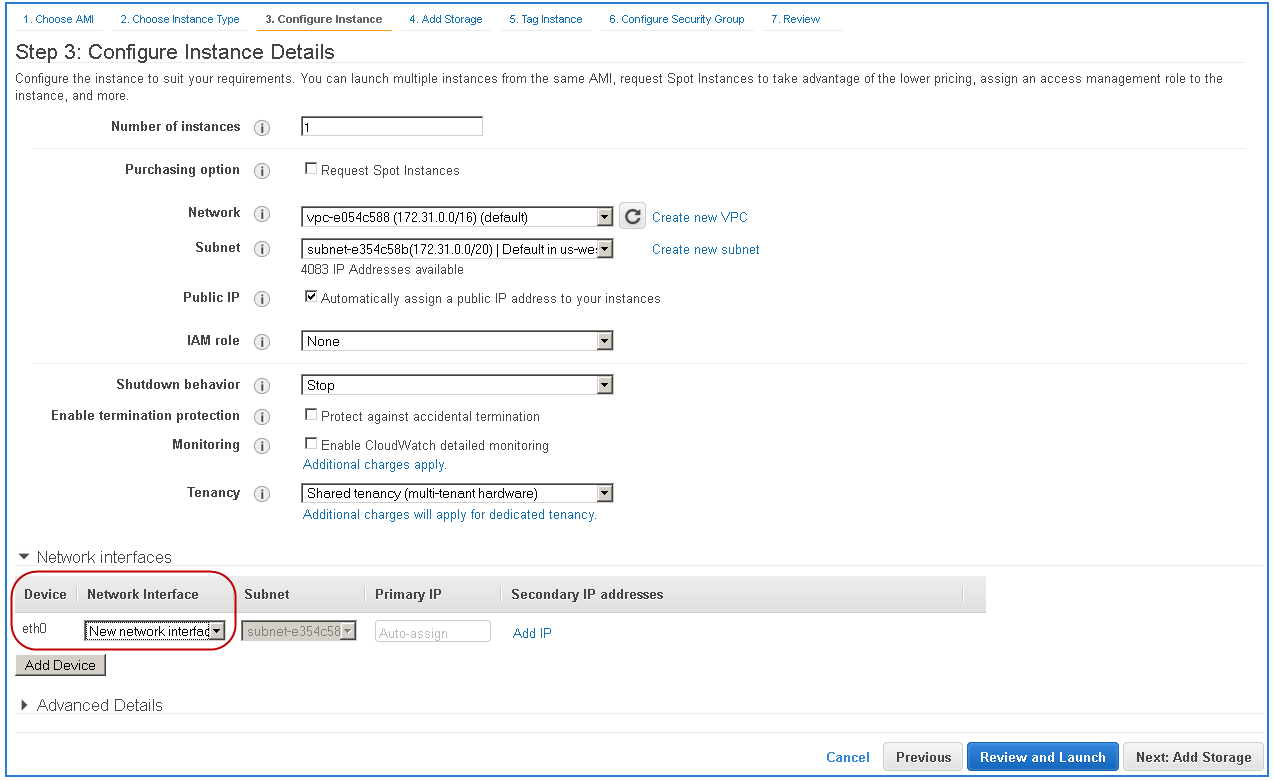
On the Step 3: Configure Instance Details page:
- Enter the Number of instances you want to launch.
- Select the appropriate Network in which you want to deploy the instance.
- Select the Subnet of the VPC where you want to create the instance.
- In the Network Interface section:
Select the network interface for Management access of the Barracuda Load Balancer ADC.
Click Add Device and select the network interface for creating services on the Barracuda Load Balancer ADC.
In the Advanced Details pane, keep the default setting for all parameters and then click Next: Add Storage.
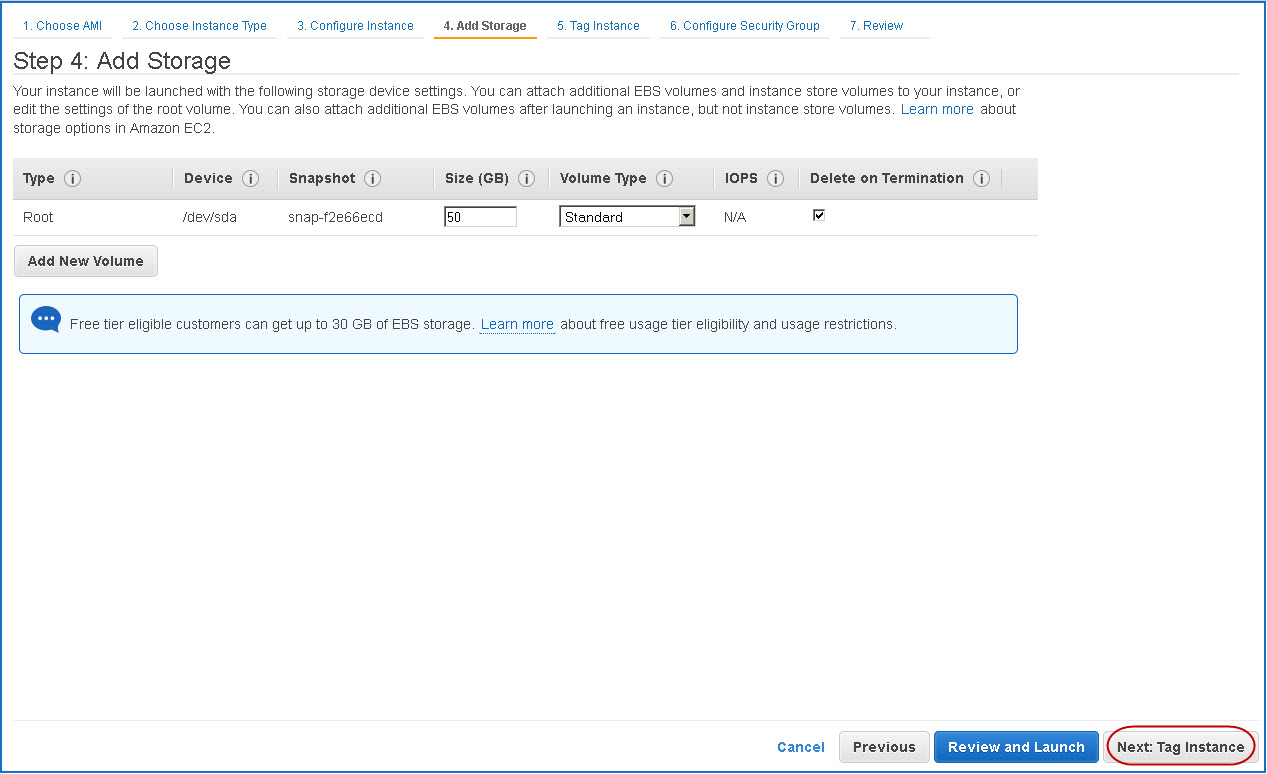
On the Step 4: Add Storage page, review the storage device settings for the instance. Modify the values if required, and then click Next: Tag Instance.
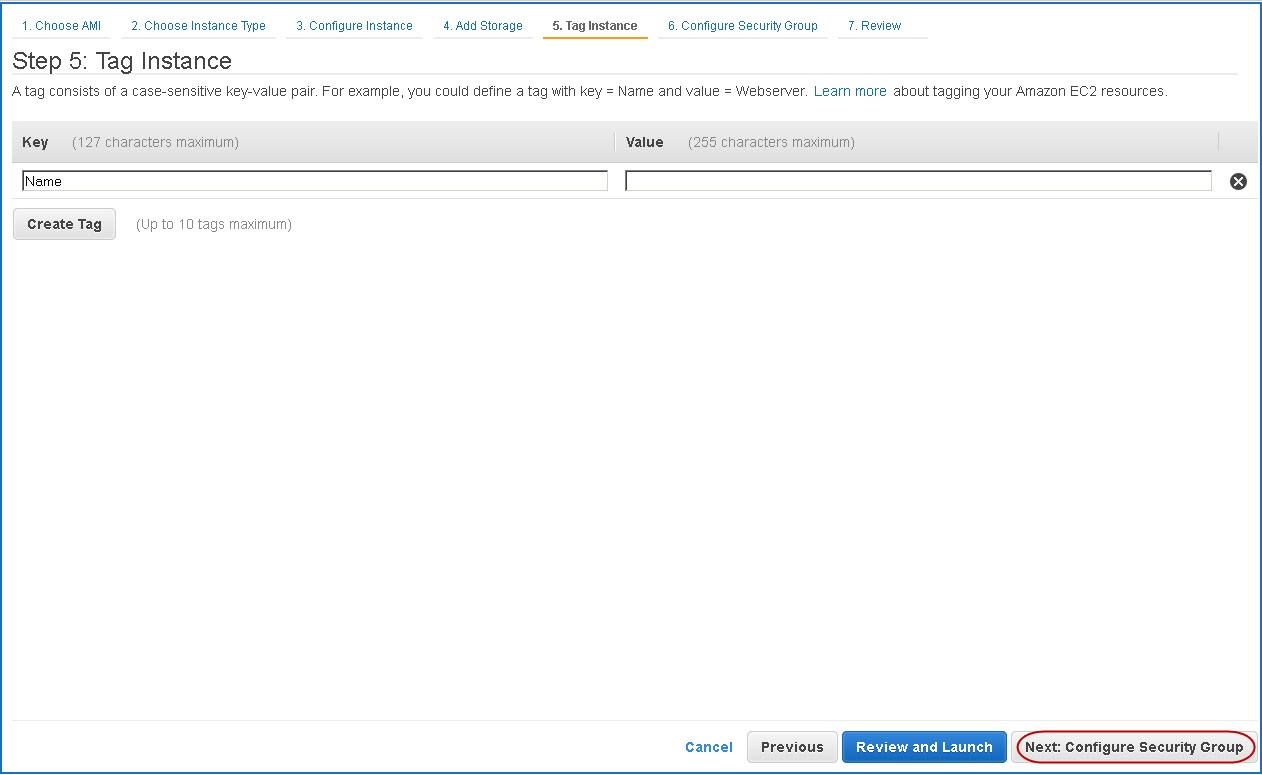
On the Step 5: Tag Instance page, add/remove the tags for the instance (if required) and then click Next: Configure Security Group.
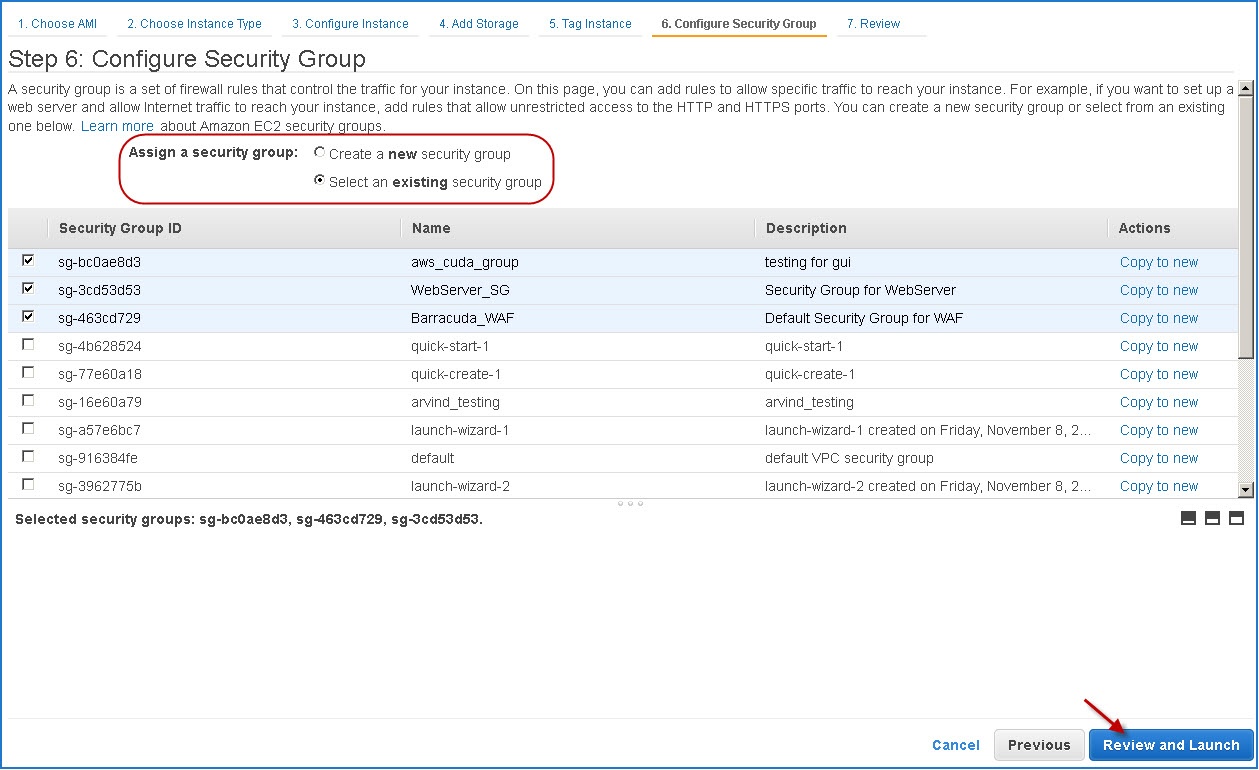
On the Step 6: Configure Security Group page, select the security groups that you created in Step 1 and then click Review and Launch.
On the Step 7: Review Instance Launch page, review your settings and then click Launch.
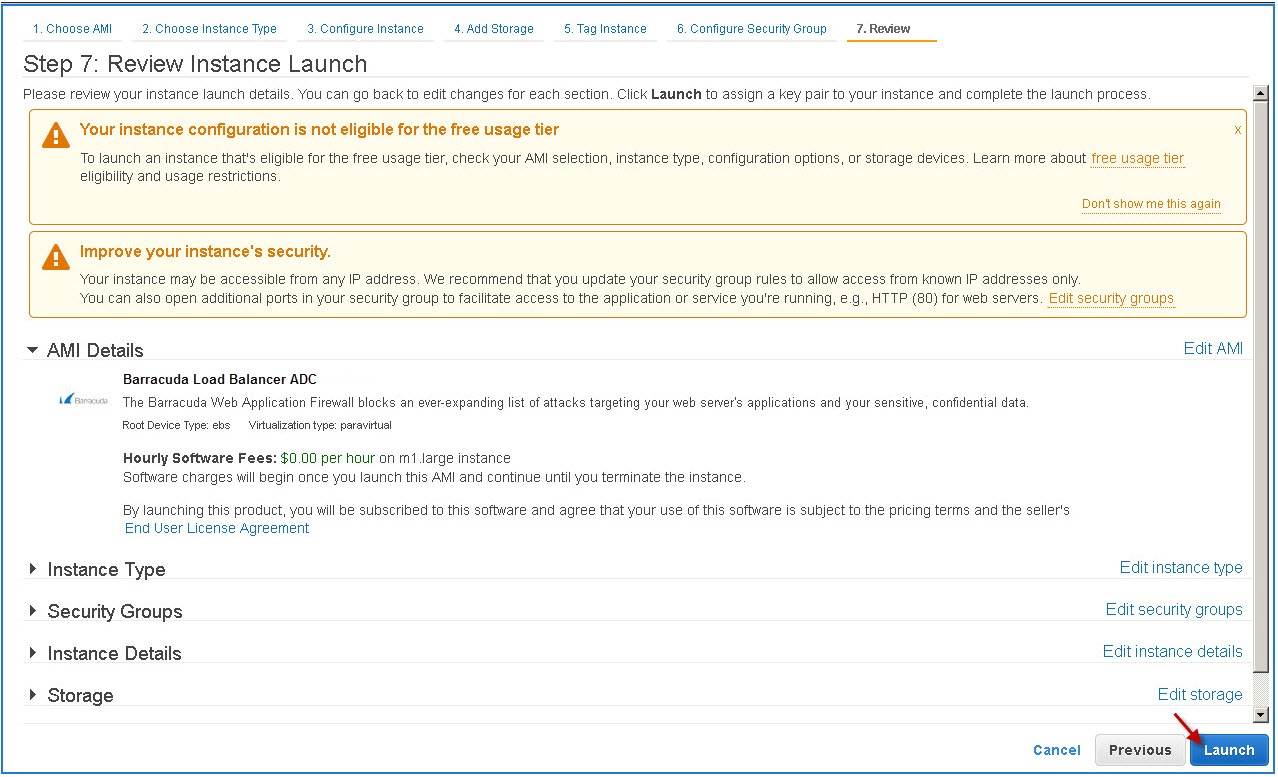
After you click Launch, Amazon Web Services begins provisioning the Barracuda Load Balancer ADC. Allow a few minutes for the Amazon Web Services Agent and the Barracuda Load Balancer ADC image to boot up.
Step 6. Allocate and Assign an Elastic IP Address to your Instance
As multiple interfaces are assigned to the instance, the Barracuda Load Balancer ADC will not be accessible to the outside world via the Internet because the unit does not not yet have a public IP address. To resolve this issue, assign a persistent public IP address to the instance using Elastic IP addressing. For more information, refer to the AWS article Elastic IP Addresses.
The elastic IP address associated to the first interface (eth0) will be the management IP address for the Barracuda Load Balancer ADC, and the elastic IP address associated to the second interface (eth1) will be used to access the services created on the Primary IP Address of the interface on the Barracuda Load Balancer ADC. Interface eth1 will be displayed as ge-1-1 on the Barracuda Load Balancer ADC.
- Log into the Amazon EC2 Management Console.
- From the EC2 dashboard, select Elastic IPs under NETWORK & SECURITY.
- Click Allocate New Address.
- Click Allocate to confirm and allocate a new IP address. A random public IP address is generated and displayed in the Allocate New Address table.
- On the Allocate New Address page, right-click the new IP address and select Associate.
- In the Associate Address window:
- Either select the Instance and the Private IP Address of the instance or select a Network Interface and the Private IP Address.
- Select the Reassociation check box.
- Click Associate.
- If you completed Step 4. (Optional) Assign Multiple Private IP Address(es) to the Network Interface of the Instance to assign multiple private IP address(es) to eth1 (which is displayed as ge-1-1 on the Barracuda Load Balancer ADC), repeat the steps above to assign the Elastic IP address to each internal IP address so that they can be reachable from the outside world via the Internet.
Step 7. (BYOL Only) License the Barracuda Load Balancer ADC
If you deployed the Barracuda Load Balancer ADC with BYOL, complete the licensing and provisioning of your system.
- Log into the Amazon EC2 Management Console.
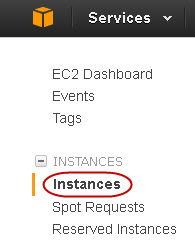
- From the EC2 Dashboard, select Instances under INSTANCES.
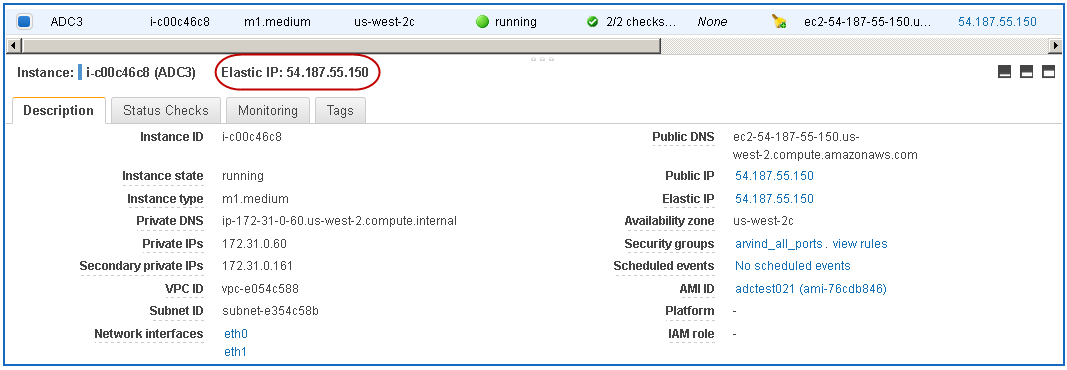
- In the Instances table, select the Barracuda Load Balancer ADC instance that you created and note the Elastic IP address associated with eth0.
In a web browser, go to the Barracuda Load Balancer ADC web interface at the Elastic IP address that was assigned to eth0. Use port 8000 for HTTP. No port is required for HTTPS. For example:
- For HTTP: http://<EIP>:8000
- For HTTPS: https://<EIP>
- On the Licensing page, enter your Barracuda Networks Token and Default Domain to complete licensing and then click Provision. The Barracuda Load Balancer ADC connects to the Barracuda Update Server to get the required information based on your license and then reboots automatically. Allow a few minutes for the reboot process.
After the boot process is complete, the Licensing page displays with the following options:
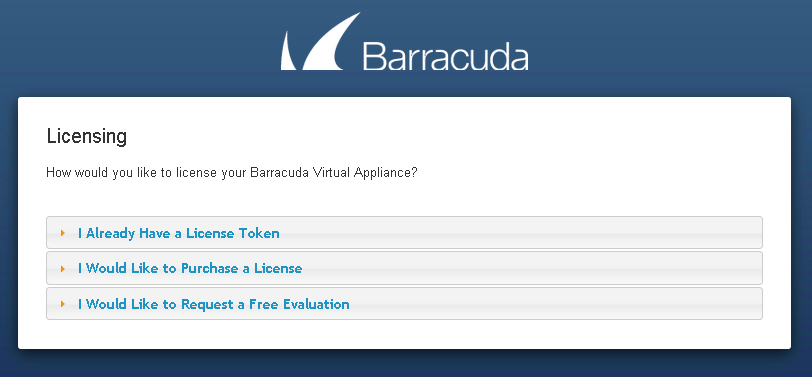
- I Already Have a License Token – Use this option to provision your Barracuda Load Balancer ADC with the license token you have already obtained from Barracuda Networks. Enter your Barracuda Networks Token and Default Domain to complete licensing, and then click Provision.
The Barracuda Load Balancer ADC connects to the Barracuda Update Server to get the required information based on your license, and then reboots automatically. Allow a few minutes for the reboot process. Once the instance is provisioned, you are redirected to the login page. - I Would Like to Purchase a License – Use this option to purchase the license token for the Barracuda Load Balancer ADC. Provide the required information in the form, accept the terms and conditions, and click Purchase.
The Barracuda Load Balancer ADC connects to the Barracuda Update Server to get the required information based on your license, and then reboots automatically. Allow a few minutes for the reboot process. Once the instance is provisioned, you are redirected to the login page. - I Would Like to Request a Free Evaluation – Use this option to get 30 days free evaluation of the Barracuda Load Balancer ADC. Provide the required information in the form, accept the terms and conditions, and click Evaluate.
The Barracuda Load Balancer ADC connects to the Barracuda Update Server to get the required information based on your license, and then reboots automatically. Allow a few minutes for the reboot process. Once the instance is provisioned, you are redirected to the login page.
- I Already Have a License Token – Use this option to provision your Barracuda Load Balancer ADC with the license token you have already obtained from Barracuda Networks. Enter your Barracuda Networks Token and Default Domain to complete licensing, and then click Provision.
Step 8. Verify your Configuration and Change the Password
- In a web browser, go to the Barracuda Load Balancer ADC web interface at the Elastic IP address that was assigned to eth0. Use port 8000 for HTTP. No port is required for HTTPS. For example:
- For HTTP: http://<EIP>:8000
- For HTTPS: https://<EIP>
- Log into as the administrator. Use the following credentials:
- Username: admin
- Password: The Instance ID of your Barracuda Load Balancer ADC in Amazon Web Services.
- Username: admin
- Go to the BASIC > Administration page and change your password.
Next Steps
Before you start configuring services on the Barracuda Load Balancer ADC, you can attach multiple interfaces to the Barracuda Load Balancer ADC, and bond those interfaces to increase the throughput of the Barracuda Load Balancer ADC. It is recommended that you create the link bond before you configure your services because the Barracuda Load Balancer ADC cannot have any configurations when you create the link bond. For instructions, see Creating a Link Bond on the Barracuda Load Balancer ADC for Amazon Web Services.
To start configuring your services in the Barracuda Load Balancer ADC, continue with Configuring Services on the Barracuda Load Balancer ADC for Amazon Web Services.
If you need help troubleshooting any issues with your Barracuda Load Balancer ADC, see Troubleshooting the Barracuda Load Balancer ADC on Amazon Web Services.