This article walks you through the steps to configure the Barracuda Load Balancer ADC instances for high availability in different availability zones in Amazon Web Services.
Step 1. Deploy Two Barracuda Load Balancer ADC Instances on Amazon Web Services
Follow the instructions mentioned in Step 5. Deploy the Barracuda Load Balancer ADC on Amazon Web Services in the Barracuda Load Balancer ADC Deployment and Quick Start Guide for Amazon Web Services article and deploy two Barracuda Load Balancer ADC instances in two different availability zones.
Step 2. Allocate and Assign an Elastic IP Address to Your Instance
Follow the instructions mentioned in Step 6. Allocate and Assign an Elastic IP Address to your Instance in the Barracuda Load Balancer ADC Deployment and Quick Start Guide for Amazon Web Services article to allocate the elastic IP address to the deployed Barracuda Load Balancer ADC instances.
Step 3. License the Barracuda Load Balancer ADC
Follow the instructions mentioned in Step 7. (BYOL Only) License the Barracuda Load Balancer ADC in the Barracuda Load Balancer ADC Deployment and Quick Start Guide for Amazon Web Services to provision the deployed Barracuda Load Balancer ADC instances.
Step 4. Verify Your Configuration and Change the Password
Follow the instructions mentioned in Step 8. Verify your Configuration and Change the Password in the Barracuda Load Balancer ADC Deployment and Quick Start Guide for Amazon Web Services article to verify your configuration and change the password on both of the deployed Barracuda Load Balancer ADC instances.
Step 5. Cluster the Deployed Barracuda Load Balancer ADC Instances
Follow the instructions mentioned in Step 5: Cluster the Deployed Barracuda Load Balancer ADC Instances in the Clustering the Barracuda Load Balancer ADC Instances in the Same Availability Zone article to deploy the instances.
Step 6. Configure the Service(s) on the Barracuda Load Balancer ADC
If you have deployed the Barracuda Load Balancer ADC instance with two interfaces (i.e., mgmt (eth0) and ge-1-1 (eth1)), create the service by following the steps mentioned below:
- Log into the Barracuda-LB-ADC1 (Primary/Active unit) web interface.
- Use the private IP addresses assigned to both the instances as your VIP to create the service. Go to the BASIC > Services page, and click Add Service.
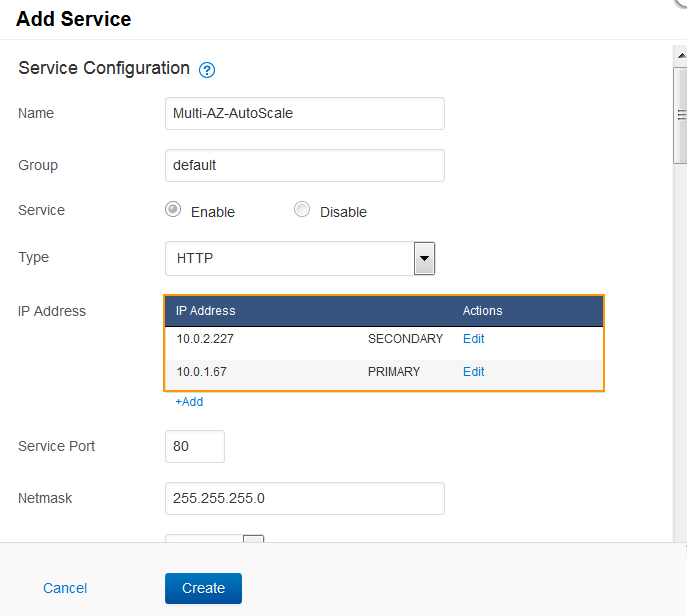
- In the Add Service window, specify values for the following fields:
- Name: Enter a name for the service.
- Group: Enter the group name under which you want to create the service.
- Service: Select Enable.
- Type: Select the type of the service you want to create. For example: HTTP
- IP Address: Click Add and enter the private IP address of the primary instance (i.e. Barracuda-LB-ADC1) and click Done Editing. Click Add again, enter the private IP address of the secondary instance (i.e.Barracuda-LB-ADC2) and click Done Editing.
- Service Port: Enter the port for the service.
- Netmask: Enter the netmask of the IP address.
- Interface: Select the interface for the service.
- Click Create. For more information on how to add a service, click the Help button in the web interface.
- Go to the NETWORK > Routes page.
- In the Add Static Route section:
- IP Protocol Version - Select IPv4
- IP Address - Enter 0.0.0.0.
- Netmask - Enter 0.0.0.0.
- Gateway Address - Enter 10.0.1.1.
- Network Interface - Select ge-1-1.
- Click Save.
- Repeat step 5 and 6 to add another route. Note: The Gateway Address for this route should be the gateway address of the secondary instance.
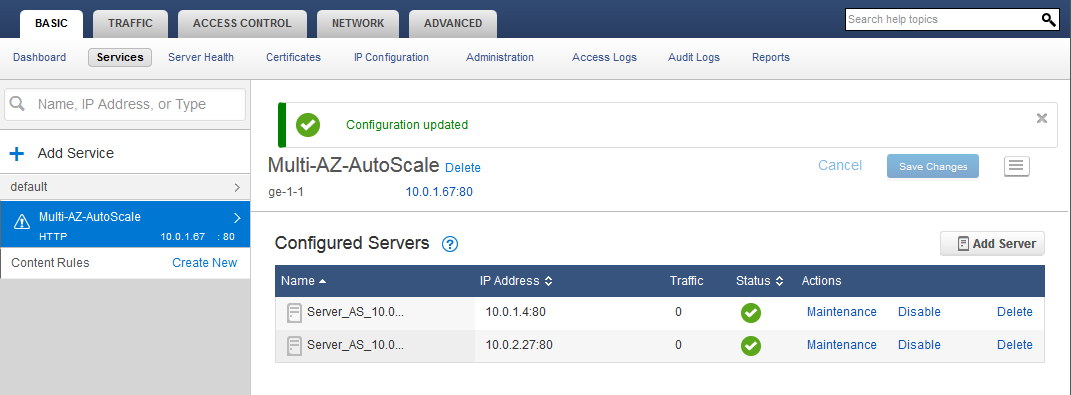
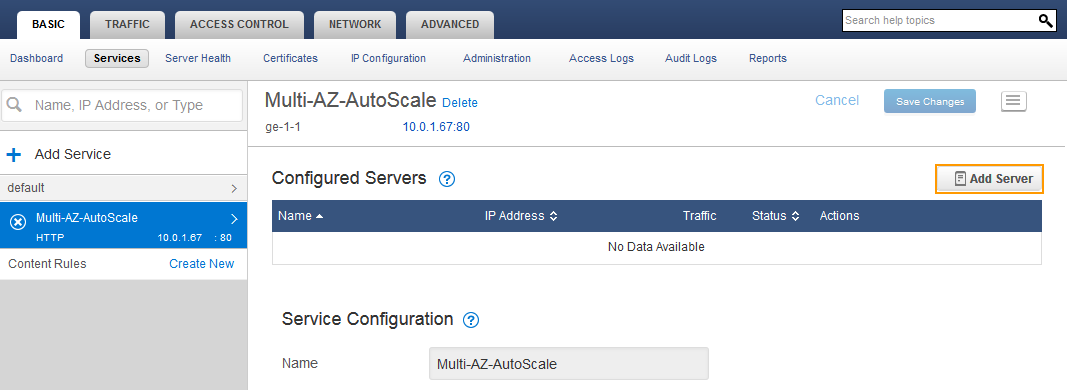
- Go to the BASIC > Services page, select the service you created in step 3 and click Add Server.
- In the Add Server window, specify values for the following fields:
- Name: Enter a name for the server.
- Status: Select Enable.
- Identifier: Select Autoscale Group.
- Port: Enter the port for the auto scale group.
- Autoscale Group: Enter the auto scale group name created in Step 1: Create an Auto Scaling Group.
- Click Resolve AutoScale Group. This will resolve the server IP addresses added in the specified auto scale group.
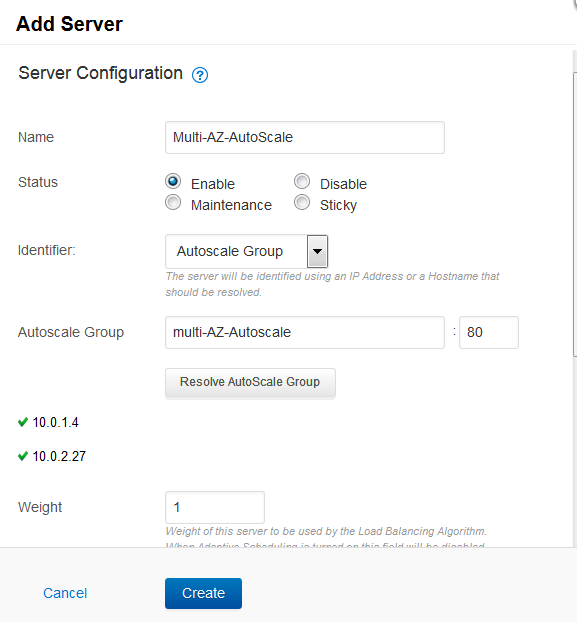
- Specify values for other parameters as required and click Create.