

This article refers to Barracuda Message Archiver firmware 5.2 or higher, and Microsoft Exchange Server 2013 and higher.
The RPC over HTTP (RoH), also known as Outlook Anywhere, connection may be required with earlier versions of Exchange Server if the Barracuda Message Archiver cannot reach the Exchange Server directly, for example, if the Exchange Server and Barracuda Message Archiver are installed in different locations.
RoH must bind to your email service account; for details on setting up an email service account, refer to Creating an Email Service Account.
Enable RoH Capability
Use the following steps to enable RoH capability for Exchange integration:
- Log in to the Barracuda Message Archiver web interface.
- On the Mail Sources > Exchange Integration page, click Start New Action.
- Select an action, for example, Email Stubbing , and then click Add New Server .
Enter the Exchange Server Configuration Name, Email Address, and associated Password in the provided fields.
Click Autodiscover; when the details display, click Save to add it to the Server table and automatically configure RoH for Exchange 2013. If Autodiscover cannot identify your settings, click Configure Manually, and complete the following steps:
Enter a Configuration Name, the Exchange Hostname, and associated Email Address and Password in the provided fields.
Select whether Extended Protection (EP) mode is enabled on the Microsoft Exchange Server, which enhances security by mitigating authentication relay and “man-in-the-middle” attacks through stronger channel and service binding. This setting ensures the Barracuda Message Archiver interacts properly with an Exchange Server that has EP enabled.
Depending on your Exchange Server configuration, select the appropriate mode:Yes – Extended Protection is enabled on the Exchange Server.
No – Extended Protection is not enabled on the Exchange Server.
Enter the hostname of the proxy server that provides RoH connectivity in the Proxy Server field, and click Save.
- Follow the onscreen directions to set up the selected action.
Confirm RoH is Available
Use the following steps to confirm RoH is available to the Barracuda Message Archiver by testing through your web browser:
Enter the Exchange CAS Server in a browser window in the form https://<CAS>/rpc, for example, https://RoH server address/rpc
- Your browser should indicate that the RoH proxy's SSL certificate is trusted.
You should be challenged for your credentials by the browser; enter the Barracuda Message Archiver service account credentials.
- Your credentials should be accepted, and you should see a blank page, be redirected to a different site, or receive an HTTP 503 error. This is expected. You should not encounter any other HTTP errors.
Troubleshooting
Use this section to test your Exchange configuration.
Test Remote Connectivity
Use Microsoft's Remote Connectivity Analyzer to test connectivity set up criteria, for example:
- Test whether Exchange Server is providing RoH
- Verify proper certificate chain is loaded
For example, from the Exchange Server tab you can test your Exchange Server RoH configuration, and from the Client tab you can download a standalone test client to your local workstation.
Test RoH Connectivity using Outlook
Use the following steps to verify your RoH configuration:
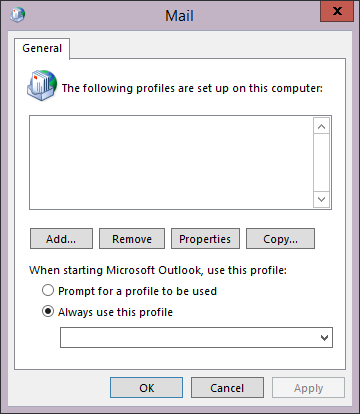
- Go to the Mail applet in the Outlook Control Panel; the exact appearance of the Mail applet varies depending on your version of Windows and Outlook:
- Click Show Profiles:
- Click Add to create a temporary profile. Enter the Profile Name:
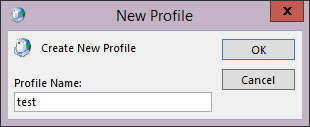
Click OK. In the Add Account page, select Manual setup or additional server types:
- Click Next. Select Microsoft Exchange Server or compatible service:
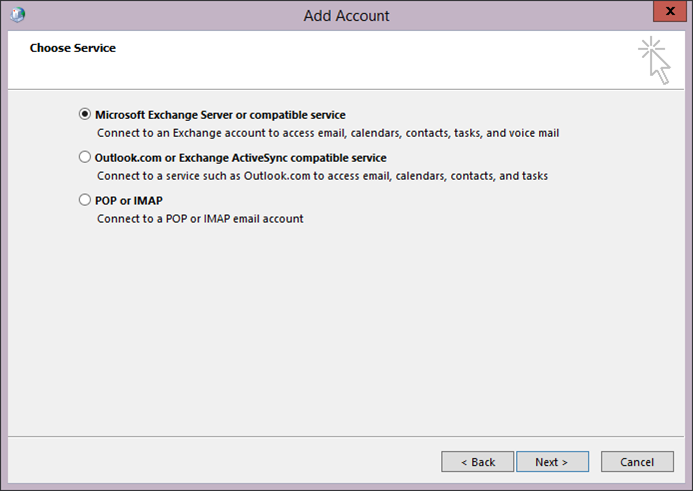
- Click Next. Enter the Exchange Server hostname in the Server field, and enter the Barracuda Message Archiver service account name in the User Name field:
Click More Settings. In the Microsoft Exchange dialog box, click the Connection tab, and turn on Connect to Microsoft Exchange using HTTP:
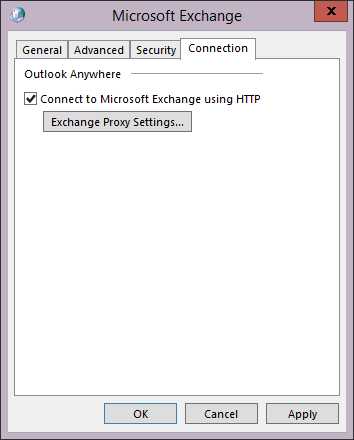
- Click Exchange Proxy Settings. In the Microsoft Exchange Proxy Settings dialog box, complete the following:
- Enter the RoH proxy server hostname in the https:// field.
- Turn on Connect using SSL only.
- Click OK to save your RoH configuration, and then click OK to close the Microsoft Exchange dialog box.
- In the Add Account dialog box, click Check Name. You should be challenged for your credentials. Enter the Barracuda message Archiver service account credentials. You should be able to authenticate, and the username that you entered in the Add Account dialog should resolve successfully.
- Click Cancel in the dialog box to remove the temporary Outlook profile. If a message displays asking if you want to create a profile without any email account, click Cancel.