

This article refers to Barracuda Message Archiver Legacy Release firmware or higher.
This article applies to Barracuda Message Archiver Vx and Microsoft Hyper-V 2008, 2008 R2, 2012, 2012 R2, and 2016.
Use the OVF file ending in -5x. ovf for this hypervisor .
- Go to https://barracuda.com, and select Message Archiver from the Products drop-down menu.
- Click Models/Editions, and select Virtual from the Deployment options drop-down menu.
- Click Free Eval Unit or Purchase, fill out the form, and submit your request.
- An email is sent to the specified email address.
Follow the instructions in the email to download and extract the Barracuda Message Archiver Vx .zip archive to a location that can be accessed from a machine running Hyper-V.
- In Hyper-V Manager, right-click your VM host and select Import Virtual Machine, and then click Next:
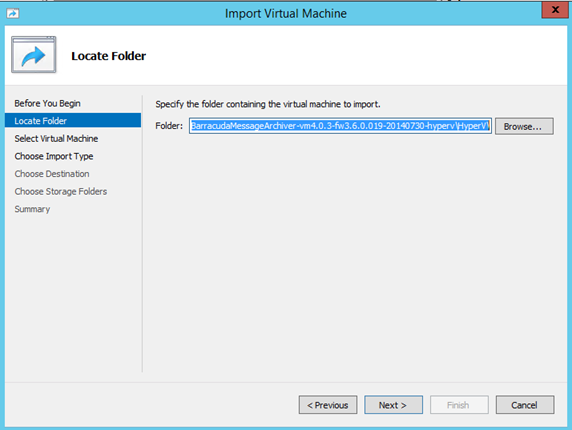
- Navigate to the HyperV folder within the extracted BarracudaMessageArchiver -vm<version>-fw<firmware>-<version-date>-hyperv folder; click Next.
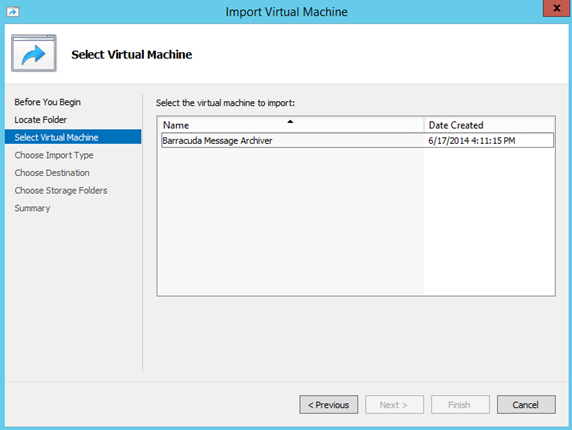
- Select the virtual machine to import:
- Click Next. Select the import type as Copy the virtual machine (create a new unique ID):

- Click Next. Select the default location for configuration files, storage, and network settings for VHD, or define custom settings, and then click Next.
- Click Finish. Before booting the virtual machine, expand the virtual disk settings and define memory and processor settings.
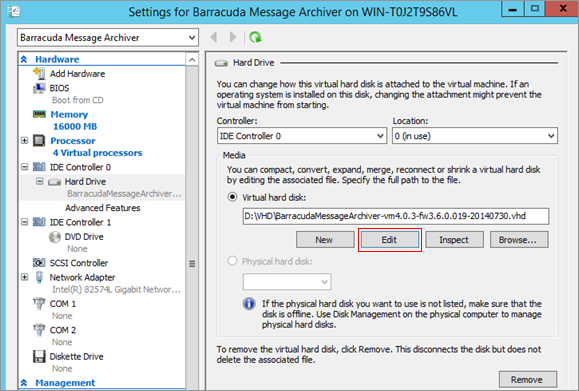
- Select the Barracuda Message Archiver disk under IDE Controller 0, and click Edit:
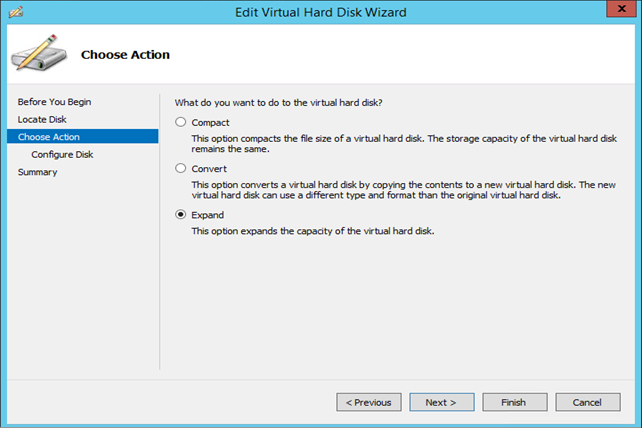
- Click Next and select Expand:
For disks larger than 2TB, refer to this guide from Microsoft and follow the steps to convert your VHD volume to a VHDX volume. Click Next. Enter the size of your new disk based on the following table:
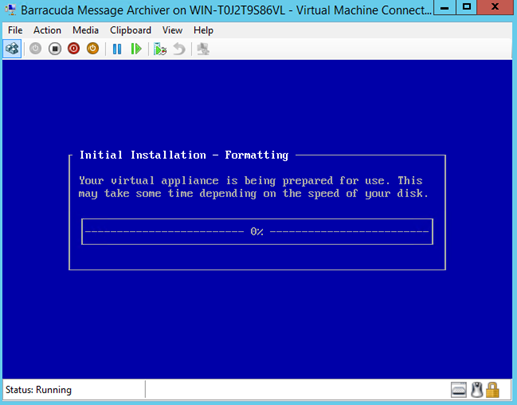
Model Storage Capacity 150 Vx 500 GB 350 Vx 2 TB 450 Vx 4 TB 650 Vx 8 TB 850 Vx 18 TB 950 Vx 28 TB 1050 Vx 66 TB - Click Finish. The Barracuda Message Archiver Vx installation is performed on the machine:
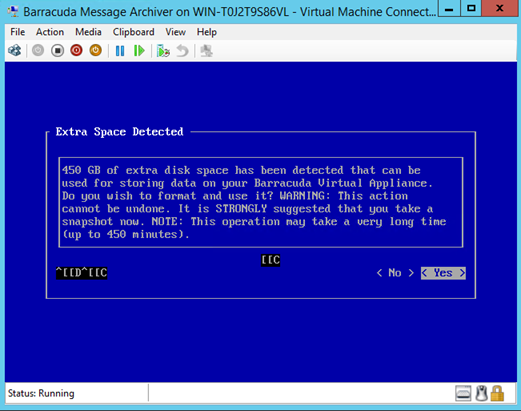
- Hyper-V is notified that the VHD file needs to be expanded; a prompt to expand the disk displays during installation:
Activate the Virtual Appliance
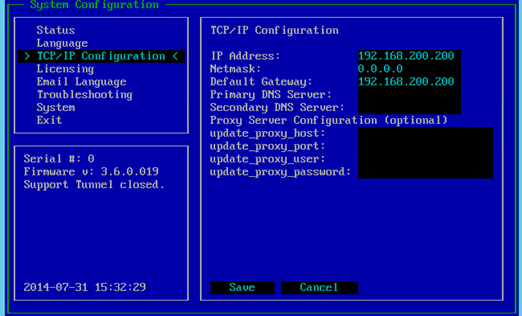
- Access the configuration menu using the credentials admin / admin, and specify network settings to activate the virtual machine:
- Enter the unique token provided by Barracuda to activate the Vx appliance:

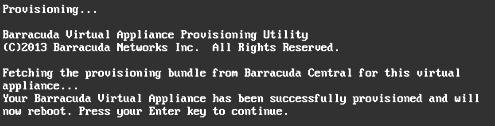
- Once you save the settings, the appliance is provisioned and requires a restart to finish activation:
- After the Vx appliance reboots, log in with username admin and password, which is either:
- The numeric part of the serial number if your Vx preboot version is 4.6.1 or higher. To find the preboot version, check the name of downloaded Vx image (zip file) which is something like
BarracudaEmailSecurityGateway-p2-vm4.6.1-fw8.1.0.003-20200113-esx-vbox.zip. The text between "vm" and "-fw" in the filename is the preboot version. In this example, it is 4.6.1. The serial number of your Vx is in your invoice and in your VM Setup email. - The word "admin" if your Vx preboot version is below 4.6.1.
For help finding the serial number of your virtual appliance, see Serial Number for Hardware and Virtual Appliances.
- The numeric part of the serial number if your Vx preboot version is 4.6.1 or higher. To find the preboot version, check the name of downloaded Vx image (zip file) which is something like