

This article refers to the Barracuda Message Archiver firmware version 5.0 and higher, and the MDaemon Messaging Server version 15.0.0.
Use the following steps to configure MDaemon Messaging Server SMTP Gateway Journaling to forward a copy of all incoming and outgoing messages to the Barracuda Message Archiver.
Step 1. Configure a Gateway
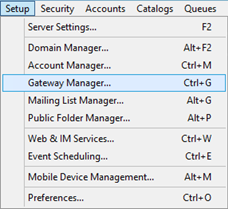
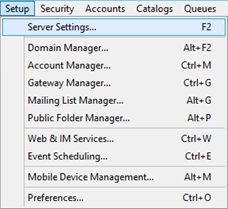
- From the MDaemon menu bar, click the Setup menu, and click Gateway Manager:
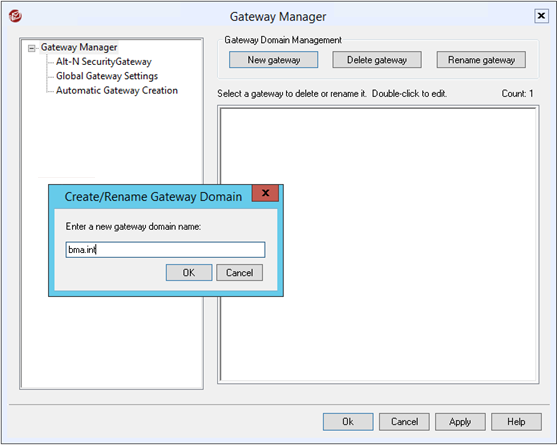
- In the Gateway Manager dialog box, click New gateway, and enter the domain bane as bma.int:
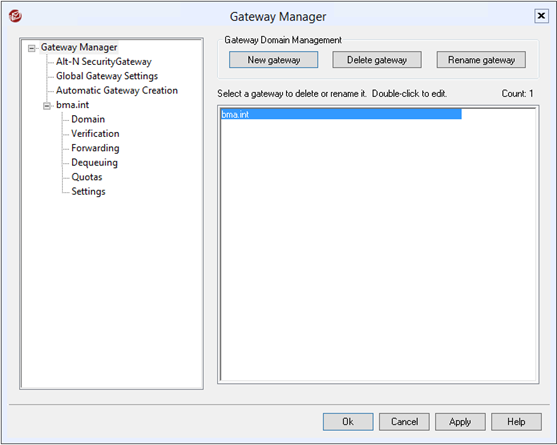
- Click OK, and then click Apply. The gateway is added:
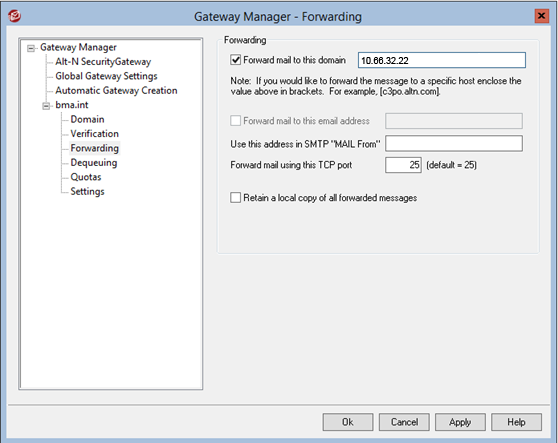
- In the left pane, click Forwarding.
- In the Forwarding section in the right pane, select Forward mail to this domain, and then enter the fully qualified domain name (FQDN) or IP address of your Barracuda Message Archiver in the associated field:
- In the left pane, click Settings.
- In the Settings section in the right pane, clear all of the options:
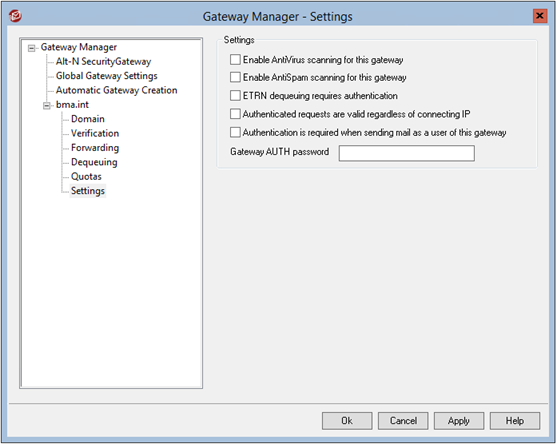
- Click Apply, and then click Ok to save your settings and close the dialog box.
Step 2. Enable Journaling
- From the MDaemon menu bar, click the Setup menu, and click Server Settings:
- Expand Server Settings in the left pane of the dialog box, and click Archiving.
In the Archiving pane, select Send copies of all inbound and outbound mail to these addresses, and type
journaling@bma.intin the associated field: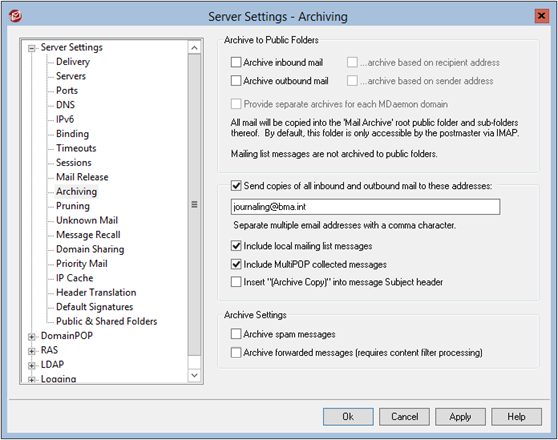
Click Delivery in the left pane, and verify the Default Smart Host settings:

Click Apply, and then click Ok to save your settings and close the dialog box.