

This article applies to Barracuda Message Archiver firmware version 5.0 and higher, and Microsoft 365 Enterprise cloud-based mail service, live@edu.
Step 1. Ensure Public Access to Port 25 on the Barracuda Message Archiver
To journal mail directly from Microsoft 365 to your Barracuda Message Archiver, you must have a public IP address and port 25 open and NATed to the Barracuda Message Archiver. Additionally, you can optionally have a public DNS record. You can test this by attempting to telnet to the Barracuda Message Archiver on port 25. You can expect one of three outcomes:
If the Barracuda Message Archiver is not accessible, either due to port 25 being blocked or incorrectly configured on the firewall, the attempt to telnet simply hangs at Trying [IP address]. In this case, troubleshoot your network settings:

If the Barracuda Message Archiver is accessible and you have set Allow Only Trusted Hosts on the Mail Sources > SMTP page to No, telnet establishes a connection to the Barracuda Message Archiver:

If the Barracuda Message Archiver is accessible, you have set Allow Only Trusted Hosts on the Mail Sources > SMTP page to Yes, and you are attempting to telnet from an IP address not listed in the Trusted SMTP Servers section, telnet establishes a connection and the connection is immediately closed.

Step 2. Add Microsoft 365 Endpoints to the Trusted SMTP Servers List
Microsoft publishes a list of IP addresses used for Microsoft 365 endpoints. The endpoints are grouped into four service areas:
Exchange Online
SharePoint Online and OneDrive for Business
Skype for Business Online and Microsoft Teams
Microsoft 365 Common and Office Online.
See the Microsoft article Microsoft 365 URLs and IP address ranges for further details. Note: For Microsoft 365 Germany endpoints, see the Microsoft article Microsoft 365 Germany endpoints.
Log into the Barracuda Message Archiver as the administrator, and go to the Mail Sources > SMTP page.
Click Bulk Edit.
Go to the Microsoft article Microsoft 365 URLs and IP address ranges. Copy and paste the IP addresses based on your Microsoft 365 endpoints.
Click Save.
Step 3. Configure SMTP Forwarding Settings
To configure SMTP forwarding settings:
Log into the Barracuda Message Archiver as the administrator, and go to the Mail Sources > SMTP page.
In the SMTP Forwarding Settings section, set Allow Only Trusted Hosts to Yes.
Click Save.
Step 4. Configure Local Domains
Log into the Barracuda Message Archiver as the administrator, and go to the Basic > IP Configuration page.
In the Local Domains section, add all of your mail-enabled domains including your onmicrosoft.com domain, as well as your non-routable domain, for example, bma.int.
Click Add after each domain entry, and then click Save.
Step 5. Configure SMTP Over TLS/SSL (Optional)
Log into the Barracuda Message Archiver as the administrator, and go to the Advanced > SMTP Configuration page.
In the SMTP Over TLS/SSL section, set Enable SMTP over TLS/SSL to Yes.
Click Save.
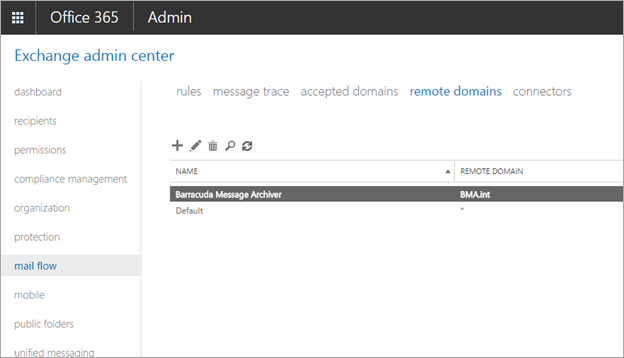
Step 6. Create a Remote Domain
Log into the Exchange admin center (EAC), and click mail flow > remote domains:
Click the + symbol, and in the new remote domain dialog box, configure the following options:
Name – Type Barracuda Message Archiver
Remote Domain – Type BMA.int or any non-routable domain
Out of Office automatic reply types – Select None
Automatic replies – Select Allow automatic forwarding
Message reporting – Clear all options
Use rich-text format – Select Never
MIME Character Set – Select None
Non-MIME Character Set – Select None
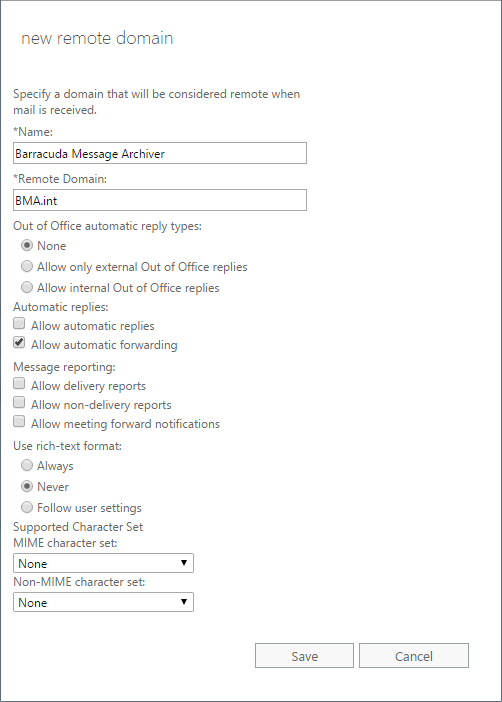
Click Save.
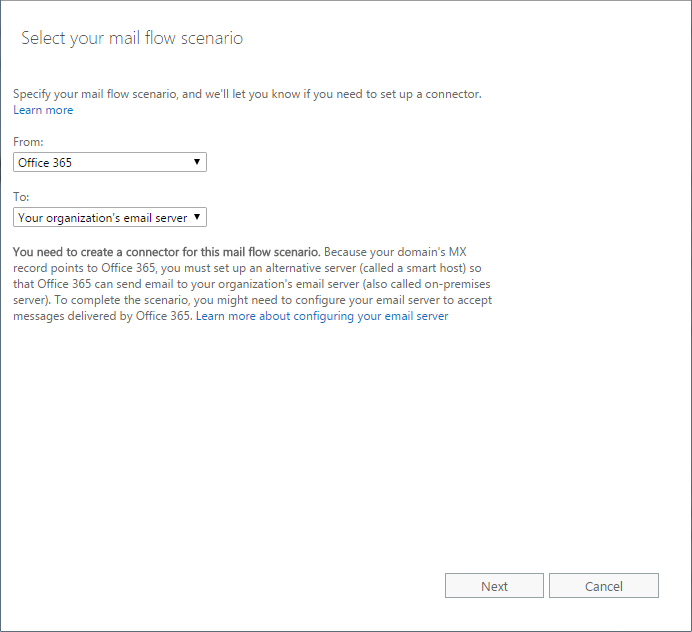
Step 7. Create a Send Connector for the Remote Domain
Log into EAC, and click mail flow > connectors.
Click the + symbol. In the Select your mail flow scenario page, configure the following options:
From – Select Office 365
To – Select Your organization's email server
Click Next. In the New connector page, Configure the following options:
Name – Type Barracuda Message Archiver
What do you want to do after connector is saved – Select both Turn it on and Retain internal Exchange email headers (recommended):
Ensure the Turn it on check box is selected, otherwise the connector will fail to validate and will not send a test message.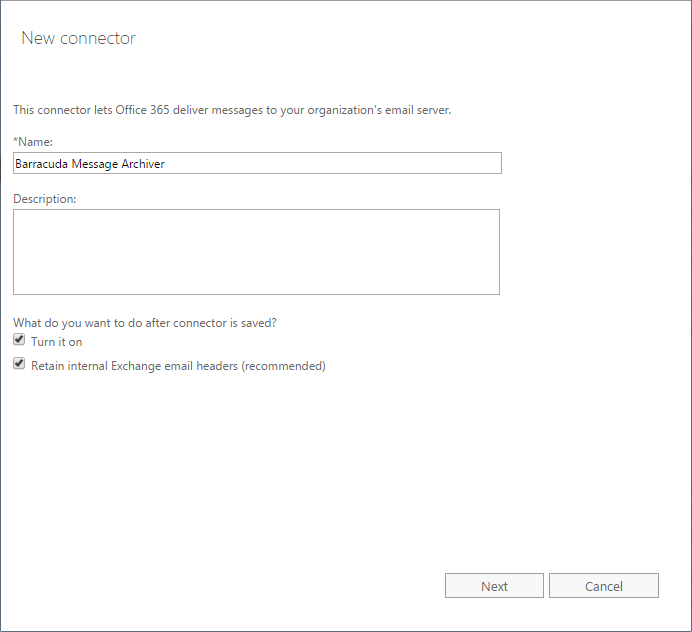
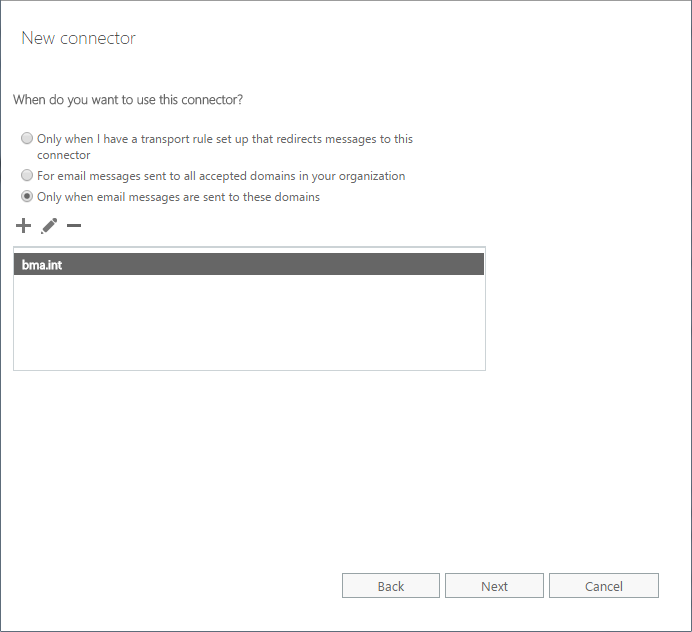
Click Next. In the New Connector page, select Only when email message are sent to these domains.
Click the + symbol. Enter the non-routable domain configured in Step 6 (for example, bma.int), and click OK:
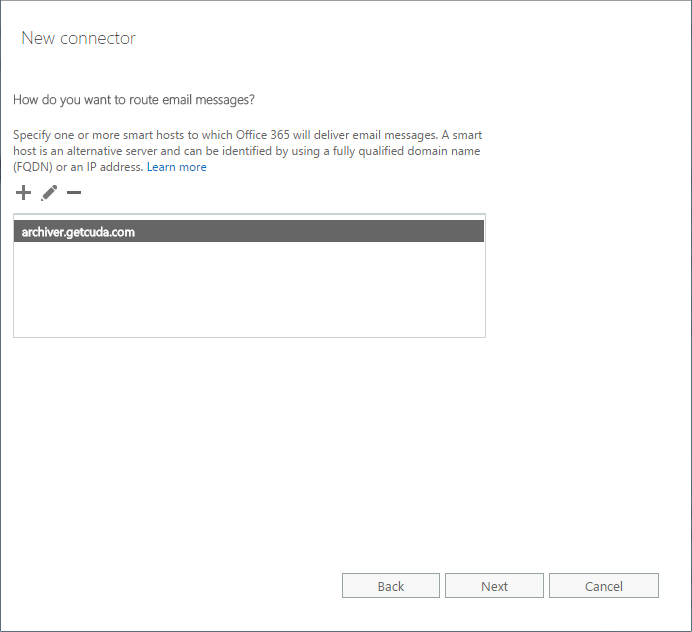
Click Next. In the New connector page, click the + symbol. Type your public FQDN or IP Address assigned to your Message Archiver. For example, archiver.getcuda.com. Click Save:
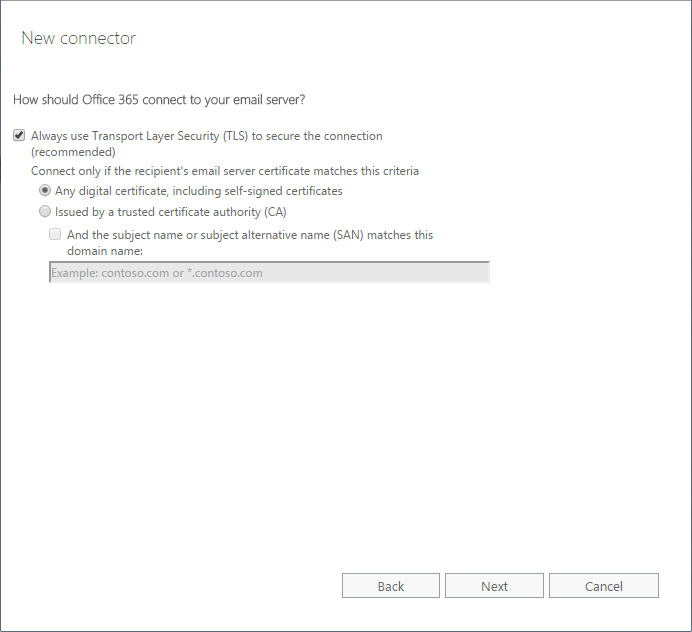
Click Next. In the New connector page, select Always use Transport Layer Security (TLS) and Any digital certificate, including self-signed certificates:
Click Next. Verify your settings in the summary page, and click Next.
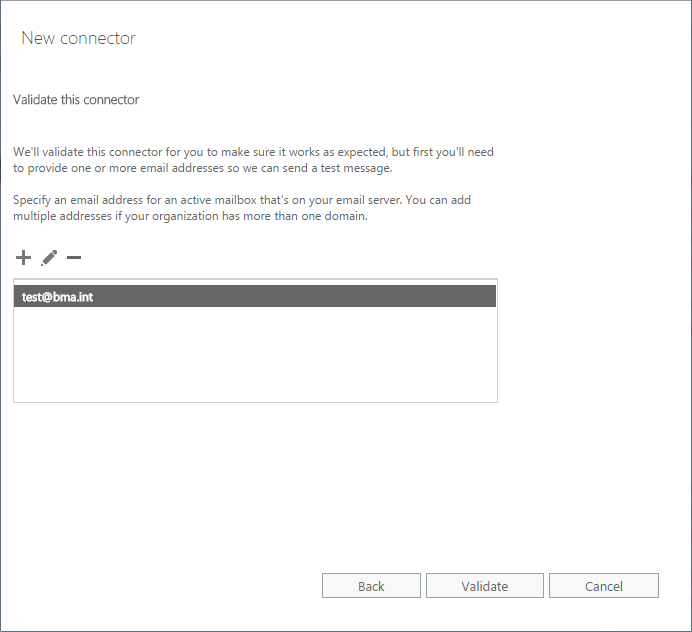
Click the + symbol in the Validate this connector page, type test@[non-routable domain] , and click OK:
Click Validate.
In the New connector validation results page, verify the connector Status displays as Succeeded, and click Finish.
Step 8. Create a Non-Delivery Report Recipient
Before creating journal rules, specify a journal recipient for non-delivery reports (NDRs) to reduce the risk of losing journal reports:
To create an NDR recipient:
Log into the Microsoft Purview compliance portal, navigate to Solutions > Data lifecycle management > Exchange (legacy).
Click the Settings icon.
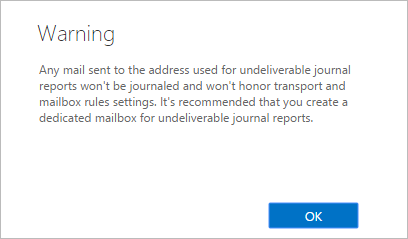
In Send undeliverable journal reports to, enter the email address of a valid user account. Note that the mailbox must be a mail user, mail contact, or external user, not an Exchange Online Mailbox.
Click Save.
Step 9. Configure Journaling
Log into the Microsoft Purview compliance portal, navigate to Solutions > Data lifecycle management > Exchange (legacy) > Journal rules, and then select + New rule.
On the Define journal rule settings page, provide a name for the journal rule and then configure the following options:
Send journal reports to – Type journal@[non-routable domain]. For example, type:
journal@bma.intJournal rule name – Type Barracuda Message Archiver
Journal messages sent or received from – Select Apply to all Messages.
Type of message to journal – Select All Messages.
Select Next, review the settings, and then click Submit to create the journal rule.