

This article refers to the Barracuda Message Archiver version 5.0 and higher, and Microsoft Lync Server 2010, 2013 and Microsoft Skype for Business 2015.
One-Time Historical Lync Data Import
Use the following steps to schedule a one-time job to immediately import historical Lync data to the Barracuda Message Archiver.
- Log in to Barracuda Message Archiver as the admin, and go to Mail Sources > Exchange Integration.
- Click Start New Action. In the Select Action page, click Email Import.
- In the Select Server page, select an existing Lync Server, or click Add New Server to set up a new Lync Server.
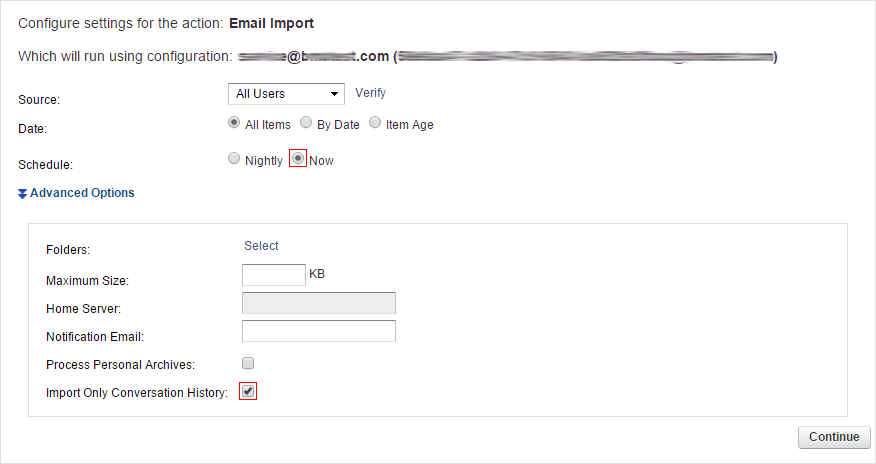
- In the Configure Action page, specify the following settings:
- Select All Users from the Source drop-down menu.
- In the Date section, select All Items.
- In the Schedule section, select Now.
(Optional) If you wish to target historical Lync data only, click Advanced Options, and select Import Only Conversation History:
- Complete the configuration setup to add the Email Import to the Scheduled Actions table.
Ongoing Nightly Lync Data Import
Use the following steps to import historical Lync Server data from a user's Outlook Conversation History folder to the Barracuda Message Archiver.
- Log in to Barracuda Message Archiver as the admin, and go to Mail Sources > Exchange Integration.
- Click Start New Action. In the Select Action page, click Email Import.
- In the Select Server page, select an existing Lync Server, or click Add New Server to set up a new Lync Server.
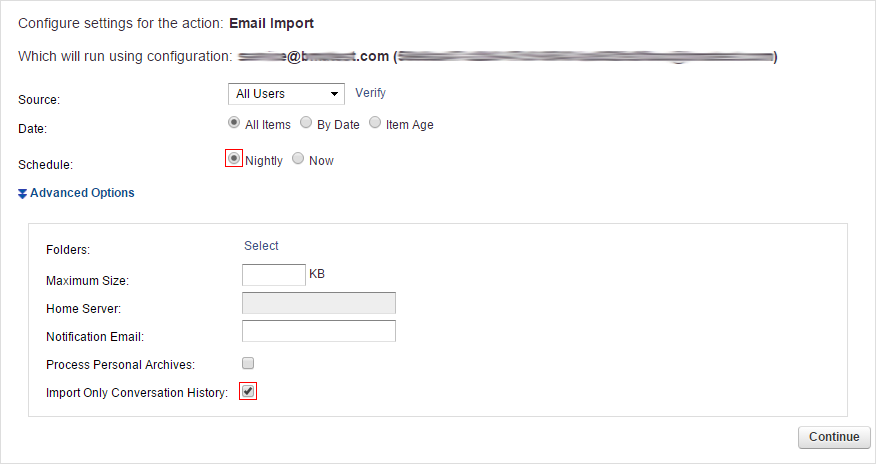
- In the Configure Action page, specify the following configuration settings:
- Select All Users from the Source drop-down menu.
- In the Date section, select All Items.
- In the Schedule section, select Nightly.
Click Advanced Options, and select Import Only Conversation History:
- Complete the configuration setup to add the Email Import to the Scheduled Actions table.