

This article refers to Barracuda Message Archiver version 5.0 and higher, and Google Workspace.
Use the steps in this article to configure Google Workspace to send journal mail to the Barracuda Message Archiver.
Step 1. Ensure Public Access to Port 25 on the Barracuda Message Archiver
To Journal mail directly from Google Workspace to your Barracuda Message Archiver, you must have a public IP address and port 25 open and NATed to the Barracuda Message Archiver. Additionally, you can optionally have a public DNS record. You can test this by attempting to telnet to the Barracuda Message Archiver on port 25. You can expect one of three outcomes:
- If the Barracuda Message Archiver is not accessible, either due to port 25 being blocked or incorrectly configured on the firewall, the attempt to telnet simply hangs at Trying [IP address]. In this case you need to troubleshoot your network settings:

- If the Barracuda Message Archiver is accessible and you have set Allow Only Trusted Hosts on the Mail Sources > SMTP page to No, telnet establishes a connection to the Barracuda Message Archiver:

- If the Barracuda Message Archiver is accessible, you have set Allow Only Trusted Hosts on the Mail Sources > SMTP page to Yes, and you are attempting to telnet from an IP address not listed in the TRUSTED SMTP SERVERS section, telnet establishes a connection and the connection is immediately closed:

Step 2. Add Google IP Address Ranges to the Trusted SMTP Servers List
Google Workspace mail servers use a large range of IP addresses which may change. To determine the current Google IP address range, see the Google IP address ranges for outbound SMTP in the Google Workspace Administrator Help .
- Use the steps outlined in the Google IP address ranges for outbound SMTP article.
- Log in to the Barracuda Message Archiver as the administrator, and go to the Mail Sources > SMTP page.
- Click Bulk Edit.
- Copy and paste the IP addresses based on your region, and click Save .
Step 3. Configure SMTP Forwarding Settings
To configure SMTP forwarding settings,
1. Log into the Barracuda Message Archiver as the administrator, and go to the Mail Sources > SMTP page.
2. In the SMTP Forwarding Settings section, set Allow Only Trusted Hosts to Yes.
3. Click Save.
Step 4. Configure Local Domains
- Log into the Barracuda Message Archiver as the administrator, and go to the Basic > IP Configuration page.
- In the Local Domains section, add all of your mail-enabled domains.
- Click Add after each domain entry, and click Save.
Step 5. Configure SMTP Over TLS/SSL (Optional)
- Log into the Barracuda Message Archiver as the administrator, and go to the Advanced > SMTP Configuration page.
- In the SMTP Over TLS/SSL section, set Enable SMTP over TLS/SSL to Yes.
- Click Save.
Step 6. Add Route
- Sign into the Google Workspace domain console, and go to Apps > Google Workspace > Gmail > Hosts .
- Click Add Route.
- In the Add mail route page, enter your Barracuda Message Archiver settings:
- Type Barracuda Message Archiver in the Name field.
In the Specify email server section, enter your Barracuda Message Archiver public IP address or public DNS record.
- Click Save.
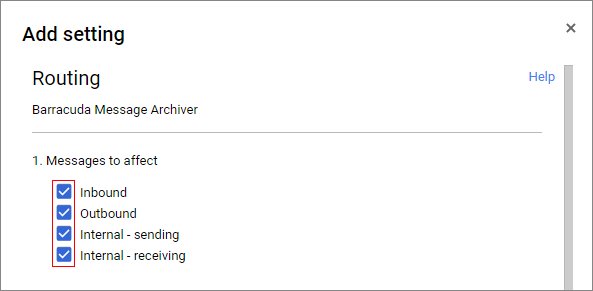
- Go to Apps > Google Workspace > Gmail > Routing. Click Configure or Add Another Rule.

- Enter a unique name to identify the setting, and select all of the check boxes under Messages to affect:
- Scroll to Also deliver to, click Add more recipients, and click Add.
- Under Recipients, select Advanced from the drop-down menu.
- Select Change route and Barracuda Message Archiver.
- Clear Do not deliver spam to this recipient and select Suppress bounces from this recipient.
- Click Save, and click Add Setting.
- Click Save:
