

Before Getting Started
Read this entire section before proceeding with configuration.
To fully utilize envelope journaling, you must complete the following steps on the Microsoft Exchange Server 2003:
- Step 1: Create a Mailbox Store for the Journaling Mailbox – Define a dedicated mailbox store for the envelope journaling mailbox, otherwise mail arriving in the mailbox results in unwanted mail loops.
- Step 2: Create Remote Domain – Create a new remote domain.
- Step 3: Set Up Message Routing for the Journal Contact – Define message routing to route journal contact via a dedicated SMTP connector.
- Step 4: Create a Journal Account Mailbox – Create a Journal account mailbox.
- Step 5: Create a Custom SMTP Recipient – Define an SMTP address in your Active Directory; this address serves as the delivery address for journaled messages.
- Step 6: Hide Mail Contact in Exchange Global Address List, Modify SMTP Addresses, and Enable Server-Side Mailbox Forwarding – Set up a server-side rule to forward all journaled messages to the custom SMTP recipient mailbox.
- Step 7: Modify Journal Mail Contact – Hide the Journal Mailbox from the Exchange Server address lists to maintain the mailbox store for envelope journaling only.
- Step 8: Enable Envelope Journaling on Exchange – Enable envelope journaling on Exchange to deliver messages using an envelope message containing a journal report with the original message as an attachment.
- Step 9: Configure Exchange Mailbox Management – Define an Outlook rule to automatically delete archived messages forwarded to the Barracuda Message Archiver from the local mailbox store to reduce storage "bloat".
- Step 10. Verify Journaling is Functioning as Expected – Verify your set up is complete.
Step 1. Create Mailbox Store for Journaling Mailbox
Use the following steps to add a new mailbox store on your Exchange Server.
1a. Go to Programs > Microsoft Exchange > System Manager to launch the Exchange System Manager (ESM) console, expand your servers, and navigate to the server where you want to add the mailbox store.
1b. Right-click First Storage Group, point to New, and click Mailbox Store: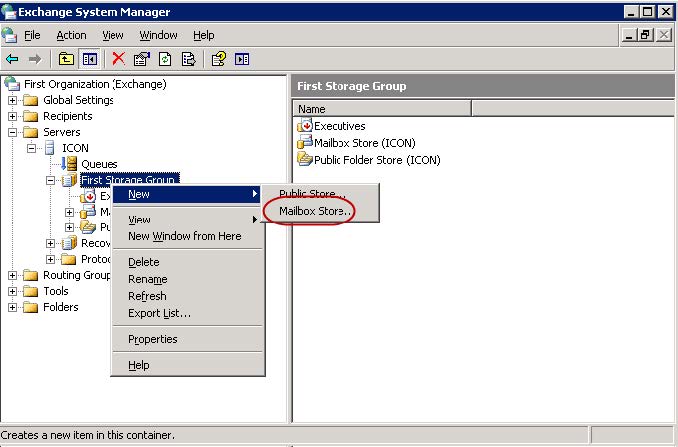
1c. In the Properties dialog box, click the General tab. In the Name field, type: Non-Journaled Mailstore 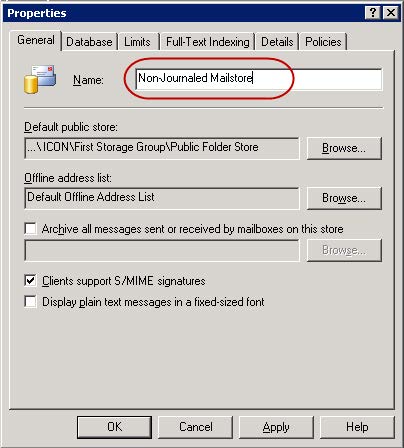
1d. Click on the Database tab, and click Browse next to the Exchange database field: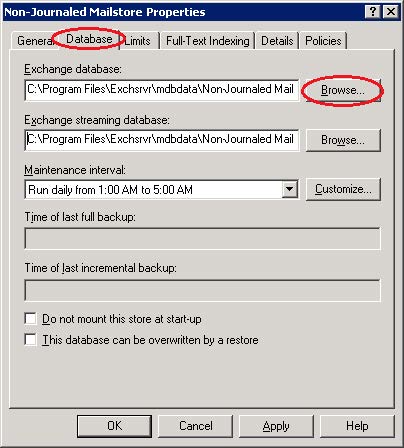
1e. Browse to and select the default database location where you want to add the mailbox store, click Apply, and then click OK. The mailbox store Non-Journaled Mailstore displays in the ESM. Right-click Non-Journaled Mailstore, and click Mount Store: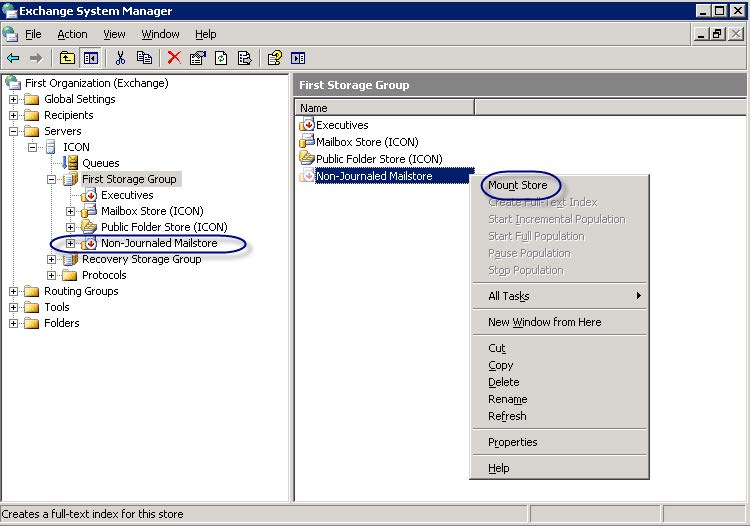
1f. Click Allow, and then click OK.
Step 2. Create Remote Domain
2a. In the ESM console, expand Global Settings, right-click Internet Message Formats, point to New, and click Domain: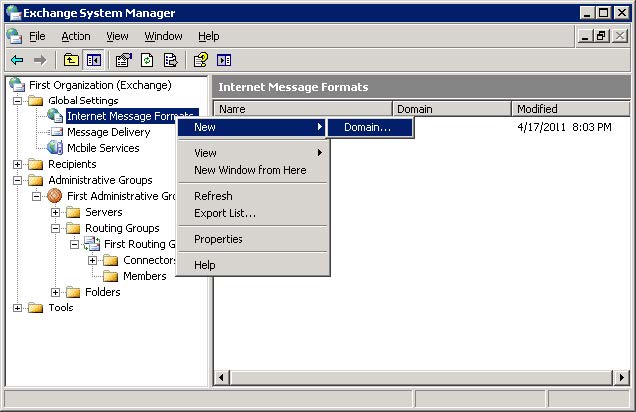
2b. In the Properties dialog box, type Barracuda Message Archiver in the Name field, and in the SMTP domain field, type bma.int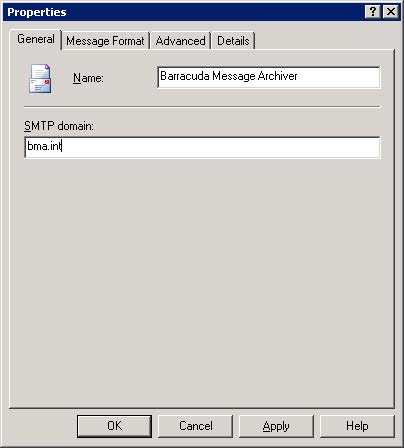
2c. Click Apply, click the Advanced tab, and in the Exchange rich-text format section, select Never use. Click Allow automatic forward, and clear the other options: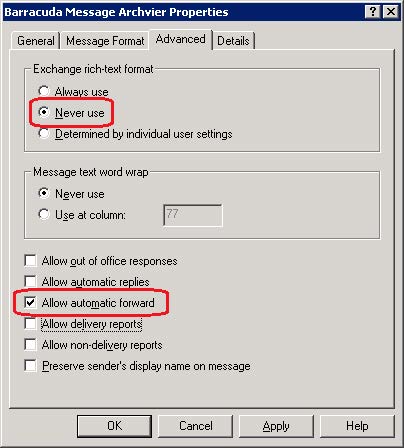
2d. Click Apply, and click OK to save your changes, and close the dialog box.
Step 3. Set Up Message Routing for Journal Contact
Use the following steps to route messages specified for the Journal Contact on Microsoft Exchange Server 2003.
3a. In the ESM, expand Connectors. For example, in the default view, the Connectors folder is located at the top level, and in the Administrative Group Display, the folder is available under Routing Groups: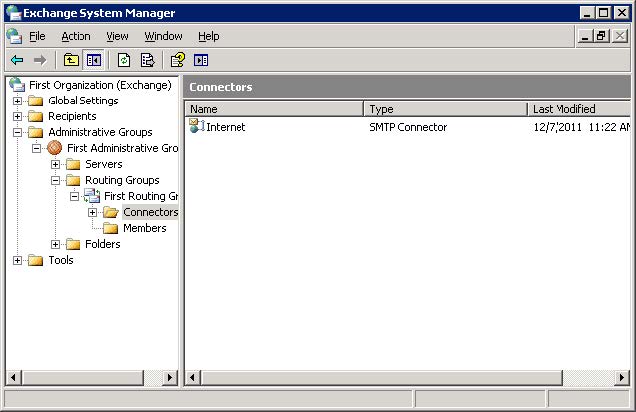
3b. Right-click Connectors, and click New > SMTP Connector. The SMTP Connector dialog box displays. Click the General tab, and in the Name field type: Barracuda Message Archiver
3c. Select Forward all mail through this connector to the following smart hosts, and enter the IP address of your Barracuda Message Archiver in the associated field enclosed in square brackets [ ].
3d. Below the Local bridgehead section, click Add. Click on your SMTP virtual server instance, and click OK; the SMTP Virtual Server is added: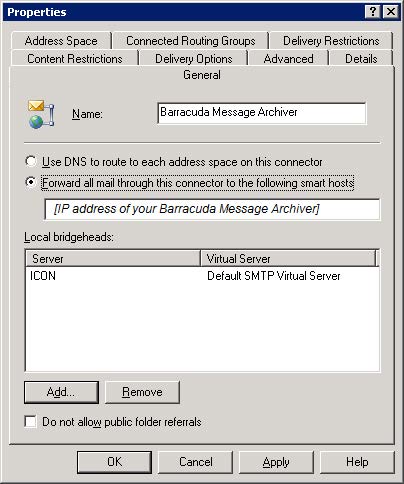
3e. Click the Address Space tab, and click Add. In the Add Address Space dialog box, click SMTP: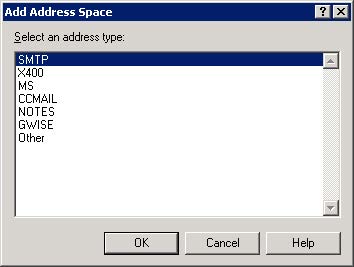
3f. Click OK. The Internet Address Space Properties dialog box displays. In the E-mail domain field, type: bma.int 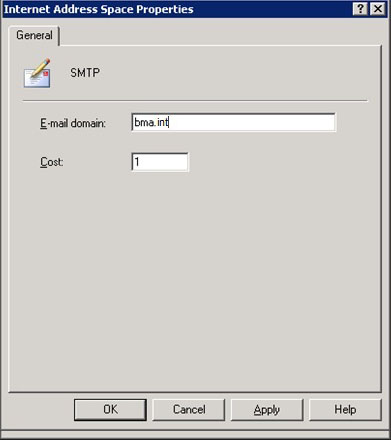
3g. Click Apply, and click OK to close the dialog box. The new address space displays in the Address Space tab: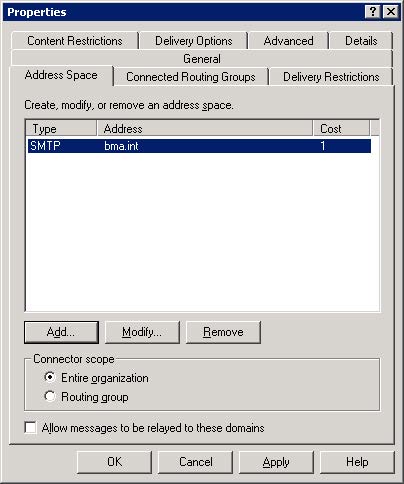
3h. Click Apply, and click OK to close the Properties dialog box and save your changes.
Step 4. Create a Journal Account Mailbox
4a. Go to Programs > Administrative Tools or Programs > Microsoft Exchange to launch the Active Directory Users and Computers console, and connect to the non-journaled Mailbox Store created in Step 1. Create Mailbox Store for Journaling Mailbox.
4b. Click on the domain or organization unit (OU) in which to create the Journal Account Mailbox. Right-click in the right pane, and click New > User to bring up the New Object - User dialog box. Enter the Journal User details: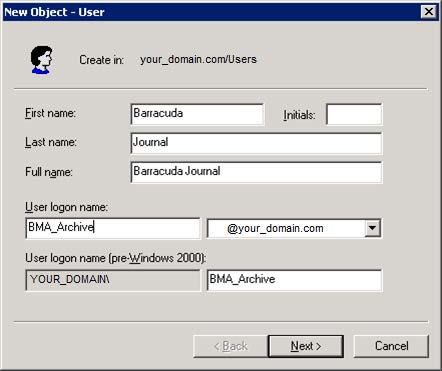
4c. Click Next. Enter a password in the Password and Confirm password fields, clear User must change password at next logon, and click Password never expires: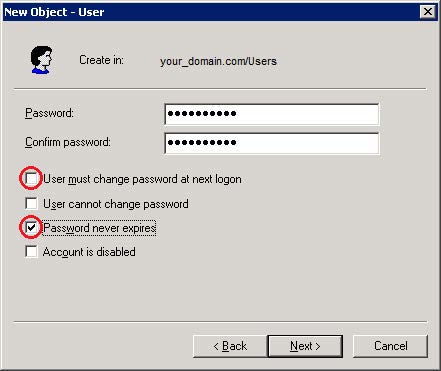
4d. Click OK in the warning dialog box, and then click Next; select Create an Exchange mailbox: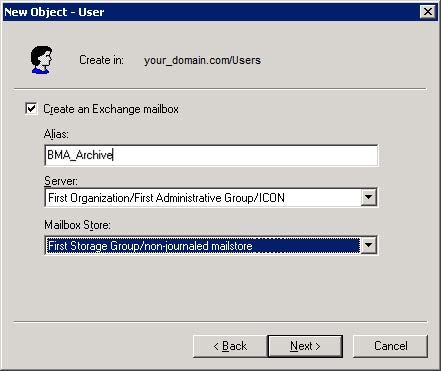
4e. Click Next, verify the entered information, and click Finish to create the user and close the dialog box.
Step 5. Create a Custom SMTP Recipient
5a. In the Active Directory Users and Computers console, click on the domain or organization unit (OU) in which to create the custom SMTP recipient, point to New, and click Contact; the New Object - Contact dialog box displays.
5b. Enter the name and display name for the custom SMTP recipient: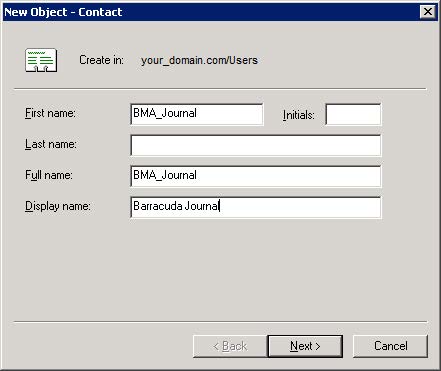
5c. Click Next. Select Create an Exchange e-mail address, enter the email alias in the Alias field, and click Modify.
5d. The New E-mail Address dialog box displays: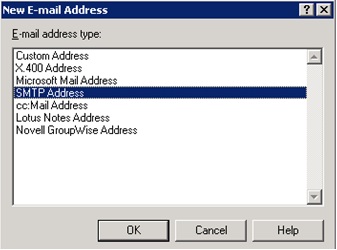
5e. Click SMTP Address, and click OK; the Internet Address Properties dialog box displays. In the General tab, type the external email address: BMA_Journal@bma.int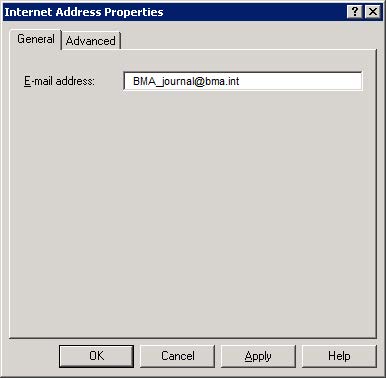
5f. Click OK. In the New Object - Contact dialog box, click Next and verify the entered details. Click Apply, and click Finish to create the contact and close the dialog box.
Step 6. Hide Mail Contact in Exchange Global Address List, Modify SMTP Addresses, and Enable Server-Side Mailbox Forwarding
6a. In the Active Directory Users and Computers console, right-click on the user you created in Step 4. Create a Journal Account Mailbox, and click Properties: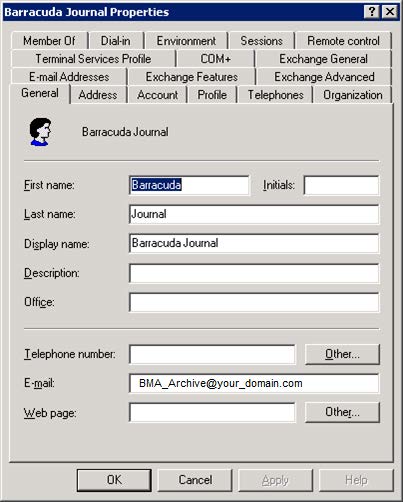
6b. Click the Exchange Advanced tab, and select Hide from Exchange address lists: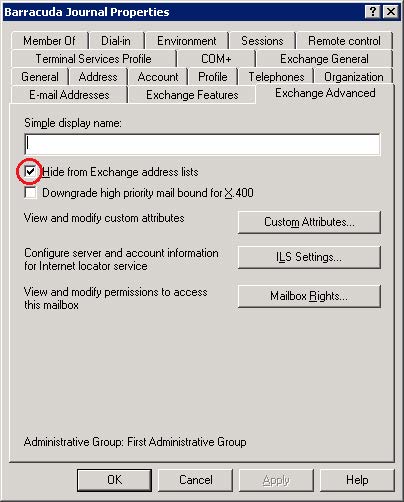
6c. Click the E-mail Address tab, remove all email addresses except the SMTP address, and clear Automatically update e-mail addresses based on recipient policy: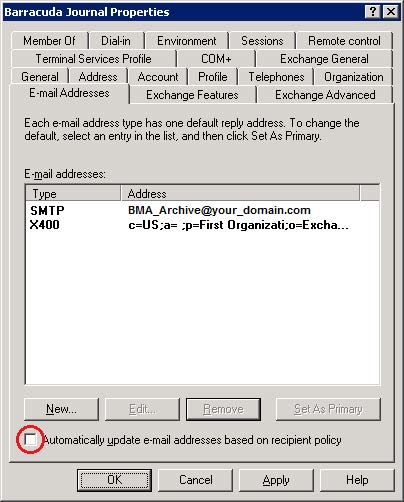
6d. Click the Exchange General tab: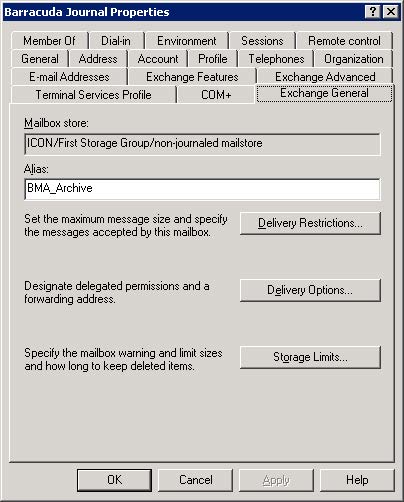
6e. Click Delivery Options. In the Delivery Options dialog box, in the Forwarding address section, select Delivery Messages to both forwarding address and mailbox, and click Forward to: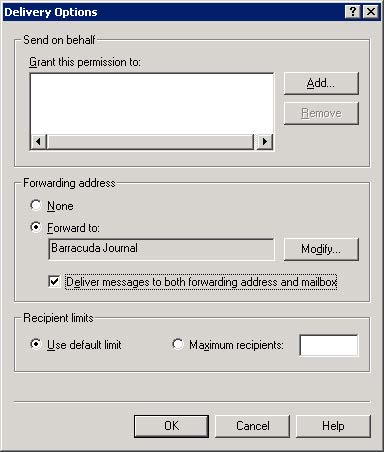
6f. Click Modify to the right of the Forward to field. In the Enter the object name to select box, type BMA_Journal, and click Check Names: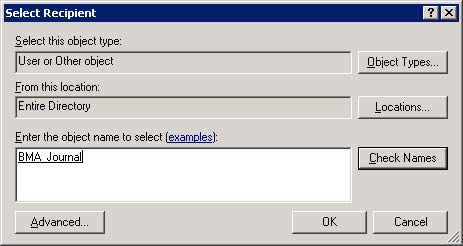
6g. Click OK to close the Delivery Options dialog box. In the Exchange General tab, click Storage Limits. In the Storage limits section, clear Use mailbox store defaults: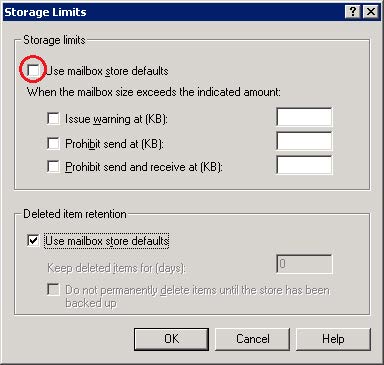
6h. Click OK. Click Apply in the Properties dialog box, and then click OK to close the dialog.
Step 7. Modify Journal Mail Contact
7a. In the Active Directory Users and Computers console, right-click on the contact you created in Step 5. Create a Custom SMTP Recipient, and click Properties.
7b. Click the E-mail Addresses tab, and remove all addresses except journaling@bma.int and X400. Clear Automatically update e-mail addresses based on recipient policy: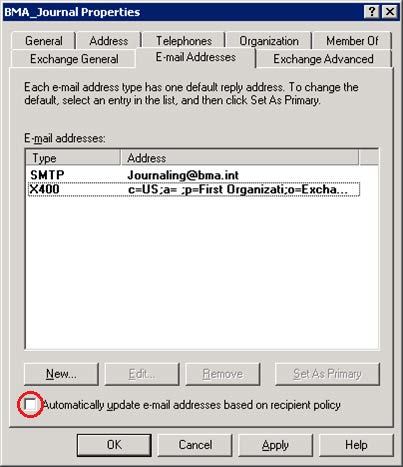
7c. Click Apply. Click the Exchange Advanced tab, select Hide from Exchange address lists, and clear Use MAPI rich text format:
7d. Click Apply, and click OK to close the dialog box.
Step 8. Enable Envelope Journaling on Mail Storage
8a. From the Microsoft website, navigate to the E-Mail Journaling Advanced Configuration tool, and complete the following to enable envelope journaling:
- Click Download, save the file Exejcfg.exe to a directory on the system, and take one of the following actions to run the executable:
- Click Open or
- Click Run this program from its current location or
- At a command prompt, navigate to the file directory, and run the command: Exejcfg.exe -e
8b. Once Envelope Journaling is enabled, in the ESM, locate the Mailbox Store for your domain, right-click Mailbox Store, and click Properties.
8c. On the General tab, select Archive all messages sent or received by mailboxes on this store, and click Browse following the Barracuda Journal field to locate and select the Journaling Account Mailbox User you created in Step 4. Create a Journal Account Mailbox:
8d. In the Enter the object name to select field, enter the User name, and click Check Names. Click OK.
8e. Click Apply, and click OK to close the dialog and save your changes.
Step 9. Configure Exchange Mailbox Management
After a message is forwarded to the Barracuda Message Archiver, define an Outlook rule to automatically delete the archived message from the local mailbox store to reduce storage "bloat".
- Step 9a. Create a Journal Account Mailbox Outlook Rule
- Step 9b. Create Recipient Policy to Delete Messages
- Step 9c. Schedule mailbox Manager to Run Recipient Policy
Step 9a. Create a Journal Account Mailbox Outlook Rule
Use the following steps to create an Outlook rule for the Journal Account Mailbox.
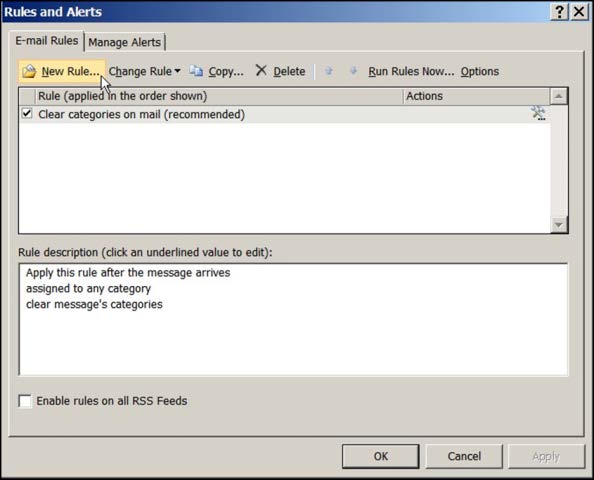
- In Outlook 2003, on the Tools menu, click Rules and Alerts, click the E-mail Rules tab, and click New Rule:
On the first page of the Rules Wizard, click Start from a blank rule, and click Next.
Under Select when messages should be checked, select Check messages when they arrive, and click Next.
In the Select condition(s) section, verify all conditions are cleared, and click Next. Click Yes to verify you want to create the rule for all messages that are received in this mailbox.
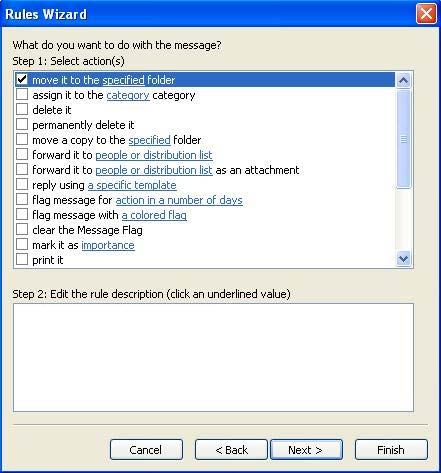
In the Select action(s) section, select move it to the specified folder:
In the Edit section, click specified; the Rules and Alerts window displays. Navigate to and select the Deleted Items folder, and click OK to return to the Rules Wizard. The underlined phrase displays as Deleted Items.
Click Finish to create and activate the rule.
Step 9b. Create Recipient Policy to Delete Messages
Use the following steps to create a recipient policy to delete messages.
- In the ESM console, expand the Recipients folder, right-click on the Recipient Policies folder, and click New > Recipient Policy.
- In the New Policy dialog box, select Mailbox Manager Settings:
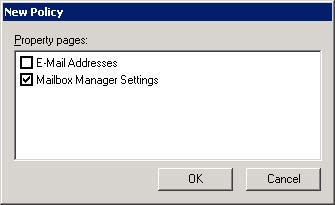
- Click OK; the Properties dialog box displays:
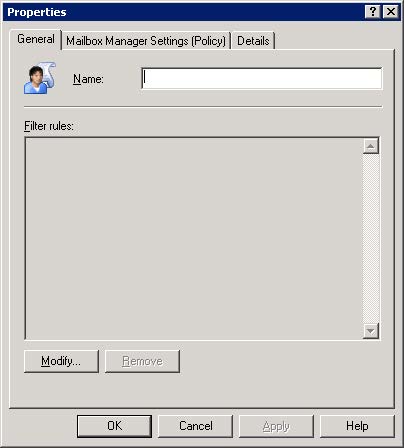
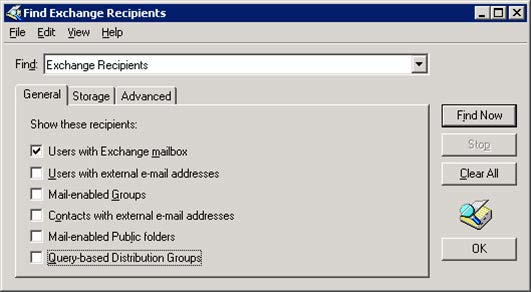
On the General tab, enter a name for the policy, and click Modify; the Find Exchange Recipients dialog box displays. Select Users with Exchange mailbox, and clear the remaining options:
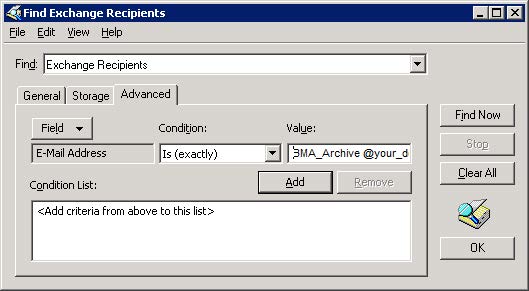
Click the Advanced tab, and set the following conditions:
From the Field drop-down menu, select E-Mail Address
From the Condition drop-down menu, select Is (exactly)
In the Value field, type: BMA_Archive@your_domain.com replacing your_domain with your domain name:
- Click Add, and then click Find Now. The Search results displays the matching email address:
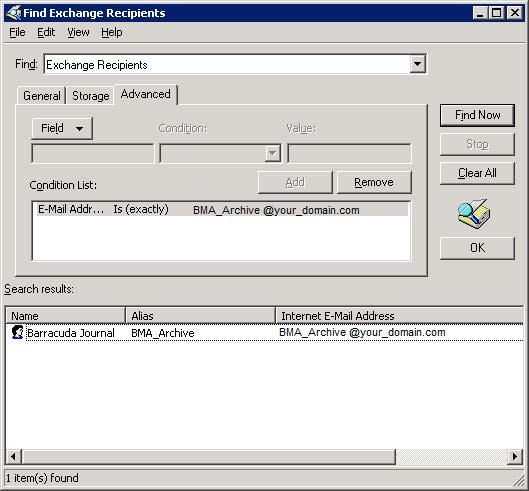
- Click OK. The Filter rules display in the General tab in the Properties dialog box:

Click the Mailbox Manager Settings (Policy) tab, and set the following options:
From the When processing a mailbox drop-down, select Delete Immediately.
In the Folder list, select Deleted Items, and clear the remaining folders:
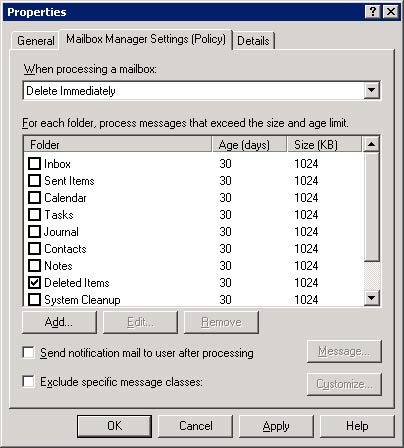
Click the Deleted Items entry, and click Edit; the Folder Retention Settings dialog box displays.
Select Age Limit (Days), and enter an appropriate age limit in the associated field. The specified age refers to the length of time a message remains in the Deleted Items folder not when the message was received into Exchange.
Clear Message Size (KB):
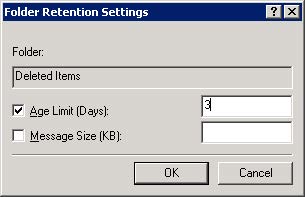
Click OK to return to the Properties dialog box, and then click OK to close the dialog.
In the ESM console, in the Recipient Policies details pane, right-click on the newly created policy, and select Apply this policy now:
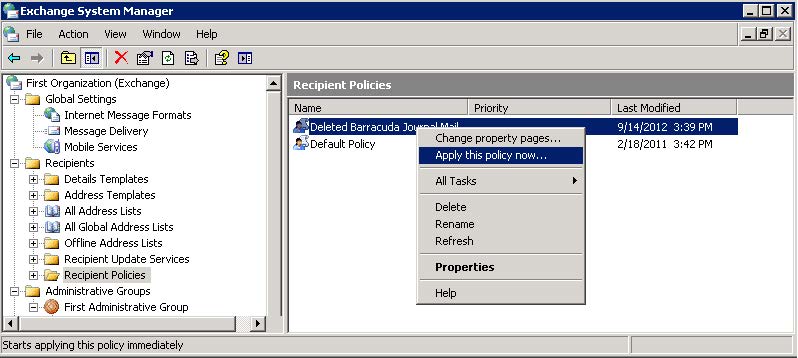
Click Yes to confirm you want to apply the policy immediately. Once the policy is created, you must schedule the policy to run on each journaling mailbox server that hosts a Journal Account Mailbox as described in Step 9c below.
Step 9c. Schedule Mailbox Manager to Run Recipient Policy
Use the following steps to schedule the policy to run on each journaling mailbox server that hosts a Journal Account Mailbox.
- In the ESM console, locate and right-click the name of the server hosting the mailbox on which to run recipient policies, and click Properties.
- Click the Mailbox Management tab, and from the Start mailbox management process drop-down menu, select the frequency for running the mailbox recipient policies on the server:
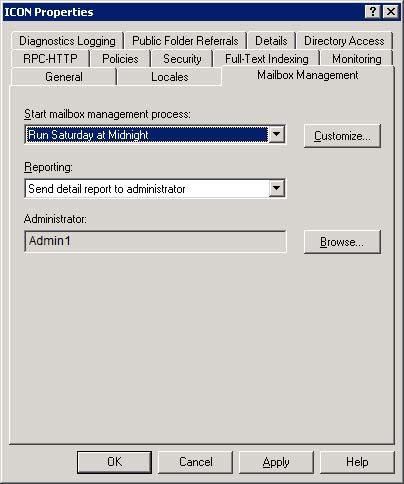
- To customize the frequency of the policy, click Customize:
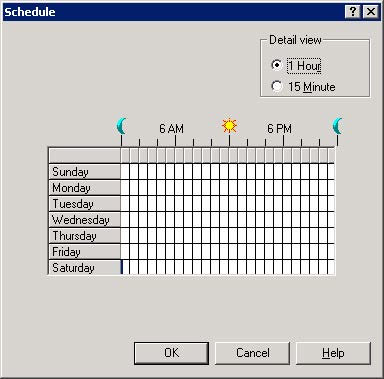
Click in the schedule to specify day(s) and time(s), and click OK to save your settings.
Click Apply, and click OK to close the Properties dialog box.
Step 10. Verify Journaling is Functioning as Expected
Use the following steps to verify journaling is set up and functioning as expected.
10a. Log in to the Barracuda Message Archiver as the administrator.
10b. View the BASIC > Status page and verify messages are being processed in the Message Statistics table.
- Log in to your email system and send a test email to yourself.
- Go to the Barracuda Message Archiver web interface.
- On the BASIC > Status page, in the Message Statistics table, recheck the status count; the Total Messages count should reflect your test message.
- If the message count does not indicate journaling is operating, verify your administrative settings are properly configured.
10c. On the ADVANCED > Syslog page, below the Mail Syslog table, click Monitor syslog to view mail-related system log output in a new window.
10d. Verify your test message is journaled in the syslog view.