

Configure the Barracuda Message Archiver to automatically retrieve messages directly from your mail server using the IMAP or POP3 protocol.
Step 1. Enable IMAP or POP3
Use the following steps to enable either IMAP or POP3 or your Exchange 2003 Server.
- Log into the Exchange Server as the Exchange Server administrator.
- Launch Exchange System Manager. and navigate to Servers > Protocols.
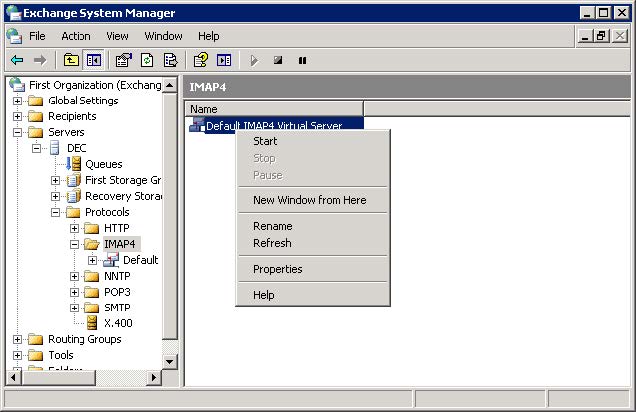
- To enable IMAP4, navigate to Servers > Protocols > IMAP4 , and in the center pane, right-click Default IMAP4 Virtual Server, and click Start:
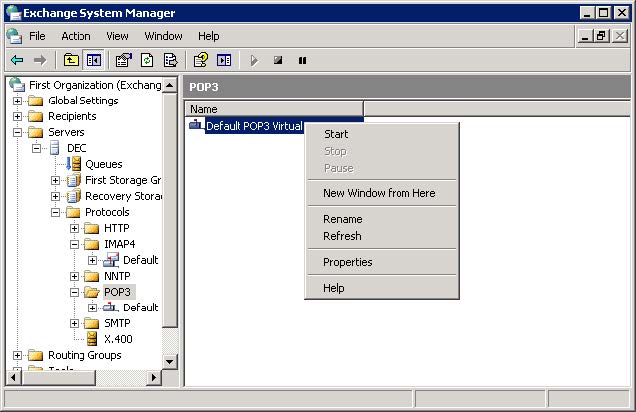
To enable POP3, navigate to Servers > Protocols > POP3, and in the center pane, right-click Default POP3 Virtual Server, and click Start:
- To enable IMAP4, navigate to Servers > Protocols > IMAP4 , and in the center pane, right-click Default IMAP4 Virtual Server, and click Start:
Step 2. Configure Account
Use the following steps to create an Active Directory (AD) user.
- Log into the Exchange Server as the Exchange Server Administrator.
- Launch Active Directory Users and Computers.
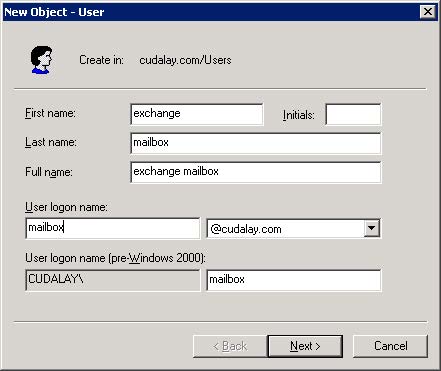
- Navigate to and right-click Users, and click New > User; the New User dialog box displays.
Enter the relevant information to identify the exchange mailbox, and click Next:
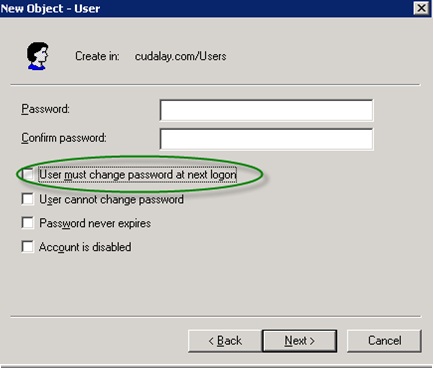
Enter the user password in the Password and Confirm Password fields, and then clear User must change password at next logon:
Click Next. Turn on Create an Exchange mailbox, and click Next.
Verify the user details, and click Next, and then click Finish.
In Active Directory Users and Computers, right-click on the newly created Exchange mailbox user, click Properties, and click the E-mail Addresses tab.
Click on the Exchange mailbox name, and click Set As Primary.
Click OK to close the Properties dialog box, and save your settings.
Step 3. Enable Envelope Journaling on Mail Storage
From the Microsoft website, navigate to the E-Mail Journaling Advanced Configuration tool, and complete the following to enable envelope journaling:
- Click Download, save the file Exejcfg.exe to a directory on the system, and take one of the following actions to run the executable:
- Click Open; or
- Click Run this program from its current location; or
- At a command prompt, navigate to the file directory, and run the command:
Exejcfg.exe -e
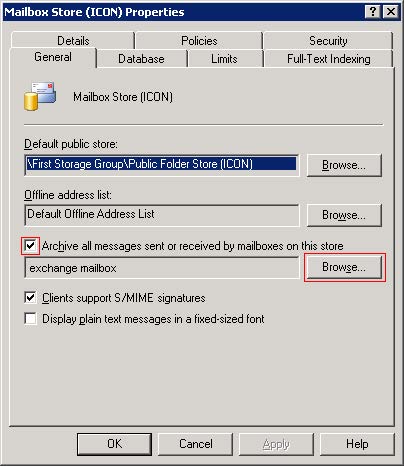
- Once Envelope Journaling is enabled, in the Exchange System Manager console, locate the Mailbox Store for your domain, right-click Mailbox Store, and click Properties.
- On the General tab, select Archive all messages sent or received by mailboxes on this store, and click Browse following the Barracuda Journal field to locate and select the Journaling Account Mailbox User created in the previous step:
In the Enter the object name to select field, enter the User name, and click Check Names. Click OK.
Click Apply, and click OK to close the dialog and save your changes.
Step 4. Verify the Service is Started
Use the following steps to configure IMAP to accept plain text authentication.
- Log into the Exchange Server as the Exchange Server Administrator.
- Go to Programs > Administrative Tools > Services.
- Verify the selected service status is set to Started:
- Microsoft Exchange IMAP
- Microsoft Exchange POP3
- To change the status, right-click on the service, and click Start.
Step 5. Configure a Barracuda Message Archiver Journal Account
Once you configure the Service Exchange Server, and the service is started, you can add the journal account to the Barracuda Message Archiver to begin retrieving new messages for archiving.
- Log into the Barracuda Message Archiver as the administrator, and go to MAIL SOURCES > Journal Accounts.
- In the Journal Accounts section, enter the following details:
- Enable Journal Accounts – Select Yes to allow the Barracuda Message Archiver to poll the listed accounts for new messages for archiving.
- Enable Journal Testing – When set to Yes, all listed accounts are tested for connectivity with each page view.
- Polling Frequency – Specify how often to poll each journal account for new messages.
- In the Journal Accounts Configuration section, specify the following details for each journal account:
- Status – Displays the connection status for each account.
- Server – Enter the hostname of the mail server where the account resides.
- Protocol – Select whether the account is POP3 or IMAP; once you select the protocol, the default port number automatically populates the Port field.
- Username – Enter the complete journaling email address you defined in the Configure Account section.
Password – The password associated with the username defined in the Configure Account section.
Encryption – Select the type of encryption used to connect to the mail server:
TLS (if available)
TLS
SSL
None
Port – Select the associated port based on the selected protocol; the default value is port 143 for IMAP, and port 110 for POP3.
Keep Items on Server – Select Keep Items on Server to allow the Barracuda Message Archiver to automatically clean up the contents of the journal mailbox after each import. When selected, prevents the Barracuda Message Archiver from removing the journaled messages from the mail server; only select this option if the contents of the journal account is required by other applications. In this case, make sure that another method for cleaning up the journal account is enabled on the mail server in order to prevent unlimited growth on the mail server and to stay in compliance with your organization’s message retention policies.
Click Add to add the journal account; verify the Status field displays green, and then click Save Changes.
To remove a journal account, click the Delete icon, and confirm you want to remove the account.