This step refers to Microsoft Exchange deployments only.
Create a Microsoft 365 Exchange Online Service Account
Note that the switch to Exchange Web Services (EWS) simplifies the Exchange Integration configuration by eliminating the need to use a service account.
Exchange Integration now supports the Exchange Web Services (EWS) protocol for connecting to Exchange Online. With recent changes from Microsoft, using EWS ensures that Exchange Integration will continue to work with Exchange Online. In addition, the switch to EWS simplifies the Exchange Integration configuration by eliminating the need to use a service account and the accompanying requirement to update the service account's permissions after creating new users with mailboxes.
Note that EWS sources do not support Email Stubbing actions.
Requirements
Your Microsoft administrator account credentials will only be used to authorize the BCAS application to keep track of authorization details that allow the appliance access to EWS. Using Exchange Integration with EWS does not require a BCAS subscription or connecting the Barracuda Message Archiver to Cloud Storage. BCAS does not handle any data in the mailboxes.
Note that you will no longer need a service account to set up an Exchange Online source.
Add a New Exchange Online Source
These instructions will set up a new Exchange Online source using EWS. To add a new Exchange Server source, see Microsoft Exchange Server Deployment.
Log into the Barracuda Message Archiver as the admin, and go to MAIL SOURCE > Exchange Integration.
Click Start New Action. In the Select Action page, click Email Import.
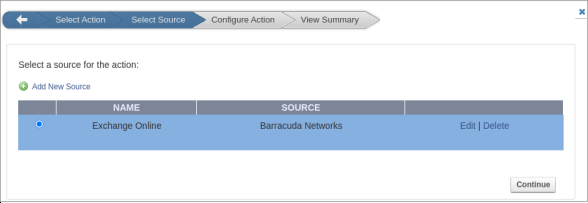
In the Select Source page, click Add New Source.
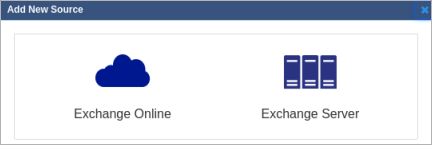
Select Exchange Online to configure using EWS.
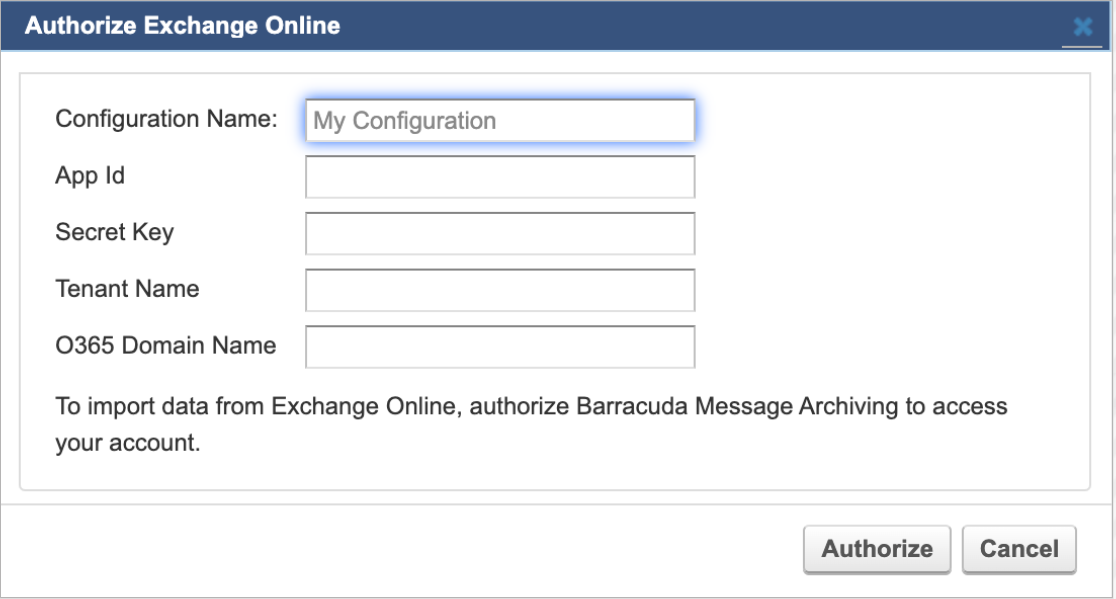
Enter a Configuration Name, App Id, Secret Key, Tenant Name, and O365 Domain Name.
Click Authorize.
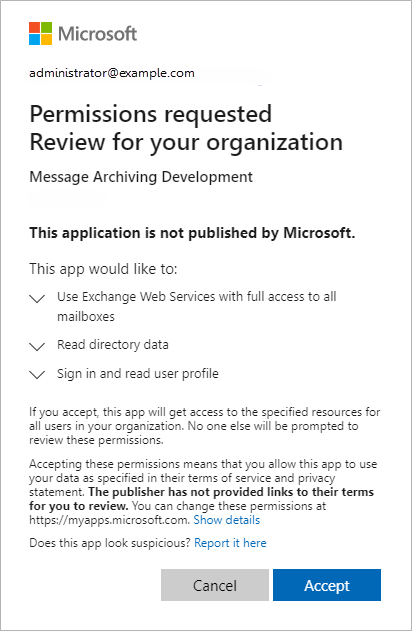
If you are not already logged in, a new tab or pop-up window prompts you to enter your Microsoft 365 administrator account login information from which Exchange Integration will process mail.
If you are not logged in and do not see the tab or window, ensure that pop-ups from the Barracuda Message Archiver are not blocked.
Click Accept to authorize the Barracuda Cloud Archiving Service application to access your details.
After the authorization tab or window closes, switch back to the Select Source page. You should now see the new source in the list. Select the new source and click Continue.
In the Configure Action page, select All Users from the drop-down menu, and specify the desired Date and Schedule settings. Click Continue.
Verify the configuration settings in the View Summary page, and then click Submit to add the Email Import to the Scheduled Actions table.
How to Find your Tenant and Primary Domain
Log into the Microsoft 365 Admin center as a global admin https://admin.microsoft.com/.
On the left-hand menu, select Overview and copy down the Name and Primary domain.
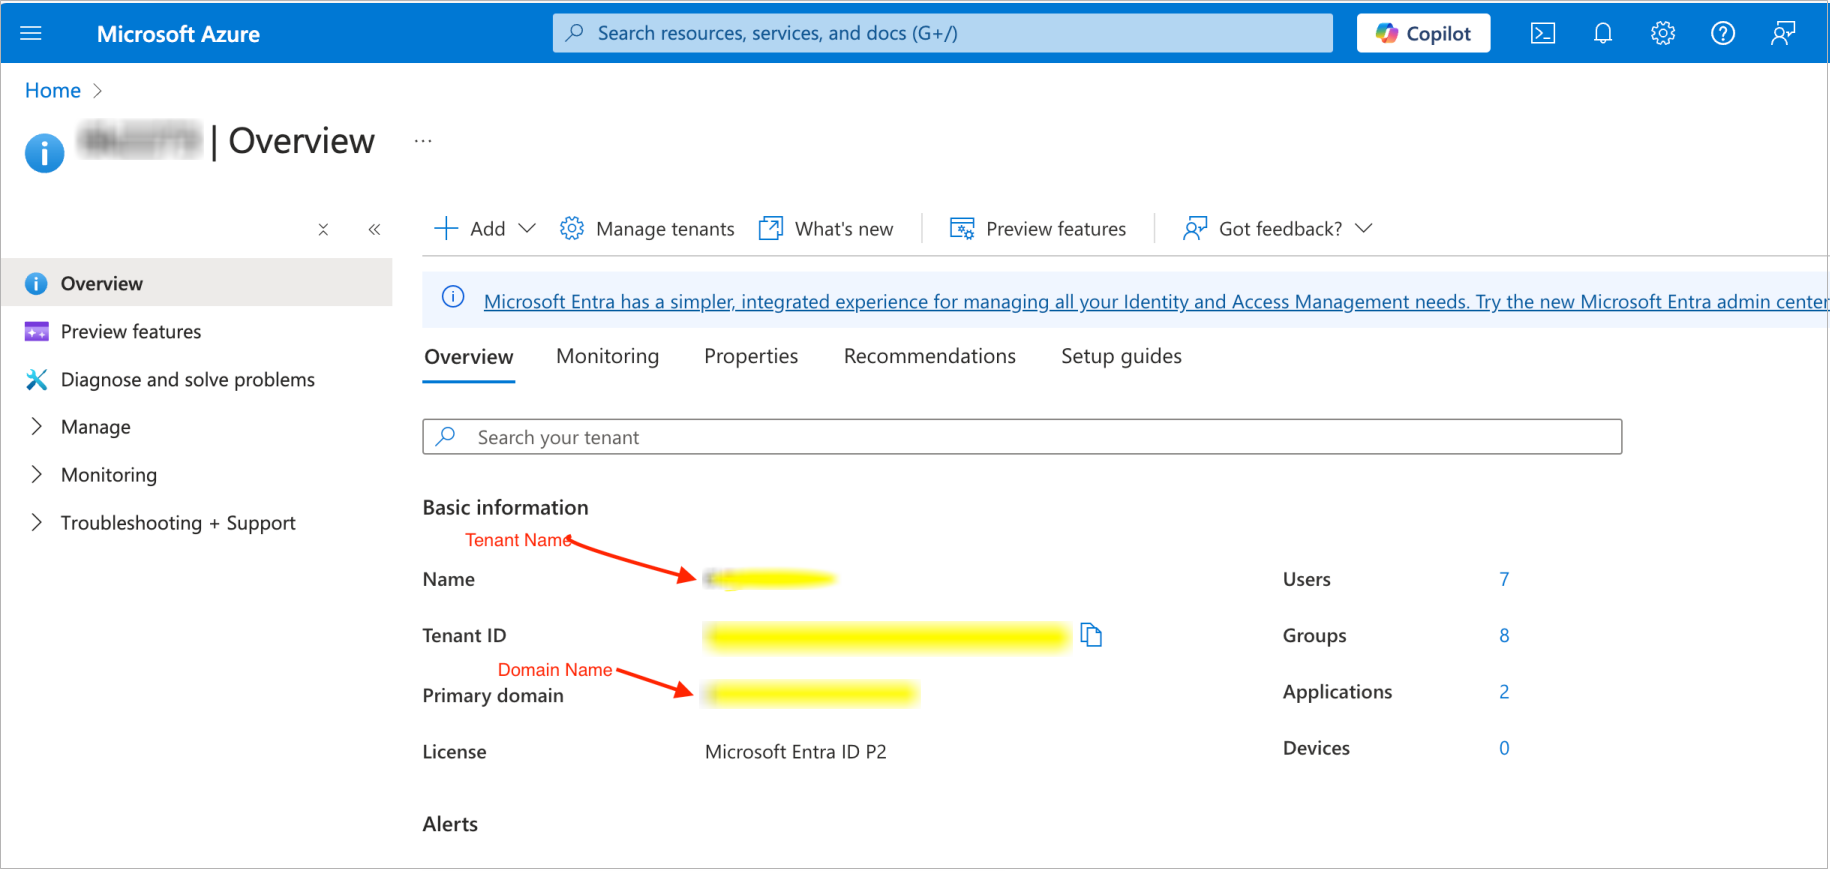
The Name and Primary domain you copied down can now be used to authorize the Barracuda Message Archiver permissions to import data from Exchange Online.
Configure a Microsoft Exchange Server 2010 and Newer Service Account
Read First
Service Account Password Setting
When configuring the service account, you must set the password to never expire. To set this option in Active Directory (AD), go to the Properties dialog box for the service account, click the Account tab, and in the Account options section, select Password never expires. Click OK to save your settings.
To create an email service account:
Verify the service account has a mailbox, and is not hidden in the Global Address List (GAL).
(Optional but highly recommended) Establish a user account through Outlook Web Access (OWA) or other source before setting up the email service account.
As a best practice, use a unique account for this integration point and grant it the least level of privileges required, coordinating with the system administrator. This email service account requires administrative write privileges to the Exchange server. For additional information, see Security for Integrating with Other Systems - Best Practices.
Use the following steps to set the permissions on Exchange where CUDASVC is the name of the Barracuda service account:
Log into the Exchange Server as the administrator.
From the Start menu, go to Start > Programs > Microsoft Exchange Server > Exchange Management Shell.
At the command prompt, enter the following command, and then press Enter:
Get-MailboxDatabase | Add-ADPermission -User "CUDASVC" -AccessRights ExtendedRight -ExtendedRights Receive-As, ms-Exch-Store-Admin
Next, enter the following command, and then press Enter:
Add-RoleGroupMember "Organization Management" -Member "CUDASVC"
Use the following steps to apply permissions for the service account where database name is the name of the specific Mail Store database rather than all databases:
Log into the Exchange Server as the administrator.
From the Start menu, go to Start > Programs > Microsoft Exchange Server > Exchange Management Shell.
At the command prompt, enter the following command, and then press Enter:
Get-MailboxDatabase -Identity database name | Add-ADPermission -User "CUDASVC" -AccessRights ExtendedRight -ExtendedRights Receive-As, ms-Exch-Store-Admin
Continue with Microsoft Exchange Server Operations based on your Exchange Server:
Configure a Microsoft Exchange Server 2007 Service Account
Read First
Service Account Password Setting
When configuring the service account, you must set the password to never expire. To set this option in Active Directory (AD), go to the Properties dialog box for the service account, click the Account tab, and in the Account options section, select Password never expires. Click OK to save your settings.
To create an email service account:
Verify the service account has a mailbox, and is not hidden in the Global Address List (GAL).
(Optional but highly recommended) Establish a user account through Outlook Web Access (OWA) or other source before setting up the email service account.
As a best practice, use a unique account for this integration point and grant it the least level of privileges required, coordinating with the system administrator. This email service account requires administrative write privileges to the Exchange server. For additional information, see Security for Integrating with Other Systems - Best Practices.
Log into the Exchange Server as the administrator.
From the Start menu, go to Start > Programs > Microsoft Exchange Server 2007 > Exchange Management Shell.
At the command prompt, enter the following command where Exchange2007 is the name of the Microsoft Exchange 2007 Server and CUDASVC is the name of the Barracuda service account, and then press Enter:
get-mailboxserver Exchange2007 | add-adpermission -user CUDASVC -accessrights GenericRead, GenericWrite -extendedrights Send-As, Receive-As, ms-Exch-Store-Admin
In the Exchange Management Shell, enter the following command to add View-Only Administrator permissions, replacing CUDASVC with the name of the Barracuda service account: add-exchangeadministrator CUDASVC -role ViewOnlyAdmin
Important:
If inheritance to the individual mail stores is not enabled on a custom mailbox database, to set the Send As, Receive As, and Administer Information Store permissions at the store level, you must enter the following command in the Exchange Management Shell:
Add-ADPermission -identity "custom database name" -user "CUDASVC" -accessrights GenericRead, GenericWrite -extendedrights Send-As, Receive-As, ms-Exch-Store-Admin
To verify the Send As, Receive As, and Administer Information Store permissions, enter the following command in the Exchange Management Shell, where Exchange2007 is the name of the Microsoft Exchange 2007 Server, dbname is the name of the Exchange mail database, and CUDASVC is the name of the Barracuda service account:
get-mailboxdatabase Exchange2007\dbname | get-ADpermission -user CUDASVC | Format-List
Continue with Microsoft Exchange Server 2007 Operations