

You can import VPN profiles and Barracuda Personal Licenses to the Barracuda Network Access Client and the Barracuda VPN Client using configuration files with the suffix *.vpn that can be configured and created within Barracuda Firewall Admin (for the importing process, see How to Import a *.vpn File into the VPN Client). Follow the instructions on this page to learn how to export a VPN profile from Barracuda Firewall Admin.
Creating a *.vpn File from a Barracuda Personal License
- In Barracuda Firewall Admin, navigate to CONFIGURATION > Configuration Tree > Box > Virtual Servers > your virtual server > Assigned Services > VPN-Service > Client to Site.
- Click Lock.
- In the Pool Licenses tab, attach the VPN profile template to a Barracuda Personal License:
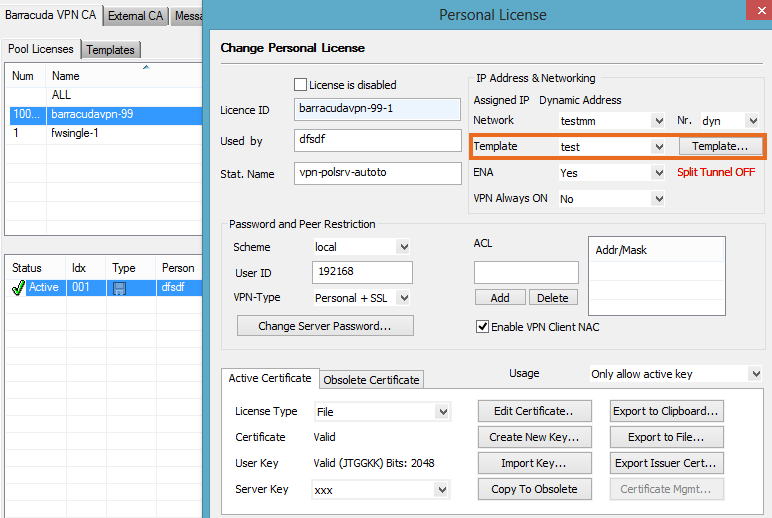
- Open a previously prepared Barracuda Personal License by double-clicking it.
- Select the configuration template to be used from the Template list, as shown in the figure below.
- If required, edit the template by clicking the Template button.
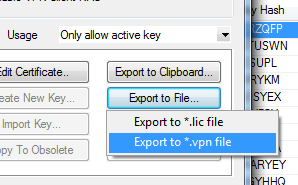
- Click Export to File and select Export to *.vpn file to export the VPN profile containing your license.
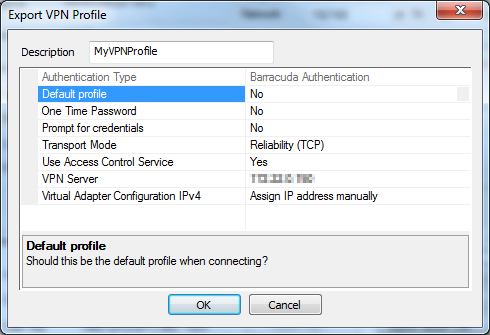
- On the Export VPN Profile page, enter a meaningful name for the profile into the Description field and adjust the other parameters as necessary.

- Click OK.
- A dialog appears asking you to set a license password. You can either type in a password and click OK, or skip the password configuration by clicking No Password.
- Choose a location to save the file, enter a name for the file, and click Save.
Creating a Group Policy-based *.vpn File
- In Barracuda Firewall Admin, navigate to CONFIGURATION > Configuration Tree > Box > Virtual Servers > your virtual server > Assigned Services > VPN-Service > Client to Site.
- Click Lock.
- Navigate to Group Policy in the External CA tab.
- Double-click a group policy in the list. The Edit Group Policy window opens.
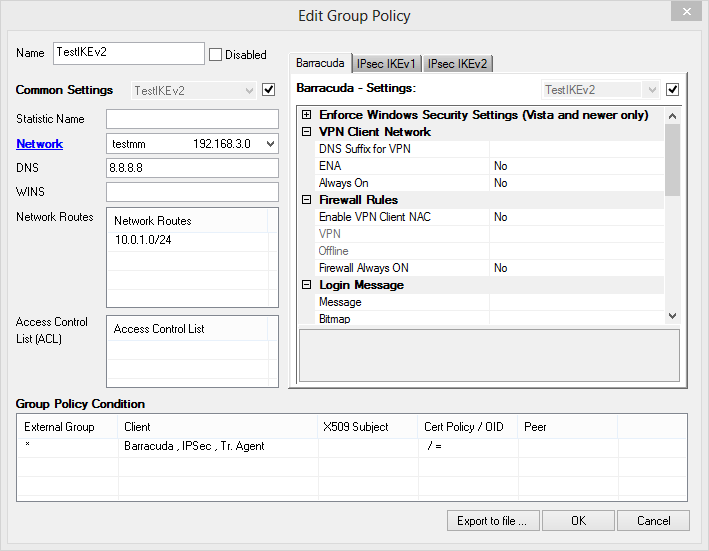
- If necessary, modify the profile settings as needed.
- Click Export to File in the bottom of the window.
- On the Export VPN Profile page, enter a name for the profile into the Description field.
- Adjust the other parameters as necessary.
- Click OK.
- A dialog follows asking you to set a password for the license. You can either type in a password and click OK, or skip the password configuration by clicking No Password.
- Choose a location to save the file, enter a name for the file, and click Save.
Editing the Contents of a *.vpn File
A *.vpn file is a ZIP archive containing a <profilename>.ini file and, if applicable, a <licensename>.lic file. These files are extracted and processed by the VPN Client during the import. To manually alter the contained profile.ini file (assuming you already have a *.vpn file), complete the following steps:
- (Optional) Rename the file from <
filename>.vpnto <filename>.zip - Open the
*.vpnfile using WinZIP, WinRAR, or another compressing / uncompressing tool that can handle ZIP files. - Extract the <
profilename>.inifile. Modify the extracted file as needed.
- Update the archive by replacing the file inside with the modified version.
- If applicable, rename the file back from <
filename.zip>to <filename>.vpn.