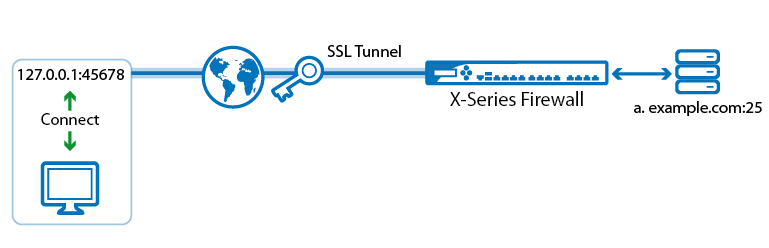
After you enable and configure the SSL VPN, you can add SSL tunnels. SSL tunnels are used to encrypt data for client/server applications that normally do not use encryption. An outgoing SSL tunnel protects TCP connections that a computer forwards from a local port to a preconfigured destination IP address and port that the user is connected to. To use SSL tunnels you must have a Remote Access Premium subscription.
Before you begin
Enable the SSL VPN service and CudaLaunch. For more information, see How to Enable SSL VPN and CudaLaunch.
SSL tunnels
Configure a resource containing one or more SSL tunnels that forward the TCP traffic of the remote service. Access to tunnel resources can be limited via the user groups.
Go to VPN > SSL VPN and click the Resources tab.
In the SSL Tunnels section, click Add SSL Tunnel.
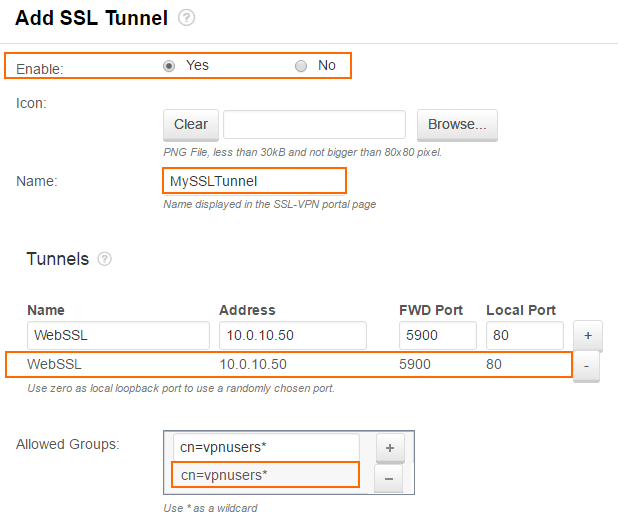
- In the Add SSL Tunnel window, set Enable to Yes.
- (optional) Click Browse to upload a PNG file for the web portal, less than 30 kB and not larger than 80x80 pixels.
- In the Name field, enter the visible name for the tunnel resource. This is the name used in the web portal for this resource.
- In the Tunnels section, configure the SSL tunnel:
- Enter the Name of the SSL tunnel.
- Enter the tunnel destination IP address in the Address field.
- Enter the port on the loopback interface that the user connects to in the FWD Port field and the Local Port of the service tunneled by the SSL VPN. To use a random port, enter
0(default). - (optional) To restrict access to the SSL tunnel by user group, remove the * entry in the Allowed User Groups list. Enter the user groups that can access the tunnel, and click + after each entry. If no groups are added, the SSL tunnel cannot be accessed. Use question marks (?) and asterisks (*) as wildcard characters.
- Click Save.
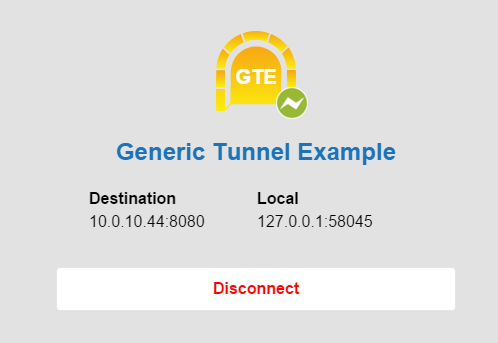
Tunnels in CudaLaunch
Tunnels are available only in CudaLaunch. To enable or disable the tunnel, go to the Tunnels tab and click the tunnel icon. The gray or green status icon shows the state of the tunnel.
| State | Icon |
|---|---|
| Tunnel inactive |  |
| Tunnel active |  |