

This article describes how to install the Microsoft Outlook button for Security Awareness Training.
With Microsoft Outlook, you have the option of configuring a 2-Step button, where users can report either phishing or spam, as shown in the image below.
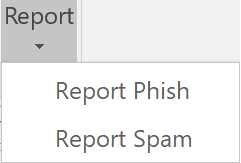
This image shows the parts involved in a 2-Step button. Refer to the corresponding sections below for configuration information.
- Report is the 2-Step Button Title.
- Report Phish is the Phishing Button Title.
- Report Spam is the Spam Button Title.
To create a new button:
Navigate to System > Button Plugin Config.
On the Button Configuration Manager page, click New.
Enter a Configuration Name, a user-friendly name you will use for this button configuration. This name is not visible to users.
Select a Code Version to specify the type of button you want to create – Microsoft Outlook – and the software version used for this configuration. Other configurations are described in other articles.
- Click Save.
Specify the configuration based on the descriptions below, then click Save again.
General
Configuration Name – The name you specified above is copied here. You can change it at this point if you choose.
- Active – Specify whether this button is active. Email clients using the Security Awareness Training servers can download only active configurations.
- Quiet Install – Specify instructions for button installation.
- Quiet Mode: Do not show end user interface or any prompts during installation.
- Passive Mode: Display a minimal user interface with no prompts.
- Debug Mode: Force the user to interact with the installation.
- No Restart/Reboot – Specifies whether the client must reboot computer after installing or removing the button.
- Enable Auto Sync – Specifies whether the system will download a new configuration each time Outlook is restarted or only the first time Outlook is successfully started.
Code Version
- Code Version – Version of the software code you chose for this configuration in Step 4 above.
- Button Code Type – Displays the type of source code for the selected Code Version.
- Code Description – Displays the description of the selected Code Version.
Button Image
- Button Image – Select and upload a graphics file to display on the button.
Recommendation: Select a GIF or PNG file. If needed, the system will automatically resize the image to approximately 80 x 80 pixels. - Button Image File Type – Displays the type of file you uploaded for the Button Image (GIF or PNG).
- Button Image File Size – Displays the size of the image file you selected and uploaded.
- Button Image – Select and upload a graphics file to display on the button.
General Settings
- No Emails Selected Message – Enter the message to display when the user clicks the button without having selected any emails.
- Include Original Subject – Select to include the subject of the reported email in the subject line for the message wrapper email.
- Add header details to wrapper email body – Select to include extra data in the body of the message wrapper email, including:
Email headers
A list of URLs in the message
The Reporting Agent (Button version, Outlook version, Windows version)
The folder containing the message
- Are You Sure - Enable – Select to prompt users to verify that they want to report the selected email message.
If you enable Are You Sure, specify the following options or accept the defaults:- Set "Are you sure" buttons to OK/Cancel – Select to change the standard Yes/No message of the Are You Sure prompt to OK/Cancel.
- Are You Sure - Title – Bold headline displayed when user reports an email.
- Are You Sure - Prompt Text – Text displayed under the headline when a user reports an email.
- Disable Internal Delete – Select to save internal emails, rather than deleting them, when reported by the user via the main button.
- Disable Mock Delete – Select to save Security Awareness Training mock emails, rather than deleting them, when reported by the user via the main button.
- Disable Not Mock or Internal Delete – Select to save emails that are not mock and not internal, rather than deleting them, when reported by the user via the main button.
Phishing
Phishing Button Label – Enter a text label for the phishing button.
Phishing Button Tool Tip Title – Enter text for the title of the tool tip that appears when a user hovers over the phishing button.
Phishing Button Tool Tip – Enter text for the tool tip that appears when a user hovers over the phishing button.
- Phishing Report Email Subject – Enter a subject line for emails reported with the phishing button. Use {0} to use the original subject.
- Phishing Body Text – Enter body text for the reported email when it is not classified as a mock phishing test or an internal message.
Internal Message
- Internal Send To – Enter one or more email addresses to notify of reported emails from the internal domains. Separate multiple email addresses with semicolons or commas. For visibility within Security Awareness Training, include
phishline_<Instance_Name>@phishline-incident-response.com. See note above. - Internal Reporting Success Pop Up Message – Optional. Enter text to appear to users when they report a phishing message from an internal domain.
- Reported Internal Body Text – Enter the body text for the reported phishing email when it is recognized as Internal. Use {0} to insert the matching internal domain.
- Internal Domains – Enter a list of domains that the plugin will use to identify reported emails that came from your internal domains. Enter one domain per line in the format example.com.
- Internal Send To – Enter one or more email addresses to notify of reported emails from the internal domains. Separate multiple email addresses with semicolons or commas. For visibility within Security Awareness Training, include
Mock Message
- Mock Send To – Enter one or more email addresses to notify of reported emails recognized as Mock Phishing tests. Separate multiple email addresses with semicolons or commas. For visibility within Security Awareness Training, include
phishline_<Instance_Name>@phishline-incident-response.com. See note above. - Mock Success Message – Optional. Enter text to appear to users when they report a mock phishing message.
- Reported Mock Body Text – Enter the body text for the reported email when it is recognized as a Mock Phishing test. Use {0} to insert header information.
- Mock Phishing Headers – Enter a list of X-Headers, one per line, to identify mock phishing emails. Configure custom X-Headers in System > Global Settings. X-Headers can be any string of alphanumeric characters. Choose a string that does not identify the function of the X-Header and is unique enough not to be duplicated by another process. An example of an X-Header for this use is
X-AEDE112EDA.
- Mock Send To – Enter one or more email addresses to notify of reported emails recognized as Mock Phishing tests. Separate multiple email addresses with semicolons or commas. For visibility within Security Awareness Training, include
Not Internal Or Mock
- Phishing Report Send To – Enter one or more email addresses notified when a user clicks the phishing button, but the suspect emails are neither Mock nor Internal. Separate multiple email addresses with semicolons or commas. For visibility within Security Awareness Training, include
phishline_<Instance_Name>@phishline-incident-response.com. See note above. - Phishing Success Message – Enter an optional message that will be shown to users for every reported phishing message that is not Mock or Internal.
- Phishing Report Send To – Enter one or more email addresses notified when a user clicks the phishing button, but the suspect emails are neither Mock nor Internal. Separate multiple email addresses with semicolons or commas. For visibility within Security Awareness Training, include
2-Step Button
These settings apply if you enable both phishing and spam reporting as separate options on the button.
- Multi Button Label – Enter the text to display under the button image.
- Multi Button Tool Tip Title – Enter the title to display when the user hovers over the main button.
- Multi Button Tool Tip – Enter the description to display when the user hovers over the main button.
Spam
- Spam Button - Enabled – Select this option to display the button with separate spam and phishing report options.
- Spam Button Text – Enter the text to display on the spam button.
- Spam Button Tool Tip Title – Enter the title to display on the spam button when the user hovers over it.
- Spam Button Tool Tip – Enter the description to display on the spam button when the user hovers over it.
- Disable Internal Delete – Select to save internal emails, rather than deleting them, when reported by the user via the spam button.
- Disable Mock Delete – Select to save Security Awareness Training mock emails, rather than deleting them, when reported by the user via the spam button.
- Disable Not Mock or Internal Delete – Select to save emails that are not Mock and not Internal, rather than deleting them, when reported by the user via the spam button.
- Spam Report Email Subject – Enter the subject line for emails reported with the spam button. Use {0} to insert the original subject.
- Spam Report Send To – Enter one or more email addresses to notify when a user reports an email as spam. Separate multiple email addresses with a semicolon.
- Spam Report Success Message – Enter the message displayed to the user after they report an email as spam.
- Spam Internal Success Message – Optional. Enter the message displayed to users after they report an internal email as spam.
- Spam Mock Success Message – Optional. Enter the message displayed to users after they report a mock email as spam.
- Spam Report Email Body – Enter the body of the email that is sent when a user reports an email as spam.
Advanced
After you save the button configuration, the Advanced section displays the code for the button, based on the values you specified.