

This article refers to the Barracuda PST Enterprise version 5.1, and .Net Framework 4.5 or higher.
Verify your server meets the hardware and software requirements before installing PST Enterprise Pre-Installation Package.
Pre-Installation
Run the pre-installation package PSTEnterprisePreInstall
Download the Barracuda PST Enterprise Pre-Installation Package to your server, and follow the onscreen instructions.
The PST Enterprise pre-installation process creates objects and grants appropriate permissions to allow smooth running of PST Enterprise, including:
Active Directory Account
- If you do not specify an Active Directory (AD) account to act as the PST Enterprise service account, PST Enterprise creates one during pre-installation.
Account is granted owner rights on the PSTEnterprise database so that all required database tables are generated when the website starts up; there is no need to manually create tables.
Account is granted owner rights on all mailboxes in the Microsoft Exchange organization using the Pre-Installation PowerShell Command below.
Owner rights on all mailboxes allows the account to log in to any mailbox associated with an uncoupled PST when a PST Processor installation searches for uncoupled PSTs using the AD account.
During the pre-installation process, the AD account is granted rights over all Exchange mailboxes, using the Pre-Installation PowerShell Command below.
AD Group
- If you do not specify an AD group, PST Enterprise creates one during pre-installation.
- Users must be members of the AD group to log in to the PST Enterprise administrative website.
SQL Database Connection
- If you do not specify database connection details, SQL Express is installed and used by default.
IIS Application Pool
- IIS Application Pool used to run the PST Enterprise website uses the Integrated Pipeline mode.
- IIS Application Pool process model identity is set to the specified AD account.
Run the Pre-Installation Package
Use the following steps to run the pre-installation package:
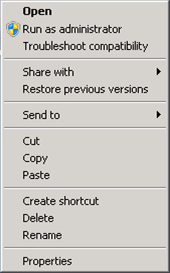
- Right-click PSTEnterprisePreInstall.exe, and click Run as administrator:
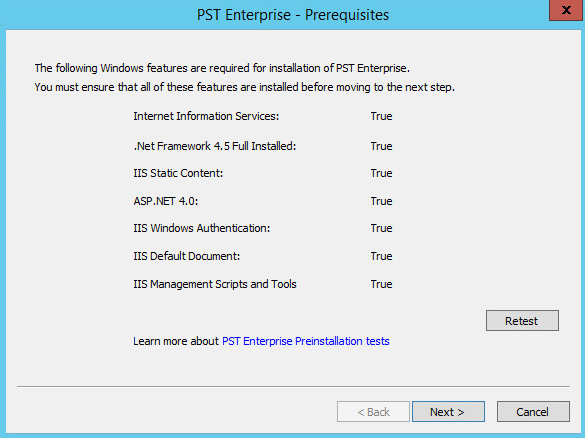
- The Wizard launches. In the Prerequisites page, verify the prerequisites are met; all tests must pass as True; correct any failures before proceeding using the Learn more about PST Enterprise Preinstallation tests link:
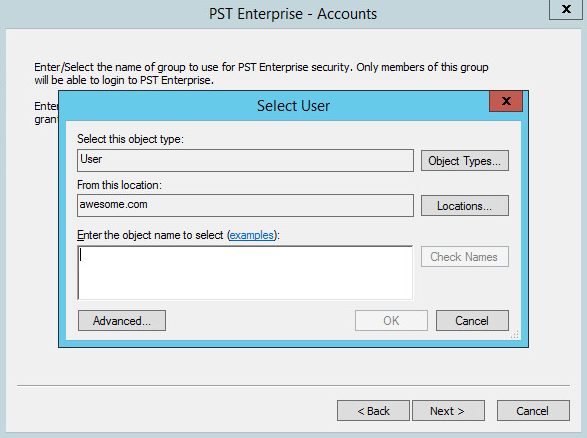
- Click Next. In the Accounts page. By default, the Group Name is PSTEnterpriseUsers. If you created a security group, click Browse to navigate to and select the group from your Active Directory (AD), otherwise you can leave the default value or enter a new name to represent the PST Enterprise users security group.

- By default, the Account Name is PSTEnterpriseAdmin. If you created an account, click Browse to navigate to and select the account from your AD:
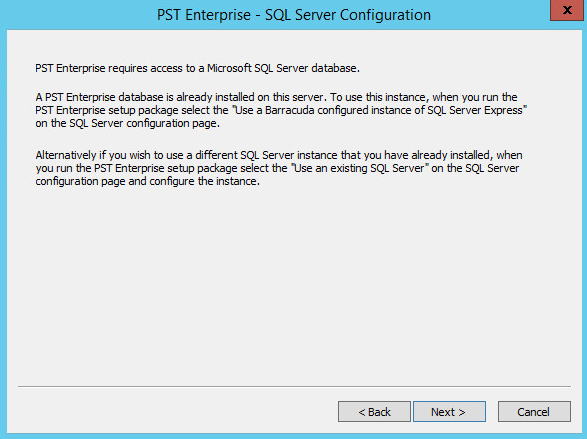
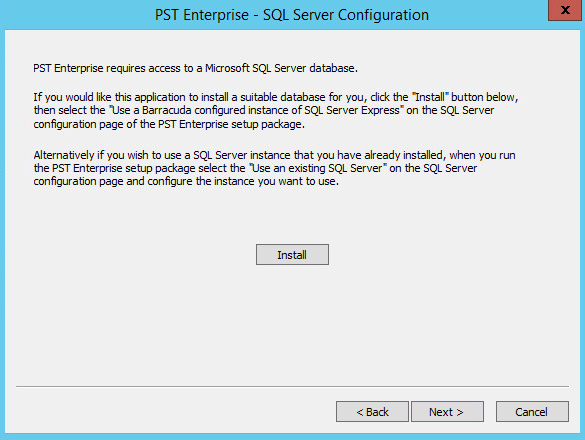
Otherwise you can leave the default value or enter a new name to represent the PST Enterprise Exchange account. - Click Next. In the SQL Server Configuration page, If an existing SQL Server instance is detected on the local server, the pre-install is complete; click Next and then Finish:
If no local SQL Server instance is detected, you are prompted to install SQL Server. To install SQL Express 2008 R2 on the local server, click Install:
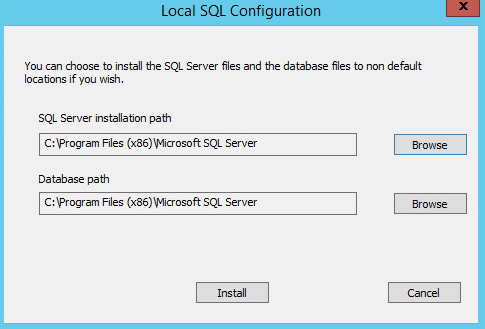
- Click Install. In the Local SQL Configuration page, by default the SQL Server installation path is set to C:\Program Files (x86)\Microsoft SQL Server. To change the folder path, click Browse and navigate to and select the new folder path:
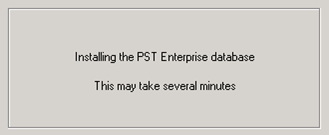
- Click Install. Allow the SQL installation to complete; this may take several minutes to complete:
- Once the installation successfully completes, the confirmation dialog displays:
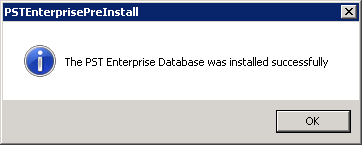
- Click OK to close the dialog. The Completion page displays:
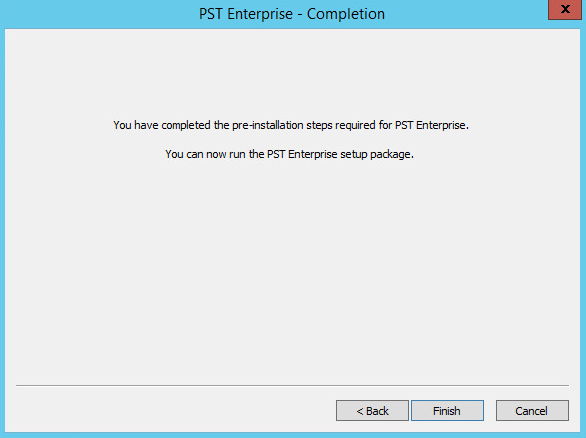
- Click Finish.