

This article refers to the Barracuda PST Enterprise version 3.1 or higher.
For information on bulk schedule upload, see Import Scheduling in the article Global Configuration.
You can set a schedule for each PST on the Assign Policy dialog in the Assigned PSTs page. Define the processing start and end date, as well as the start and end time. When the PST Enterprise Client considers processing a PST, it does not start if the current time is before the scheduling start time for the PST or after its end time.
To set the schedule,
Go to the Assign PSTs page. If you want to assign a policy to a set of PSTs, select one or more PSTs in the table.
- Click Assign Policy. In the dialog box, select the policy from the drop-down menu.
- Click Start the policy at a schedule time, and then set the Start and End dates and times:
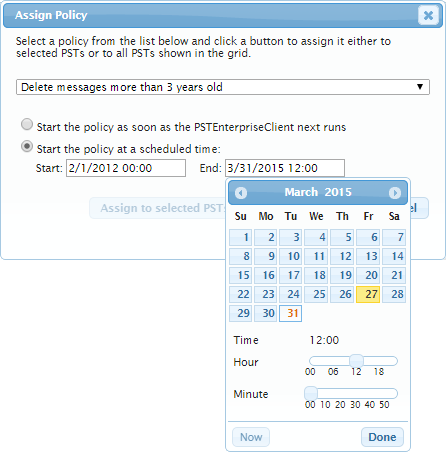
- Click Assign to selected PSTs to assign to only those PSTs currently selected in the table, or click Assign to all PSTs to assign the policy to all PSTs currently shown in the table.
- The schedule is added to the selected PSTs, and the start and end dates and times display in the Schedule Start/Schedule End columns in the table.