

A configuration profile provides a simple way to define settings and restrictions for devices, computers, and users. Using a configuration profile, you can pre-configure the macOS network stack with a VPN profile so that upon installation of the SecureEdge Access Agent on end-user devices, the user is not prompted to approve/accept installation of software or policies. This profile does not represent an MDM enrollment profile, and thus can only be deployed via MDM after a device has been enrolled.
The .mobileconfig configuration profile can be copied and pasted from this page, and can then be uploaded to any MDM solution to be used for deployment. Before deploying this profile to all of your managed devices, test it on a local machine as described below.
Using the Tamperproof Feature
To use the Tamperproof feature mentioned below, you must use the SecureEdge Access Agent app version 1.1.0 or later. Deploying via MDM when using the Tamperproof feature requires using a specific .mobileconfig configuration profile and, in the case of macOS devices, a .plist file is required as well. Both file types can be copied and pasted from this page and stored on your macOS device.
Test the Configuration Profile on a Local macOS Device
Make sure the device does not have SecureEdge Access Agent installed.
When using the Tamperproof feature:
Copy and paste the contents of the macOS configuration file as shown in the mobilconfigmacOSTamperproof section of this article, and name the file
.mobileconfig.Download and install the configuration profile to your test macOS device. The .mobilecconfig file is set to prevent the VPN profile from being uninstalled, and to make sure that the user cannot bypass web filtering by recreating a connection on the VPN when a connection is initiated.
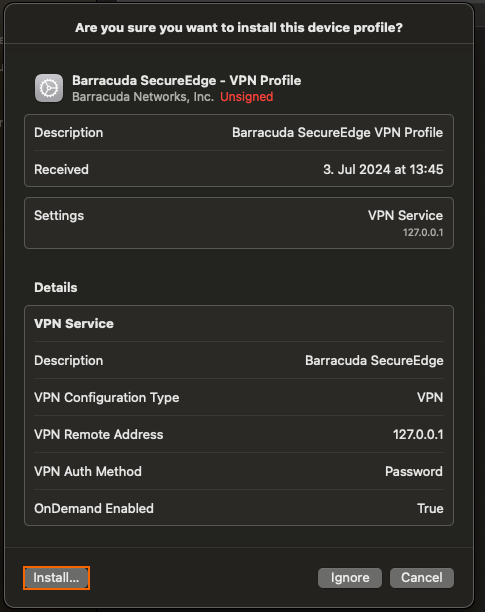
Double-click on the
.mobileconfigfile or open it with a profile installer application, and follow the installation instructions on screen.Go to Profiles, and review and install the profile. This profile is unsigned, so it will be marked as Unsigned accordingly:
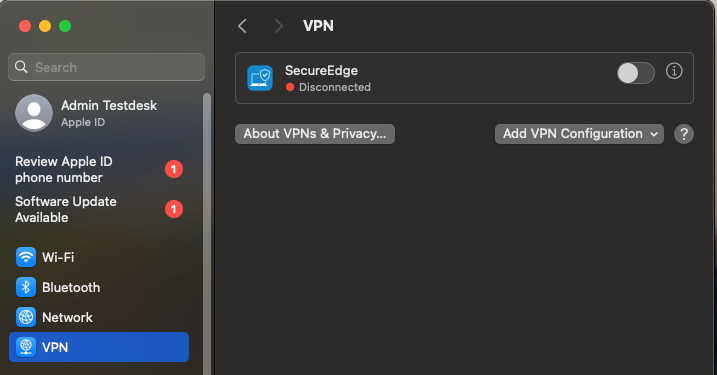
Go to Settings >VPN and verify that SecureEdge Access shows up as Disconnected.
Open the App Store and search for Barracuda SecureEdge Agent.
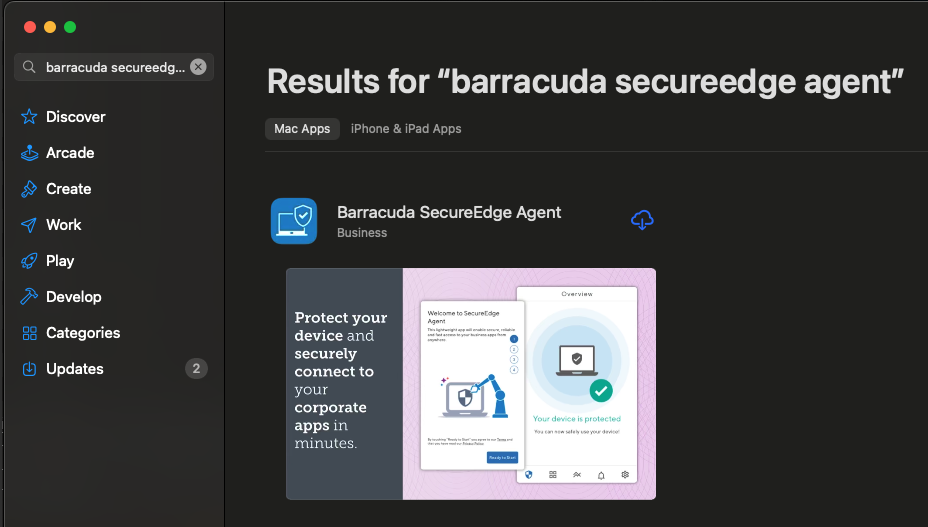
Install the Barracuda SecureEdge Access Agent and to enroll the user, click Enroll. Note: You can also enroll the user by using the email enrollment link. For more information, see How to Enroll Users in Barracuda SecureEdge. You must ensure that the Tamperproof settings are enabled on the SecureEdge Manager. For more information, see How to Configure SecureEdge Access Global Settings.
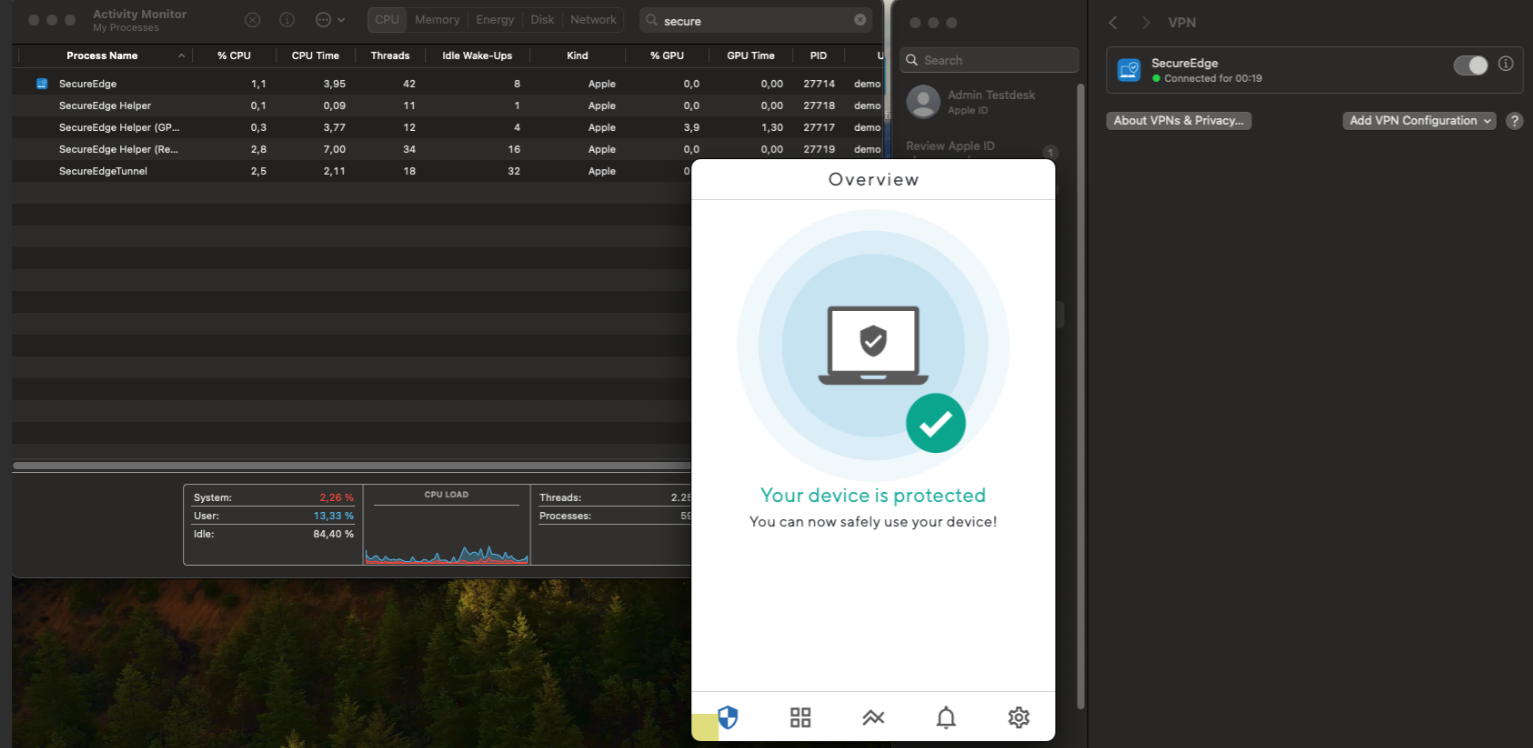
After installation, check the Network Preferences again for the SecureEdge Access Agent. It should now be in the Connected state and display as active.
If you are using Tamperproof on the macOS device, you also need to copy and paste plistFileTamperproofmacOS and store it under
/Library/LaunchAgents/. The.plistfile is used to restart the SecureEdge Access Agent app in case it gets closed.Copy the
com.barracuda.guardian.plistfile in the/Library/LaunchAgentsfolder. Note that the administrative users must have appropriate permissions to do so.
Execute the command
launchctl load /Library/LaunchAgents/com.barracuda.guardian.plist.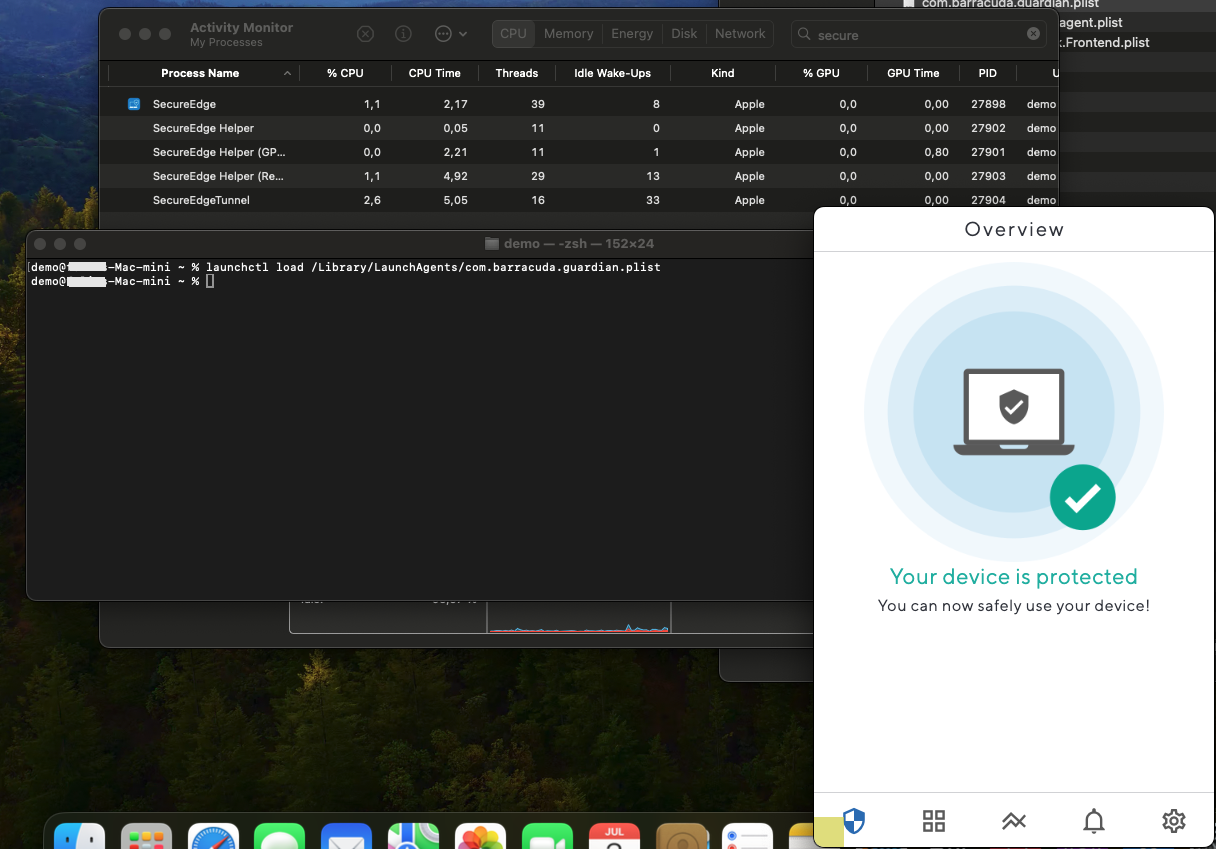
You can verify the following:
You are no longer able to remove or disable the SecureEdge VPN profile on the System Settings page. This is due to the se.mobileconfig profile you have installed.
If you stop the process in which the SecureEdge Access Agent application is running, the application is automatically restarted by the system. This is due to the .plist file .
The .mobileconfig Configuration Profiles for macOS
The .mobileconfig Configuration Profile for macOS – USING the Tamperproof Feature
<?xml version="1.0" encoding="UTF-8"?>
<!DOCTYPE plist PUBLIC "-//Apple//DTD PLIST 1.0//EN" "http://www.apple.com/DTDs/PropertyList-1.0.dtd">
<plist version="1.0">
<dict>
	<key>PayloadContent</key>
	<array>
		<dict>
			<key>OnDemandMatchAppEnabled</key>
			<false/>
			<key>PayloadDescription</key>
			<string>Configures Barracuda SecureEdge VPN profile.</string>
			<key>PayloadDisplayName</key>
			<string>Barracuda SecureEdge</string>
			<key>PayloadIdentifier</key>
			<string>com.apple.vpn.managed.190B5F98-6340-4B70-B2CE-11913B298611</string>
			<key>PayloadOrganization</key>
			<string>Barracuda Networks, Inc.</string>
			<key>PayloadType</key>
			<string>com.apple.vpn.managed</string>
			<key>PayloadUUID</key>
			<string>2C0D7638-6071-4ECB-A8D1-CAFAD3F8E679</string>
			<key>PayloadVersion</key>
			<integer>1</integer>
			<key>UserDefinedName</key>
			<string>SecureEdge</string>
			<key>VPN</key>
			<dict>
				<key>AuthenticationMethod</key>
				<string>Password</string>
				<key>OnDemandEnabled</key>
				<integer>1</integer>
				<key>OnDemandRules</key>
				<array>
					<dict>
						<key>Action</key>
						<string>Connect</string>
						<key>InterfaceTypeMatch</key>
						<string>WiFi</string>
					</dict>
				</array>
				<key>ProviderBundleIdentifier</key>
				<string>com.barracuda.guardian.macos.extension</string>
				<key>ProviderType</key>
				<string>packet-tunnel</string>
				<key>RemoteAddress</key>
				<string>127.0.0.1</string>
			</dict>
			<key>VPNSubType</key>
			<string>com.barracuda.guardian.macos</string>
			<key>VPNType</key>
			<string>VPN</string>
			<key>VPNUUID</key>
			<string>4812F41C-374A-4859-9106-1D881205A64E</string>
		</dict>
	</array>
	<key>PayloadDescription</key>
	<string>Barracuda SecureEdge VPN Profile</string>
	<key>PayloadDisplayName</key>
	<string>Barracuda SecureEdge - VPN Profile</string>
	<key>PayloadIdentifier</key>
	<string>543CC1DE-AC7A-4227-B45B-2055ACDD0AF5</string>
	<key>PayloadOrganization</key>
	<string>Barracuda Networks, Inc.</string>
	<key>PayloadRemovalDisallowed</key>
	<false/>
	<key>PayloadScope</key>
	<string>System</string>
	<key>PayloadType</key>
	<string>Configuration</string>
	<key>PayloadUUID</key>
	<string>A4797083-FC34-4D22-B622-A386141FDAD3</string>
	<key>PayloadVersion</key>
	<integer>1</integer>
</dict>
</plist>
The .plist file for macOS USING the Tamperproof Feature
<?xml version="1.0" encoding="UTF-8"?>
<!DOCTYPE plist PUBLIC "-//Apple//DTD PLIST 1.0//EN" "http://www.apple.com/DTDs/PropertyList-1.0.dtd">
<plist version="1.0">
<dict>
    <key>KeepAlive</key>
    <true/>
    <key>Label</key>
    <string>com.barracuda.secureedge</string>
    <key>LimitLoadToSessionType</key>
    <string>Aqua</string>
    <key>ProgramArguments</key>
    <array>
        <string>open</string>
        <string>--wait-apps</string>
        <string>/Applications/SecureEdge.app</string>
    </array>
    <key>RunAtLoad</key>
    <true/>
</dict>
</plist>
Additional Information
Recommended Steps for Updating the SecureEdge Access Agent
Note that you may need to turn off the SecureEdge Access Agent on macOS during the upgrade process. If the operating system keeps restarting the application, it may prevent updates. Follow these steps during the upgrade process:
launchctl unload /Library/LaunchAgents/com.barracuda.guardian.plist
upgrade agent
launchctl load /Library/LaunchAgents/com.barracuda.guardian.plist