

You can configure one or more LAN connections and static routes on a Site appliance.
Add a New LAN Connection
Go to https://se.barracudanetworks.com and log in with your existing Barracuda Cloud Control account.
In the left menu, click the Tenants/Workspaces icon.
From the drop-down menu, select the workspace containing your Site.
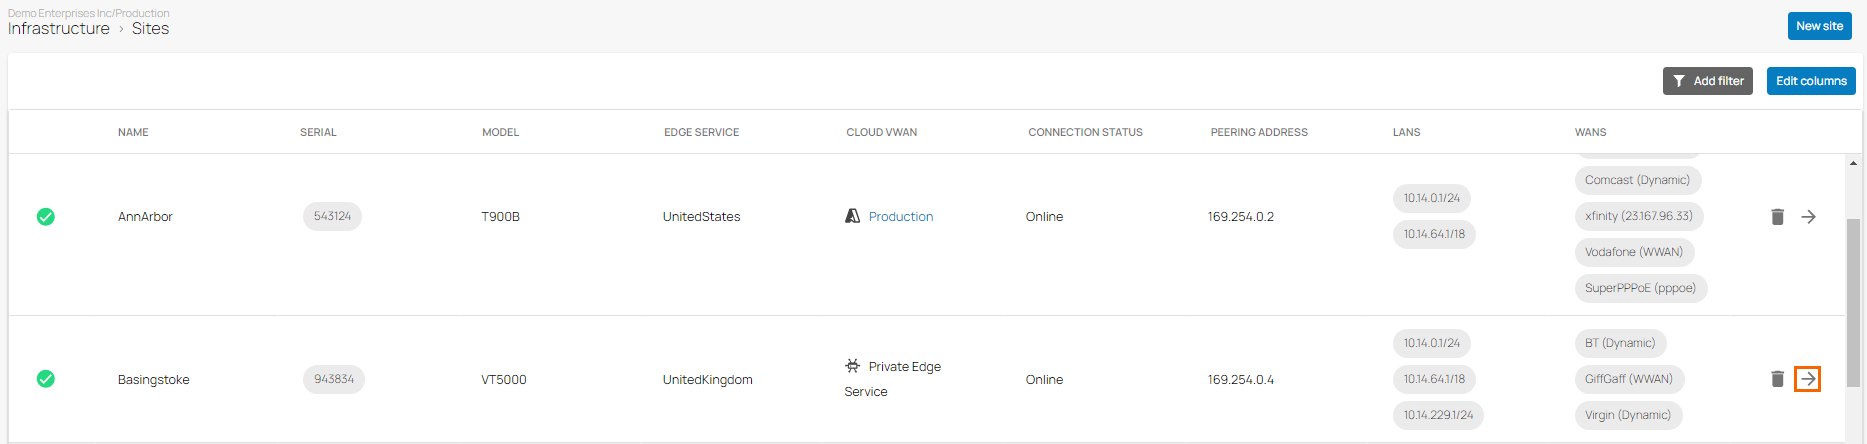
Go to Infrastructure > Sites. The Sites page opens.
Select the Site you want to add a LAN interface for. You can either search for the name or serial, or use filters to tailor the list of displayed Sites. You can also simply scroll through the list.
Click on the arrow icon next to the Site you want to configure.
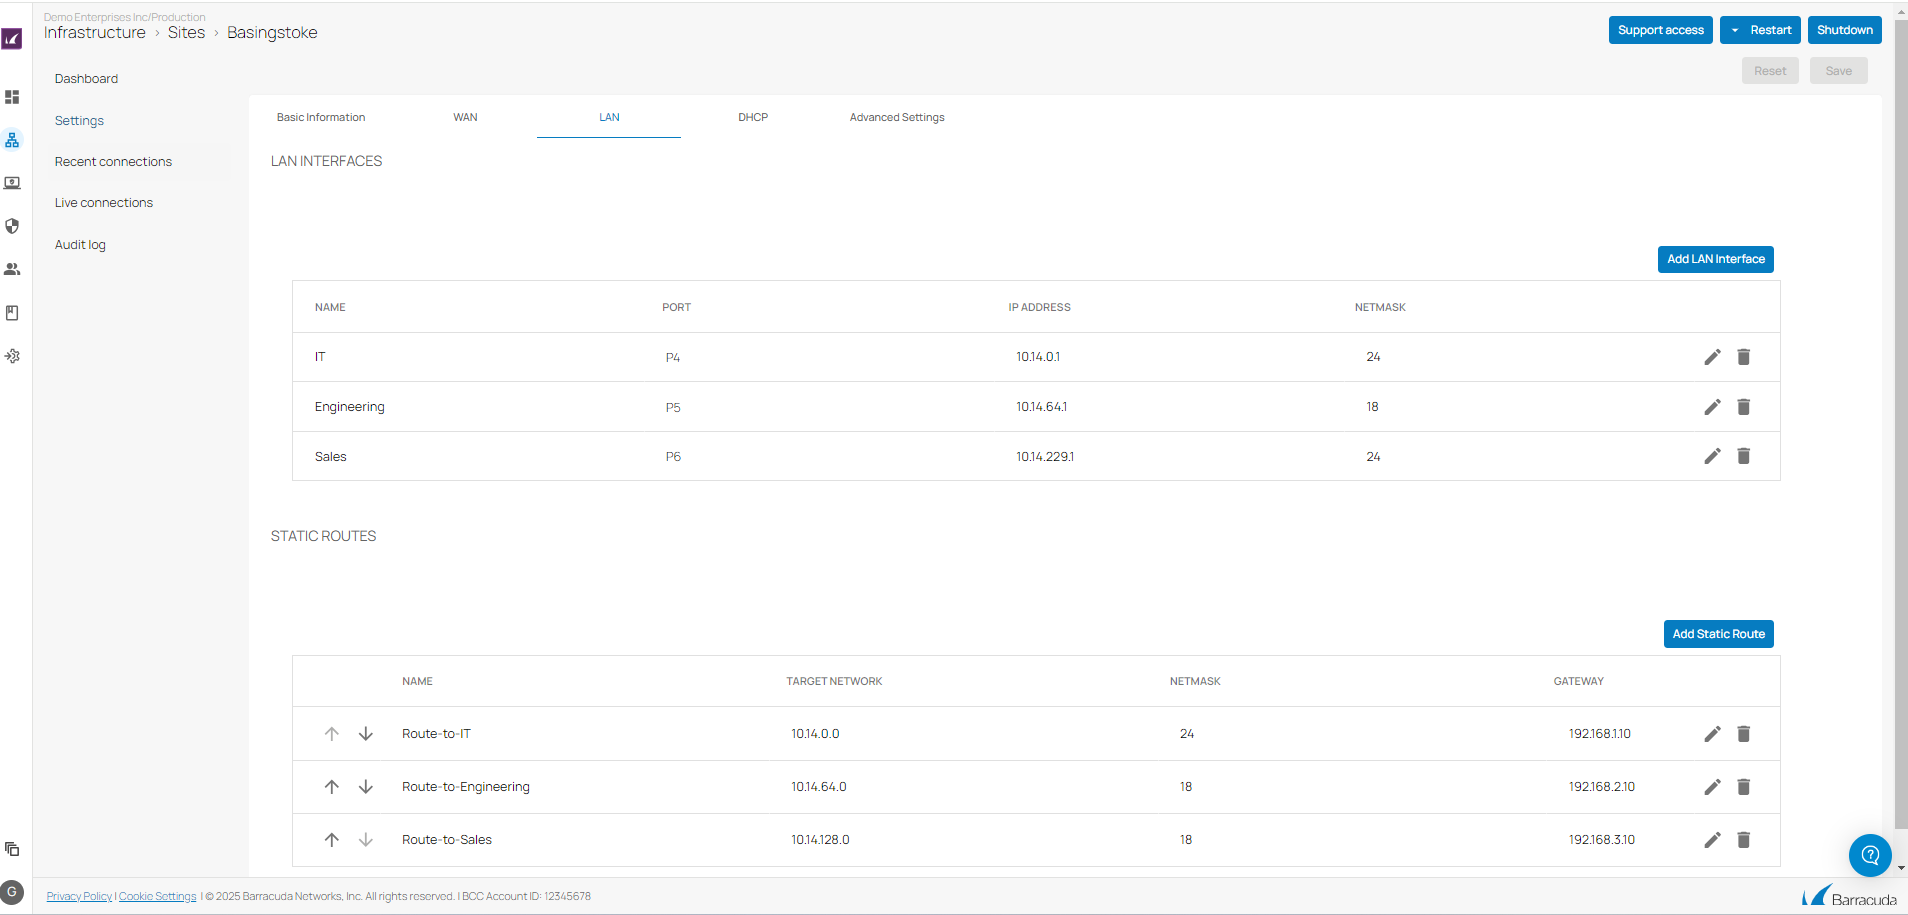
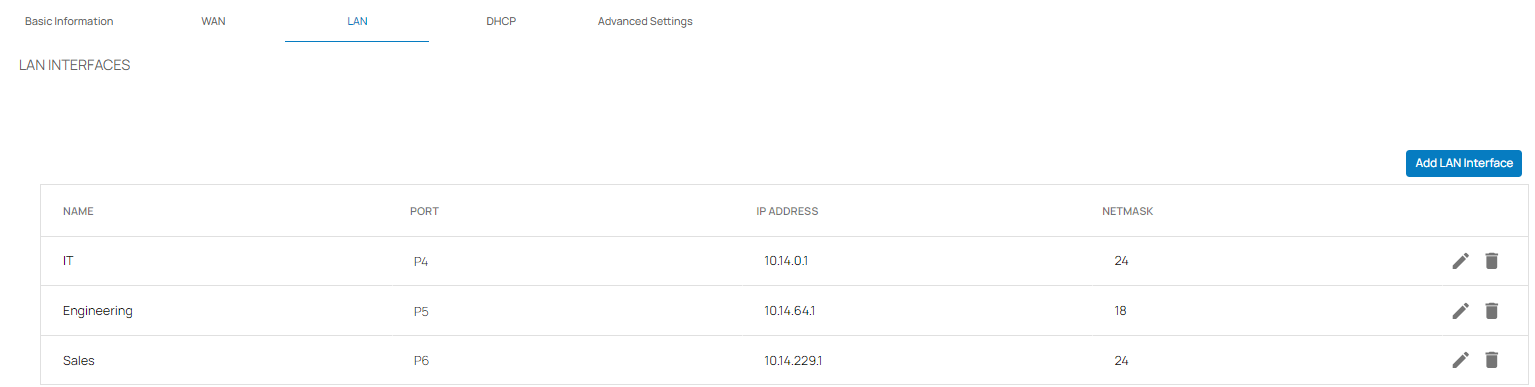
In the Site menu, go to Settings > LAN and click Add LAN Interface.

The Add New LAN Interface window opens. Specify values for the following:
Name – Enter a name for your LAN.
Type – Select the interface type. You can choose either Single Port or Bridge. Note: Here, Single Port represents a default LAN interface.
Port – Select a port from the drop-down list where the LAN is attached to. Note: Port 1 is reserved for high availability.
Virtual LAN ID (Optional) – If required, enter the Virtual LAN ID this interface is connected to. You can use Virtual LAN ID if connecting to a switch with virtual LAN support.
IP Address – Enter the IP address to assign to the port.
Netmask – Enter a number between
0and32for the subnet mask.HA Failover – Only available in a High Availability cluster. Click to enable. For more information, see How to Enable Interface Monitoring in a High Availability Cluster.
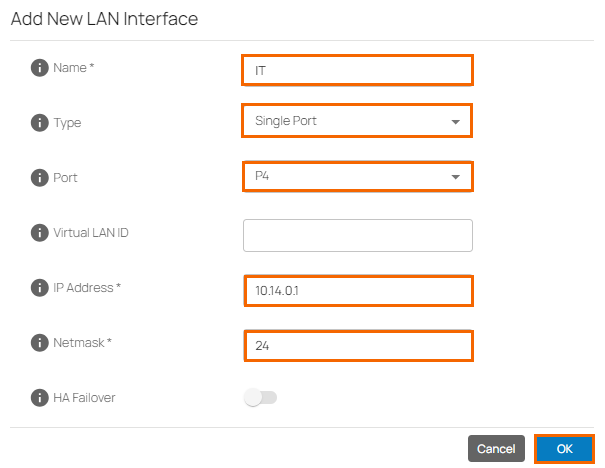
Click OK.
Click Save.
After configuration is complete, you can see that a new LAN interface has been added in the LAN INTERFACES table on the Overview page of your selected Site.
Edit an Existing LAN Connection
Go to https://se.barracudanetworks.com and log in with your existing Barracuda Cloud Control account.
In the left menu, click the Tenants/Workspaces icon.
From the drop-down menu, select the workspace containing your Site.
Go to Infrastructure > Sites. The Sites page opens.
Select the Site you want to edit. You can either search for the name or serial, or use filters to tailor the list of displayed Sites. You can also simply scroll through the list.
Click on the arrow icon next to the Site you want to edit.

In the Site menu, go to Settings and select the LAN tab.
Click on the pencil icon next to the LAN interface you want to edit.

The Edit LAN Interface window opens. Edit the value you are interested in.
Click OK.
Click Save.
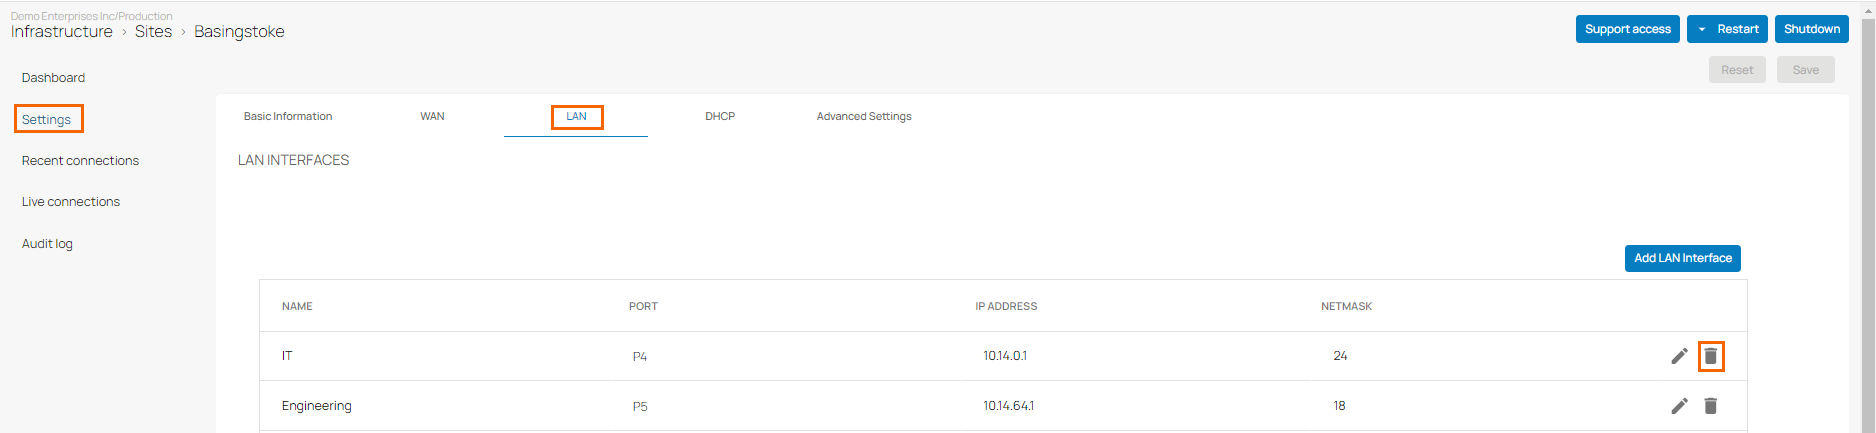
Remove an Existing LAN Connection
Go to https://se.barracudanetworks.com and log in with your existing Barracuda Cloud Control account.
In the left menu, click the Tenants/Workspaces icon.
From the drop-down menu, select the workspace containing your Site.
Go to Infrastructure > Sites. The Sites page opens.
Select the Site you want to remove. You can either search for the name or serial, or use filters to tailor the list of displayed Sites. You can also simply scroll through the list.
Click on the arrow icon next to the Site you want to configure.

In the Site menu, go to Settings and select the LAN tab.
Click on the trash can icon next to the LAN interface you want to remove.
The Delete LAN Interface window opens.
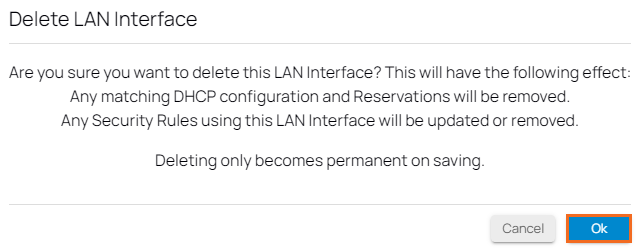
Click OK to confirm.
Click Save.
Further Information
For more information on HA failover, see How to Enable Interface Monitoring in a High Availability Cluster.
For more information on the DHCP service, see DHCP Service.
For more information on static routes, see How to Create a Static Route.