

The Barracuda SecureEdge Manager allows administrators to configure and authenticate Security Assertion Markup Language (SAML) as an identity provider for the workspace.
Configure SAML 2.0
Go to https://se.barracudanetworks.com and log in with your existing Barracuda Cloud Control account.
In the left menu, click the Tenants/Workspaces icon and select the workspace you want to configure SAML 2.0 as an identity provider for.
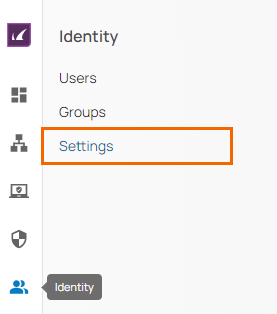
In the left menu, click Identity > Settings.
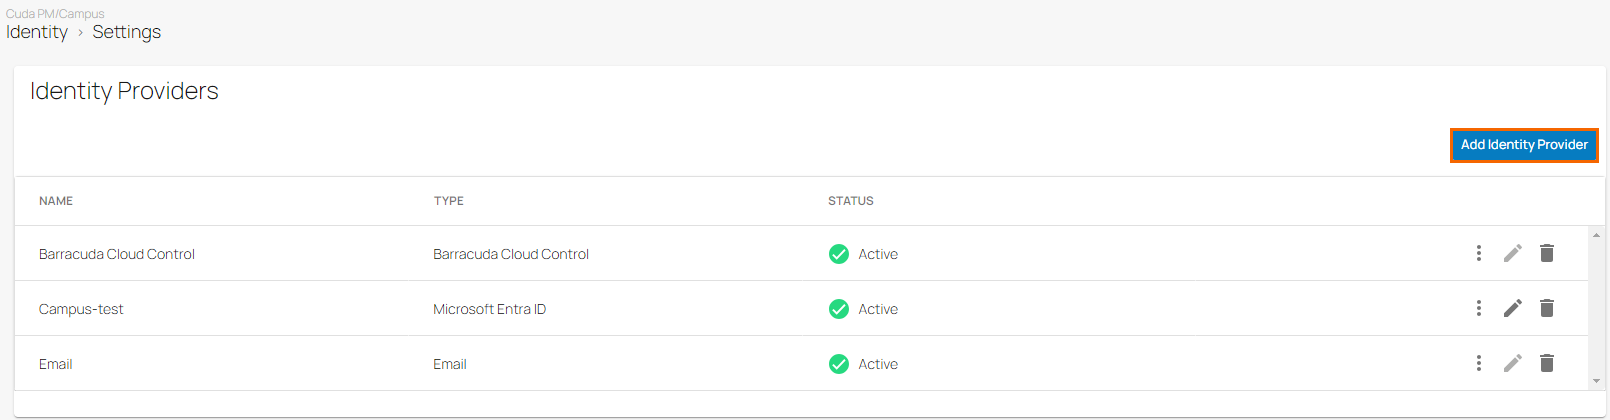
The Settings page opens. In the Identity Providers section, click Add Identity Provider.
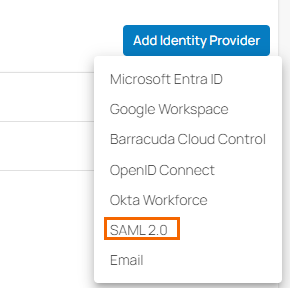
From the drop-down menu, select SAML 2.0.
The Add Identity Provider page opens. Specify the values for the following:
Display Name – Enter display name.
Sign In Endpoint – Enter the sign-in endpoint.
Signing Cert – Enter the signing certificate.
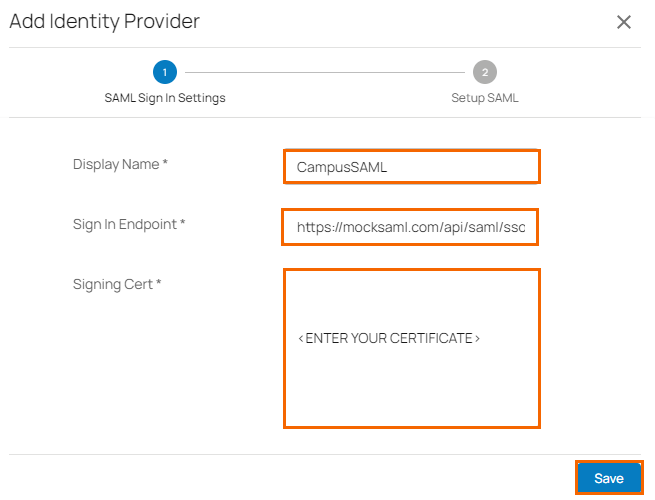
Click Save.
Under Information needed by your Identity Provider, you receive an Entity ID and ACS URL.

Click Finish.
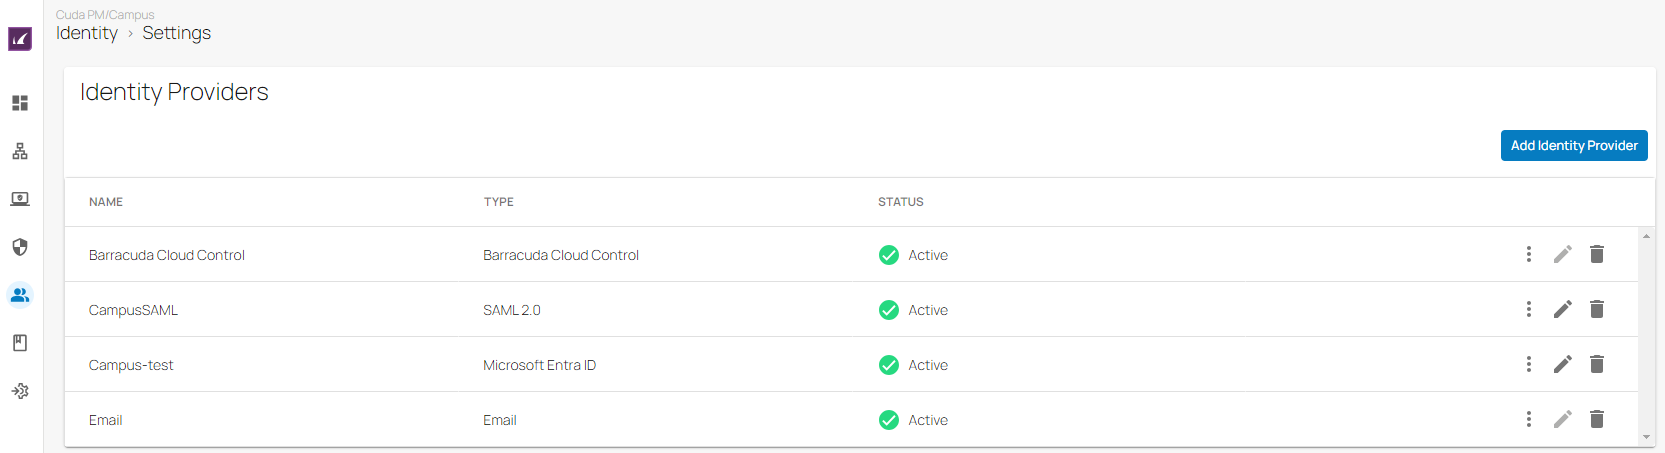
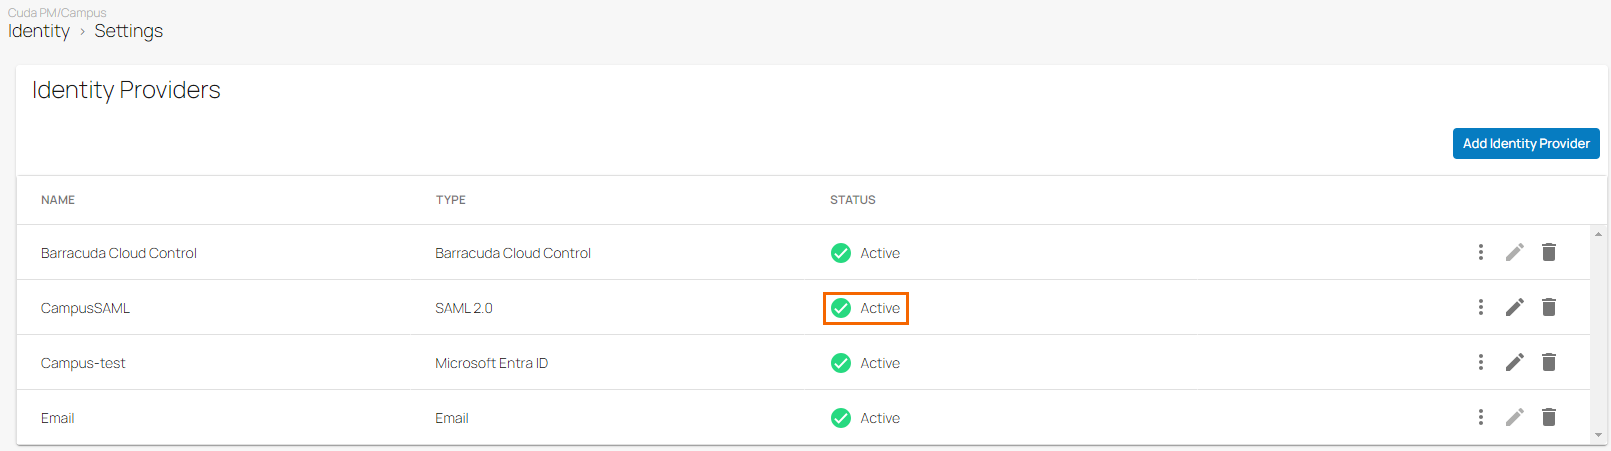
In the Identity Providers table, you can see that the identity provider SAML 2.0 has been added and under the fieldname STATUS the text now states Active with a green check mark.
Edit SAML 2.0
To edit the SAML 2.0 identity provider:
In the left menu, click the Tenants/Workspaces icon and select the workspace you want to edit the SAML 2.0 identity provider for.
Go to Identity > Settings.
The Settings page opens. In the Identity Providers section, you can see that SAML 2.0 is displayed as your identity provider.
To edit your SAML 2.0 account, click on the pencil icon.

The Edit Identity Provider page opens. Edit the value you are interested in. For example, Display Name or Signing Cert. Note: You cannot change the value for Sign In Endpoint as the option Sign In Endpoint is disabled.
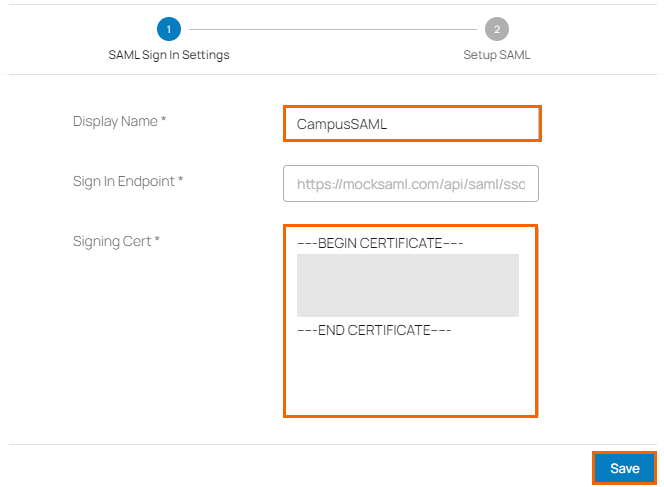
Click Save.
Remove SAML 2.0
Go to Identity > Settings. The Settings page opens.
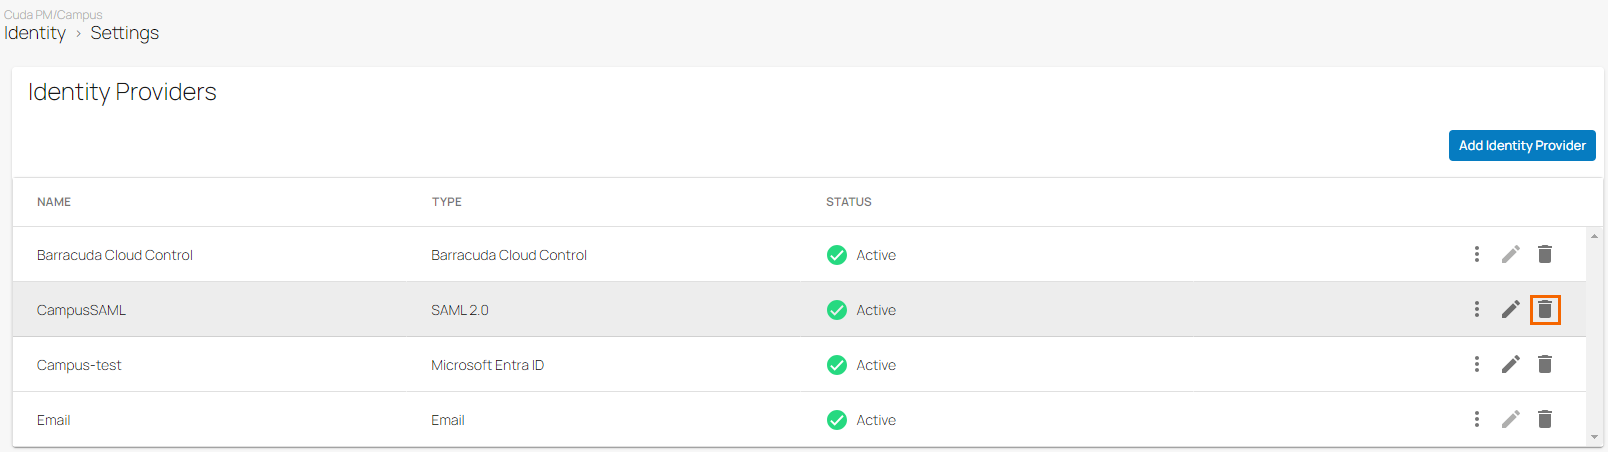
In the Identity Providers section, you can see that SAML 2.0 is displayed.
To remove SAML 2.0, click on the trash can icon.
The Remove Identity Provider page opens.
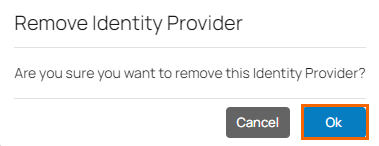
Click OK to confirm.
(Optional) Test SAML 2.0
If you must test SAML 2.0 quickly, proceed with the following steps:
On the Settings page in the Identity Providers section, click the icon of three vertical dots to test the identity provider.
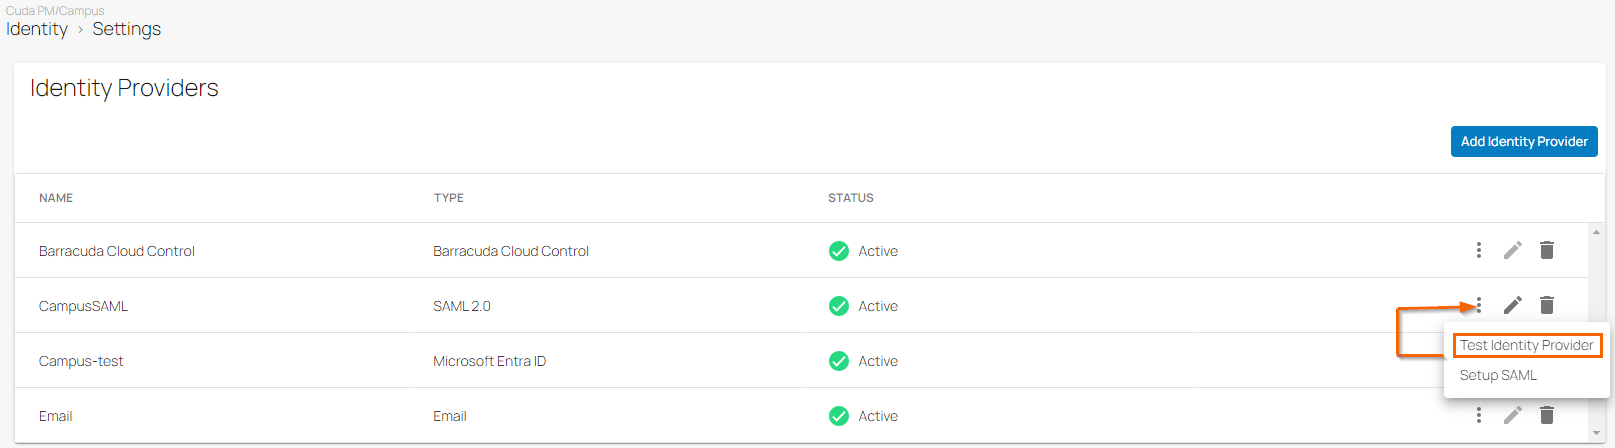
Click Test Identity Provider.
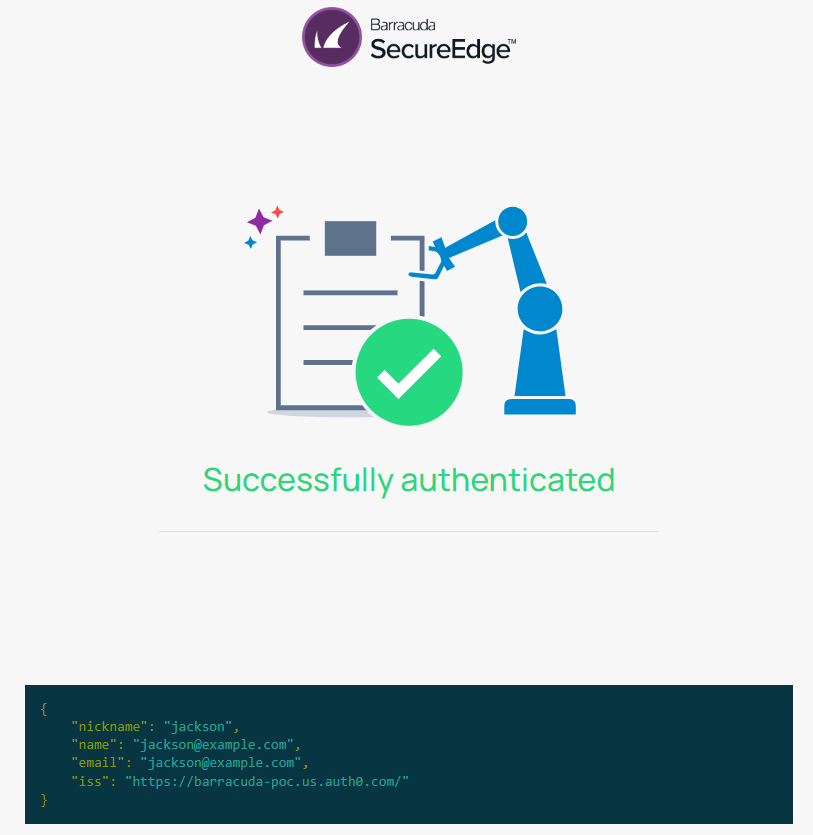
To authenticate your identity provider, follow the authentication instructions on screen.
Enter your credentials to authenticate with your identity provider.
After logging into your account, you receive the confirmation message that the authentication was successful. You can also see verification values for fieldnames such as nickname, name, email, email verified, and iss.
(Optional) Set Up SAML
On the Settings page in the Identity Providers section, click the icon of three vertical dots to test the identity provider.
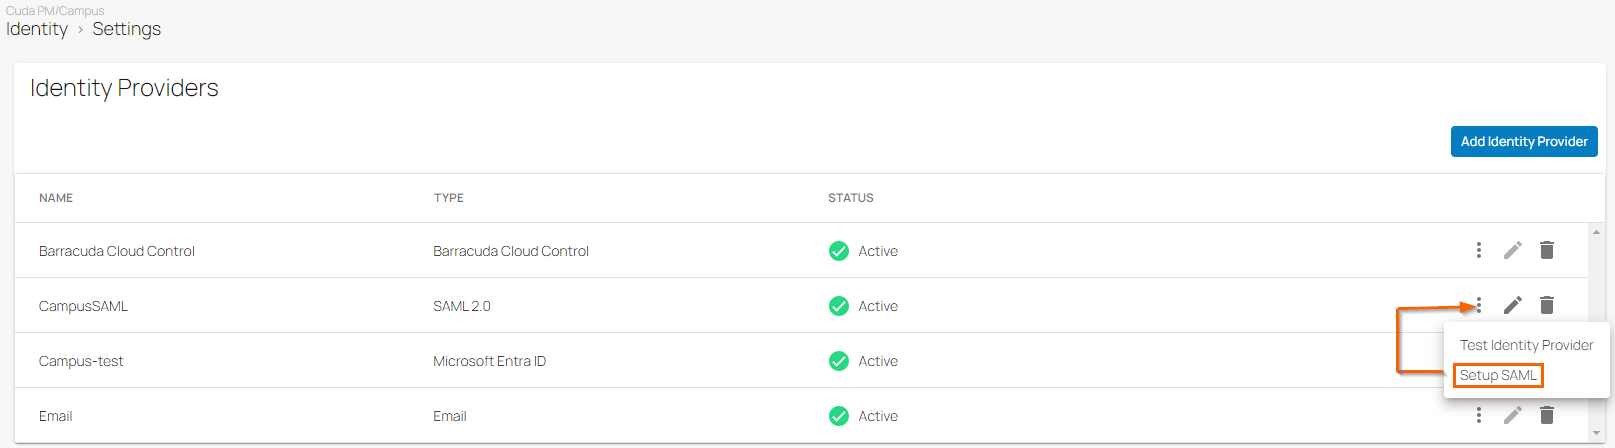
Click Setup SAML.
The Setup SAML page open.
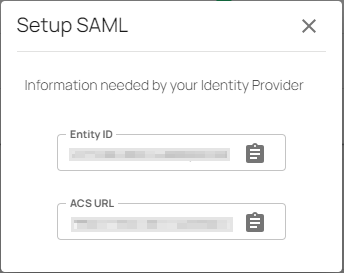
You can use the ACS URL and Entity ID values to update an existing SAML configuration.