The SecureEdge Manager allows administrators to configure DNS Interception on Sites and Private Edge Services. Some of the key features of DNS Interception are:
It intercepts and replaces DNS queries matching the configured domains.
It enables Sites and Private Edge Services to respond with custom DNS entries.
You can the add an IP address from either a public or private range. This IP address must be resolved for specific domains within the connected LANs.
There is no need for the IP address to be unique either on the Site/Private Edge Service or in the selected workspace.
By default, DNS Interception is disabled for existing or new Sites/ Private Edge Services.
There is no limit to the number of domain/IP mappings.
You can add, edit, and delete domain/IP mappings. In addition, you can remove all of them to turn off DNS Interception.
Currently, the DNS Interception configuration is not supported on Azure vWAN or on Barracuda hosted Edge Services.
Configure DNS Interception on the Private Edge Service
Go to https://se.barracudanetworks.com and log in with your existing Barracuda Cloud Control account.
In the left menu, click the Tenants/Workspaces icon and select the workspace containing your Private Edge Service.
Go to Infrastructure > Edge Services.
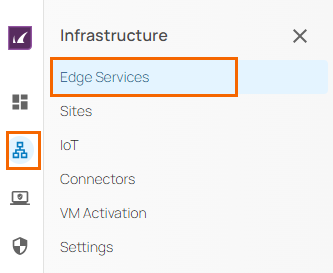
The Edge Services page opens. Select the Private Edge Service you wish to configure DNS Interception for.
Click on the arrow icon next to the Private Edge Service you are interested in.

The selected <Name of Your Private Edge Service > page opens.
In the Edge Service menu, go to Settings > Advanced Settings.

Under the Advanced Setting in the DNS Interception section, click +.
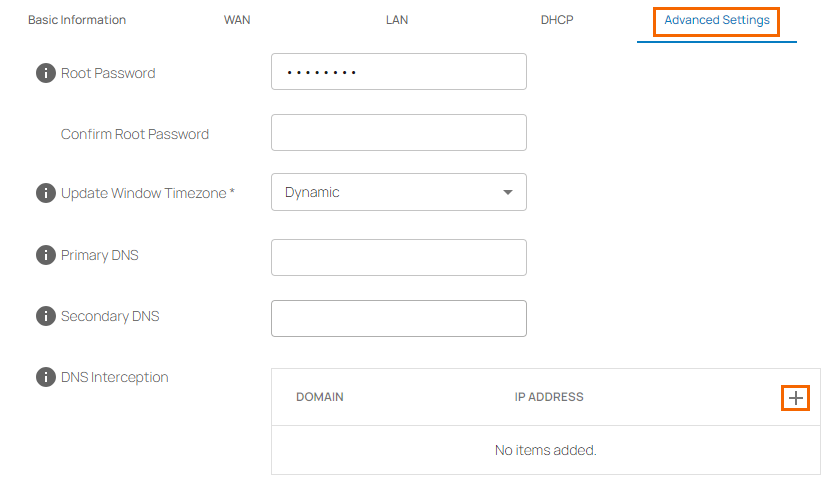
The Add Domain/IP mapping window opens. Specify the values for the following:
Domain – Enter the domain name.
IP Address – Enter the IP address.

Click Ok.
To add more domain entries, click +. You can also edit or remove the domain entry by clicking the pencil or trash icon, respectively.
You can verify all your domain entries for the Private Edge Service.
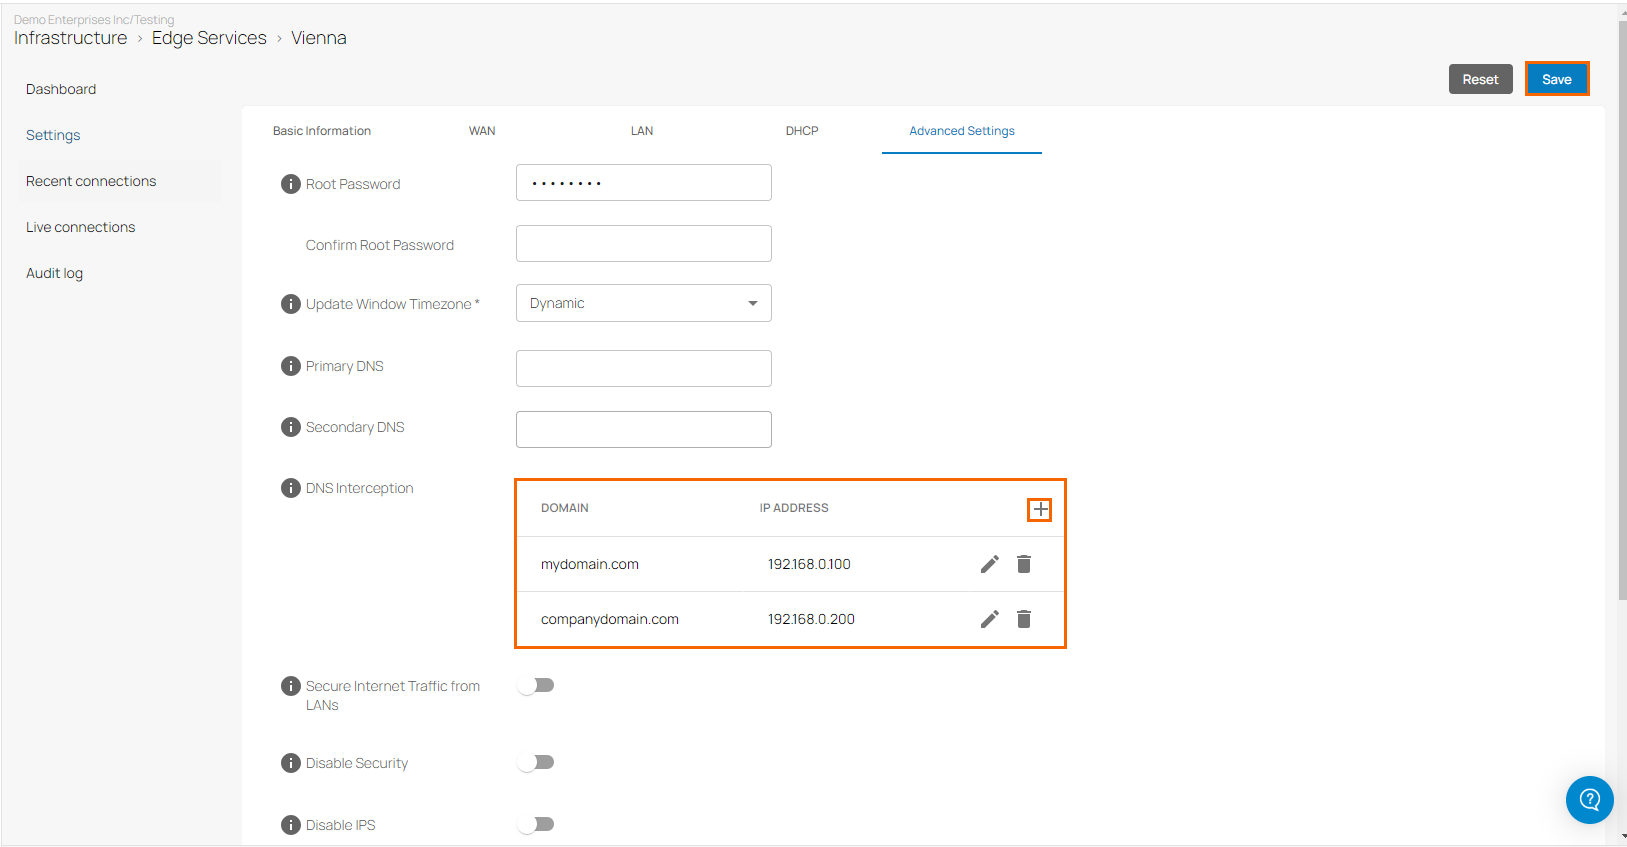
Click Save.
Configure DNS Interception on the Site
Go to https://se.barracudanetworks.com and log in with your existing Barracuda Cloud Control account.
Select the workspace containing your site.
Go to Infrastructure > Sites.
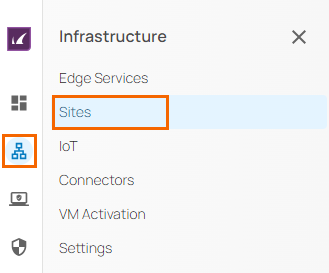
The Sites page opens.
Select the Site you wish to configure DNS Interception for. Click on the arrow icon next to the Site you want to configure.

The selected <Name of Your Site> page opens.
In the Sites menu, go to Settings > Advanced Settings.

Under Advanced Settings in the DNS Interception section, click +.
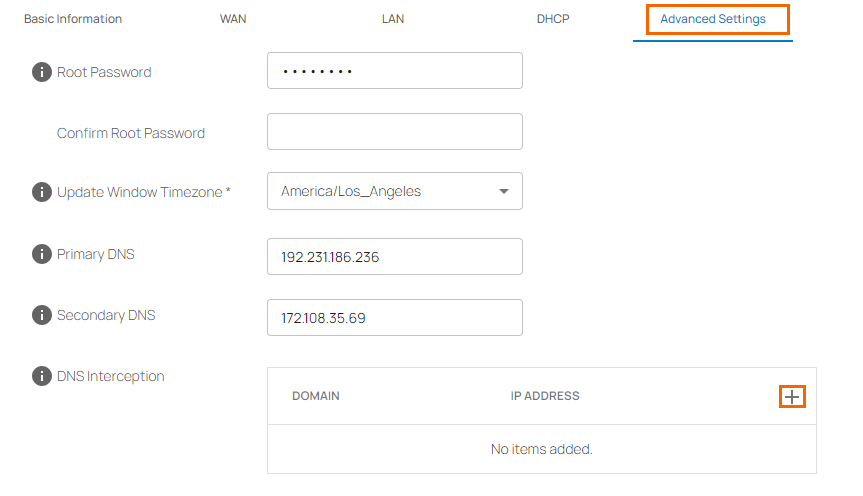
The Add Domain/IP mapping window opens. Specify the values for the following:
Domain – Enter the domain name.
IP Address – Enter the IP address.

Click OK.
To add more domain entries, click +. You can also edit or remove the domain entry by clicking the pencil or trash icon, respectively.
You can verify all your domain entries for the connected Site.
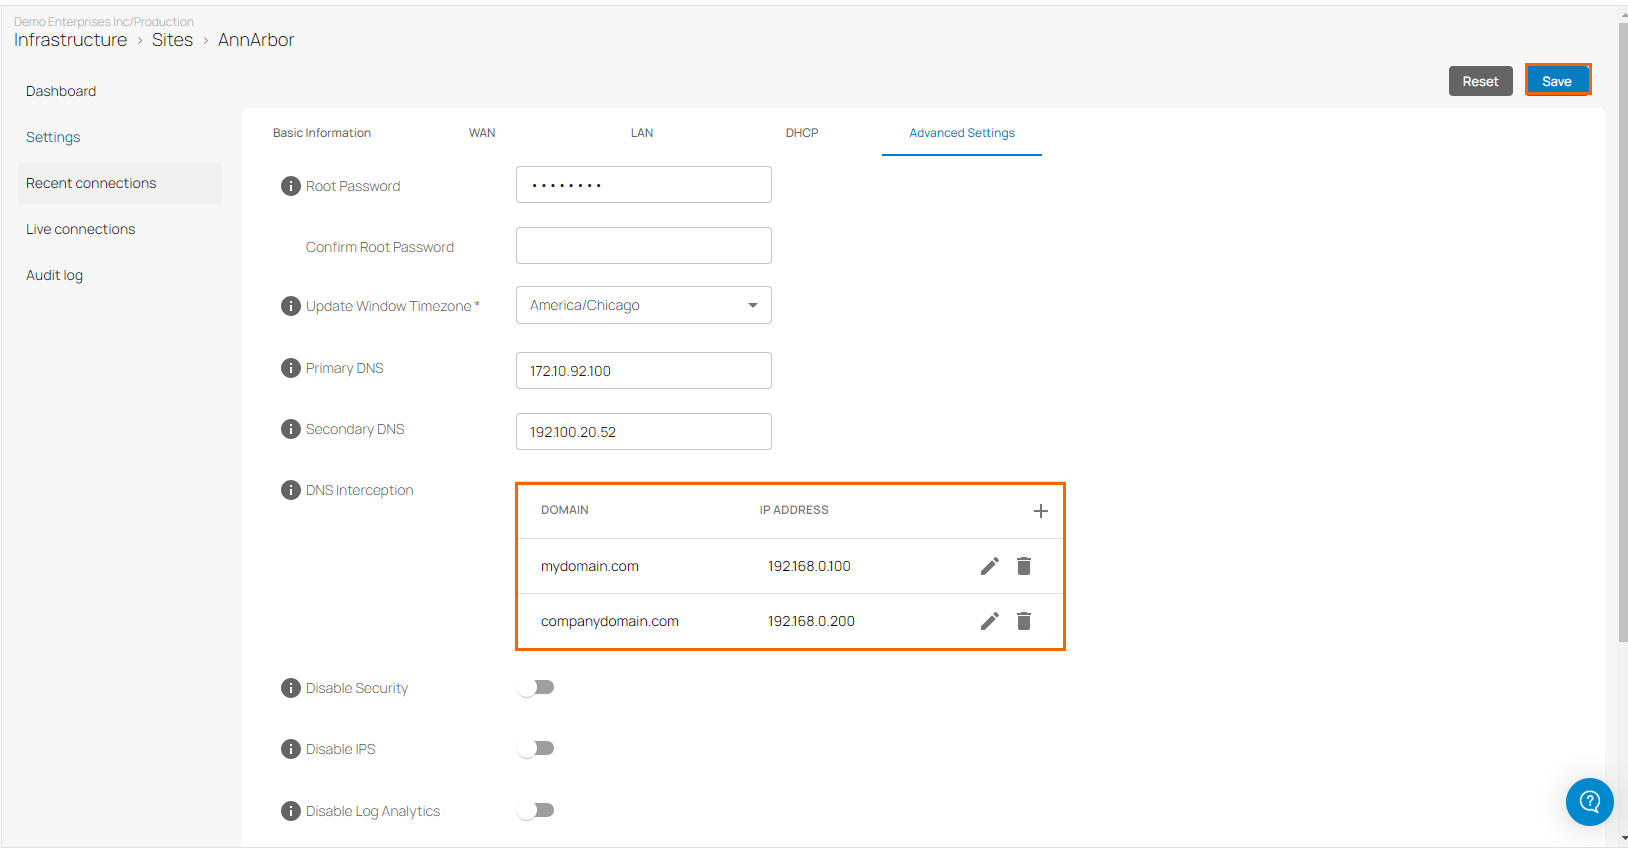
Click Save.
