

You can now add a multiple locations in SecureEdge and define location-based policies. A location is a physical Site that is connected to the Barracuda SecureEdge network. It can be a branch office, a data center, or a cloud service. Locations added in SecureEdge can be used within Web Filter policies.
The key features of Location settings are:
Locations are either static or dynamic:
A Static Location consists of one or more IP addresses or IP addresses in CIDR notation, or a mix of both.
A Dynamic Location is a single IP. The Dynamic Location require you to install the Helper application on your device.
You can modify a location from static to dynamic, and vice-versa. The value will be cleared when the type is changed.
When creating a static location, only valid public IP addresses or networks are allowed. Note: You cannot create a static location using a private IP address.
You can configure DNS over HTTPS (DoH).
Requirements and Limitations
You cannot create a location with the same name used in the workspace.
You must define a globally unique IP address across SecureEdge. This IP should not overlap between users.
You cannot create a static location IP used in the same or a different workspace, or in another account.
Add a Static Location
Go to https://se.barracudanetworks.com and log in with your existing Barracuda Cloud Control account.
The chosen Tenant/Workspace is displayed in the top menu bar.
From the drop-down menu, select the workspace your location should be assigned to.
In the left menu, click the Infrastructure icon and select Locations.
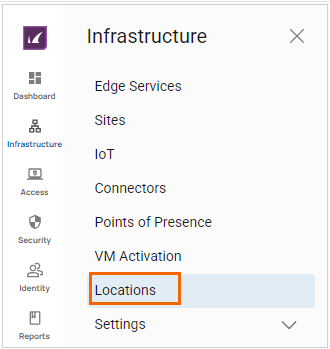
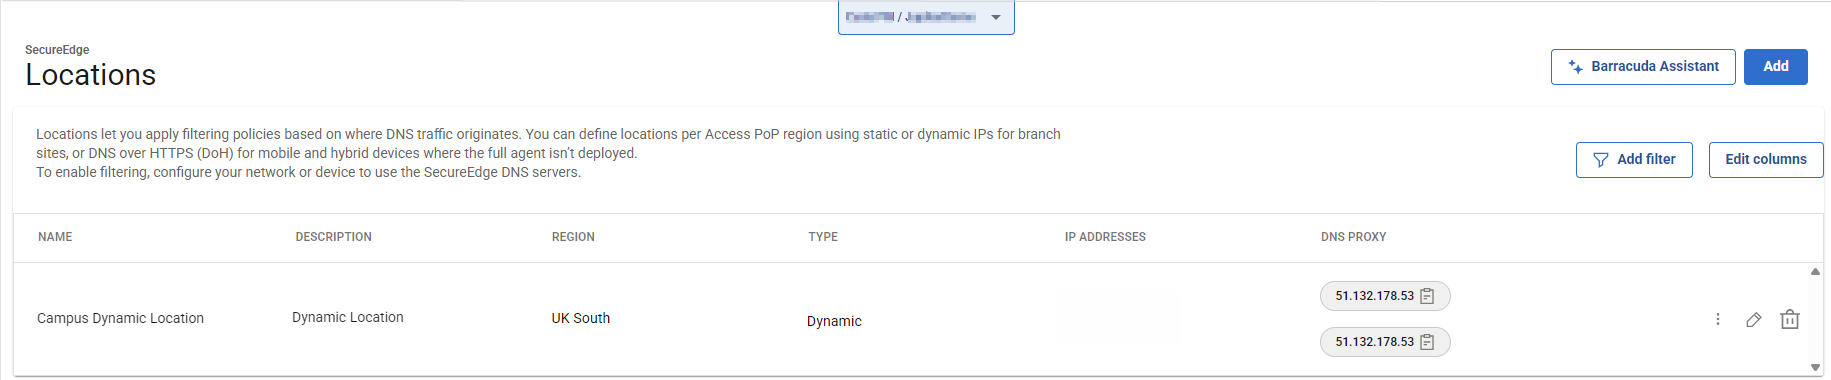
The Locations page opens. Click Add.

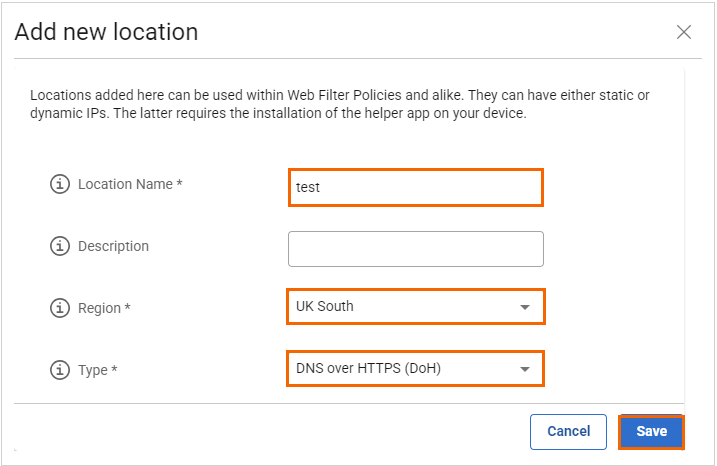
The Add new location window opens. Specify values for the following:
Location Name – Enter the unique name for the location.
Description – Enter a brief description.
Region – Select a region from the drop-down menu. You can choose between Australia East, East US, UK South, or West Europe.
Type – From the drop-down menu, select an IP type. You can choose between Static, Dynamic, or DNS over HTTPS (DoH). For example, in this case, select Static and specify a value for the following:
IP Address – Enter the IP address and click +. To remove the specific IP address or multiple IP addresses, click X.
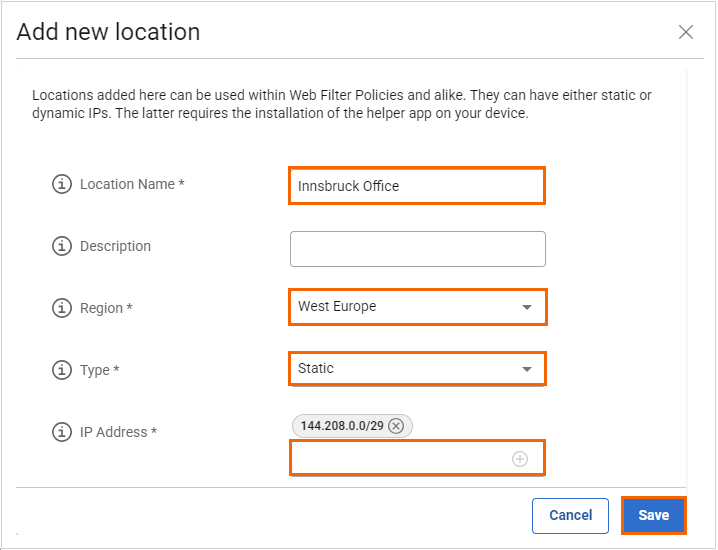
Click Save.
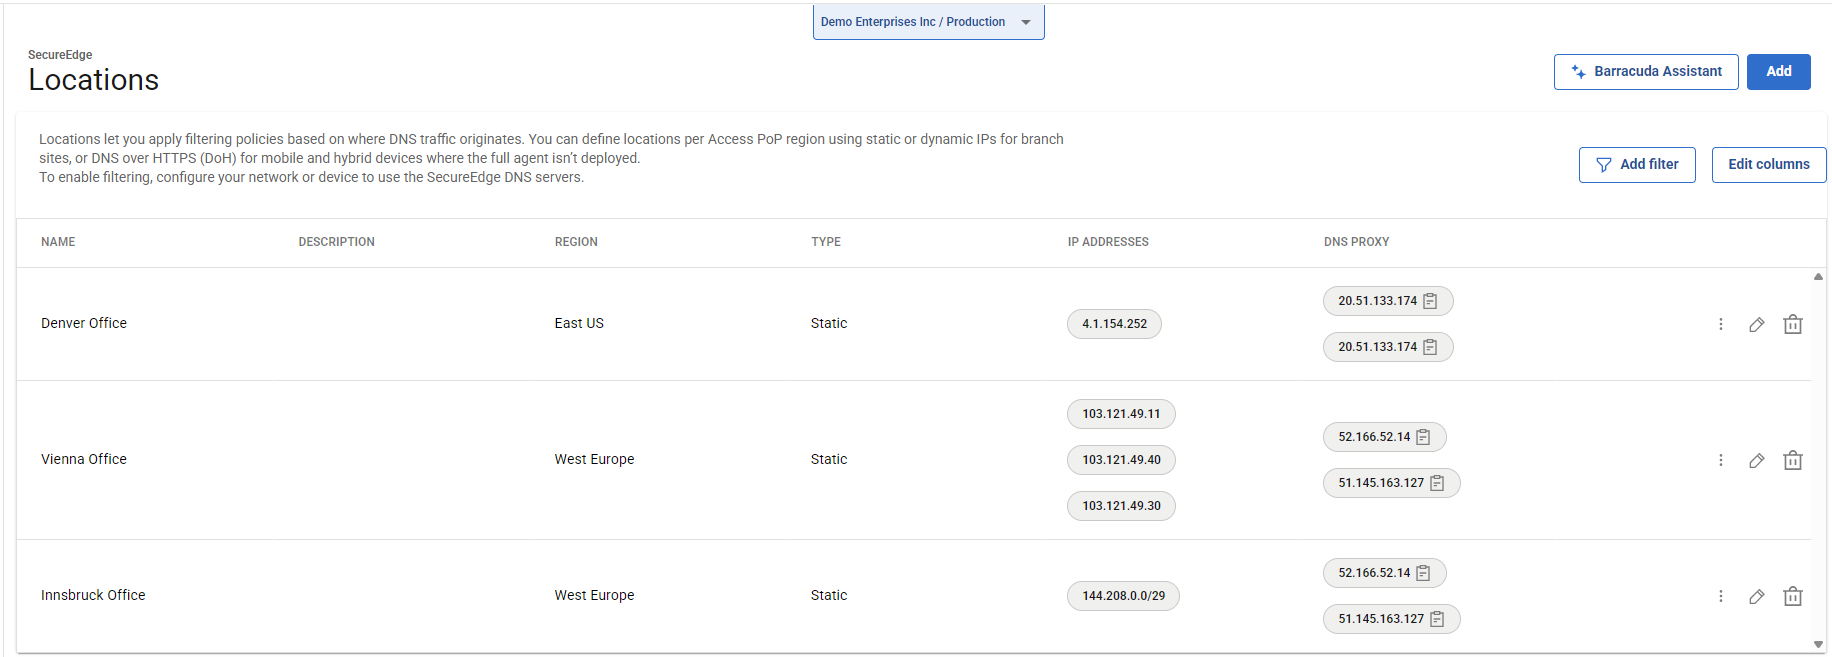
After the configuration is completed, you can see that the new static location has been added on the Infrastructure > Locations page. In addition, you can verify that changes to the Locations settings with IP addresses/networks in the Audit Log have been made and that notifications have been sent.
You can now configure Web Filter policies for this location.
Edit an Existing Static Location
To edit an existing location:
Select the workspace you want to edit the location for.
Go to Infrastructure > Locations.
The Locations page opens. On the Locations page, select the location you want to edit.
To edit your location, click on the pencil icon.
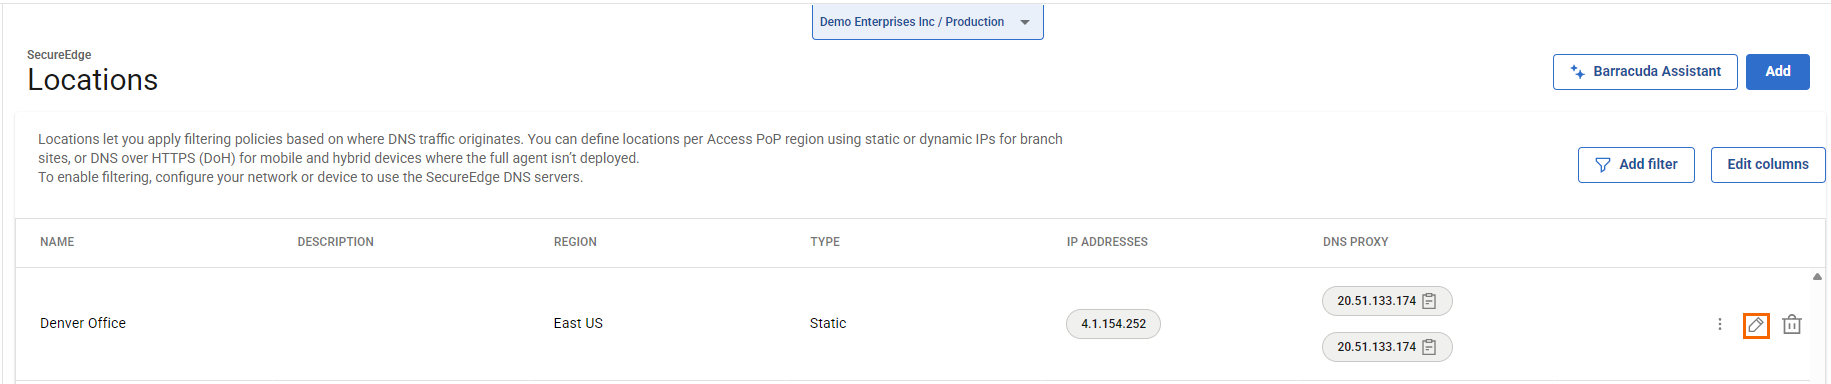
The Edit location page opens. Edit the value you are interested in.
Click Save.
Remove an Existing Static Location
To remove an existing location associated with the selected workspace:
Select the workspace where you want to remove the location.
Go to Infrastructure > Locations.
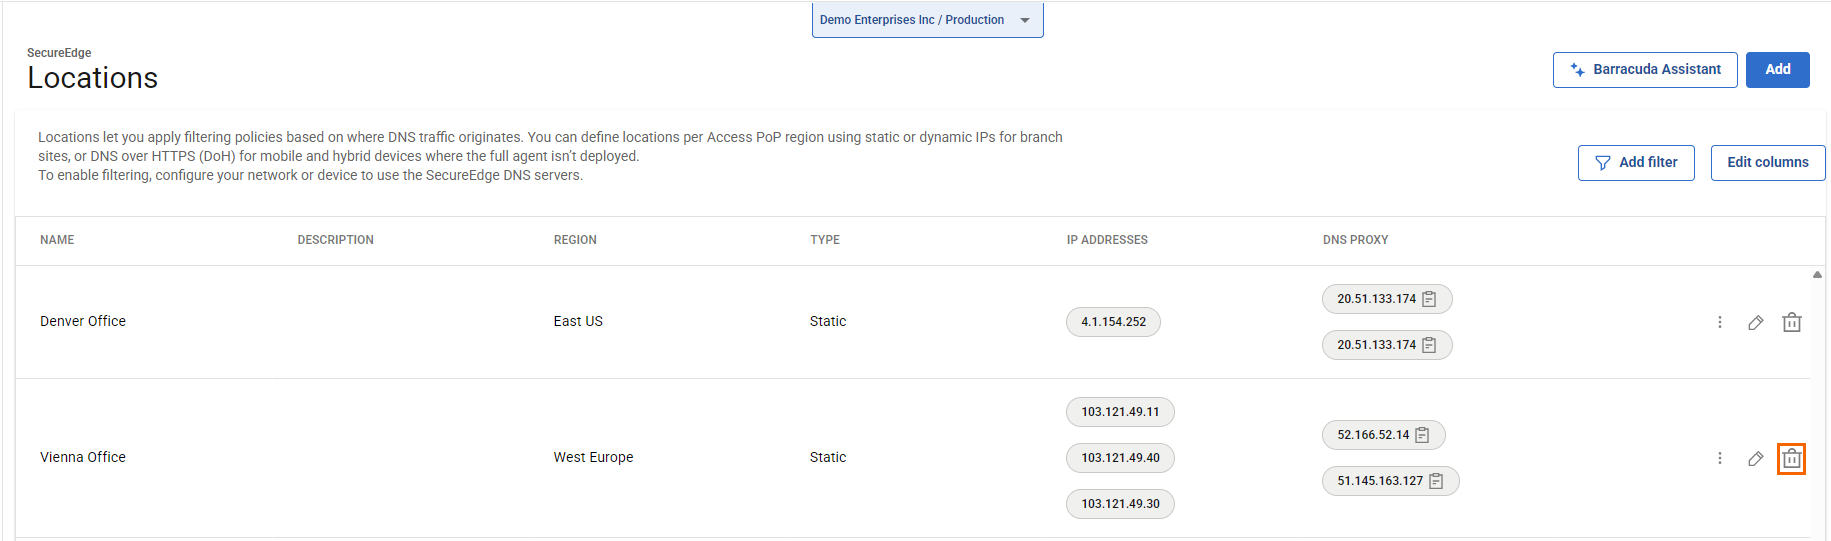
The Locations page opens. On the Locations page, select the location you want to remove.
To remove an existing location, click on the trash can icon.
The Delete Location <Name of Location> page opens.
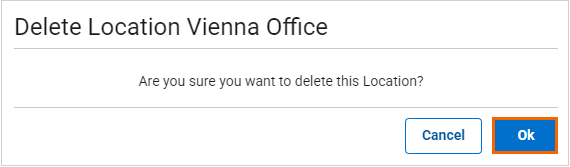
Click Ok to confirm.
Add a Dynamic Location
Go to https://se.barracudanetworks.com and log in with your existing Barracuda Cloud Control account.
Select the workspace your location should be assigned to.
In the left menu, click the Infrastructure icon and select Locations.
The Locations page opens. Click Add.
The Add new location window opens. Specify values for the following:
Location Name – Enter the unique name for the location.
Description – Enter a brief description.
Region – Select a region from the drop-down menu. You can choose between Australia East, East US, UK South, or West Europe.
IP Type – From the drop-down menu, select an IP type. You can choose between Static and Dynamic. For example, in this case, select Dynamic.

Click Save.
The Location Linking Token page opens. You can see the value for following parameters:
License token – You must copy the displayed license token. Note: You must download and install the Helper application on your Windows machine and provide this token value.
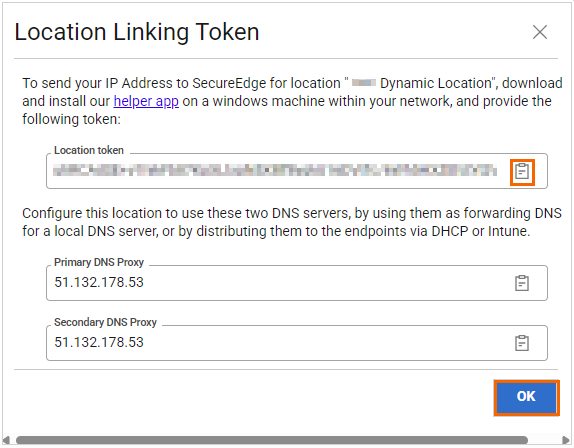
Click Ok.
After configuration is complete, you can see that the new dynamic location has been added on the Infrastructure > Locations page.
(Optional) To Generate a Pairing/Linking Code and Install the Helper Application
If you must generate a pairing/linking code and install the Helper application quickly, proceed with the following steps:
On the Locations page, click the icon of three vertical dots next to your selected dynamic location.
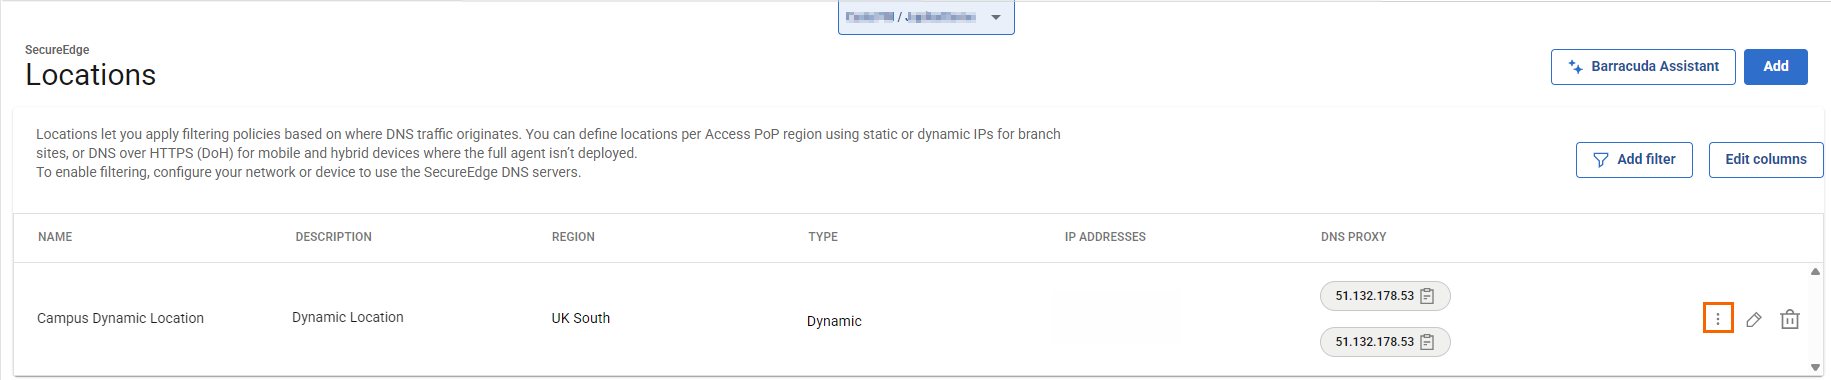
You have two options:
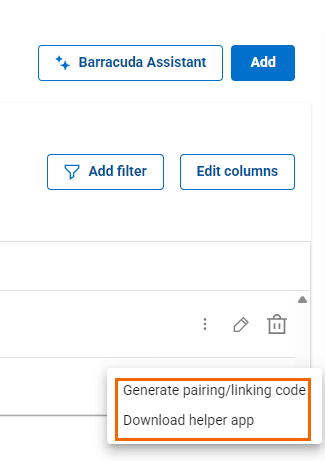
To generate a pairing/linking code, click Generate pairing/linking code.
The Location Linking Token page opens. You must copy the displayed license token.

To download the Helper app, click Download helper app.
Edit and Remove an Existing Dynamic Location
Select the workspace you want to edit the location for.
Go to Infrastructure > Locations. The Locations page opens.
On the Locations page, all existing locations are displayed.
To edit a location:
Select the dynamic location you want to edit and click on the pencil icon.
The Edit location page opens. Edit the value you are interested in and click Save.
To remove a dynamic location associated with the selected workspace:
Click on the trash can icon next to your selected dynamic location.
The Delete Location <Name of Location> window opens.
Click Ok to confirm.
Add a DNS over HTTPS (DoH)
Select the workspace your location should be assigned to.
Go to Infrastructure > Locations.
The Locations page opens. Click Add.
The Add new location window opens. Specify values for the following:
Location Name – Enter the unique name for the location.
Description – Enter a brief description.
Region – Select a region from the drop-down menu. You can choose between Australia East, East US, UK South, or West Europe.
IP Type – From the drop-down menu, select an IP type. You can choose between Static and Dynamic. For example, in this case, select Dynamic.
Click Save.
After configuration is complete, you can see that the DoH location has been added on the Infrastructure > Locations page.

(Optional) Edit Visible Columns
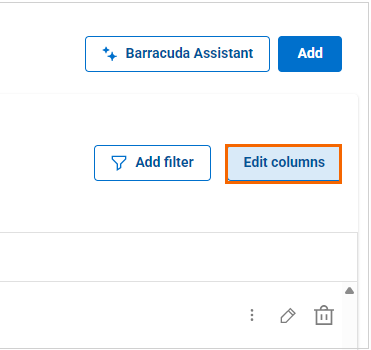
To get more detailed information on a location, click Edit columns.
The Edit Visible Columns page opens. Select the field names you wish to display the columns for.
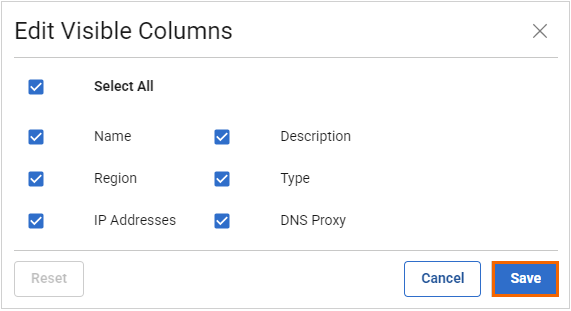
Click Save.
Filtering Features
You can add filters to view specific content on the page.
Click Add Filter in the top-right corner of a page, and select the criteria you wish to search for.
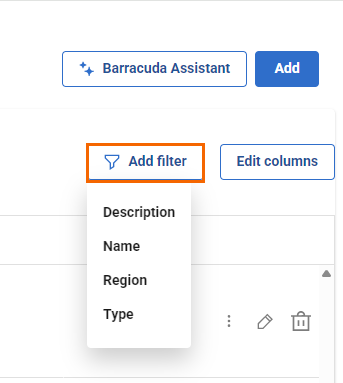
To reset the filter, click Clear Filters.
Further information
You can use locations added on SecureEdge in Web Filter Policies.