

The Barracuda SecureEdge Manger allows you to configure unattended enrollment on a Windows device using Microsoft Intune. The SecureEdge Access Agent can be enrolled if a proper certificate is installed on the endpoint device.
Requirements
Access to Microsoft Intune
A Microsoft public key infrastructure (PKI), such as:
Microsoft Cloud PKI, a built-in, cloud-based service for Microsoft Intune. (This will be used in the following example.)
Active Directory Domain with Active Directory Certificate Services (AD CS).
A third-party PKI with Simple Certificate Enrollment Protocol (SCEP) support.
A Windows device running Windows 10/11 can be used for the unattended enrollment feature.
Preparing Microsoft Intune
You can re-use any existing PKI infrastructure. If no PKI infrastructure is present, a new one must be created to allow you to deploy certificates to devices from end users that can then be used for unattended enrollment. For more information on how to configure a root and issuing CA for Microsoft Cloud PKI, see https://learn.microsoft.com/en-us/intune/intune-service/protect/microsoft-cloud-pki-configure-ca
Step 1. Create a New PKI Infrastructure Using Microsoft Cloud PKI
Open the Microsoft Intune.
Go to Tenant admin > Cloud PKI.
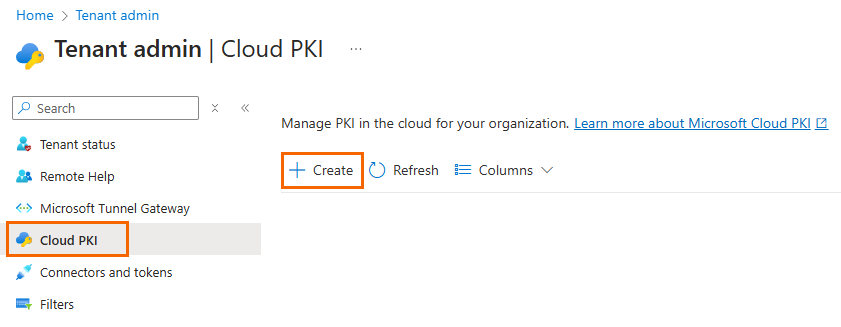
To create a new root CA, click + Create.
According to your requirements, you can create a new root CA.
For this example, specify values for the following:
Name – Enter
ACME-CACA type – Select Root CA.
Validity period – Select 5 years.
Extended Key Usages – Select Client auth. Note: You must select at least one Extended Key Usages.
Subject attributes – Configure a Common name (CN). Note: You must select at least one Subject attributes.
According to your requirements, you can create a new Intermediate CA.
For this example, specify values for the following:
Name – Enter
ACME-ISSUINGCA type – Select Issuing CA.
Root CA source – Select Intune > ACME-CA Note: Select the root CA you have created in the previous step.
Validity period – Select 4 years
Extended Key Usages – Select Client auth. Note: You must select at least one Extended Key Usages.
Subject attributes – Configure a Common name (CN). Note: You must select at least one Subject attributes.
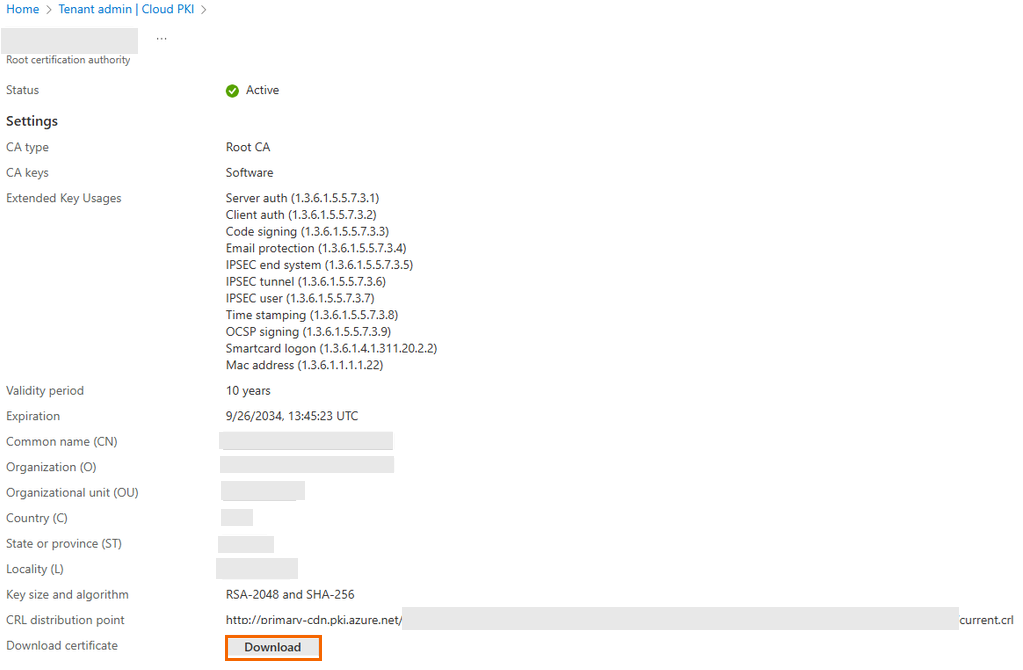
You can now see a Root and an Issuing certificate on the Overview page of Cloud PKI. Note: Click Refresh to see your new CA.

To download the Root certificate, select ACME-CA and click Download.
To download the Issuing certificate, select ACME-ISSUING and click Download.
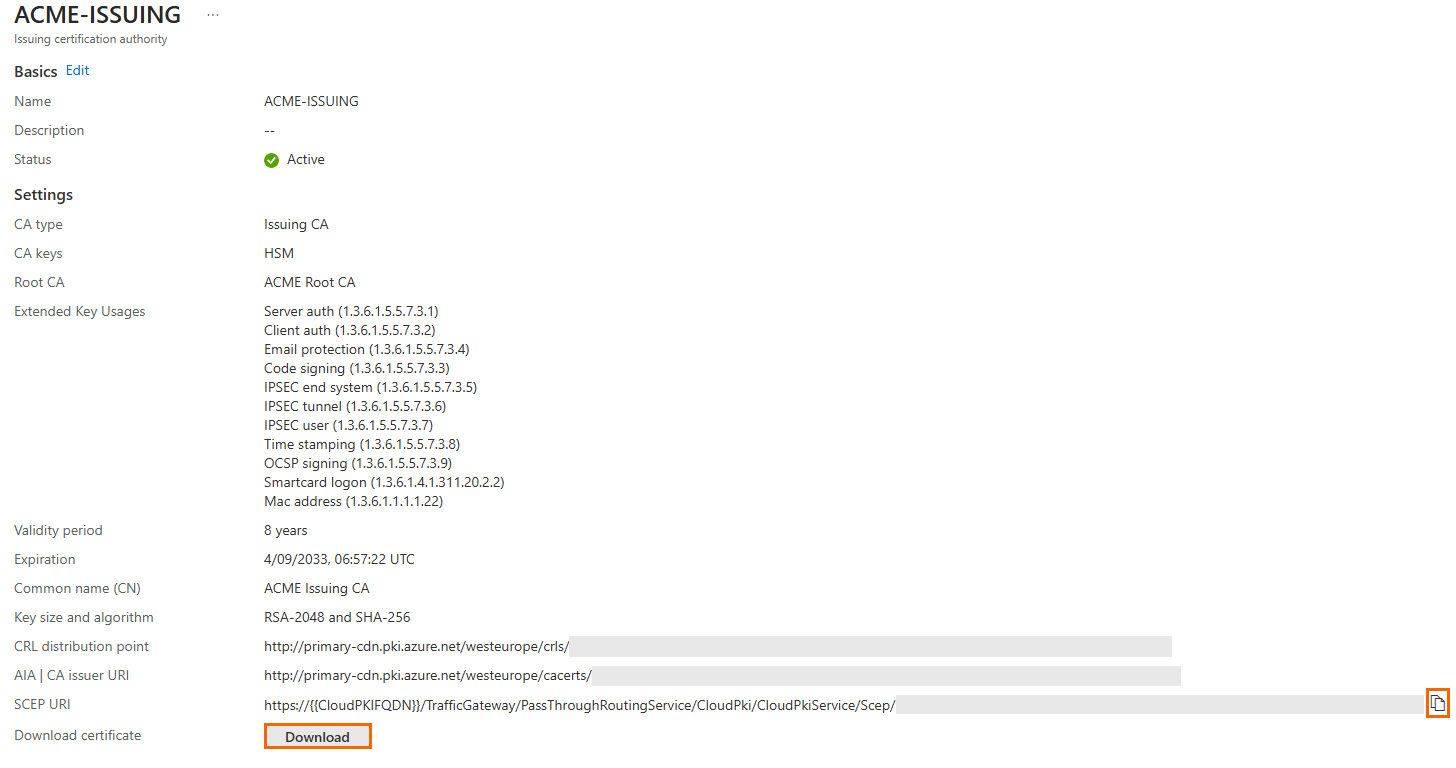
In addition, you must copy the unique SCEP URI. Note: This value will be used later when creating certificate profiles.
Step 2. Create a New Trusted Certificate Policy for Windows Devices
On Microsoft Intune, go to Devices > Windows > Configuration.
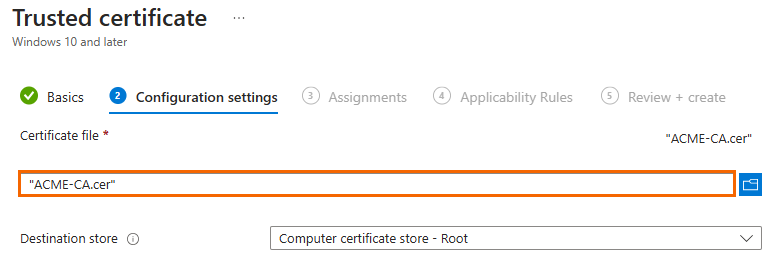
Create a new Trusted certificate policy, and specify values for the following:
Platform – Select Windows 10 and later.
Profile type – Select Templates.
Template Name – Select Trusted certificate
Upload the Root certificate that you downloaded when setting up Microsoft Cloud PKI.
Make sure to include all devices / user groups to be used for unattended enrollment.
Step 3. Create a New SCEP Certificate Policy for Windows Devices
On Microsoft Intune, go to Devices > Windows > Configuration
Create a new SCEP certificate policy, and specify values for the following:
Platform – Select Windows 10 and later.
Profile type – Select Templates.
Template Name – Select SCEP certificate.
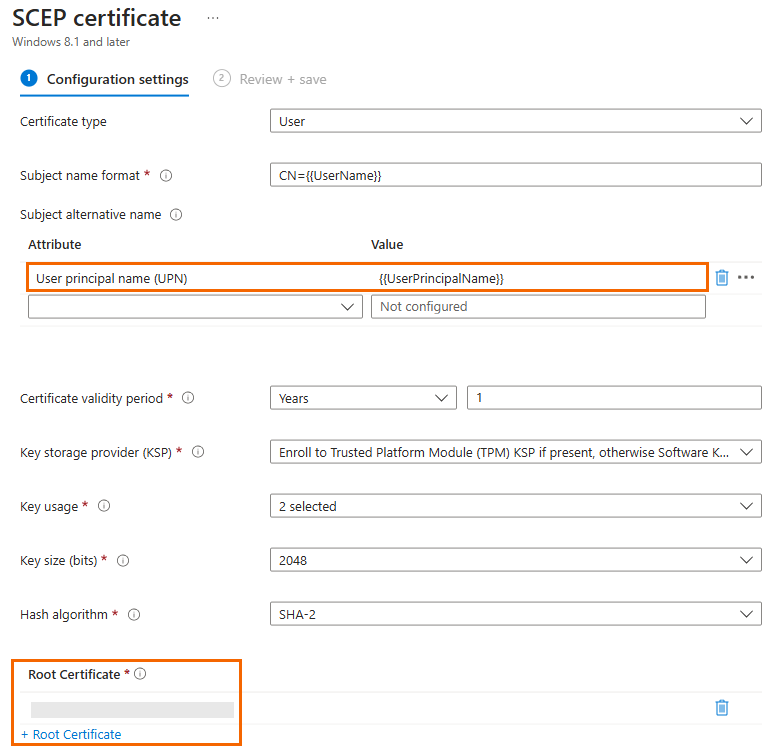
Create a new SCEP certificate policy, and specify values for the following parameters:
Certificate type – Select User
Subject name format – As needed, e.g., CN={{UserName}}
Subject alternative name – Make sure to include the attribute User principal name (UPN) with the value {{UserPrincipalName}}
Root Certificate – Select the Trusted certificate policy that you created in the previous step.
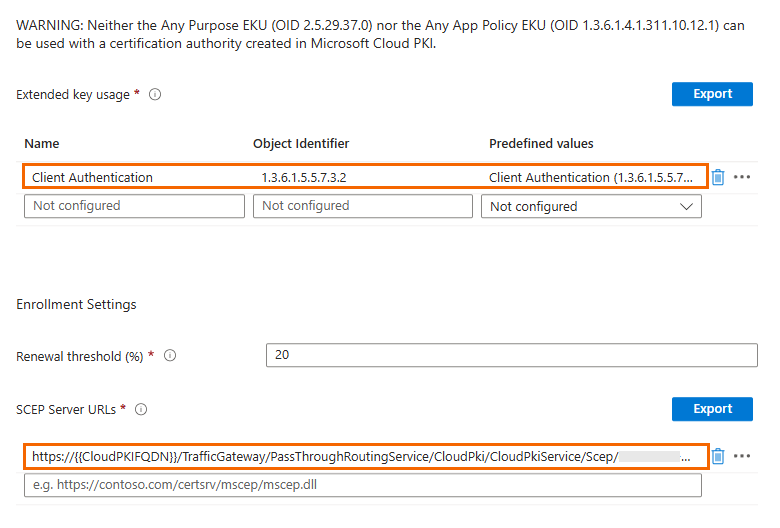
Extended key usage – Make sure Client Authentication (OID 1.3.6.1.5.5.7.3.2) is included.
SCEP Server URL – Paste the URL you copied in Step 1 from Microsoft Cloud PKI (Issuing certificate).
Make sure to include all devices / user groups to be used for unattended enrollment.
Note: On Windows, certmgr.msc can be used to check if the certificate has been deployed properly.
SecureEdge Configuration
Go to https://se.barracudanetworks.com and log in with your existing Barracuda Cloud Control account.
The chosen Tenant/Workspace is displayed in the top menu bar.

Click the expandable drop-down menu and select the workspace you want to enroll in.
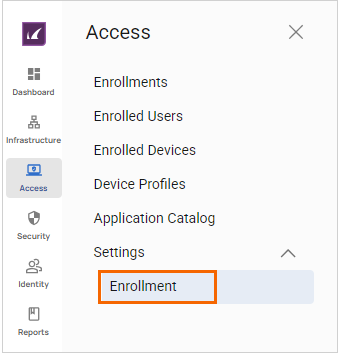
In the left menu, click Access and select Settings.
Expand the Settings menu on the left and select Enrollment.
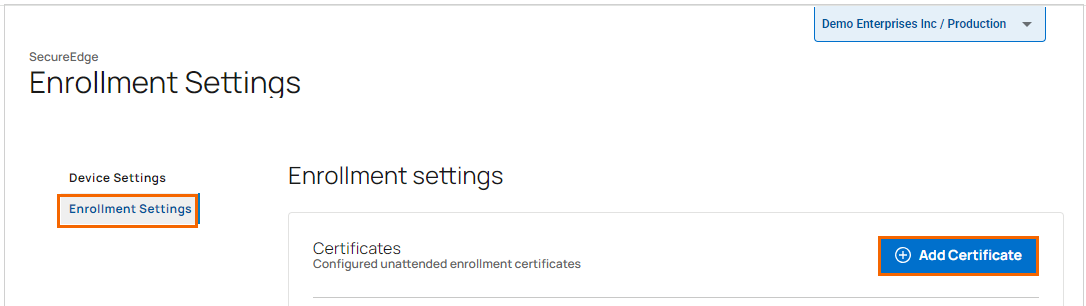
The Enrollment Settings page opens. Click Enrollment Settings.
To add certificates for unattended enrollment, follow these steps:
In the Enrollment settings section, under Certificates, click Add Certificate. Note that you must add both the Root certificate and the Issuing certificate.
Add your certificates. Repeat to add more certificates.
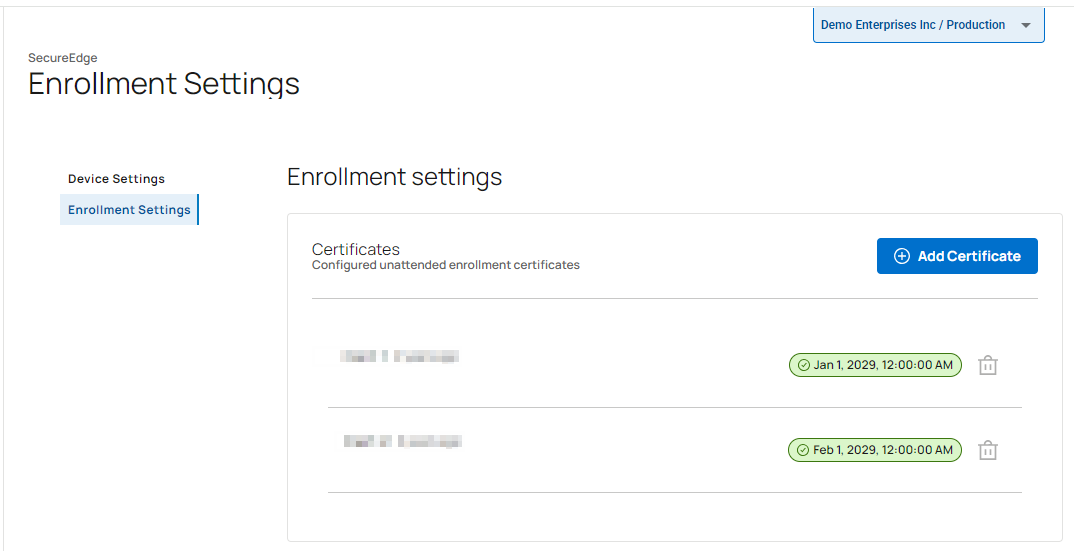
Verify that your certificates have been added to the Certificate table.
To add a domain for unattended enrollment of devices, do the following:
In the Enrollment settings section, under Domain, specify a value for the following:
Domain – Enter a unique domain used for unattended enrollment of devices.

Click Save.
SecureEdge Access Installation
To ensure that the SecureEdge Access Agent can initiate unattended enrollment after installation or during the first app startup, the SecureEdge Access Agent must be provisioned with the Tenant Domain (e.g., acme.se.barracudanetworks.com) as configured within the SecureEdge Manager.
Windows
On Windows, the following MSI installation parameter can be used to pre-configure the Agent installation:
SecureEdgeAgent_2.0.0-xxx_x64.msi TENANT_DOMAIN="acme.se.barracudanetworks.com" Alternatively, the domain name can also be configured on an existing installation via the following registry key:
[HKEY_LOCAL_MACHINE\SOFTWARE\Barracuda\SecureEdge Agent]
TenantDomain="acme.se.barracudanetworks.com"
Additional Information Regarding MSI Installation Configuration
On Windows, you must specify values for the MSI installation parameters as follows:
Name – Enter the name of your application. E.g.,
Barracuda SecureEdge Agent 2.0.0 (x.64)Description – Enter a brief description. E.g.,
Barracuda SecureEdge Agent 2.0.0 (x.64)Publisher – Enter a publisher name. E.g.,
Barracuda Network Inc.Ignore app version – Select No.
Command-line arguments – Enter
/quiet TENANT_DOMAIN ="acme.se.barracudanetworks.com"Category – Select Business.
Show this as a featured app in the Company Portal – Select Yes.
Information URL –
https://www.barracuda.com/products/network-protection/secureedgePrivacy URL –
https:// www.barracuda.com/legal/privacy
Further Information
For more information on how to configure a root and and issuing CA for Microsoft Cloud PKI, see https://learn.microsoft.com/en-us/intune/intune-service/protect/microsoft-cloud-pki-configure-ca
For more information on how to create and assign SCEP certificate profiles in Microsoft Intune, see https://learn.microsoft.com/en-us/intune/intune-service/protect/certificates-profile-scep
For more information on how to install the Certificate Connector for Microsoft Intune, see https://learn.microsoft.com/en-us/intune/intune-service/protect/certificate-connector-install