

This article provides migration instructions for WSG forward proxy setups in SecureEdge. The forward proxy setup supports High Availability
Forward Proxy Deployment
The figure below shows a forward proxy deployment.
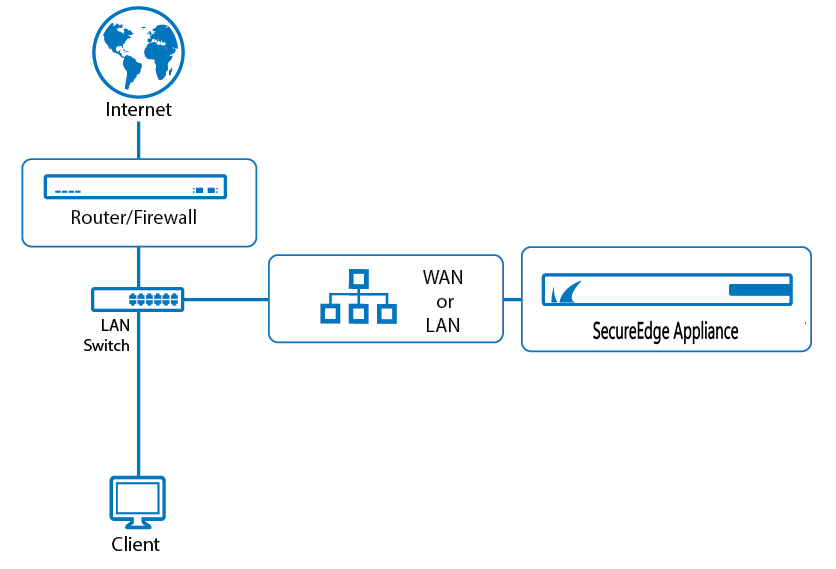
Note that in the following example the proxy address will be set to 10.1.0.3 and the border firewall / internet gateway address to 10.1.0.1.
Initial Setup
Add the appliance to your SecureEdge Manager account as a Site device with the following properties:
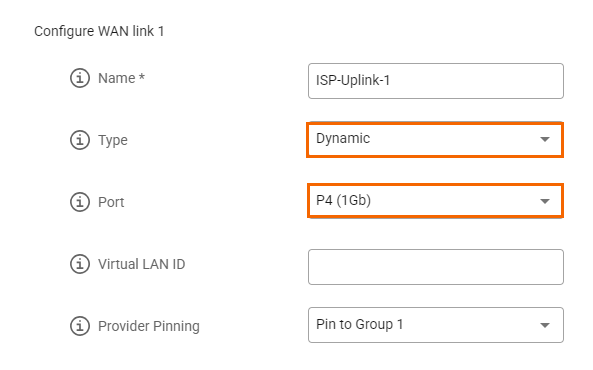
Configure a Dynamic WAN on port P4 (only needed for initial setup). For basic Site device configuration information, see How to Create a T/VT Site Configuration in Barracuda SecureEdge.
Configure a LAN on port P3 to match the proxy IP configuration (
10.1.0.3/24).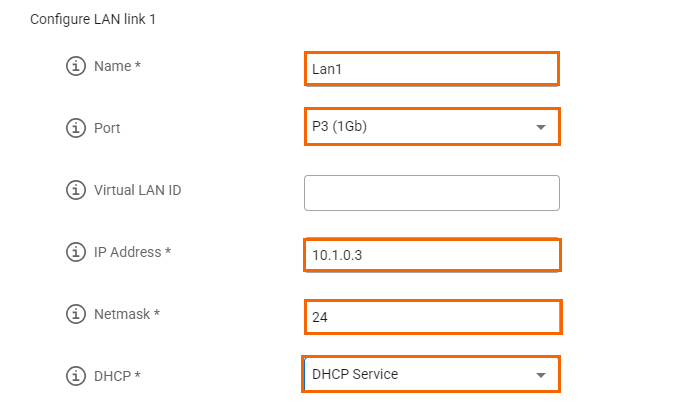
Under the Site menu of your Site, go to Settings > LAN and click Add Static Route.
Add these two routes:
1.0.0.0/1and128.0.0.0/1via your internet gateway, for example,10.1.0.1. Repeat the step to add the second static route.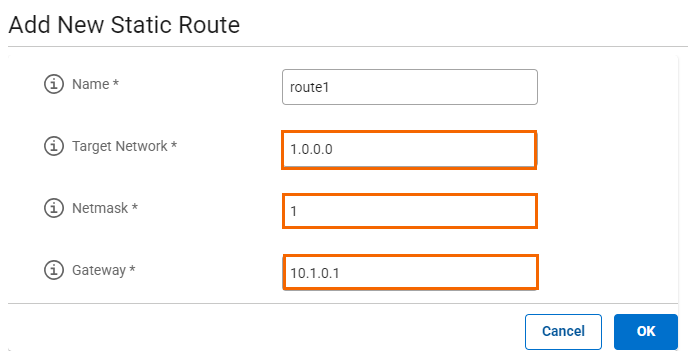
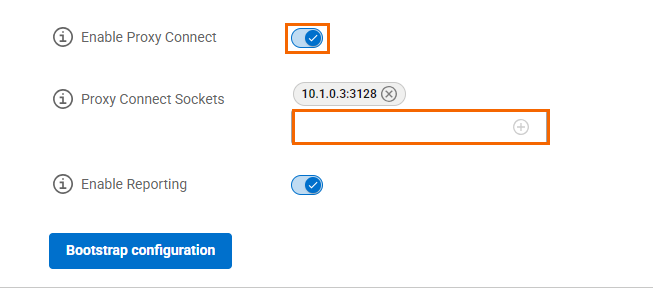
Under the Site menu of your Site, go to Settings > Advanced settings and toggle the following two options:
Enable Proxy Connect – Click to enable.
Proxy Connect Sockets (Optional) – Enter the IP address. For example, in this case,
10.1.0.3:3128This creates a proxy socket listening on the LAN IP at port 3128 for HTTP+S traffic.
Enable Reporting – Click to enable. Enabled by default.
The box requires temporary internet access via P4 to download its configuration. By default, port P4 uses DHCP. Note: Static configuration can be set either through the bootstrap config or the web UI running on the device. For more information on Barracuda SecureEdge devices, see Hardware Deployment.