

This article provides the steps to protect Google email with Impersonation Protection.
All four steps of this process must be completed to protect Google email.
Step 1 – Sign In and Grant Barracuda Access to Google Workspace
Sign in to Impersonation Protection to get started. If you do not already have an account, you can create one here.
Select Google when asked to connect to an email provider.
Sign in to your Google Workspace account as a Super Admin.
Click Allow when asked to grant access to Barracuda Networks.
After Barracuda Networks verifies your Super Admin account, you will be taken to Step 2.
Step 2 – Set Up Privileges in Google Workspace
Google Workspace must have the correct privileges to use Impersonation Protection. Follow the steps below to configure privileges.
Sign in to the Google Workspace Admin Console. The link provided can take you to the login.
(Note: Super Administrator permissions are required.)Navigate to Security > Access and data control > API controls.
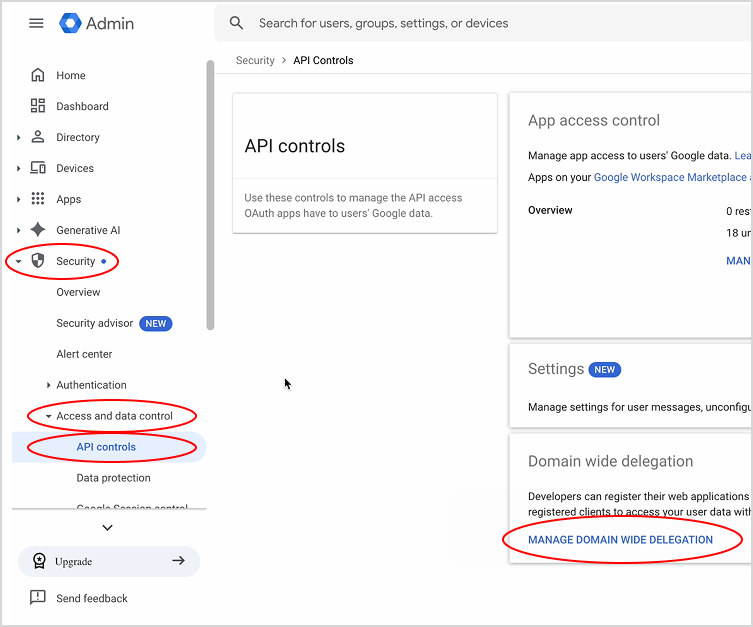
Click MANAGE DOMAIN WIDE DELEGATION.
Select Add new.
Enter the following into the Client ID field:
116785958912330628458
Add the following OAuth scopes:
https://www.googleapis.com/auth/userinfo.profile,https://www.googleapis.com/auth/userinfo.email,https://www.googleapis.com/auth/admin.directory.user,https://www.googleapis.com/auth/gmail.modify,https://www.googleapis.com/auth/admin.reports.audit.readonly,https://www.googleapis.com/auth/apps.licensing,https://www.googleapis.com/auth/admin.directory.domain.readonly,https://www.googleapis.com/auth/admin.directory.customer.readonly,https://www.googleapis.com/auth/admin.directory.group.readonlyClick Authorize.
The Workspace privileges are now configured. Return to Impersonation Protection and click Verify.
Note: It may take time for privileges to propagate; you may need to wait and try again.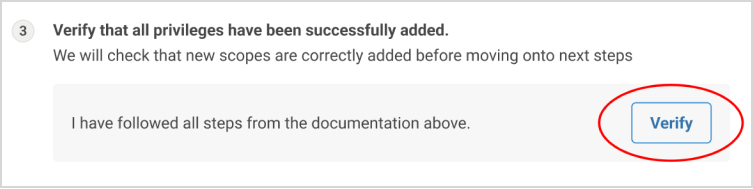
After privileges have been verified, click the Next button at top-right of your screen to go to Step 3.
Step 3 – Set Up Headers in Google Workspace
Impersonation Protection looks for specific headers in Google email. Follow the steps below to configure these headers.
Continue or sign in to the Google Workspace Admin Console.
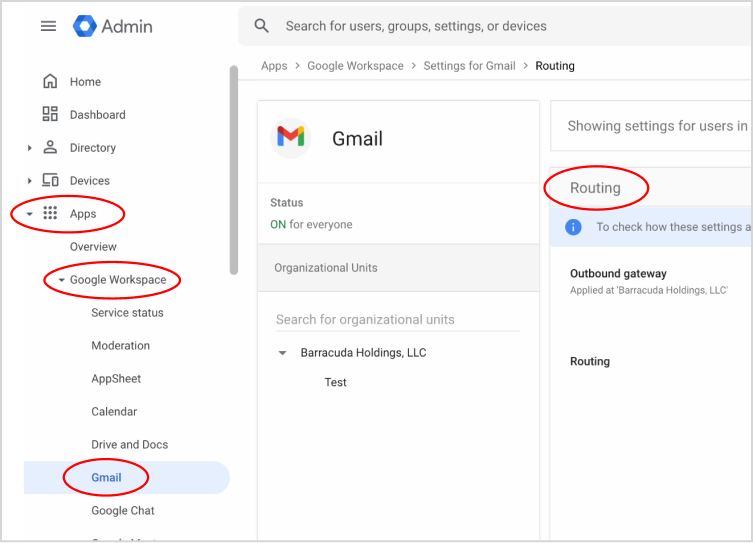
Navigate to Apps > Google Workspace > Gmail > Routing.
Under the Routing table, click the ADD ANOTHER RULE link.
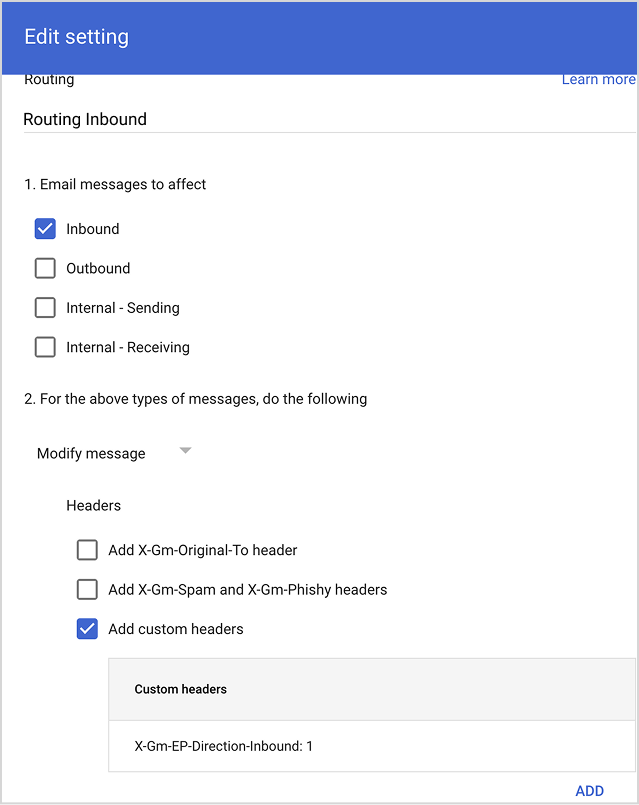
The Add setting dialog opens. This is the first of three rules to be added.
Enter a name for the rule in the top field. Example:
Routing InboundUnder Email messages to affect, select the Inbound option.
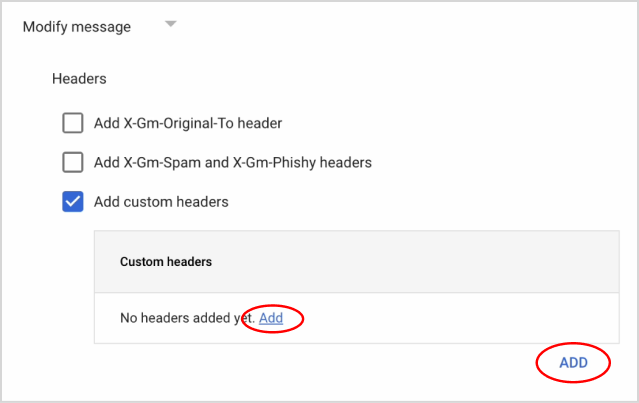
Under Modify message > Headers, select the Add custom headers option.
In the Custom headers box, click Add.
For Header key, enter
Gm-EP-Direction-InboundFor Header value, enter
1.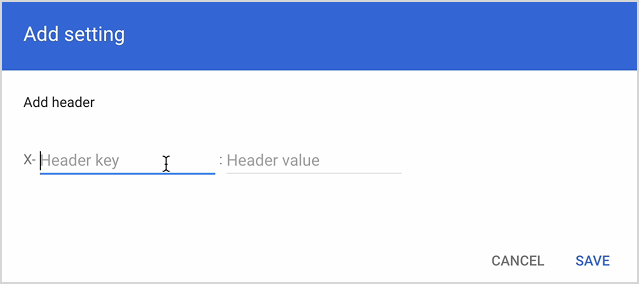
Click SAVE. The rule setting should look like this:
Click ADD at the bottom. The rule should appear in the Routing table.
Add a second rule by doing the following:
Give the rule a name. Example:
Routing OutboundUnder Email messages to affect, select the Outbound option.
Under Modify message > Headers, select the Add custom headers option.
In the Custom headers box, click Add.
For Header key, enter
Gm-EP-Direction-OutboundFor Header value, enter
1.The rule setting should look like this:
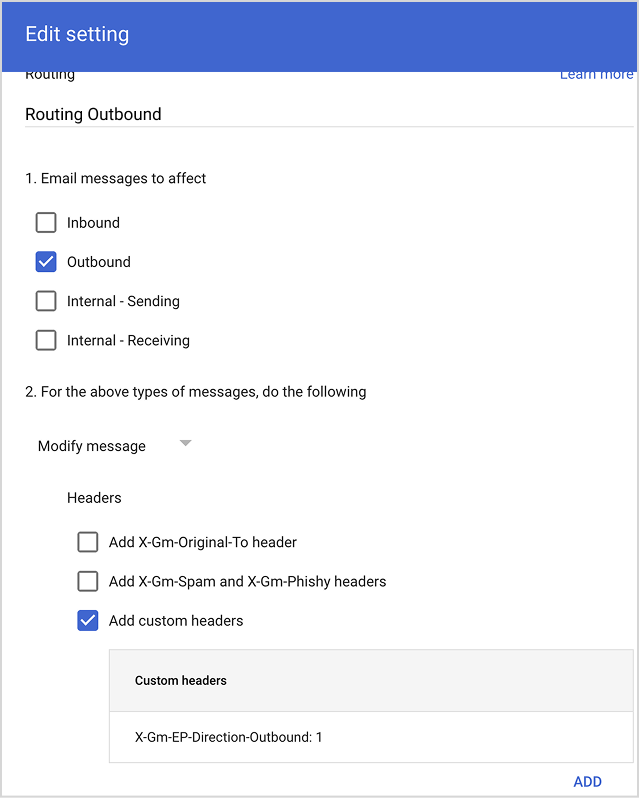
Click ADD at the bottom. The rule should appear in the Routing table.
Add a third rule by doing the following:
Give the rule a name. Example:
Sending and ReceivingUnder Email messages to affect, select both the Internal - Sending and Internal – Receiving options.
Under Modify message > Headers, select the Add custom headers option.
In the Custom headers box, click Add.
For Header key, enter
Gm-EP-Direction-InternalFor Header value, enter
1.The rule setting should look like this:
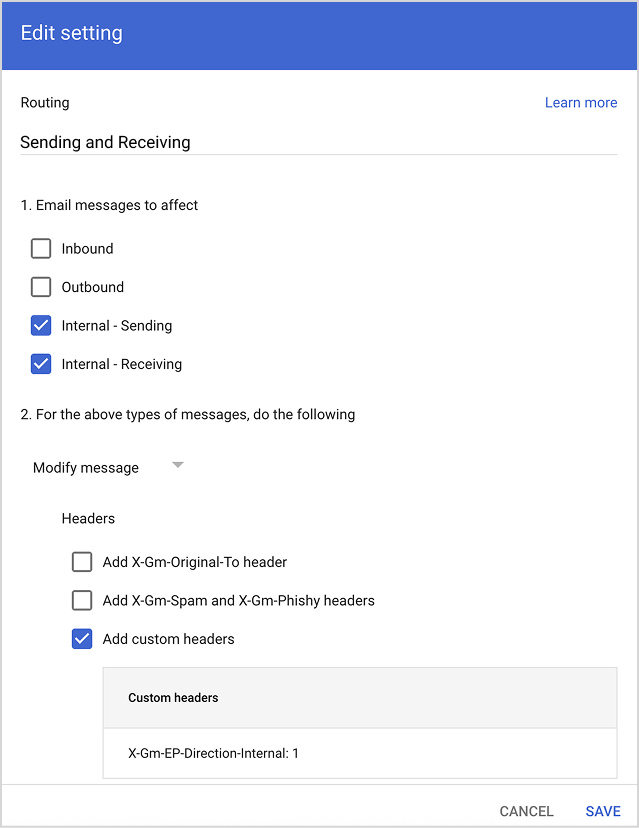
Click ADD at the bottom. The rule should appear in the Routing table.
Return to Impersonation Protection.
Barracuda will send emails to ensure that the headers have been set up correctly. As in the example shown in the image below, an email will be sent from your Google admin account to a Barracuda email address. Another email will be sent from Barracuda to your Google admin account.
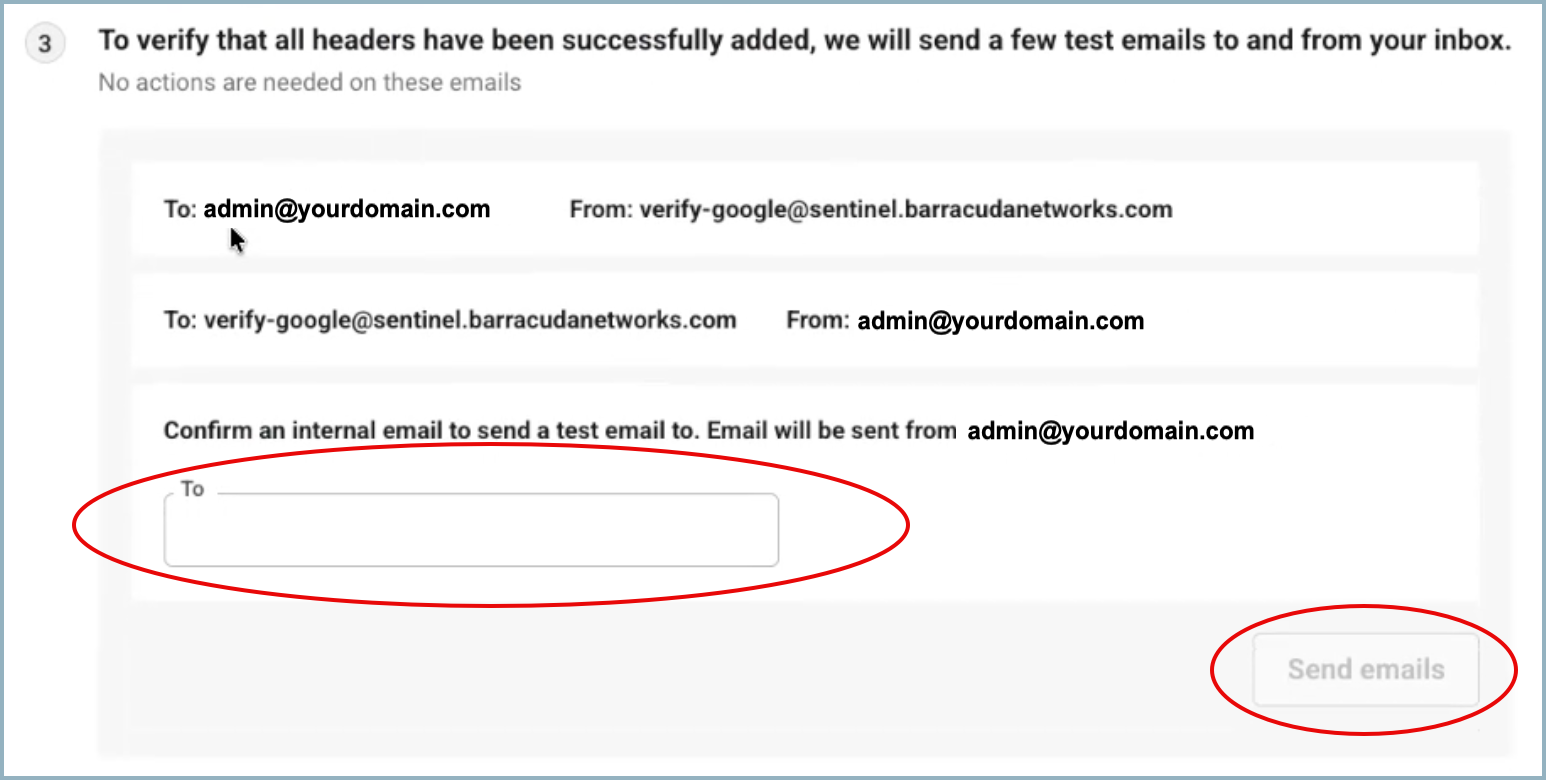
In the empty field shown above, add an email address that is internal to your mailbox. (i.e. user@yourdomain.com)
As you start to type, the field should pre-populate with internal email addresses.Click the Send emails button. The green Emails sent chip will display once all messages are away.
It typically takes a minute or two for Barracuda to receive and inspect the emails.Click the Verify button to ensure all headers have been added correctly.

If headers are correct, the green Verified chip will display.
If there is a problem, an error will be displayed. Wait a few minutes to see if the emails are received by Barracuda and the error goes away. If the error message persists, try again by clicking Resend emails and then waiting several minutes before clicking the Verify button. If that is still unsuccessful, return to the beginning of this step (Step 3).Once the Google email header configuration is verified, click the Next button at top-right of your screen to go to Step 4.
Step 4 – Select Protection Setting
Now that the Workspace setup is verified, select how Impersonation Protection will remediate phishing and other email fraud attacks.
The options for default settings are:
Enforcement mode (Recommended)
Barracuda remediates attacks as they happen by:Moving the messages to the recipient’s junk folder.
Alerting you and the recipient.
You will be able to customize this behavior.
Reporting mode
Barracuda will track attacks and display them on your dashboard. Barracuda will not take any remediation action in real time (as they happen). With this option, you are not protected by phishing and fraud.
After making a selection, click Complete setup.
Barracuda will take anywhere from several hours to several days (depending on the size of your account) to fully learn about your environment. After the initial learning phase is finished, you will receive an email notifying you that Impersonation Protection is now available.