The Barracuda WAF Control Center is a comprehensive centralized management system that allows administrators to manage multiple Barracuda Web Application Firewalls with varying configurations from a single console. The Barracuda WAF Control Center web interface allows you to view all connected devices, both as an aggregate view and as simple devices through a Proxy view.
The Barracuda WAF Control Center allows you to customize configuration templates and selectively apply those templates to connected devices. Templates are defined based on the configuration of a single connected device, and stored on the Barracuda WAF Control Center. From here, the template can be pushed to one or more devices selected by you.
You can configure the security policy settings and share it with the connected devices. For more information on sharing the configuration, see Shared Configuration. The Barracuda WAF Control Center provides role based administration feature to restrict access to system resources based on the roles assigned to users. A user can be assigned different permissions in different groups, along with a different permission assigned to the same user. In such cases, the Barracuda WAF Control Center chooses the maximum permission role assigned to the user and grants access to the selected devices i.e., the lower level user role will be overridden by the higher-level user role.
This guide walks you through installation and initial configuration of your Barracuda WAF Control Center with the Barracuda Web Application Firewall, and provides concepts and examples to help you understand how to manage Barracuda Web Application Firewalls through the web interface according to your organization’s deployment needs and security policies.
The Barracuda WAF Control Center with the Barracuda Web Application Firewall is a valuable tool for large enterprises, MSSP’s and others with multi-WAF deployments. Some common use cases include:
- Shared infrastructure – In this scenario, multiple or varying applications and services are configured on the connected Barracuda Web Application Firewalls. Each system has a custom configuration but uses the same set of security policies. In this scenario, the administrator configures security policies once and pushes them to all connected devices without modifying custom configuration settings.
- Dedicated infrastructure – In this scenario, the application deployed on a system has sufficient resource requirements that this entire appliance is dedicated. Through the Barracuda WAF Control Center, dedicated Barracuda Web Application Firewalls completely isolate your server environment from the public cloud.
- Multi DC infrastructure – In this scenario, the application may be critical enough that it is hosted in different data centers either for scalability or for disaster recovery purposes. In this situation, the same service exists on multiple systems but is really the same application, so it is like a 'super service' hosted on multiple systems. It may have different IP addresses on different clusters but all the configurations elements for the services are the same.
- Hybrid Deployments – Deployments which have both on-prem (Hardware or Virtual) and cloud Barracuda Web Application Firewalls serving multiple applications are easily managed using the Barracuda WAF Control Center in a single location.
The Barracuda WAF Control Center web interface allows administrators to configure and monitor multiple Barracuda Web Application Firewall devices running firmware version xxxx from a single console, including:
- Monitor connected device health;
- Access security, service traffic, server traffic, client traffic, and aggregated system traffic reports across all connected devices;
- Manage certificates for all connected devices;
- Create and manage templates to create and import object type backups such as services, URL profiles, and URL policies;
- View firmware and definition version for each connected device;
- Create and manage users and groups, and assign permission-based roles.
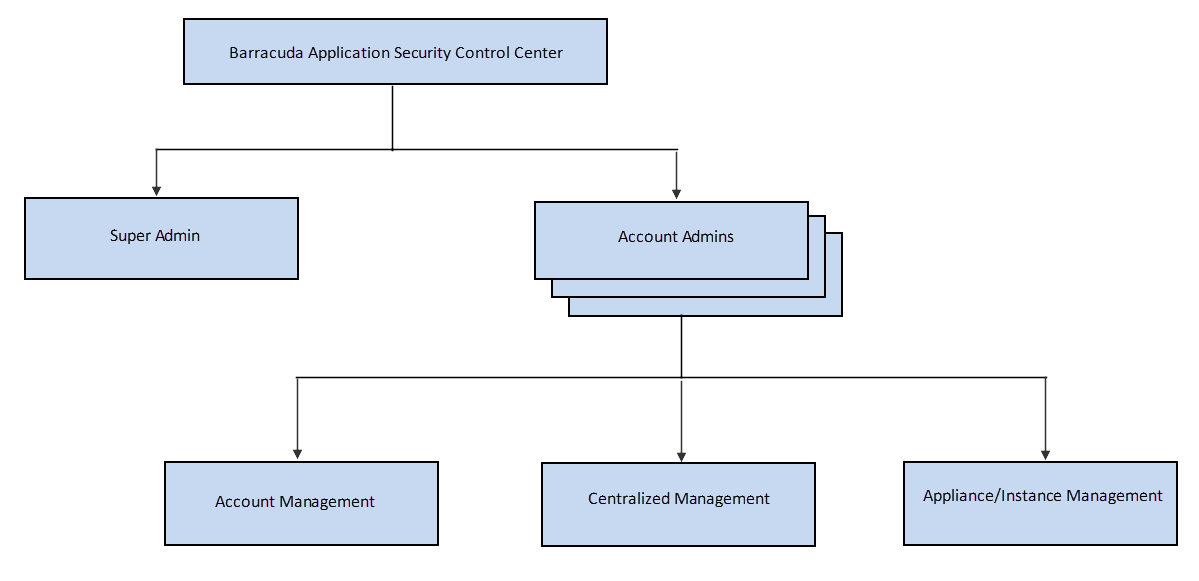
The Barracuda WAF Control Center supports two different administrator accounts, one to manage and configure the Barracuda WAF Control Center including IP configuration and SNMP management, and one to create users and connect and manage connected Barracuda Web Application Firewall devices:
- Barracuda WAF Control Center Administrator Account – Manage and configure the Barracuda WAF Control Center.
- Barracuda WAF Control Center Account Admin – Create users and manage and connect products through the Barracuda WAF Control Center web interface.