

This guide will walk you through the steps to load balance traffic across multiple instances of the Barracuda Web Application Firewall deployed in the old Microsoft Azure Management Portal.
To configure a load-balanced set in the old Microsoft Azure Management Portal, do the following:
Complete the steps in Step 1. Deploy the Barracuda Web Application Firewall Instances in Microsoft Azure and Step 2. Set Up a High Availability Environment With the Barracuda Web Application Firewall under the Configuring a Load-Balanced Set Using the Classic Model section, and proceed with the steps below:
Step 3. Set Up Load Balancing on the First Barracuda Web Application Firewall Instance
- Go to the Microsoft Azure Management Portal.
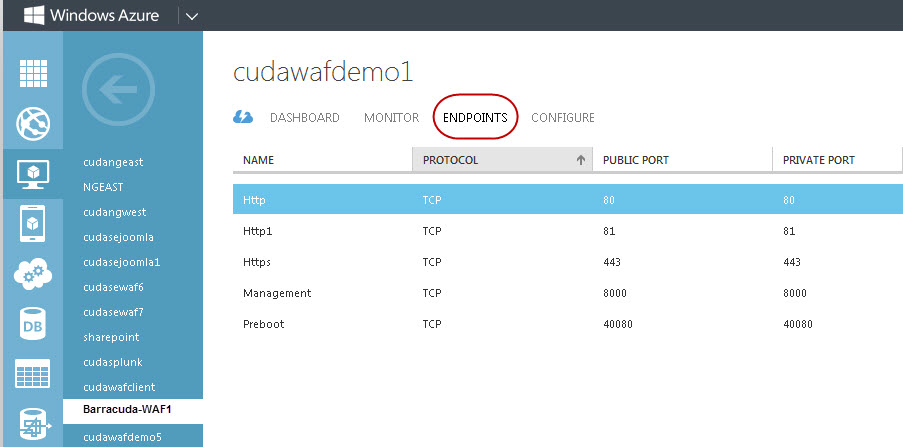
- Click Virtual Machines and select Barracuda-WAF1.
- Click ENDPOINTS, and then click ADD.
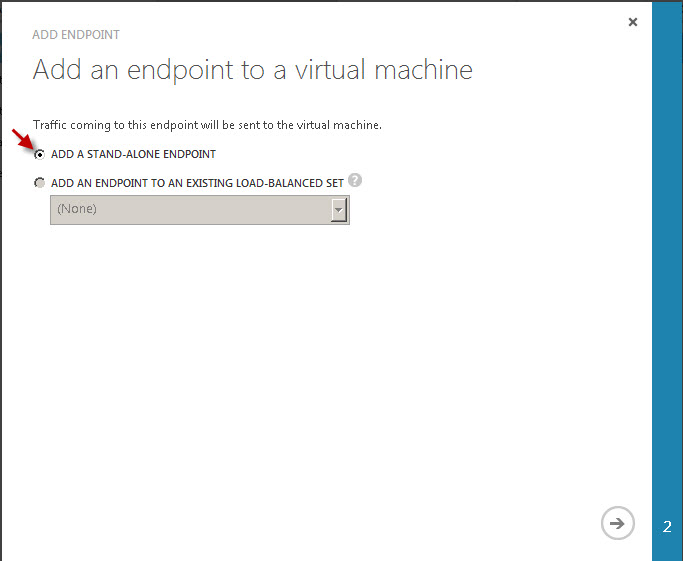
- In the Add an endpoint to a virtual machine window, select Add A STAND-ALONE ENDPOINT and click the arrow to continue.
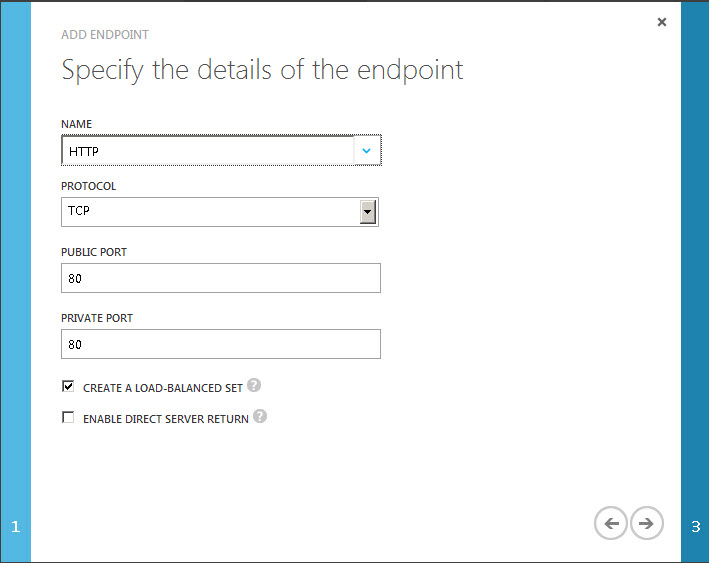
- Specify values for the following fields:
- NAME – Enter the name for the endpoint. Example: HTTP
- PROTOCOL – Select TCP from the list.
- PUBLIC PORT – Enter the port number of the service you are load balancing. Example: Port 80 for HTTP traffic.
- PRIVATE PORT – Enter the internal port that should listen to traffic on the endpoint. Example: 80.
- Select Create A LOAD-BALANCED SET and click the arrow to continue.
- In the Configure the load-balanced set window, specify a name for the load-balanced set and assign the values for the load-balancing probe.
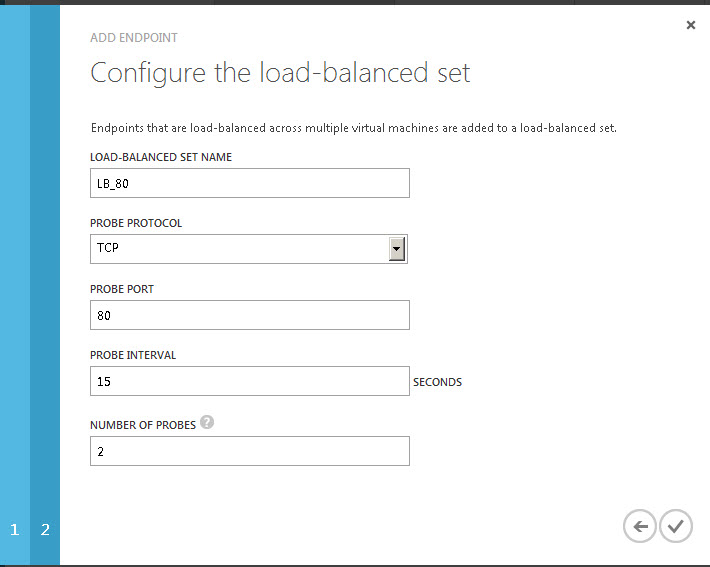
- Click the check mark to set up a load-balanced set.
- Repeat the process to add more ports to the load-balanced set.
Step 4. Add Other Barracuda Web Application Firewall Instances to the Load-Balanced Set
After you create the load-balanced set for Barracuda-WAF1, add other Barracuda Web Application Firewall virtual machines to the set. Example: Barracuda-WAF2
- Go to the Microsoft Azure Management Portal.
- Click Virtual Machines and select Barracuda-WAF2.
- Click ENDPOINTS, and then click ADD.

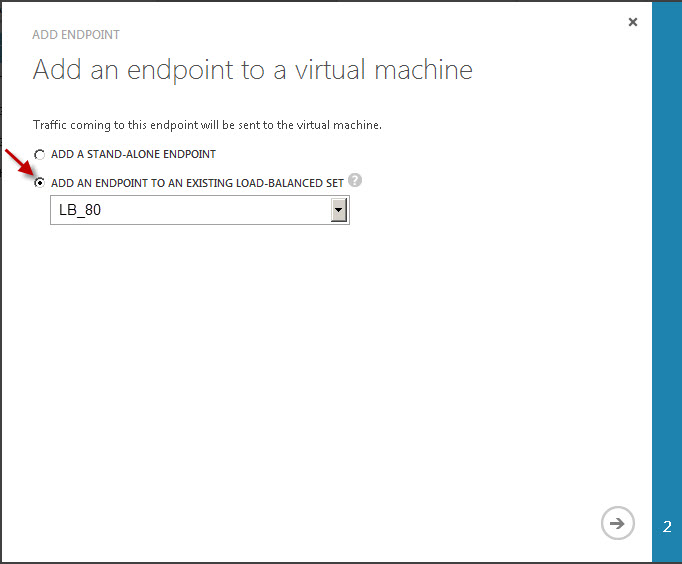
- In the ADD ENDPOINT window, select ADD AN ENDPOINT TO AN EXISTING LOAD-BALANCED SET and then select the load-balanced set name from the list. Click the arrow to continue.
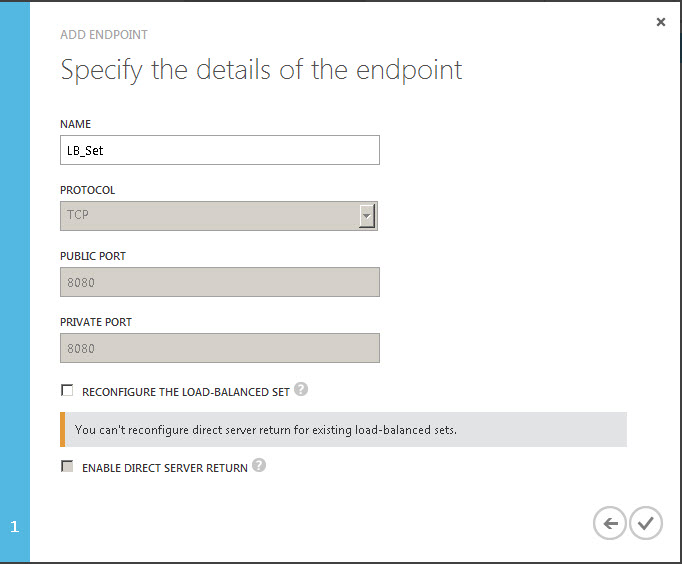
- In the Specify the details of the endpoint window, specify a name for the load-balanced set and then click the check mark.
- Repeat the process to add more Barracuda Web Application Firewall virtual machines to the load-balanced set.