

The Barracuda Web Application Firewall for AWS can be deployed in One-Arm Proxy Mode on Amazon Web Services. This article explains One-Arm Proxy Mode deployment. Complete the steps in this guide to configure, launch, and license your Barracuda Web Application Firewall instance. Then log into the Barracuda Web Application Firewall to verify your configuration and change your password.
Requirements
Before you deploy the Barracuda Web Application Firewall on Amazon Web Services, ensure that you have completed the following:
- Set up an Amazon Virtual Private Cloud (VPC) for the Barracuda Web Application Firewall.
- If you want to use the Bring Your Own Licensing (BYOL) model, get the Barracuda Web Application Firewall license. See Bring Your Own License (BYOL) .
Step 1 - Create a Security Group
Create a security group with rules specifying allowed protocols, ports and source IP ranges. Multiple security groups can be created with different rules, and assigned to each instance. For more information on security groups, refer to the AWS article Amazon EC2 Security Groups.
- Log into the Amazon EC2 Management Console.
- From the EC2 dashboard, select Security Groups under Network & Security.
- Click Create security group.
- In the Create security group window, do the following:
- Enter a name to identify the security group.
- Specify the description for the security group.
- Select a VPC ID from the list.
- Specify the inbound and outbound traffic to be allowed for the instance and click Create security group.
Step 2 (Optional) - Allocate and Assign an Elastic IP Address to Your Instance
When an instance of your Barracuda Web Application Firewall is created, a public IP address is associated with the instance. That public IP address changes automatically when you STOP and START the Barracuda Web Application Firewall. To resolve this issue, assign a persistent public IP address to the instance using Elastic IP addressing. For more information, refer to the Amazon Web Services article Elastic IP Addresses.
- Log into the Amazon EC2 Management Console.
- From the EC2 dashboard, select Elastic IPs under Network & Security.
- Click Allocate Elastic IP Address.
- On the Allocate Elastic IP address page, keep the default settings and click Allocate to allocate a new IP address. A random Public IP gets generated and displayed in the Elastic IP addresses table.
- In the Elastic IP addresses table, click on the new allocated IP address.
- On the IP address page, click Associate Elastic IP address.
- On the Associate Elastic IP address page:
- Select Instance and the Private IP Address of the instance from the respective lists.
OR - Select Network Interface and the Private IP Address from the respective lists.
- Select the Allow the Elastic IP address to be reassociated check box.
- Select Instance and the Private IP Address of the instance from the respective lists.
- Click Associate.
Step 3 - Deploy the Barracuda Web Application Firewall on Amazon Web Services
Before you proceed, it is recommended that you go through the Deployment Best Practices article.
In the Amazon VPC that you configured, launch an Amazon EC2 instance with the Barracuda Web Application Firewall AMI image. The Amazon Launch Instance wizard guides you through the following steps:
- Log into the AWS Management Console and open the EC2 Management Console.
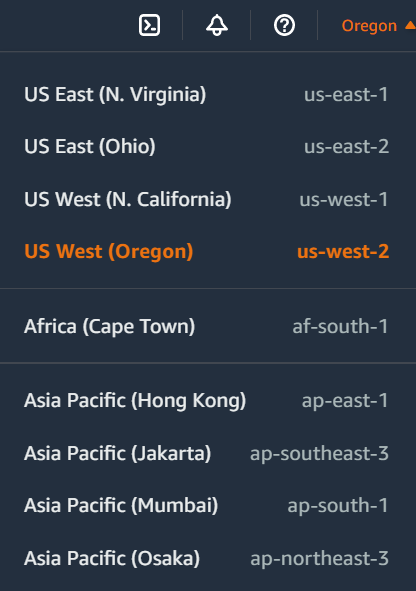
- From the top right corner of the page, select the region for the instance. This is important because some Amazon EC2 resources can be shared between regions.
Select Instances under Instances.
On the Instances page, click Launch Instances.

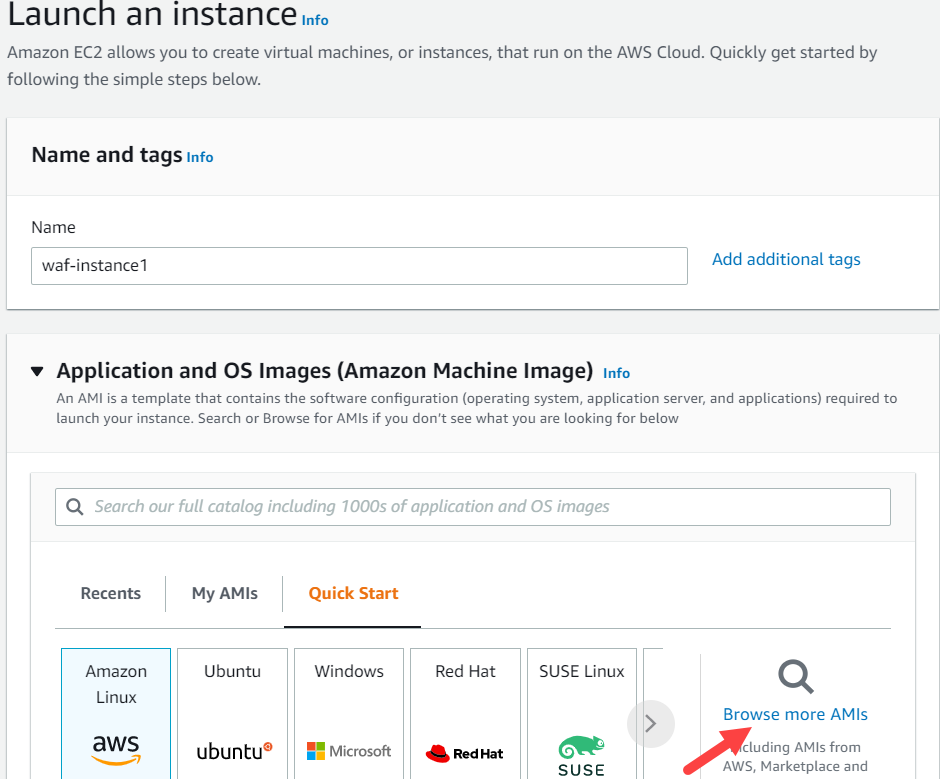
On the Launch an instance page, do the following:
Name and tags
Name: Specify a name for the instance.
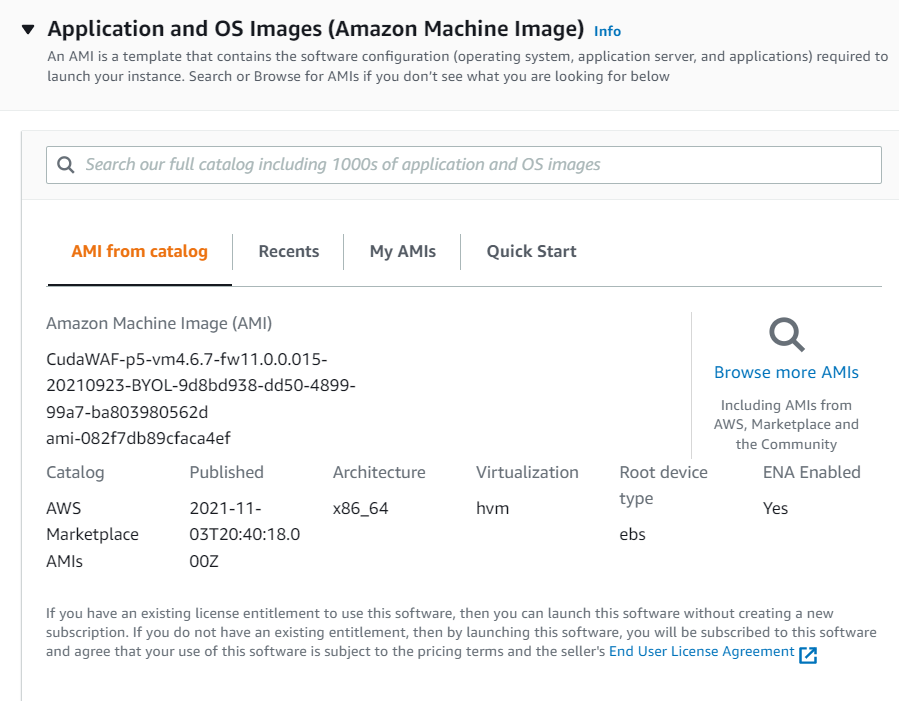
Application and OS Images (Amazon Machine Image)
Click Browse more AMIs.
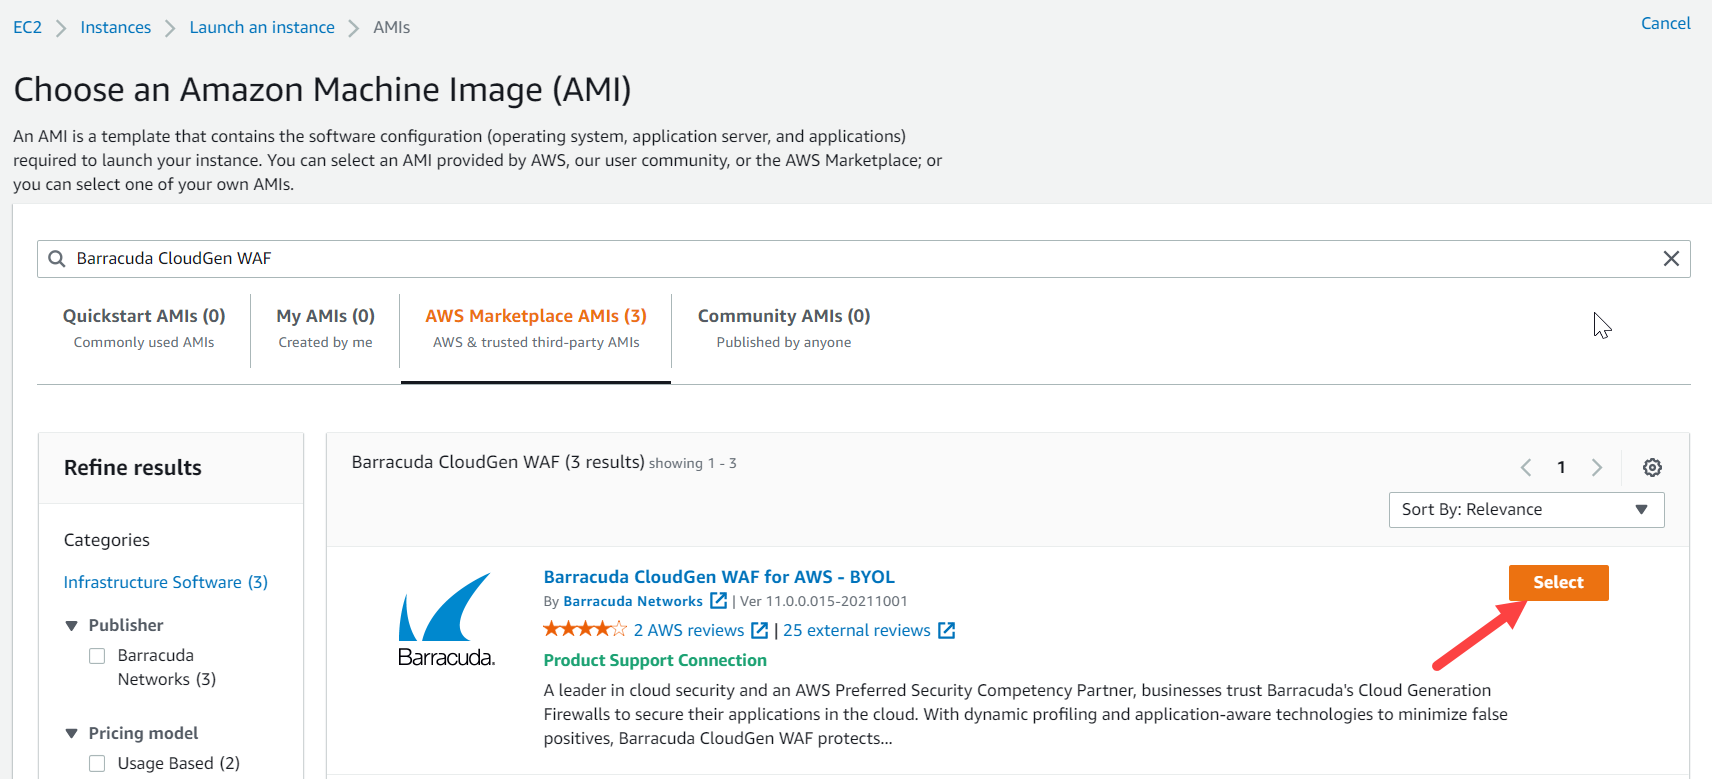
On the Choose an Amazon Machine Image (AMI) page:
Select AWS Marketplace AMIs and search for the Barracuda Web Application Firewall AMI. Click Select next to the Barracuda Web Application Firewall AMI.
Go through the overview and product details and click Continue.
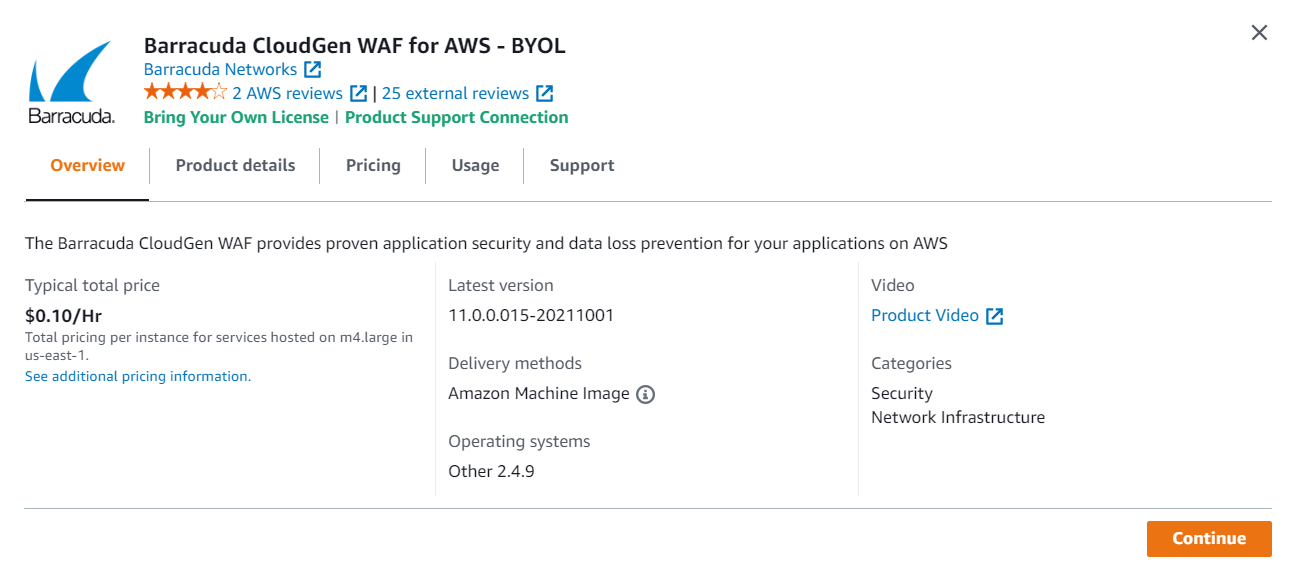
Click Confirm Changes when prompted.
The selected AMI appears on the Launch an instance page.
Instance type
Select an instance type from the drop-down list.
Key pair (login)
Select the existing key pair or create a new key pair.
Network Settings
VPC: Select the VPC from the drop-down list.
Subnet: Select a subnet from the drop-down list. Make sure to select the subnet of the VPC where you want to create the instance.
Firewall (security groups): Click Select existing security group to select and assign the security group(s) from the existing list, or choose Create security group to create a new group.
Configure Storage
The storage device settings for the instance is displayed. Modify the values if required.
Advanced details
Keep the default setting for all parameters.
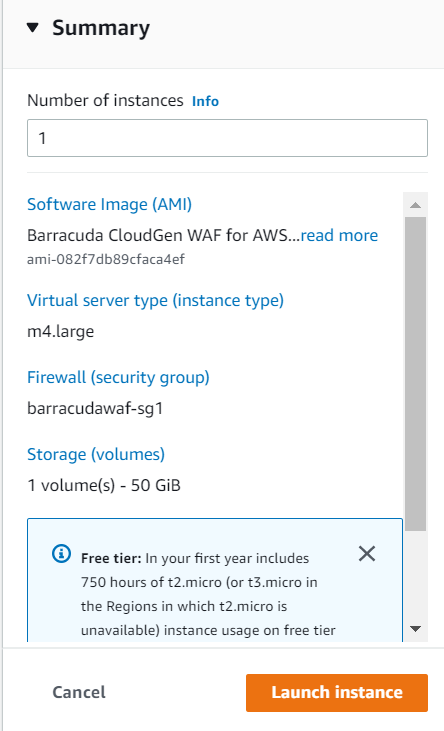
Review your settings under Summary and click Launch instance.
After you click Launch instance, Amazon Web Services begins provisioning the Barracuda Web Application Firewall. Allow a few minutes for the Amazon Web Services Agent and the Barracuda Web Application Firewall image to boot up.
Step 4 - License the Barracuda Web Application Firewall
If you deployed the Barracuda Web Application Firewall with BYOL, complete the licensing and provisioning of your system.
- Log into the Amazon EC2 Management Console.
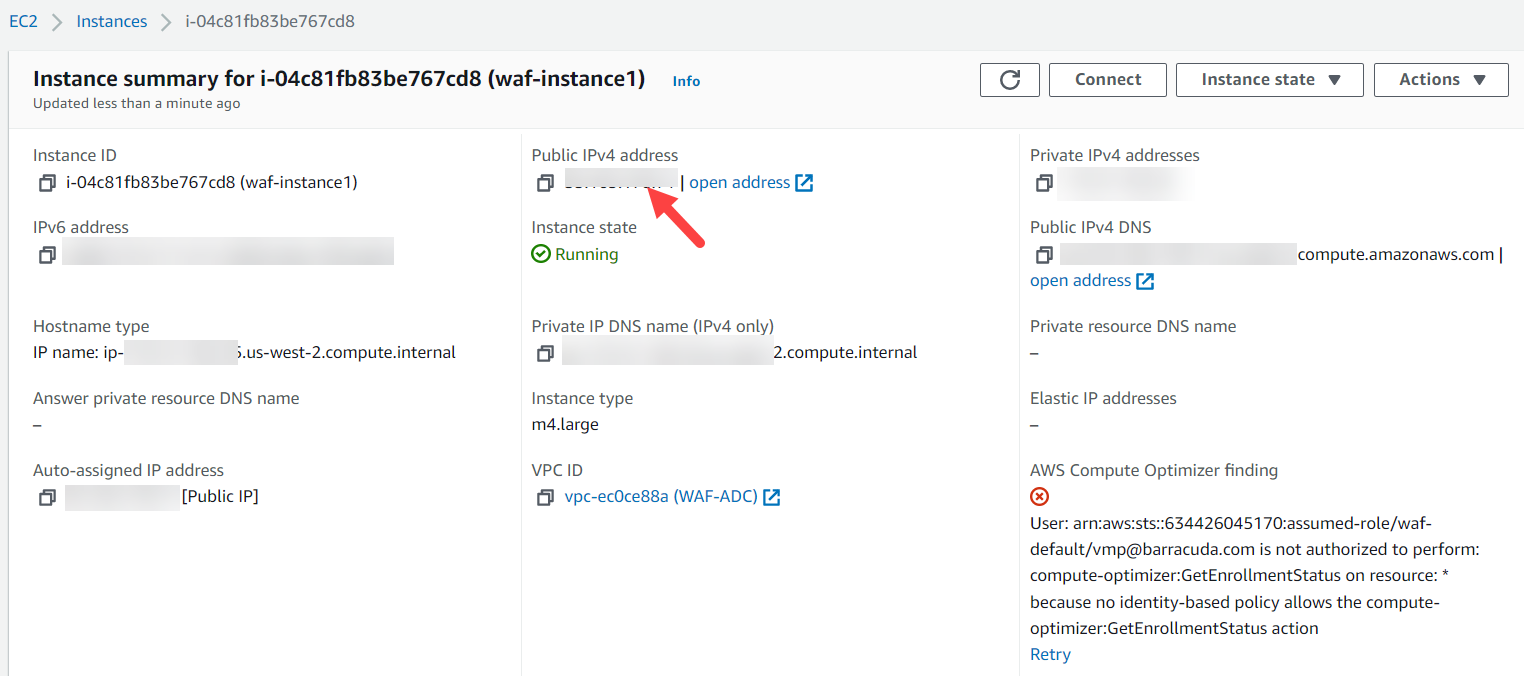
- From the EC2 Dashboard, select Instances under Instances.
- In the Instances table, select the Barracuda Web Application Firewall instance you created and note the Public IPv4 address.
Open the browser and enter the copied Elastic IP address (from step 3) with port 8000 for HTTP. No port is required for HTTPS. For example:
For HTTP: http://<Public DNS>:8000 (Unsecured)
For HTTPS: https://<Public DNS> (Secured)- After the boot process is complete, the Licensing page displays with the following options:
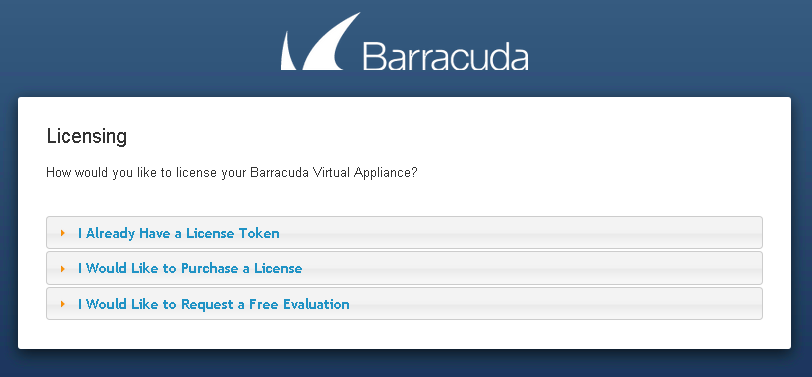
- I Already Have a License Token – Use this option to provision your Barracuda Web Application Firewall with the license token you have already obtained from Barracuda Networks. Enter your Barracuda Networks Token and Default Domain to complete licensing, and then click Provision.
The Barracuda Web Application Firewall connects to the Barracuda Update Server to get the required information based on your license, and then reboots automatically. Allow a few minutes for the reboot process. Once the instance is provisioned, you are redirected to the login page. - I Would Like to Purchase a License – Use this option to purchase the license token for the Barracuda Web Application Firewall. Provide the required information in the form, accept the terms and conditions, and click Purchase.
The Barracuda Web Application Firewall connects to the Barracuda Update Server to get the required information based on your license, and then reboots automatically. Allow a few minutes for the reboot process. Once the instance is provisioned, you are redirected to the login page. - I Would Like to Request a Free Evaluation – Use this option to get 30 days free evaluation of the Barracuda Web Application Firewall. Provide the required information in the form, accept the terms and conditions, and click Evaluate.
The Barracuda Web Application Firewall connects to the Barracuda Update Server to get the required information based on your license, and then reboots automatically. Allow a few minutes for the reboot process. Once the instance is provisioned, you are redirected to the login page.
- I Already Have a License Token – Use this option to provision your Barracuda Web Application Firewall with the license token you have already obtained from Barracuda Networks. Enter your Barracuda Networks Token and Default Domain to complete licensing, and then click Provision.
Step 5 - Open Network Address Ranges on Firewall
For more information on the list of Open Network Address ranges required for the firewall, refer to the
Step 6 - Verify Configuration and Change the Password
- Log into the Barracuda Web Application Firewall web interface as the administrator using the URL, as described in step 4 of Licensing of the Barracuda Web Application Firewall after deploying on Amazon Web Services above. Log in with:
- Username: admin
- Password: Instance ID of your Barracuda Web Application Firewall in Amazon Web Services.
- Username: admin
- Navigate to the BASIC > Administration page and enter your old password, new password, and re-enter the new password. Click Save Password.
Configuring the Service(s) on the Barracuda Web Application Firewall
You can configure the services on the BASIC > Services page. In Amazon Web Services, the services can be created either using the System (WAN) IP address of the instance or any other IP address from the IP address pool as your System (WAN) IP address in the Virtual IP Address field. Note that configuring the VIP with an IP address from the IP address pool as your System (WAN) IP address is possible only for stand-alone instances. Also, ensure that you:
- Assign multiple private IP addresses to the network interface of the deployed Barracuda Web Application Firewall instance. The assigned private IP addresses can be used to create the service(s) on the Barracuda Web Application Firewall. For information on how to assign multiple private IP addresses, see Step 3 - (Optional) Assign Multiple Private IP Addresses to the Network Interface of the Instance.
- Allocate and assign an Elastic IP (EIP) address to each private IP address assigned to the network interface of the Barracuda Web Application Firewall instance, so that it can be accessed externally. Ensure that the corresponding ports are opened in your security group and firewall. For more information on how to assign the EIP to the private IP address, see Step 4 - Allocate and Assign an Elastic IP Address to your Instance.
If you want to cluster the Barracuda Web Application Firewall instances to load balance the traffic, ensure that the services are created using only the System (WAN) IP address. After the service is created using the System (WAN) IP address, the service will be accessible through the Public IP/DNS of the Barracuda Web Application Firewall VM. Ensure that the corresponding ports are opened in your security group and firewall.
For more information on services, see Step 2: Configuring a Service. For detailed instructions on how to add a service, click the Help button.