

To configure dual authentication for LDAP/RADIUS/RSA SecurID authentication service, perform the following steps:
Step 1 - Configure the Authentication Service
For dual authentication, create two authentication services, an LDAP authentication service and a RADIUS or RSA SecurID authentication service.
- Go to the ACCESS CONTROL > Authentication Services page, and select the LDAP, RADIUS or RSA SECURID tab.
- Enter information about your server and click Add.
For more information on configuring an external authentication service, see How to Configure Authentication and Access Control (AAA).
Step 2 - Associate the Authentication Service with your Website
- Go to the ACCESS CONTROL > Authentication page.
- Identify the service to associate with the authentication service.
- Click Edit next to that service. The Edit Authentication Policy window appears.
- In the Edit Authentication Policy section, do the following:
- Set Status to On.
- Select the LDAP authentication service you created in Step 1 from the Authentication Service list.
- Set Dual Authentication Required to Yes.
- Select the RADIUS or RSA SecurID authentication service you created in Step 1 from the Secondary Authentication Service list.
- Specify values for other parameters as required and click Save.
For more information, refer to the online help.
Step 3 - Configure the Authorization Policy for the Website
- Go to the ACCESS CONTROL > Authorization page.
- In the Add Authorization Policy section, do the following:
- Select the service for which you are adding access control.
- Specify a name for the policy.
- Set Status to On.
- Enter appropriate values for URL Match, Host Match, Extended Match, and Extended Match Sequence.
- Select the Login Method to be used for authenticating users and click Add.
- To enforce fine grained access control, click Edit next to the authorization policy. Specify appropriate values for the parameters and click Save.
Step 4 - (Optional) Enable Send Basic Authentication for the Website
If Basic Authentication is enabled on the backend server, the user is challenged to authenticate twice (i.e., once to the Barracuda Web Application Firewall and again to the backend server). To log in only once, enable Send Basic Authentication on the Barracuda Web Application Firewall. This ensures that the user credentials are sent to the backend server in the Basic Authentication Header, allowing the user to access the requested page.
To enable Send Basic Authentication, perform the following steps:
- Go to the ACCESS CONTROL > Authorization page.
- Click Edit next to the authorization policy created in Step 3. The Edit Authorization Policy window appears.
- In the Edit Authorization Policy section:
- Set Send Basic Authentication to Yes.
- (Optional) Set Domain Basic Authentication to Yes if you want the domain information to be forwarded to the server along with the user credentials in the Basic Authentication Header. The domain information is received either as part of the user name or the host header value that is used to access the service.
- Specify values for other parameters as required and click Save.
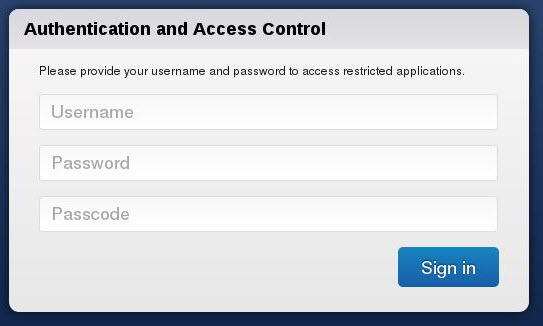
When Dual Authentication Required is set to Yes in the authentication policy, the default login page appears. See the screenshot below:
Step 5 - (Optional) Set Up Custom Login Page for Authentication
To set up a custom login page for authentication, perform the following steps:
- Create a custom login page.
- Deploy the created custom page on your web server.
- Configure the Barracuda Web Application Firewall to use the custom login page.
Step 1 - Creating a Custom Login Page
Create a custom login page (HTML page) with the following configuration:
- Form ID = nclogin
- Name = login
- Action = "/nclogin.submit"
- Method = POST
- User name field should be named - f_username
- Password field should be named - f_passwd
- Passcode field should be named - f_passcode
- An additional hidden parameter named f_method should be specified with value "LOGIN"
The form will look something like this:
<form id="nclogin" name="login" action="/nclogin.submit" method=POST>
<p>User Name: <input TYPE="text" name="f_username">
<p>Password: <input TYPE="password" name="f_passwd">
<p>Passcode: <input TYPE="passcode" name="f_passcode">
<p>input type=hidden name="f_method" value="LOGIN"><input TYPE="submit" Value="Login"><input TYPE="reset" Value="Reset">
</form>
Continue with: Step 2 - Deploying the created custom page on your web server and Step 3 - Configuring the Barracuda Web Application Firewall to use the custom login page.
Step 6 - (Optional) Set Up Custom Challenge Page for Authentication
Refer to the How to Set Up a Custom Challenge Page for Authentication article.