

To increase the hard disk size of the deployed Barracuda Web Application Firewall on Amazon Web Services, do the steps below:
Step.1: Note the disk size of the Barracuda Web Application Firewall and stop the instance
- Log into the AWS EC2 Management Console.
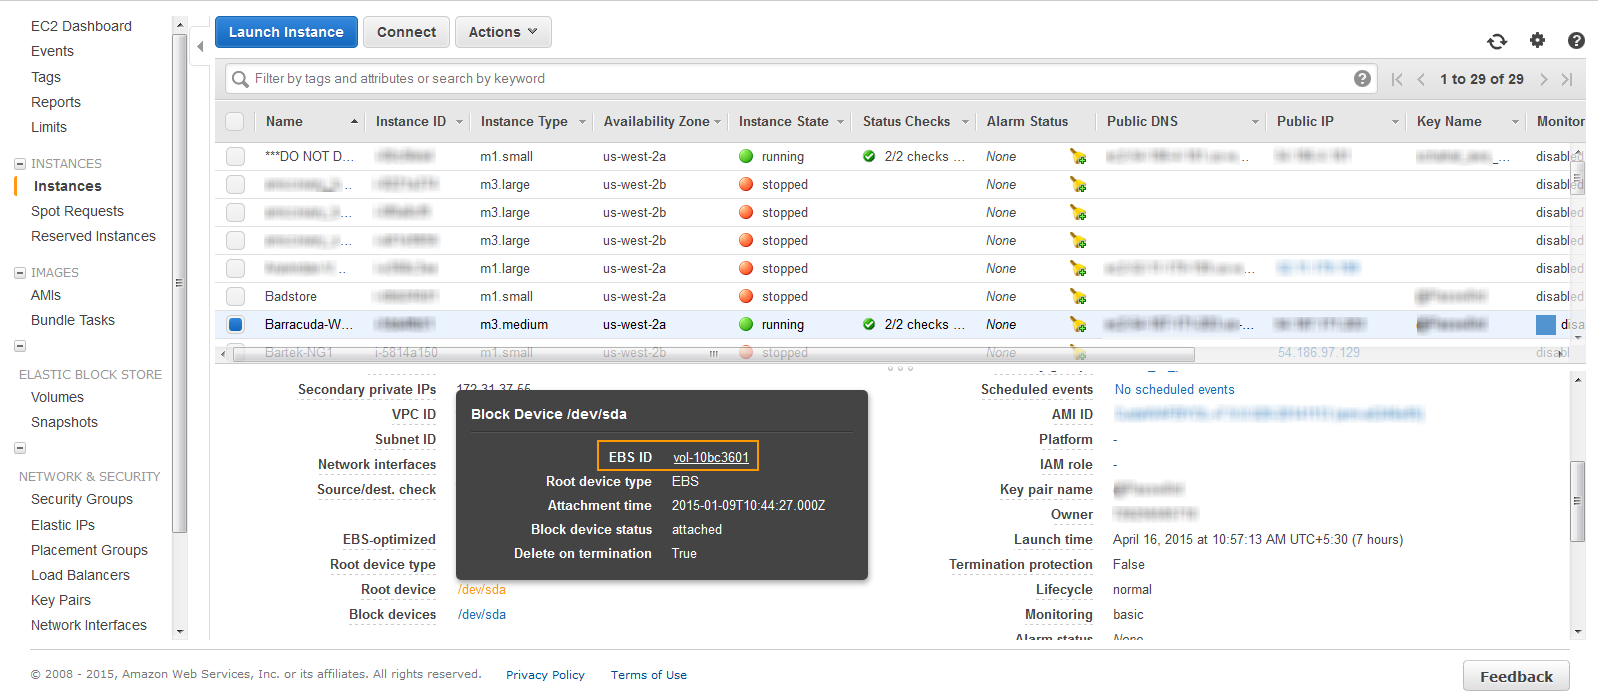
- From the EC2 dashboard, select Instance under INSTANCES.
- In the Instances table, select the Barracuda Web Application Firewall requiring increased disk size and note the following:
- Instance ID
- Availability Zone
- EBS ID by clicking on the Root device value.
- If the instance is running, ensure you shut down the instance by following the steps below:
- Right click on the instance, select Instance Settings and then select Change Shutdown Behavior.
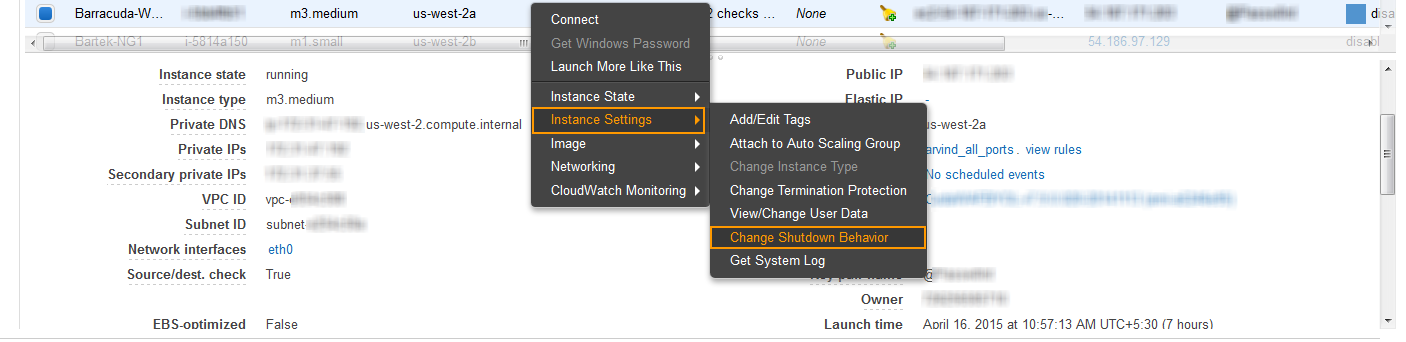
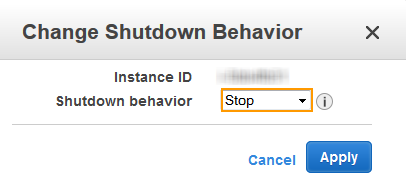
- In the Change Shutdown Behavior window, select Stop from the Shutdown behavior list and click Apply.
- Right click on the instance, select Instance Settings and then select Change Shutdown Behavior.
- If the Shutdown behavior is already set to Stop, then choose Cancel.
Step.2: Create a Snapshot of the Volume
- From the EC2 dashboard, select Volumes under ELASTIC BLOCK STORE.
- In the search filter, enter the EBS ID noted in step 3.c under Step.1: Note the disk size of the Barracuda Web Application Firewall and stop the instance.
- Right click on the volume, and select Create Snapshot.
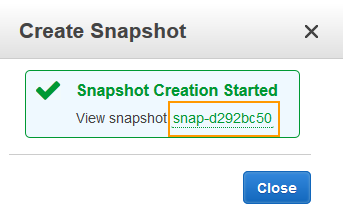
- In the Create Snapshot window, enter a name and description, and click Create.
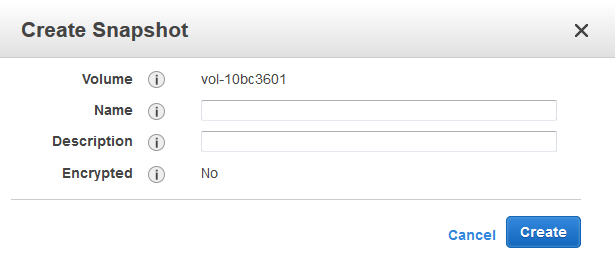
- Note the snapshot ID.
Step.3: Create a New Volume for the Snapshot
- From the EC2 dashboard, select Snapshots under ELASTIC BLOCK STORE.
- In the search filter, enter the snapshot ID noted in step 5 under Step.2: Create a Snapshot of the Volume.
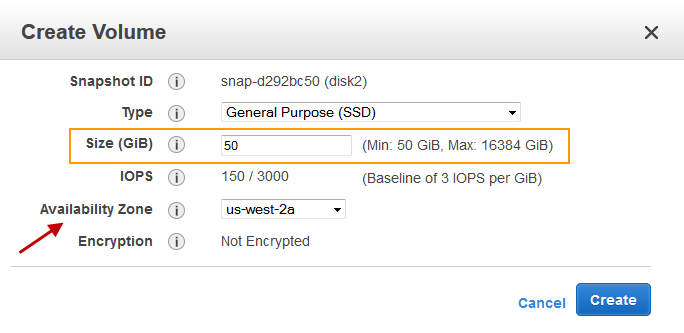
- Right click on the snapshot when Status displays completed, and click Create Volume.
- In the Create Volume window, do the following:
- Select the desired volume type and enter a new volume size.
- Ensure the Availability Zone matches the instance Availability Zone noted in step 3.b under Step.1: Note the disk size of the Barracuda Web Application Firewall and stop the instance.
- Click Create.
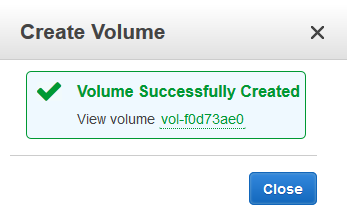
- Note the volume ID.
Step.4 Detach the Old Volume from the Instance
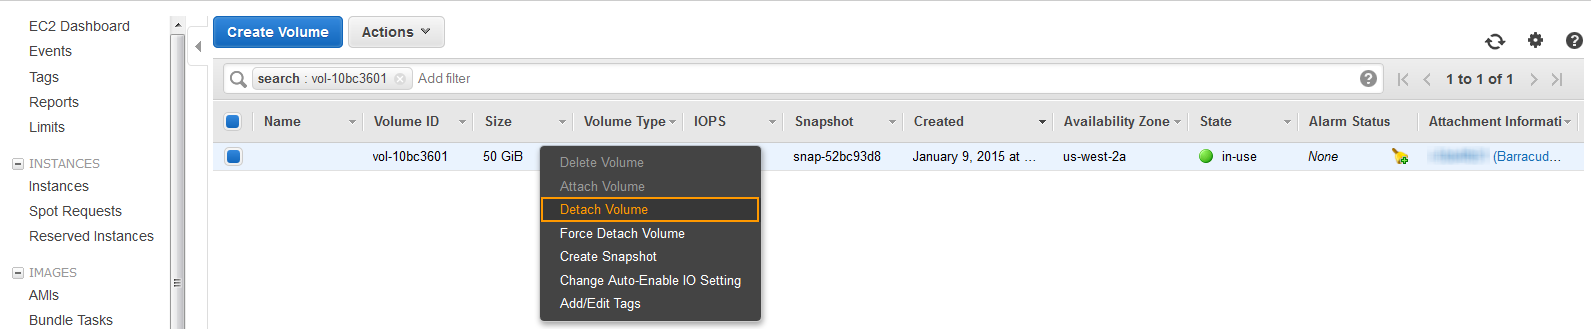
- From the EC2 dashboard, select Volumes under ELASTIC BLOCK STORE.
- In the search filter, enter the EBS ID noted in step 3.c under Step.1: Note the disk size of the Barracuda Web Application Firewall and stop the instance.
- Right click on the volume, and select Detach Volume.
- In the Detach Volume window, click Yes, Detach to confirm.
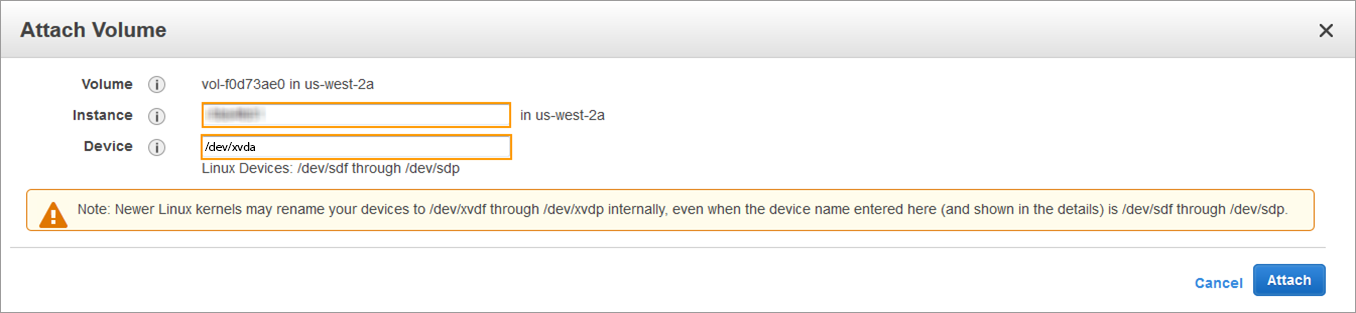
Step.5: Attach the New Volume to the Instance
- From the EC2 dashboard, select Volumes under ELASTIC BLOCK STORE.
- In the search filter, enter the volume ID noted in step 5 under Step.3: Create a New Volume for the Snapshot.
- Right click on the volume, and select Attach Volume.
- In the Attach Volume window, do the following:
- Enter the name or instance ID in the Instance field, and select the instance noted in step 3.a under Step.1: Note the disk size of the Barracuda Web Application Firewall and stop the instance.
- Ensure the device name is /dev/xvda.
- Click Attach.
Step.6: Restart the Instance to Apply the New Volume
- From the EC2 dashboard, select Instance under INSTANCES.
- In the Instances table, select the Barracuda Web Application Firewall instance to which the new volume was attached in step 4 under Step.5: Attach the New Volume to the Instance.
- Right click on the instance, select Instance State and then select Start.
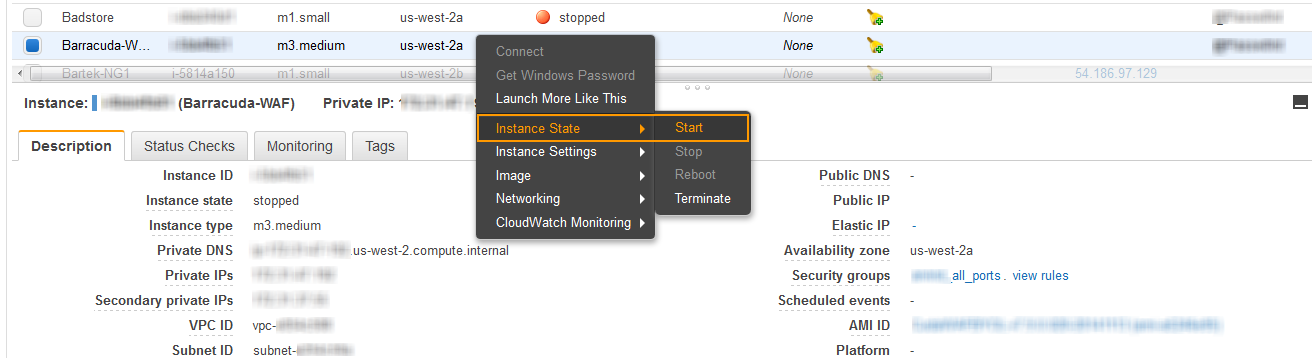
- In the Start Instances window, choose Yes, Start. If the instance fails to start, and the volume being expanded is a root volume, verify that you attached the expanded volume using the same device name as the original volume, i.e /dev/xvda.