

An IdP is a service/website that certifies user identities using security tokens. The identity provider may be an on-premises Active Directory Federation Services (AD FS) setup, or an Microsoft Entra ID located in the Azure cloud.
- Configuring Microsoft Entra ID as IdP:
- Configuring AD FS 2.0 as IdP
- Configuring Okta as IdP
- Configuring Duo Single Sign-On
Configuring Microsoft Entra ID for SAML Authentication in the New Microsoft Azure Portal
Microsoft Entra ID is the identity provider responsible for authenticating users accessing web applications hosted on the Microsoft Azure cloud. Microsoft Entra ID manages user identities along with applications. You should configure the SAML endpoints in Microsoft Entra ID for web applications requiring protection from the Barracuda Web Application Firewall. Perform the following steps to configure Microsoft Entra ID:
- Log into the Microsoft Azure Portal.
- Select Microsoft Entra ID and then from the left pane select Enterprise application.
- In the Enterprise applications page, click + New application.
- In the Add an application page, click Non-gallery application.
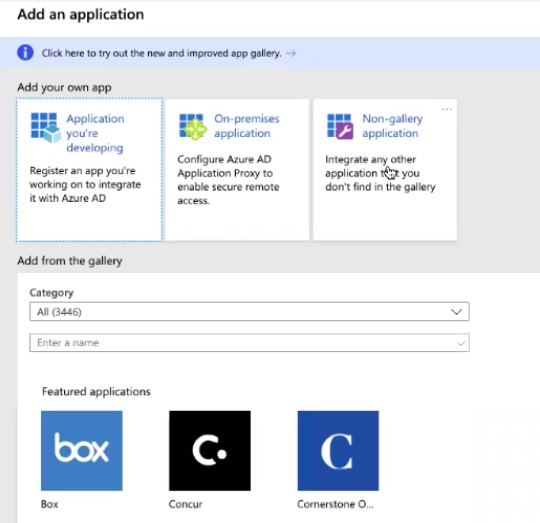
- In the Add your own application page, enter a name for the application and then click Add. For example: samlv2app
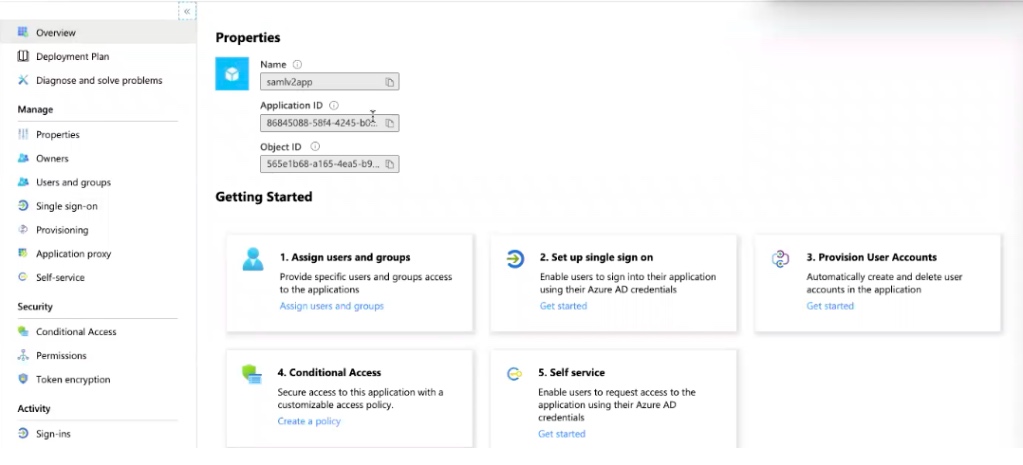
The application page is created. - In the Overview page, click 1. Assign users and groups.
- Click Add users > Users and groups and from the right pane, select the user who has to be part of the application.
- Go to to the Overview page and then click Set up single sign on.
- Select SAML, scroll down, and then copy the App Federation Metadata Url link. This is the Identity Provider Metadata URL to be configured on the Barracuda Web Application Firewall in the ACCESS CONTROL > Authentication Services > New Authentication Service > SAML Identity Provider page. Example: https://login.microsoftonline.com/ <AzureAD tenantID>/ federationmetadata/2007-06/federationmetadata.xml?appid=< app_ID>
- Use the IdP metadata information and create a SAML IDP authentication service on the ACCESS CONTROL > Authentication Services page. Also, verify that the SP Entity ID is the same and then click Save to save the metadata file to your desktop.
- Continue with Steps 3 to 6 under Configuring SAML on the Barracuda Web Application Firewall in the SAML Authentication article.
- Use the SAML identity provider created in the previous steps and create an authorization policy in the ACCESS CONTROL > Authentication Policies page.
- Click Generate to generate an XML file. For more information on how to generate the service provider (SP) metadata file, refer to, Generate Service Provider (SP) Metadata in the SAML Authentication article.
- Go to the SAML-based sign on page, click Upload metadata file, select the XML file to upload, and then click Save.
Verify the same on the Microsoft Azure Portal page.
Configuring Active Directory Federation Services (AD FS) 2.0 for SAML Authentication
Active Directory Federation Services (AD FS) is the identity provider responsible for authenticating users accessing the web applications hosted on the Microsoft Windows server. Perform the following steps to configure AD FS 2.0:
- Download the IdP metadata from the AD FS server.
- Use the IdP metadata information and create a SAML IDP authentication service on the ACCESS CONTROL > Authentication Services page.
- Continue with Steps 3 to 6 under Configuring SAML on the Barracuda Web Application Firewall in the SAML Authentication article.
- Go to the ACCESS CONTROL > Authentication Policies page, and generate the Service Provider (SP) Metadata file by following the steps in Step 6 in the Configuring SAML on the Barracuda Web Application Firewall article.
- Save the metadata file to the location you desire on the AD FS server.
- Log into the AD FS server, and do the following:
- Click the Start menu and select AD FS 2.0 Management.
- On the AD FS 2.0 window, expand the Trust Relationships folder under the AD FS 2.0 root directory by clicking the plus ( + ) button.
- Right-click Relying Party Trusts and select Add Relying Party Trust. The Add Relying Party Trust Wizard appears.
- In the Add Relying Trust Wizard window, click Start.
- In the Select Data Source step:
- Select Import data about the relying party published from a file.
- Click Browse and select the SP Metadata file saved in Step 5.
- Click Next.
- The message “Some of the content in the federation metadata was skipped because it is not supported by AD FS 2.0” may appear. Click OK.
- In the Specify Display Name step:
- Enter the service provider domain in Display Name. Example:
service1.domain.com - Click Next.
- Enter the service provider domain in Display Name. Example:
- In the Choose Issuance Authorization Rules step, keep the default settings and click Next.
- Click Next in the Ready to Add Trust step, and then click Close. The Edit Claim Rules window appears.
- In the Edit Claim Rules window, add, edit, or remove rules and click OK.
- The added trust displays in the Relying Party Trusts list.
Configuring SAML Attributes on the AD FS 2.0 Server
To illustrate how to configure SAML attributes on the AD FS server, the LDAP attributes User-Principal-Name and Token-Groups – Unqualified Names are used as examples in this section.
Perform the following steps to configure SAML attributes on the AD FS server:
- Log into the AD FS server.
- Click the Start menu and select AD FS 2.0 Management.
- In the AD FS 2.0 window, expand the Trust Relationships folder under the AD FS 2.0 root directory by clicking the plus ( + ) button.

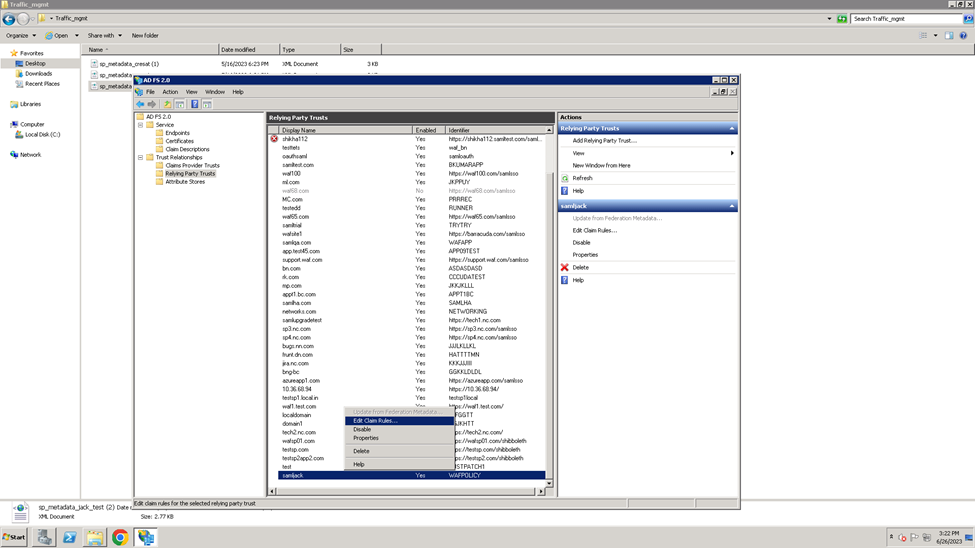
- Click on the Relying Party Trusts folder. The Relying Party Trusts list appears in the right pane.

- Right-click on the relying party application you created, and select Edit Claim Rules. For example, service1.domain.com
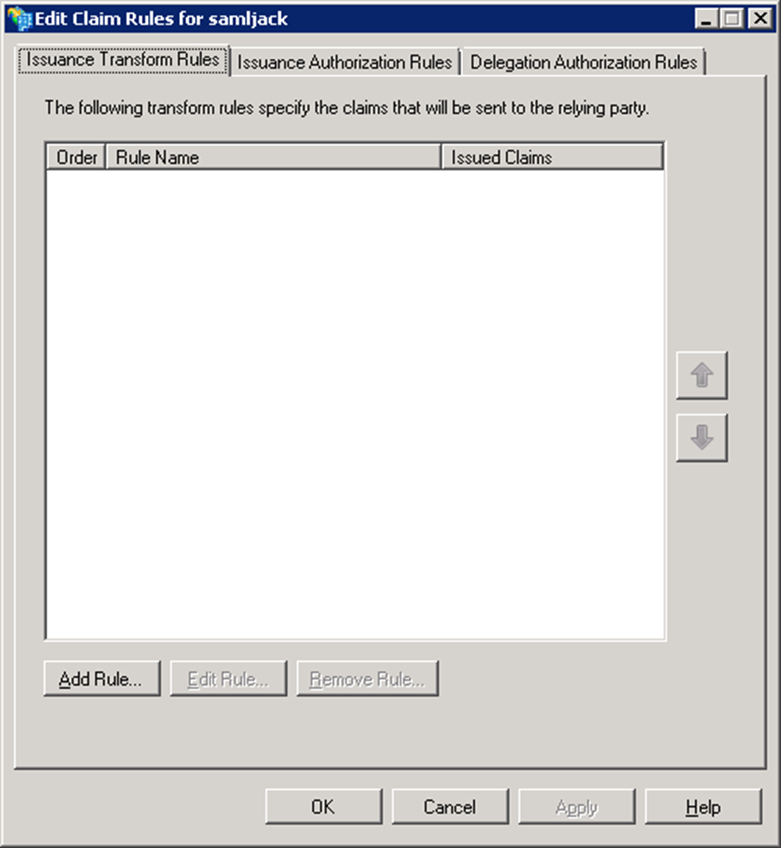
- In the Edit Claim Rules window, click Add Rule in the Issuance Transform Rules tab.
- In the Add Transform Claim Rule Wizard window:
- Select Send LDAP Attributes as Claims in the Choose Rule Type step, and click Next.
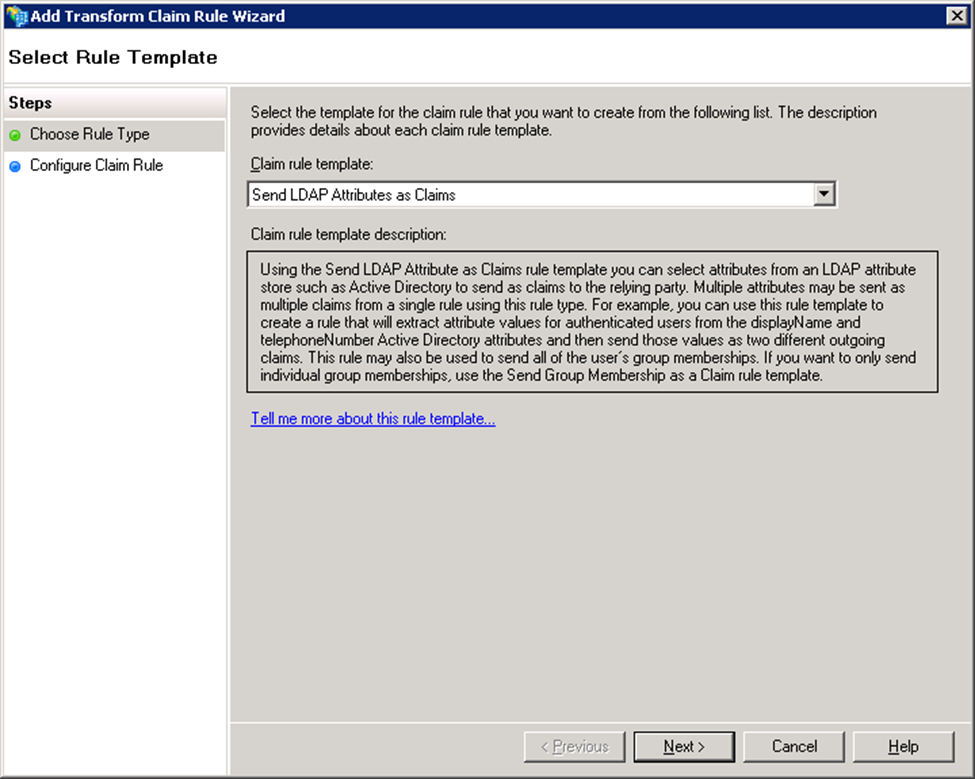
- Select Send LDAP Attributes as Claims in the Choose Rule Type step, and click Next.
- In the Configure Claim Rule step:
- Enter a name in Claim rule name.
- Select Active Directory from the Attribute store list.
Under Mapping of LDAP attributes to outgoing claim types, create mappings for the attributes that need to be allowed in the SAML IdP response. Example:
LDAP Attribute Outgoing Claim Type User-Principal-Name UPN Token-Groups – Unqualified Names Group 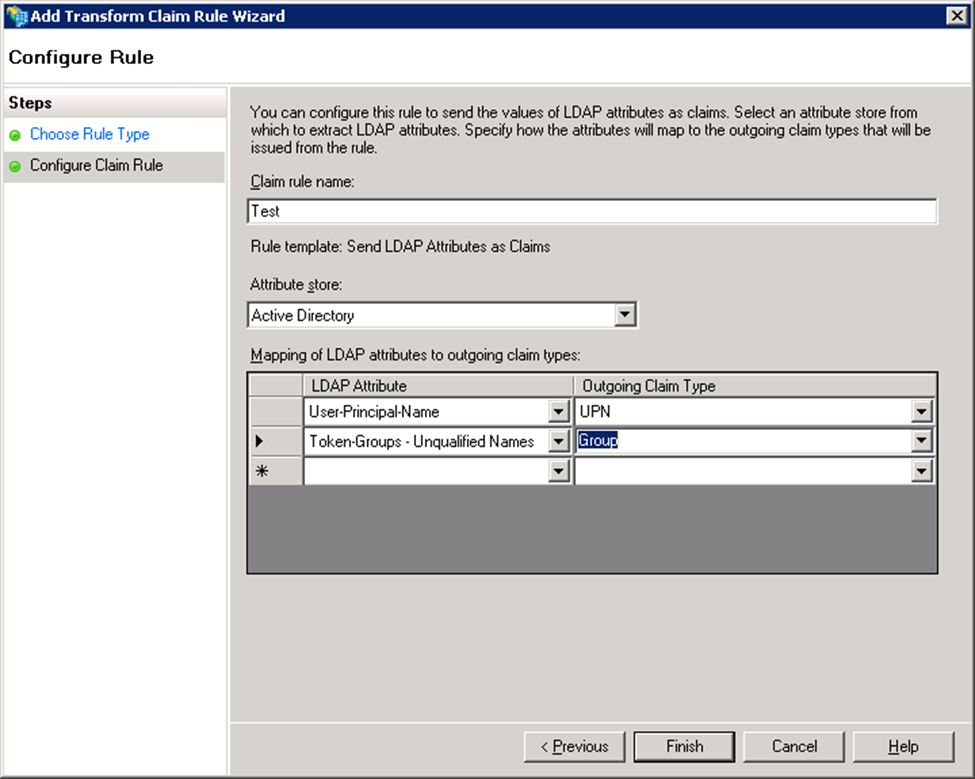
- Click Finish.
- Create transform rules for the attributes added in Step 8c (i.e., User-Principal-Name and Token-Groups – Unqualified Names).
- To add a transform rule for the attribute User-Principal-Name, repeat Step 6 and 7, and then continue with the steps below.
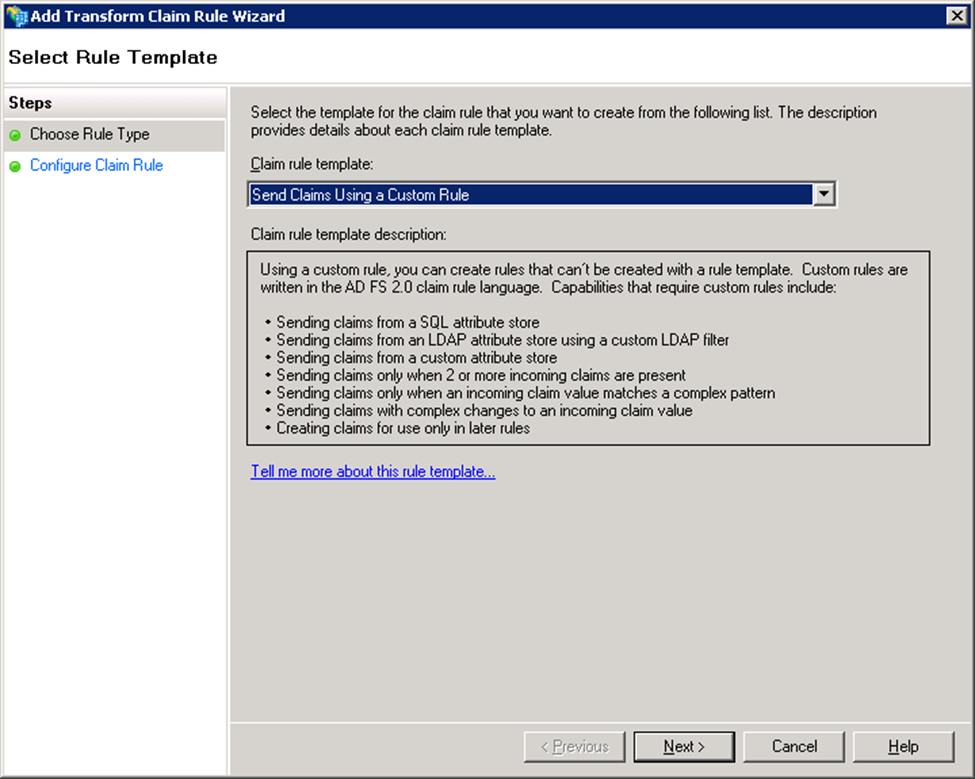
- Select Send Claims Using a Custom Rule in the Choose Rule Type step and click Next.
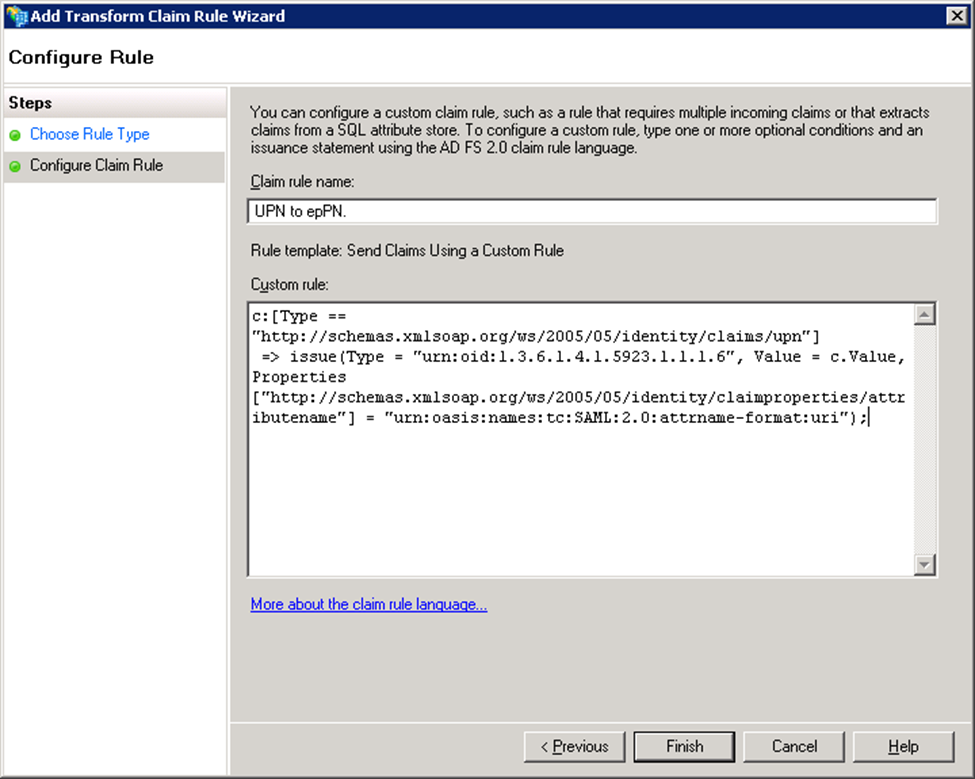
- In the Configure Claim Rule step:
- Enter a name in Claim rule name. Example: Transform UPN to epPN.
- Type or copy and paste the following in the Custom rule text box:
c:[Type == "http://schemas.xmlsoap.org/ws/2005/05/identity/claims/upn"]=> issue(Type = "urn:oid:1.3.6.1.4.1.5923.1.1.1.6", Value = c.Value, Properties["http://schemas.xmlsoap.org/ws/2005/05/identity/claimproperties/attributename"] = "urn:oasis:names:tc:SAML:2.0:attrname-format:uri"); - Click Finish.
- To add a transform rule for the attribute Token-Groups – Unqualified Names, repeat Step 6 and 7, and then continue with the steps below.
- Select Send Claims Using a Custom Rule in the Choose Rule Type step and click Next.
- In the Configure Claim Rule step:
- Enter a name in Claim rule name. Example: Transform Group to epSA
Type or copy and paste the following in the Custom rule text box:
c:[Type == "http://schemas.xmlsoap.org/claims/Group", Value == "Domain Users"]=> issue(Type = "urn:oid:1.3.6.1.4.1.5923.1.1.1.9", Value = "member@domain.com ", Properties["http://schemas.xmlsoap.org/ws/2005/05/identity/claimproperties/attributename"] = "urn:oasis:names:tc:SAML:2.0:attrname-format:uri");
- Click Finish, and then OK.
- The added rules display under the Issuance Transform Rules tab.
Configuring Okta for SAML Authentication
The Barracuda Web Application Firewall can authenticate users configured on Okta using SAML single sign-on. Okta is as an SAML IDP provider and the Barracuda Web Application Firewall is the service provider to authenticate users. Perform the following steps to configure Okta:
- Download the IdP metadata from the Okta.
- Use the IdP metadata information and create a SAML IDP authentication service on the ACCESS CONTROL > Authentication Services page.
- Continue with Steps 3 to 6 under Configuring SAML on the Barracuda Web Application Firewall in the SAML Authentication article.
- Go to the ACCESS CONTROL > Authentication Policies page, and generate the service provider (SP) metadata file by following the steps under Generate Service Provider (SP) Metadata in the SAML Authentication article.
- Save the metadata file to your desktop.
- Open the metadata file and note the following:
- Entity ID
- AssertionConsumerService Location
- Log into the Okta application.
- Click Admin on the Okta homepage.

- On the Okta Dashboard, click Add Applications under Shortcuts.
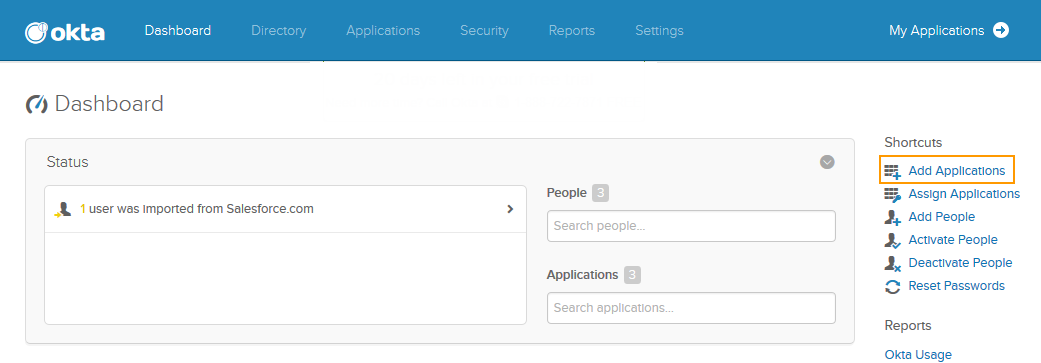
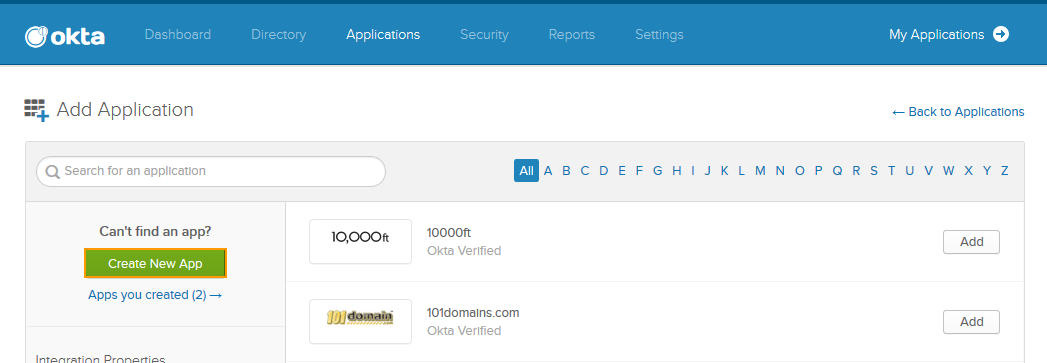
- On the Add Application page, click Create New App and do the following:
- Select SAML 2.0 in the Create a New Application Integration window and click Create.
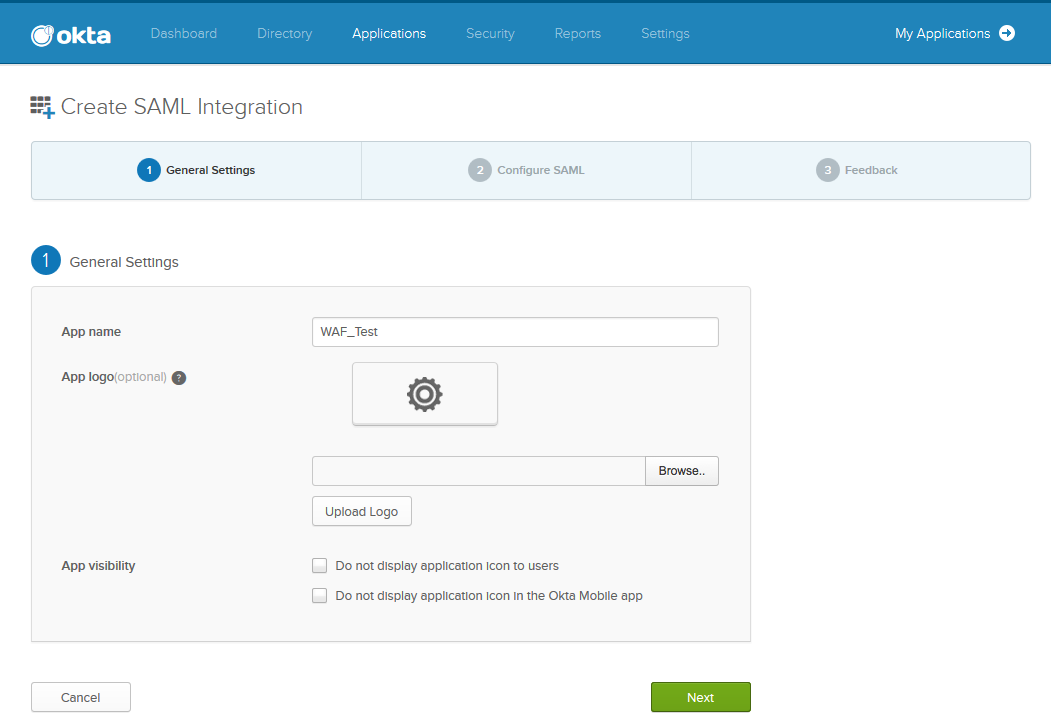
- In the Create SAML Integration page under General Settings, enter a name for the application in the App name field and click Next.
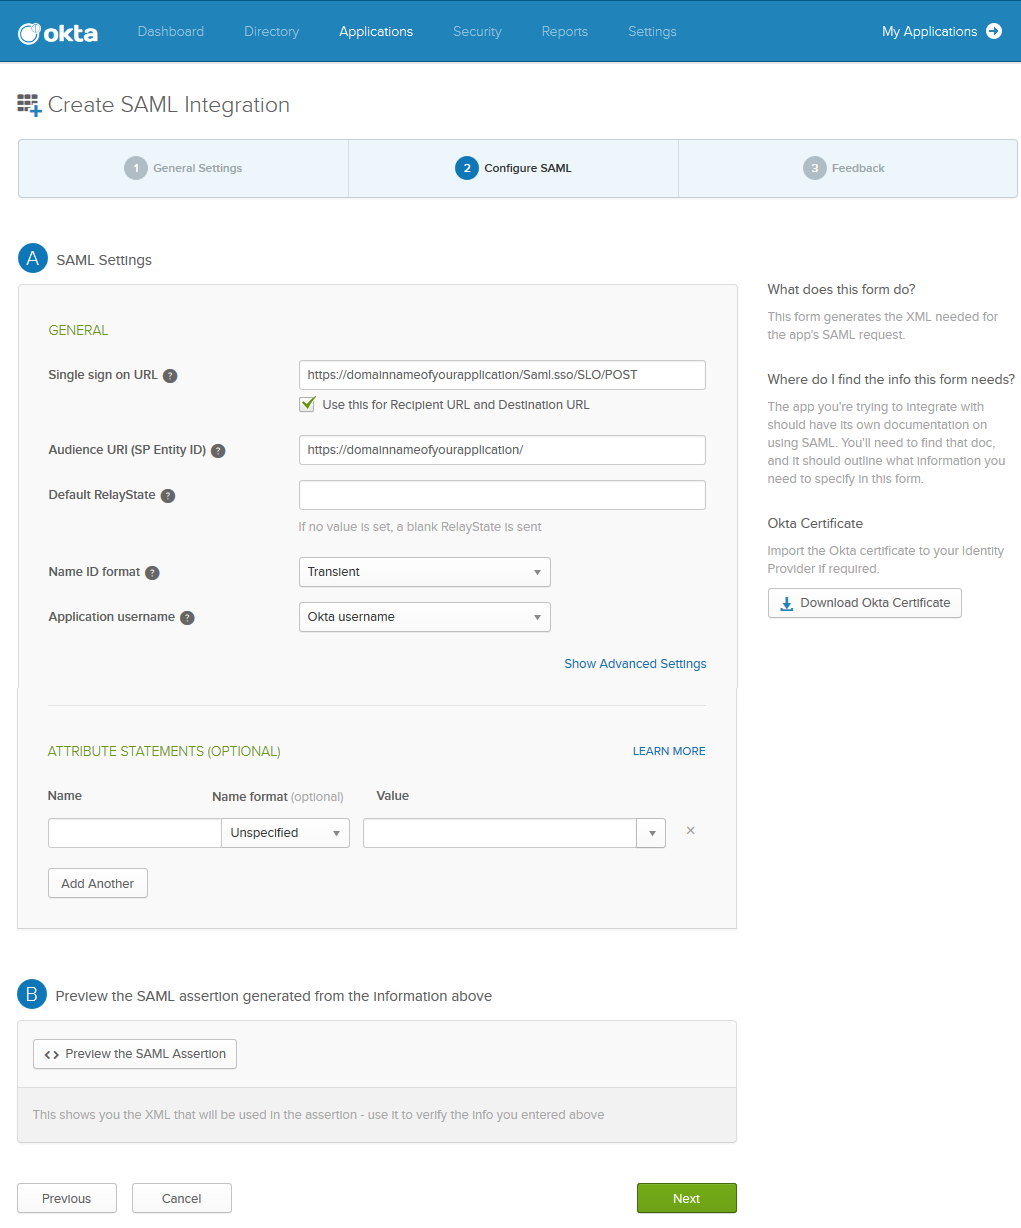
- Under Configure SAML:
- Specify the AssertionConsumerService Location noted in Step 6 in the Single sign on URL field. Verify Use this for Recipient URL and Destination URL is selected.
- Specify the Entity ID noted in step 6 in the Audience URI (SP Entity ID).
- Select Transient as Name ID format.
- Click Next.
- Under Feedback:
- Select I’m an Okta customer adding an internal app next to Are you a customer or partner?.
- Select It’s required to contact the vendor to enable SAML next to Contact app vendor.
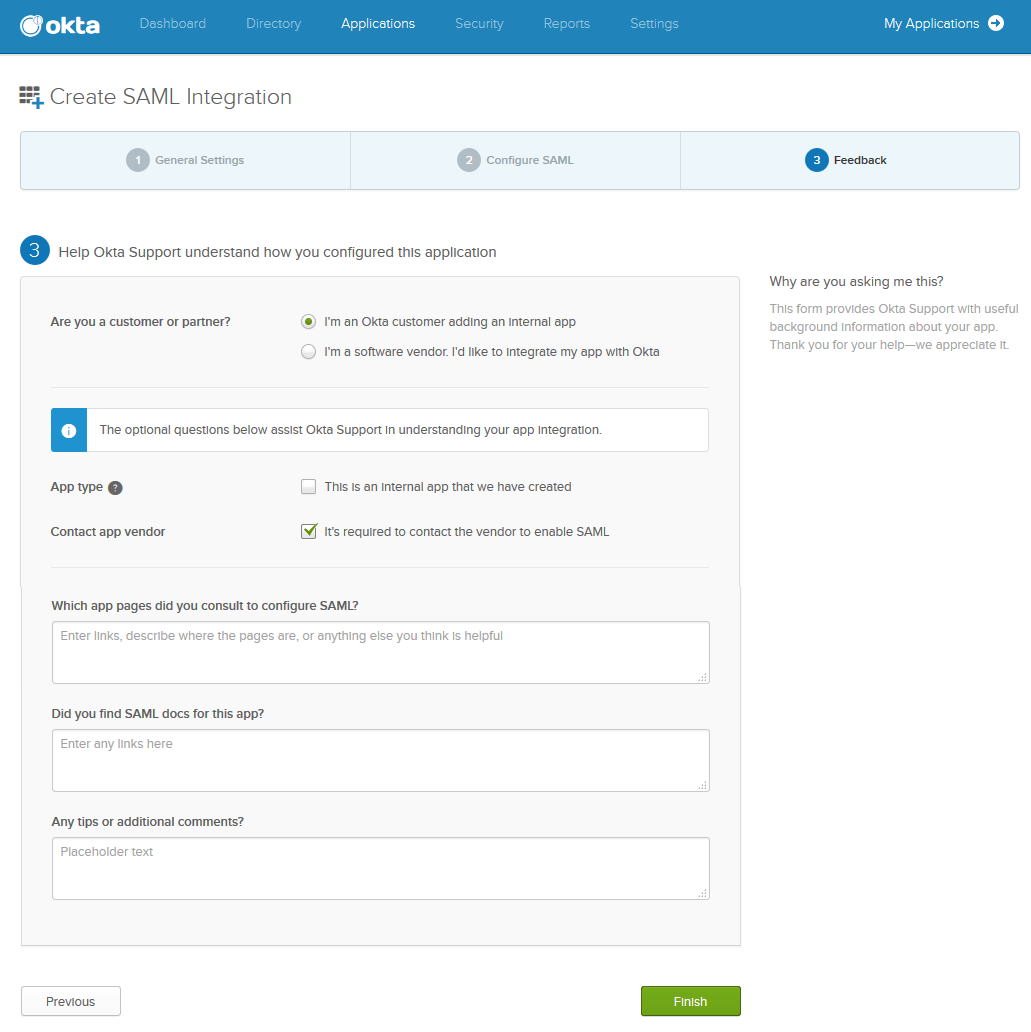
- Click Finish.
- Select SAML 2.0 in the Create a New Application Integration window and click Create.
Configuring Duo Single Sign-On (SSO) Using SAML Authentication
To configure the Barracuda Web Application Firewall with Duo SSO using SAML Authentication, see the article Duo Single Sign-On for Barracuda Web Application Firewall .