

After the CloudFormation template completes its operation and the stack is created, the CREATE_COMPLETE message is displayed in “Status”. With this, the Barracuda Web Application Firewall instances will be deployed in the specified VPC and boot up with the default configuration. To verify the instance(s) created for auto scaling, perform the following steps:
- Log into the Amazon EC2 Management Console.
- From the EC2 Dashboard, select Auto Scaling Groups under AUTO SCALING.
- Select the auto scaling group you created from the Auto Scaling Group list. This will display the details of the auto scaling group.
- Select Instances under the Auto Scaling Group sub-tabs.
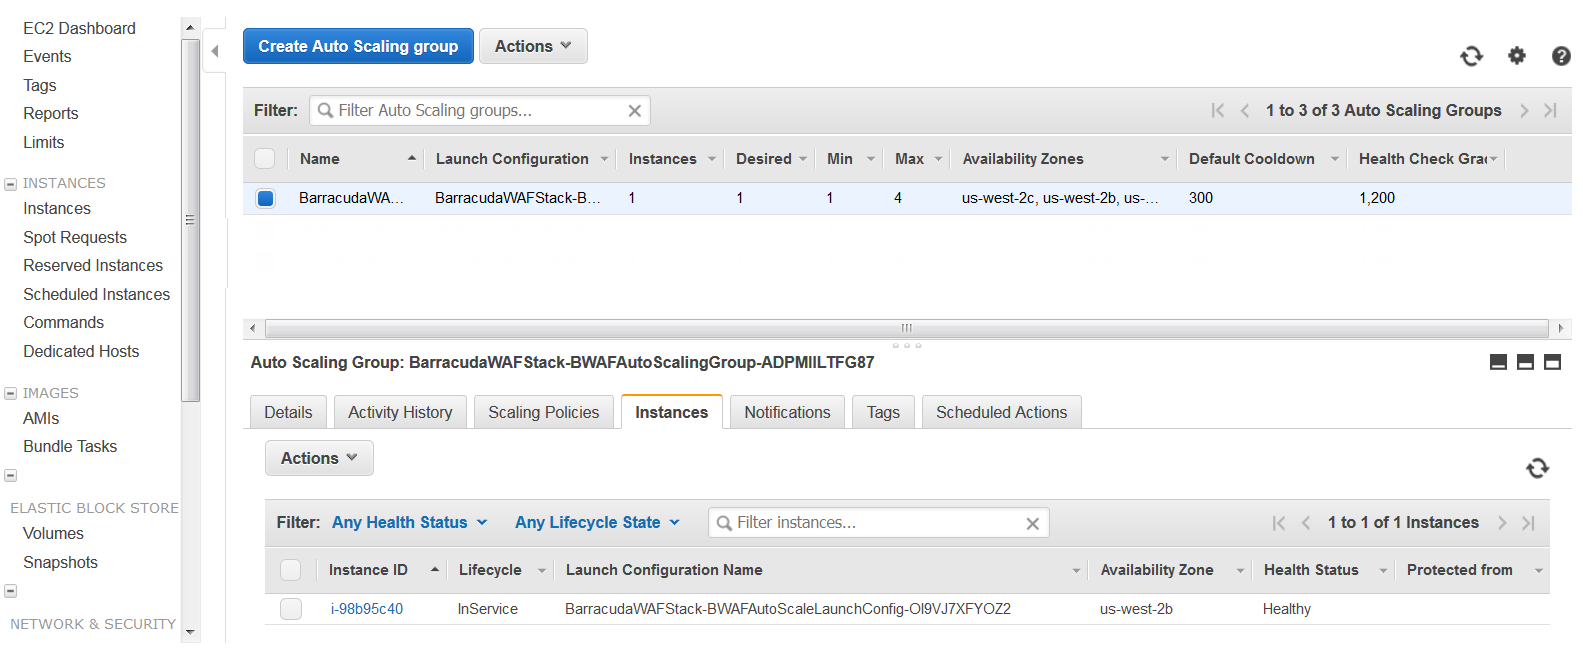
- Click on an Instance ID and note it down. The instance details are displayed on the Instances page. Note: Ensure you note down the Public IP or Public DNS address.
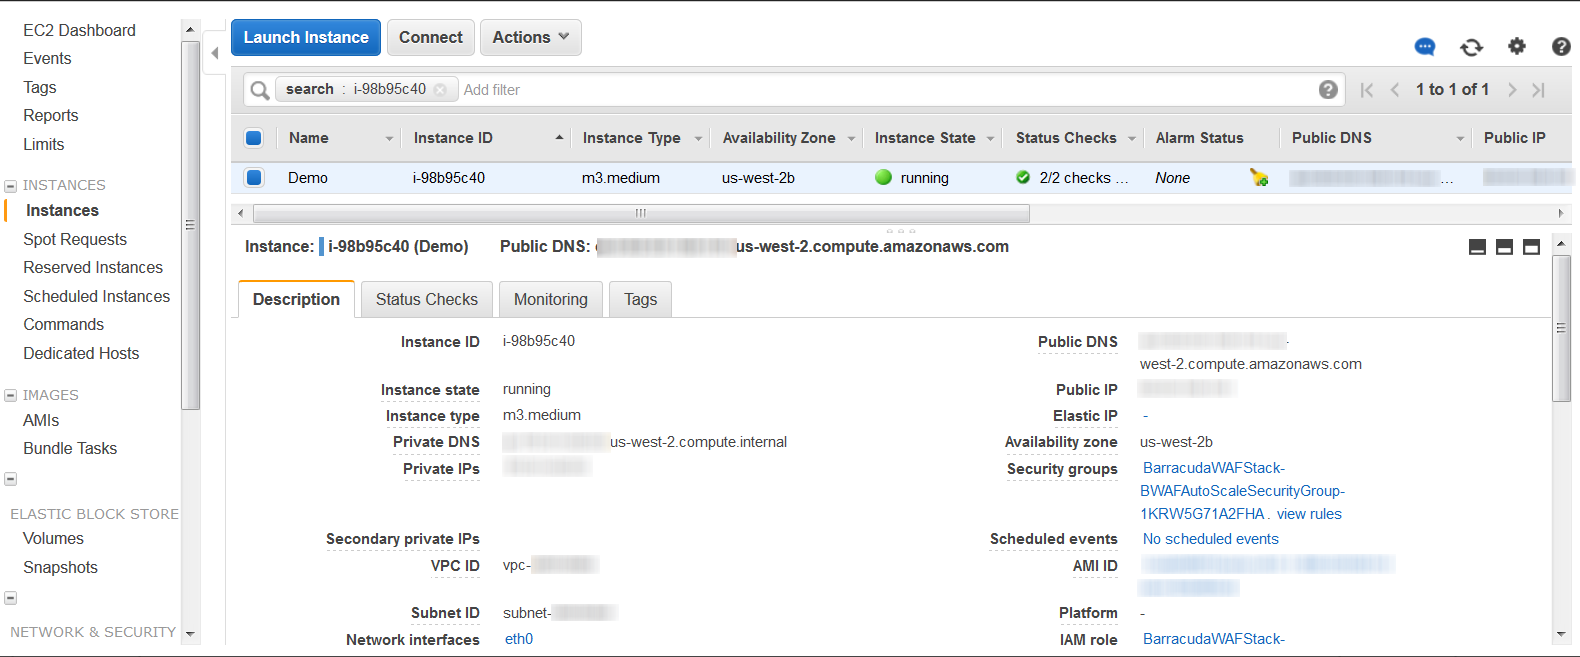
Open a web browser and enter the Public IP or Public DNS address noted in Step 5 followed by port 8000 (Example: http://40.41.42.43:8000 or http://ec2-40-41-42-43.us-west-2.compute.amazonaws.com:8000).
- Log into the Barracuda Web Application Firewall web interface using your login credentials:
Username – admin
Password – <Instance ID of the Barracuda Web Application Firewall noted in Step 5 > - On the Barracuda Web Application Firewall web interface:
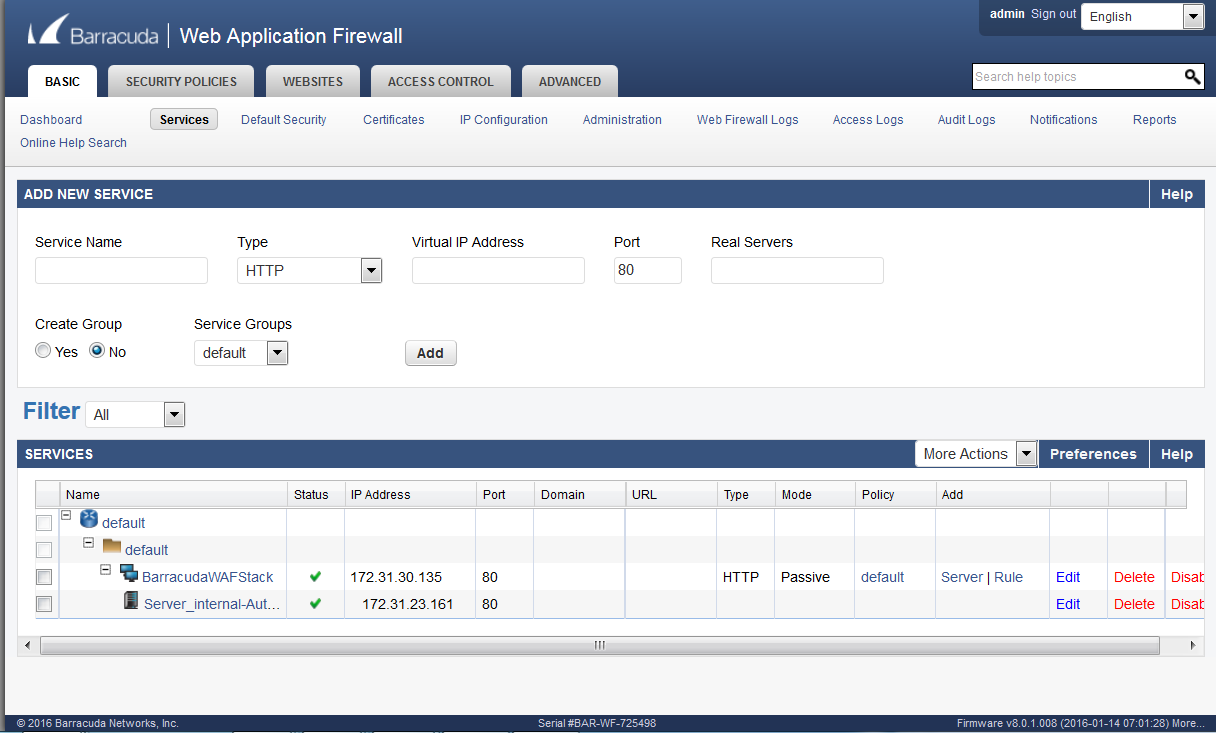
Go to the BASIC > Services page and check if the service is created with the values you specified when creating the stack.
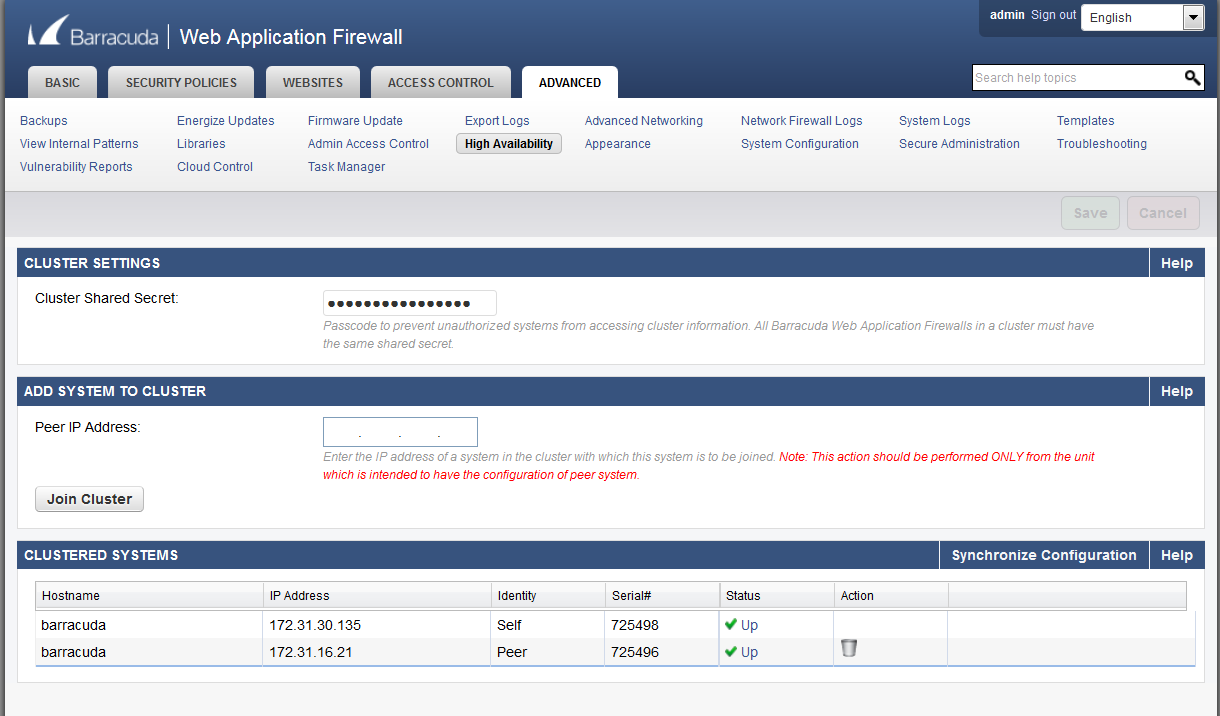
- Go to the ADVANCED > High Availability page and check the cluster status. Ensure the cluster page displays all the instances deployed in this auto scaling group.
- Repeat the Steps 5 to 8 for all other instances in this auto scaling group. Note: In an auto scaling group, each instance has a unique public DNS (which includes the public IP address in it), and is associated with same security group. When a new instance is added to the auto scaling group, you can use the public DNS or public IP address of that instance to access it. See Step 6 to learn how to access the instance using the public DNS or public IP address.
- Log into the Amazon Management Console and select S3 under Storage and Content Delivery.
- In the S3 Management Console:
- An S3 bucket is automatically created with the stack name as part of the unique identifier. Example: “barracudawafstackone-s3bucket-1pcf5nbtp8uh5”. You can verify that the bucket includes the data of the deployed Barracuda Web Application Firewall instances.