

Perform the following steps to deploy and provision the Barracuda Web Application Firewall using Resource Manager in the new Microsoft Azure portal:
Log into the Microsoft Azure Management Portal.
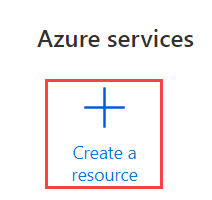
Click Create a resource under Azure services.
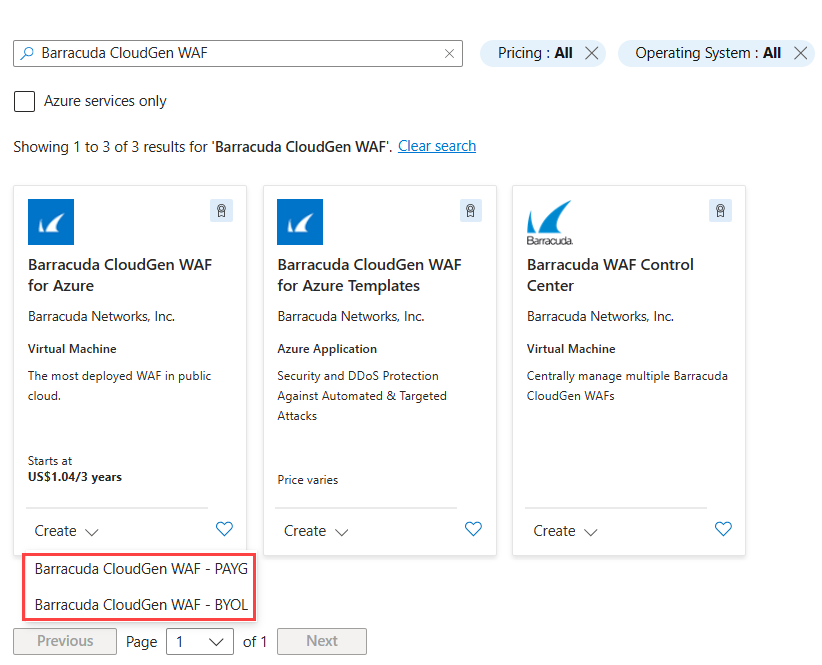
In the Search services and marketplace text field, enter
Barracuda CloudGen WAF for Azureand click Enter.In the search results, click the Create drop-down list under Barracuda CloudGen WAF for Azure and select Barracuda CloudGen WAF - PAYG or Barracuda CloudGen WAF - BYOL as per your requirement.
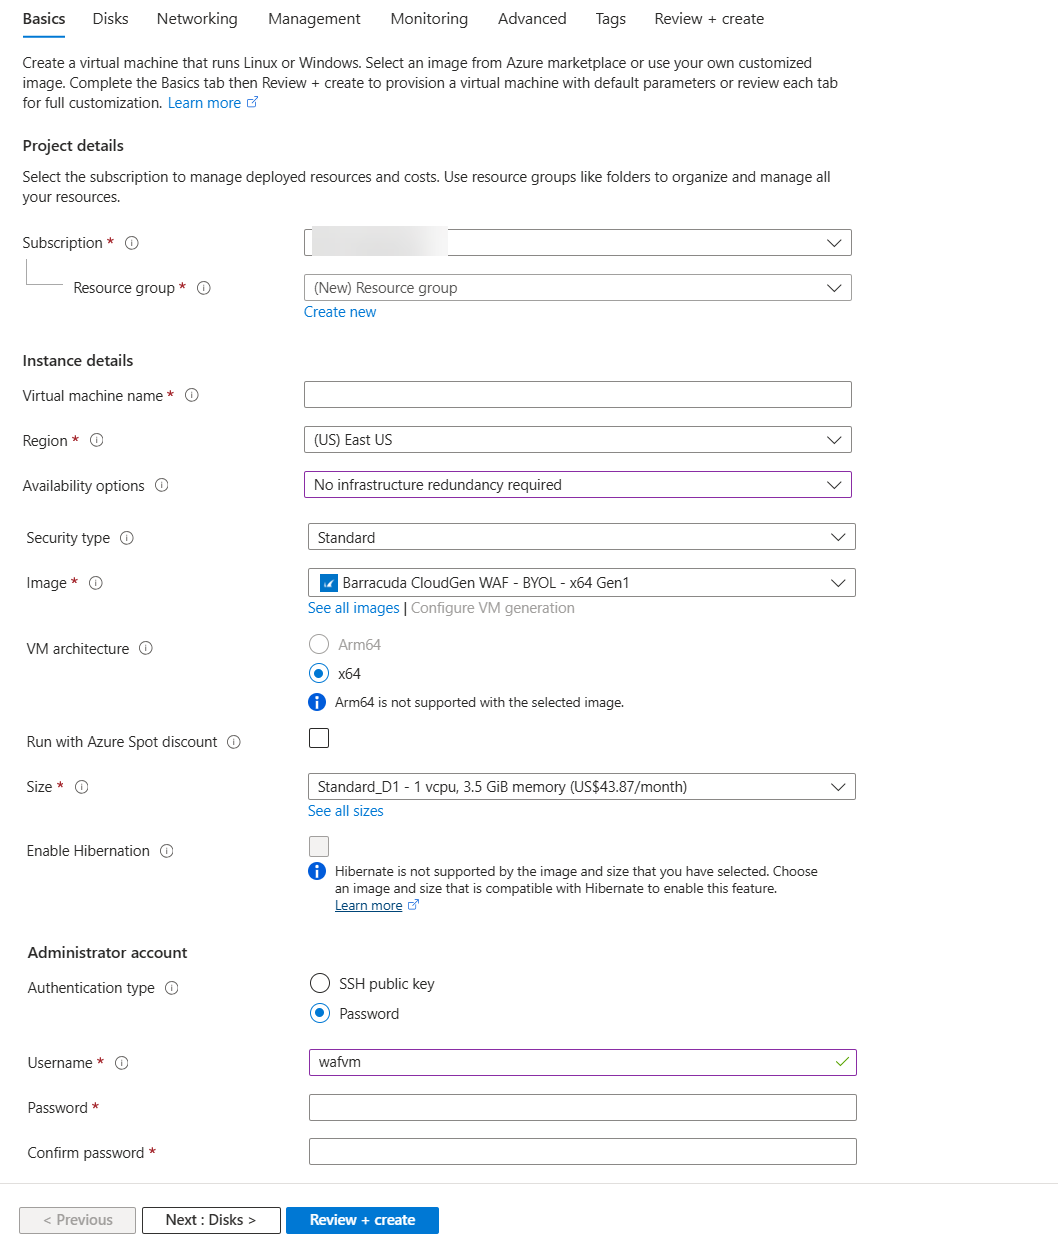
In the Create a virtual machine, Basics page:
Project details
Subscription: Select the subscription you want.
Resource group: Create a new resource group, or select a resource group from the existing Resource group list.
Instance details
Virtual machine name: Enter a name for the virtual machine.
Region: Select the region where you want to deploy the virtual machine.
Availability options: Select the required option from the drop-down list.
Security type: Select a security type as per your requirement.
Image: Keep the default.
VM architecture: Select the required option.
Size: Select a size for the virtual machine.
Administrator account
Authentication type: Choose Password and enter a password for the authentication. Note that this will be your password to access the Barracuda Web Application Firewall web interface.
Username: Enter a username. Note: This entry is not used by the Barracuda Web Application Firewall.
Password: Enter the password.
Confirm Password: Re-enter the password.
Click Next : Disks.
In the Create virtual machine, Disks page:
Select the disk options and data disks as per your requirement.
Click Next : Networking.

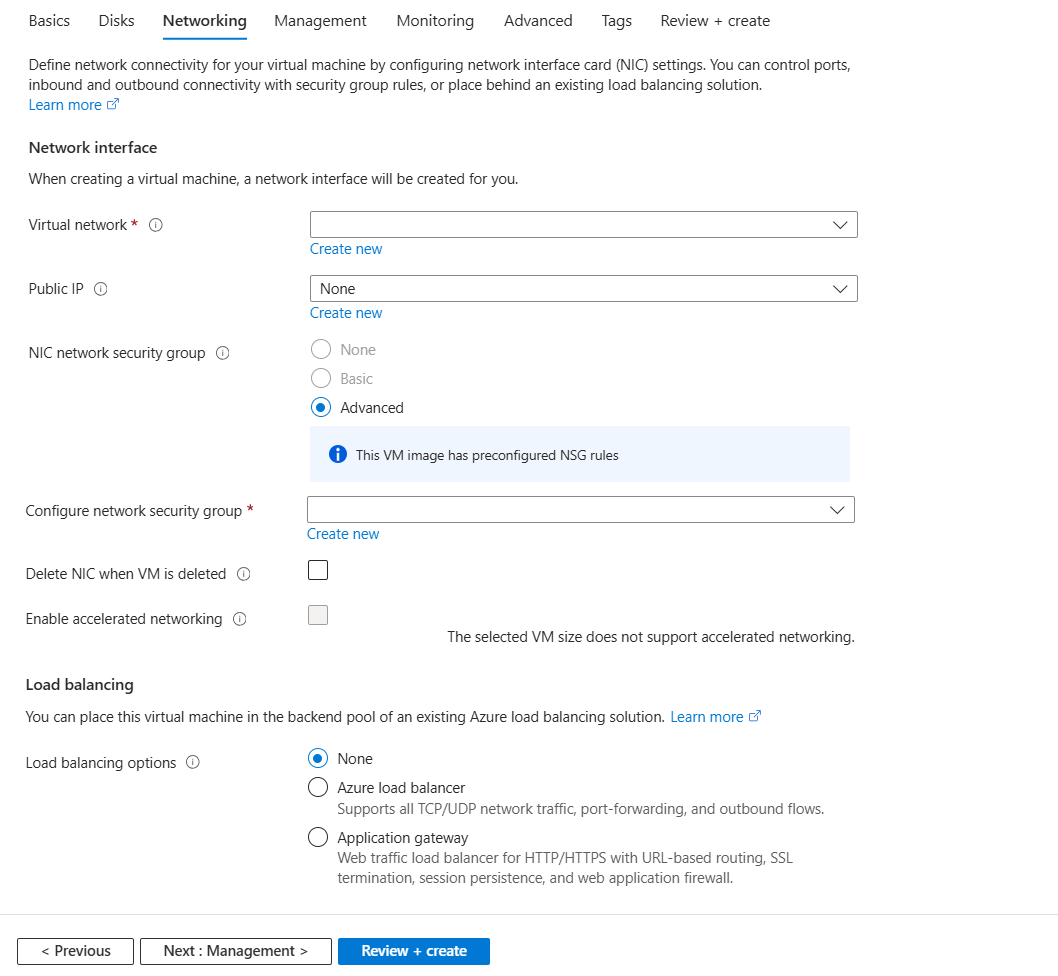
In the Create virtual machine, Networking page:
Network interface
Virtual network: Configure or select the network in which you want to deploy the Barracuda Web Application Firewall.
Subnet: Configure or select the subnet in which you want to deploy the Barracuda Web Application Firewall.
Public IP: Configure or select the public IP address to the Barracuda Web Application Firewall.
NIC network security group: Keep the default value.
Configure network security group: By default, port 8000 (TCP) and port 443 (TCP) will be opened as in your Security Group to access the web interface of the Barracuda Web Application Firewall. Configure additional rules that you want to use for creating services on the Barracuda Web Application Firewall.
Load balancing options: Select an option if you want to place the virtual machine behind an existing load balancing solution.
Click Next : Management.
In the Create a virtual machine, Management page:
Configure as per your requirement.
Click Next : Monitoring.
In the Create a virtual machine, Monitoring page:
Boot diagnostics: Set the default values.
Other configurations are not required.
Click Next : Advanced.

In the Create a virtual machine, Advanced page:
No configuration is required..
Click Next : Tags.
In the Create a virtual machine, Tags page:
Add the required tags and click Next : Review + create.
In the Create a virtual machine, Review + create page, review the configuration settings and click Create.
After you click Create, Microsoft Azure begins provisioning the Barracuda Web Application Firewall. You can check the status of the provisioned Barracuda Web Application Firewall from the Microsoft Azure Portal. Allow a few minutes before taking any further actions in the portal. During this time, the Microsoft Azure Linux Agent and Barracuda Web Application Firewall image boots up.
Next Step
Continue with the Barracuda Web Application Firewall Quick Start Guide - Microsoft Azure for licensing and initial configuration of your virtual machine.