

In this lab, you will deploy an unsecure web application into Amazon Web Services (AWS), and then secure the application using the Barracuda Web Application Firewall. To create the environment, you will deploy a Virtual Private Cloud, Internet Gateway and NAT Gateway to provide for the virtual networking. Then a Barracuda Web Application Firewall and an Ubuntu server with Apache, PHP, MySQL and the Damn Vulnerable Web Application (DVWA), installed.
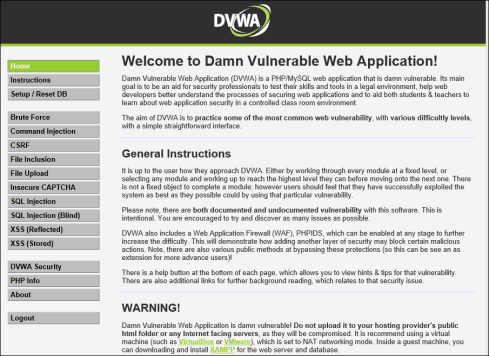
DVWA is a PHP/MySQL web application that is vulnerable attack. Its main goals are to be an aid for security professionals to test their skills and tools in a legal environment, help web developers better understand the processes of securing web applications and aid teachers/students to teach/learn web application security in a class room environment. More information can be found on the DVWA site.
Once this infrastructure is built you create an Elastic Load Balancer in AWS that will direct traffic from the Internet to the Barracuda Web Application Firewall (both management and web). Next you will configure a Barracuda Web Application Firewall (WAF) to provide the service of the Damn Vulnerable Web Application (DVWA). After this is created you will connect to the DVWA web application and run the attacks to see how they are logged in the Barracuda Web Application Firewall.
These detailed step-by-step instructions will guide you through the lab.
Scenarios
- Deploy and configure an AWS Virtual Private Cloud.
- Provision and configure the Barracuda Web Application Firewall.
- Deploy and configure the DVWA application.
- Simulate attacks on the site using the DVWA application and capture the attacks being launched, configure policies and run reports from the WAF.
Requirements
- Amazon Web Services subscription
- Valid contact details to complete the Barracuda Web Application Firewall trial registration
The following is a diagram of the deployment that will be completed at the end of this hands-on lab.
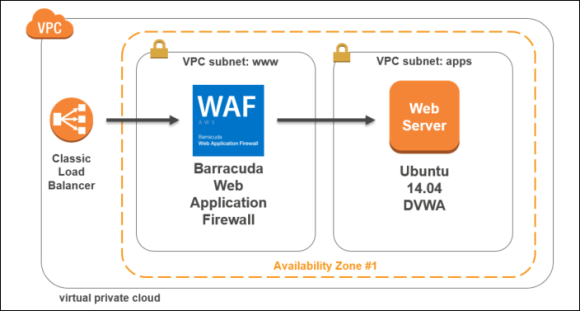
Exercise 1: Environment Setup
In this exercise, you will use an AWS Console to implement the infrastructure that will be leveraged for the rest of the exercises. This includes creating the Virtual Private Cloud (VPC), provisioning the Barracuda Web Application Firewall, the Elastic Load Balancer (ELB), and the Ubuntu server which will host the DVWA application.
Task 1: Create the Networking Infrastructure using an AWS Console
- Go to the AWS portal https://console.aws.amazon.com/. After entering your credentials, the AWS Dashboard will display.
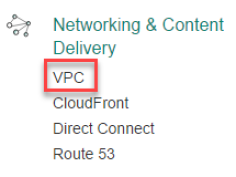
- Click through Console > Networking & Content Delivery > VPC.
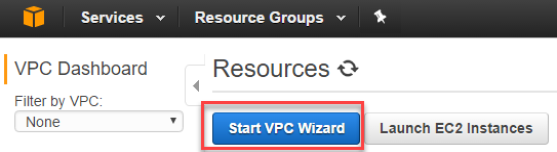
- Next, click Start VPC Wizard.
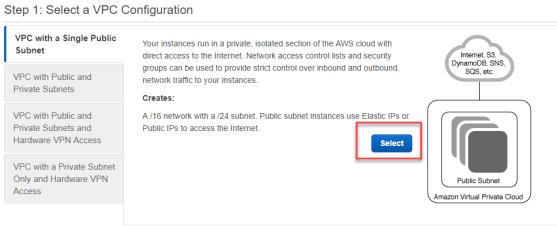
- On Step 1: Select a VPC Configuration, click Select.
- Complete the Step 2: VPC with a Single Public Subnet screen using the following details and then click Create VPC.
- IPv4 CIDR block –
10.0.0.0/16 - VPC name –
BarracudaWAFLab - Availability Zone –
us-east-1a - Subnet name –
www
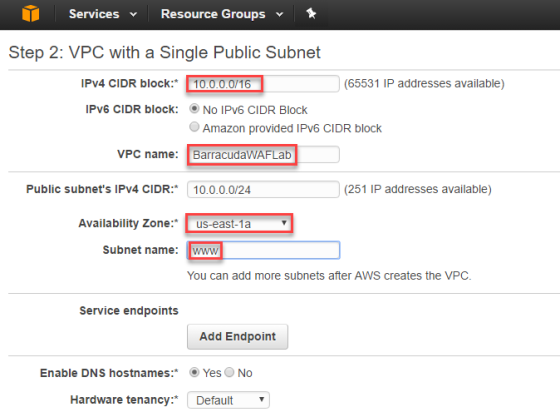
- IPv4 CIDR block –
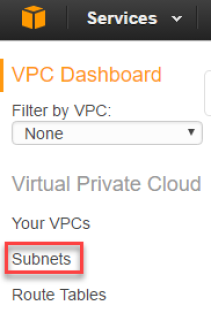
- Next, click Subnets and review the subnet that was created by the wizard.

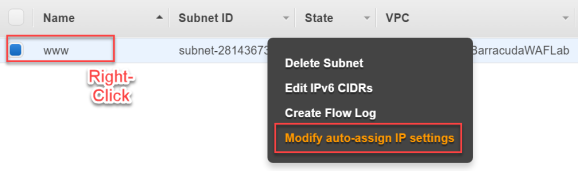
- Right click on the subnet, and then click Modify auto-assign IP settings. The Modify auto-assign IP settings screen opens.
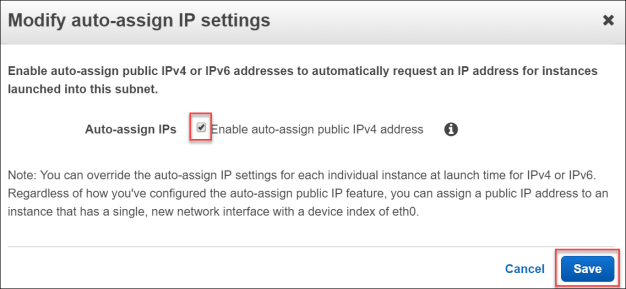
- Check the box for Enable auto-assign public IPv4 address and then click Save.
- From the Subnet screen, click Create Subnet to create a new subnet.
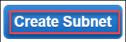
- Complete the Create Subnet screen using the following details, then click Yes Create:
- Name tag –
apps - Availability Zone – us-east-1a
- IPv4 CIDR block –
10.0.1.0/24
- Name tag –
- On the Subnets page, review both the www and apps subnets.
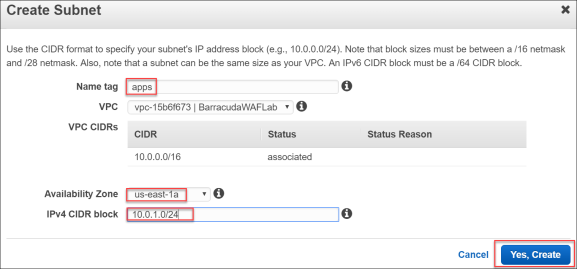
- From the VPC Dashboard, click Internet Gateways and review how this was created by the wizard. Make sure that the State shows attached.
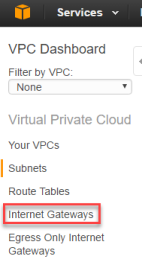

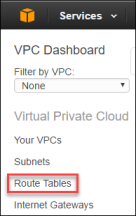
- Next, click Route Tables to review how the routing has been configured.

- Notice that the www subnet has been configured to associate the Internet bound route 0.0.0.0/0 to the Internet Gateway.
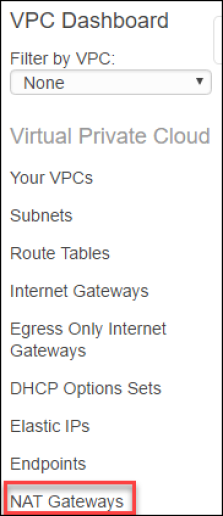
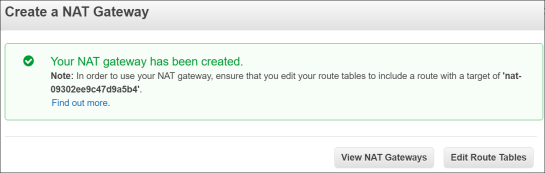
- From the AWS console, click VPC under the Networking and Content Delivery, then click NAT Gateways.
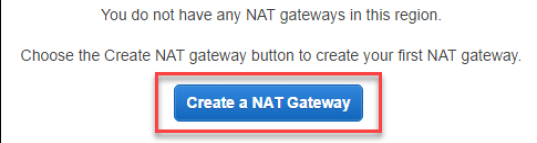
- Click Create a NAT Gateway.
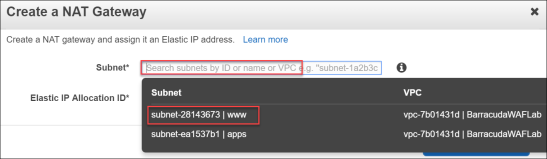
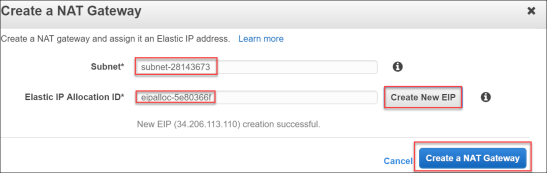
The Create a NAT Gateway window opens. - Select the www Subnet, then click Create a New EIP.
- Once this is completed click Create a NAT Gateway.
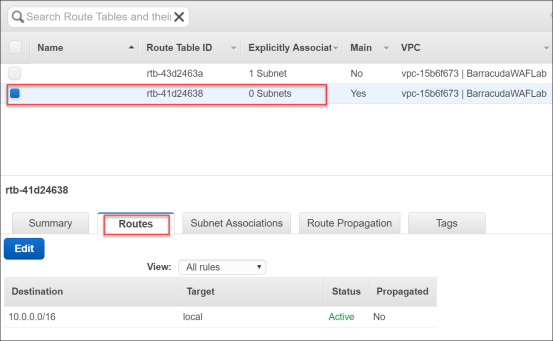
- Next, click Route Tables to review how the routing has been configured.
- Locate the second route table that was created, but currently has 0 subnets associated.
- Click this Route Table and select Routes. Notice how currently this is only a route for local traffic in the CIDR range of 10.0.0.0/16. This means there is no route to the Internet.
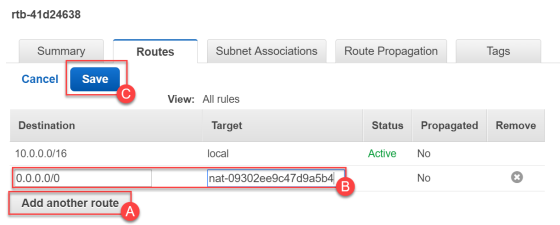
- Click Edit, to make changes to the route table:
- Click Add Another Route.
- As the Destination, select 0.0.0.0/0.
- As the Target, select the NAT gateway.
- Click Save.
- Click the Subnet Associations tab, and select Edit.
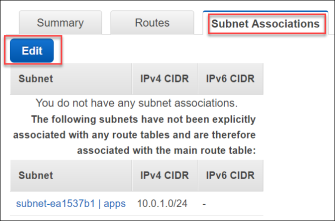
- Now, check the box for the apps subnet to associate this route table with the apps subnet.
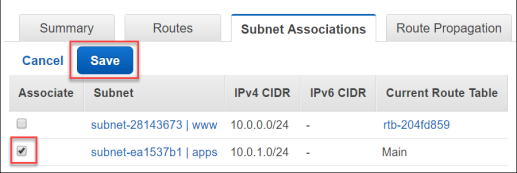
Now the private servers on the apps subnet will use the NAT gateway for their Internet bound traffic.
Task 2: Provision the Barracuda WAF using the AWS Marketplace
- Sign-in to the AWS Console.
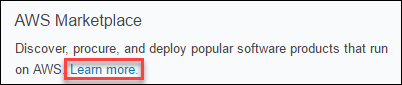
- On the right-hand side of the console under AWS Marketplace, click the Learn more link.
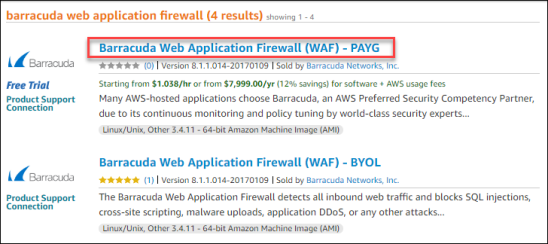
- In the AWS Marketplace search box, type
Barracuda Web Application Firewalland then click on the magnifying glass.
- Several Barracuda Networks products will be returned by this search. Choose the Barracuda Web Application Firewall (WAF) – PAYG.
- Once the WAF page loads, click Continue.
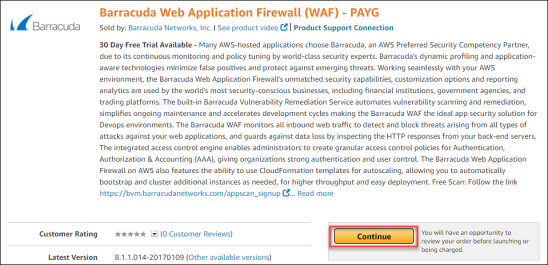
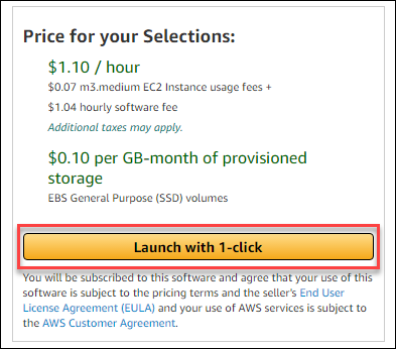
- Complete the Launch wizard using the following settings:
- Type – 1-Click Launch
- Software Pricing – Hourly / m3. medium
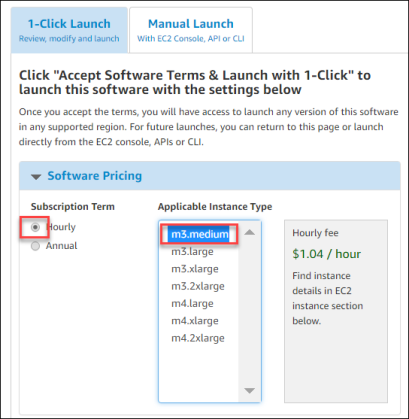
- Version – accept the latest version.
- Region – US East (N. Virginia)
- EC2 Instance Type – m3.medium
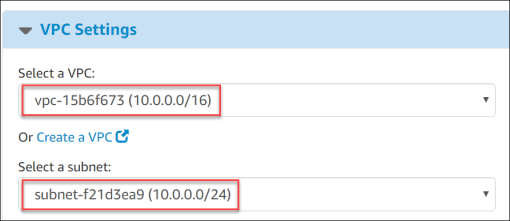
- VPC Settings – Select the VPC and www subnet (10.0.0.0/24).
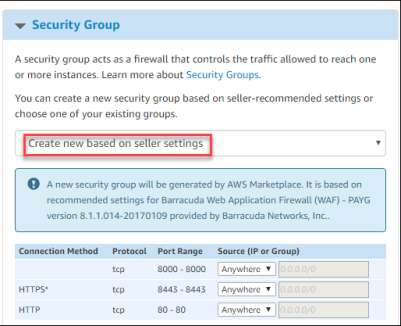
- Security Group – Select Create new based on seller settings.
- Key Pair – Select or Create a New Key
- After verifying the selections, click Launch with 1-click.
- Next on the AWS Marketplace Product Support Connection screen, click Share your contact details.
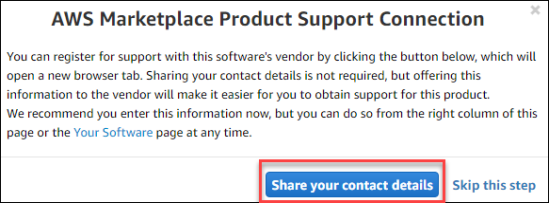
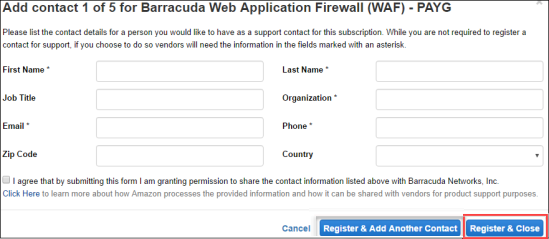
- Complete the Barracuda Networks Support Form and click Register & Close.
- After completing the registration, the following page will appear from which the WAF was launched:
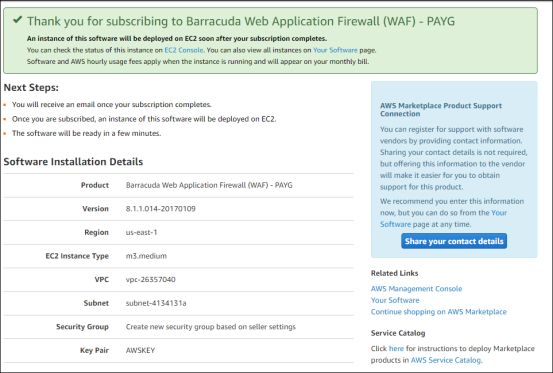
Click on the EC2 Console link in the green message about the deployment of the Barracuda Web Application Firewall. Once it is deployed the instance will show it is Running.

Task 3: Provision the Elastic Load Balancer
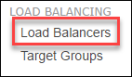
- In the AWS Console, click on Load Balancers.
- Select Create Load Balancer.
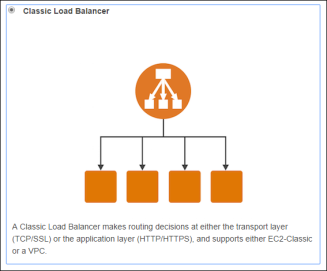
- Select the Classic Load Balancer as the type of Elastic Load Balancer, and click Continue.
- In Step 1: Define Load Balancer, complete the screen using these inputs.
- Load Balancer Name –
BarracudaWAF-ELB - Create LB Inside – Select the VPC that you created for this lab.
- Subnet – Select the www subnet.
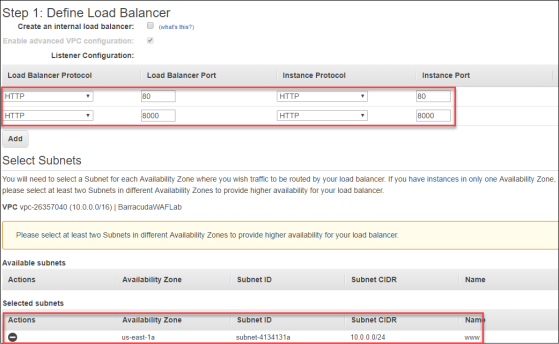
- Load Balancer Name –
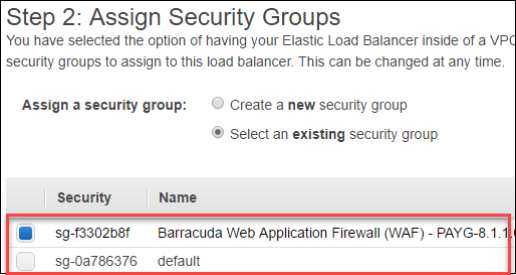
- Click Next: Assign Security Groups.

- Deselect the default security group, and select the new Barracuda Web Application (WAF) security group that was created by the AWS Marketplace deployment of the device.
- Click Next: Configure Security Settings.
- Click Next: Configure Health Check.
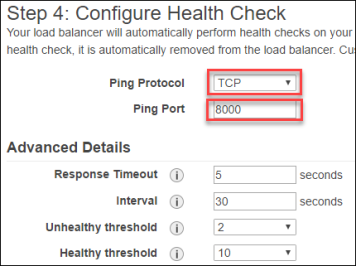
- Complete the Step 4: Configure Health Check screen, using the following settings:
- Ping Protocol – TCP
- Ping Port – 8000
- Advanced Details – Accept defaults.
- Click Next: Add EC2 Instances.
- On the Step 5: Add EC2 Instances screen, click on the instance.

- Click Next: Add Tags.

- Click Review and Create.
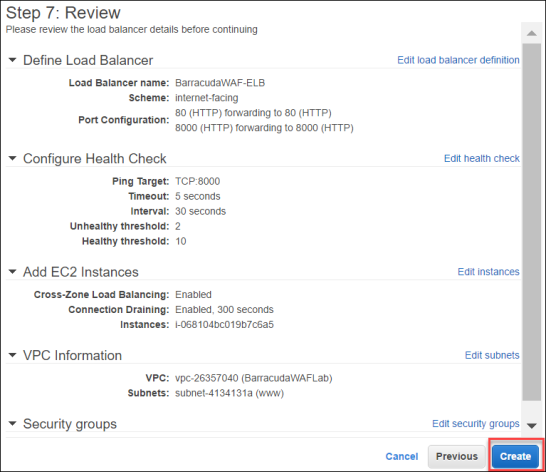
- Review Step 7: Review and compare to the ensure that everything is configured properly.
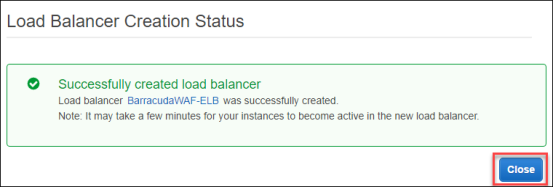
- You should then get a message that the BarracudaWAF-ELB was successfully created:
- In the AWS Console, click the Load Balancers link.
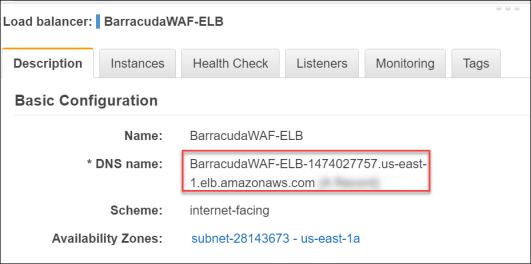
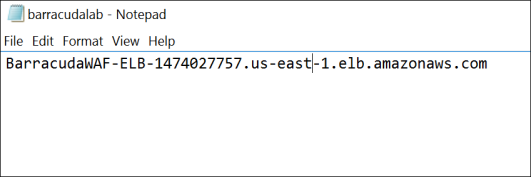
- On the BarracudaWAF-ELB load balancer that you crated, on the Description tab, locate the DNS name of the load balancer and copy it to a text file. You will use this to connect to later in the lab.
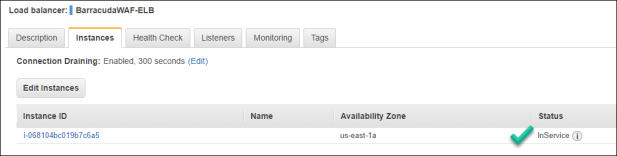
- Next, click the Instances tab. You may notice that the WAF has yet to be put into service by the ELB. Wait until you see that the Status change to InService. You need to hit the refresh button to see the updates.

- Click the Instance ID number which will break up details about the BarracudaWAF instance.
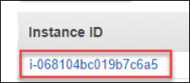
- On the Description tab, locate the IPv4 Public IP for the WAF and take note of the address.

Open a new tab on your web browser and point it to PUBLIC IP address on the management port of 8000. This will bring you to the home page of the WAF where there will be a licensing agreement displayed.
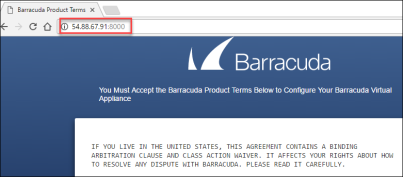
- Scroll down to the bottom of the webpage and click Accept.

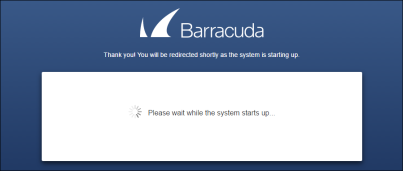
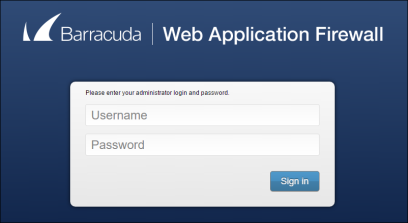
- Once the system starts the login page will appear. Once this page has loaded move on to the next step leaving the tab here.
Task 4: Provision Ubuntu Server with the DVWA Application
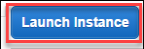
- From the AWS console click Instances, then click Launch Instance.
- Scroll down and select the Ubuntu Server 14.04 LTS (HVM) AMI to deploy as your Web Server for the DVWA.

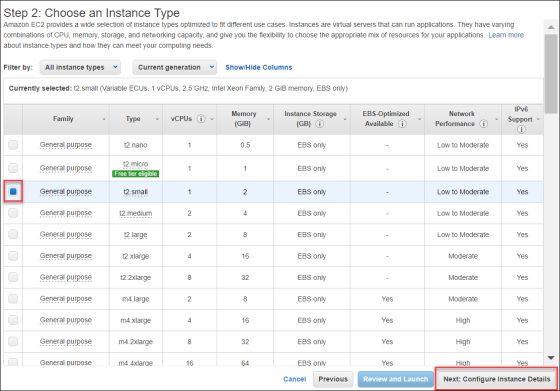
- At Step 2: Chose an Instance Type, select t2.small size for the VM. Then click Next: Configure Instance Details.
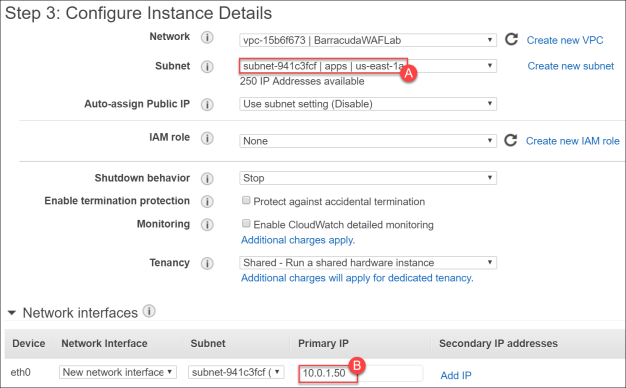
- On Step 3: Configure Instance Details, complete the screen using these details wherever details are not provided leave the defaults, move on to the next step without clicking Next.
- Subnet – apps
- Primary IP –
10.0.1.50
- Again, on Step 3: Configure Instance Details, scroll down and click the Advanced Details tab. Copy this script text into the User Data box:
#!/bin/bashwget https://opsgilityweb.blob.core.windows.net/20170304-barracudawaf/dvwa.shbash dvwa.sh
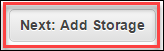
- Click Next: Add Storage.
- On the Step 4: Add Storage screen, accept the defaults and click Next: Add Tags.
- On the Step 5: Add Tags screen, accept the defaults and click Next: Configure Security Groups.

- On Step 6: Configure Security Group, name it
DVWA, click Add Rule, and add a rule for HTTP Port 80.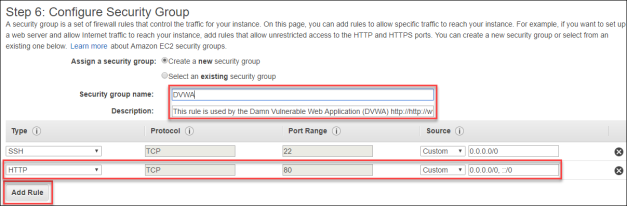
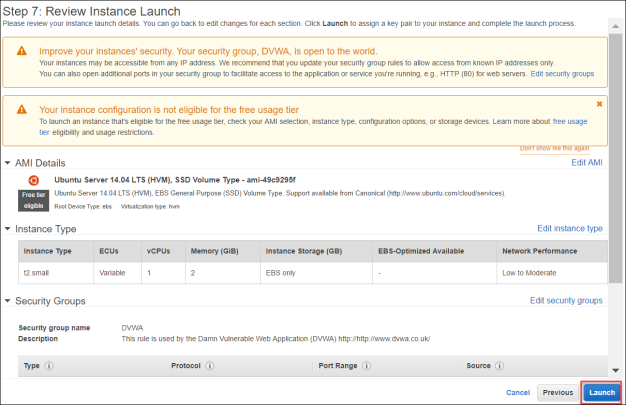
- Click Review and Launch.

- On Step 7: Review Instance Launch, click Launch.
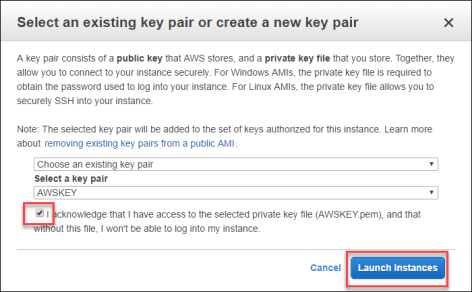
- Select your AWS key pair, and click Launch Instances.
- After a few minutes (maybe 10), check back on the EC2 Console and now both the WAF and the DVWA server should show as running. You can add names to the instances to make it easier to identify the VMs. The T2.small is the DVWA and the M3.Medium is the WAF.

Summary:
In this exercise, the AWS Console was to implement the infrastructure that will be leveraged for the rest of the exercises. This included creating the Virtual Private Cloud (VPC), provisioning the Barracuda WAF, the Elastic Load Balancer (ELB), and the Ubuntu server.
Exercise 2: Configure the Barracuda WAF Virtual Appliance and the DVWA Application
In this exercise, the Barracuda WAF Appliance and the DVWA Services will be configured. First the WAF will be configured to connect to the DVWA. Once this is completed then a connection to DVWA server will be made and the configuration will be completed. After this is finished the end to end setup will be complete allowing for simulated attacks in the next exercise.
Task 1: Configure the WAF Appliance
- Move back to the tab that contained the login page or if this has been closed open it backup and connect to the WAF.
- Use the following login information:
- Username –
admin - Password – Instance ID of your Barracuda WAF Instance in Amazon Web Services.

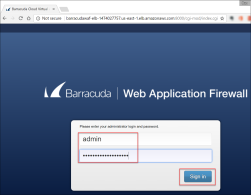
- Username –
- Once logged in, you will be directed to the Dashboard page of the Barracuda Web Application Firewall.
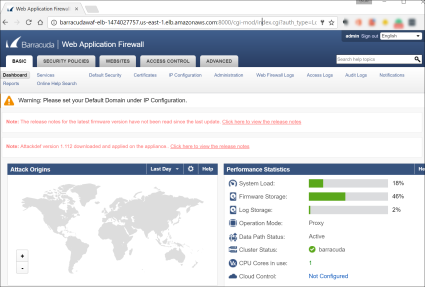
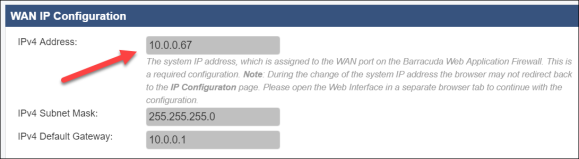
- Go to BASIC > IP Configuration.
- Review the networking configuration and take note of the IP address assigned to the WAF by AWS.
Update the Default Host Name
barracudawafwhich is the name you gave the VM when you provisioned in the AWS Portal.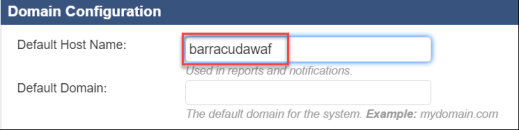
Click Save.
Task 2: Create a Web Service to Publish the DVWA Application
- Log into the Barracuda Networks device.
- User –
admin - Password –
[InstanceID]
- User –
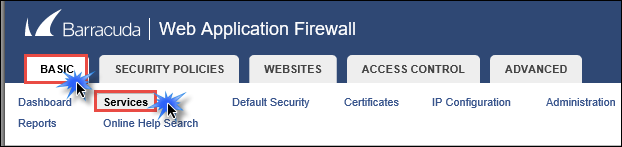
- Go to BASIC > Services.
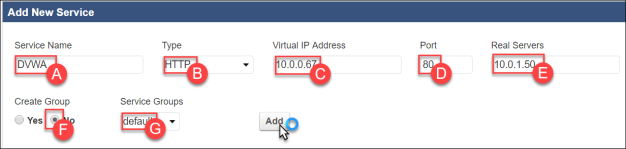
- Go to ADD NEW SERVICE, update the fields, and then click Add.
- Service Name –
DVWA - Type – HTTP
- Virtual IP Address – IP address assigned to the WAF by AWS.
- Port –
80 - Real Servers –
10.0.1.50(This is the address you assigned to the DVWA Server) - Create Group – No
- Service Groups – default
- Service Name –
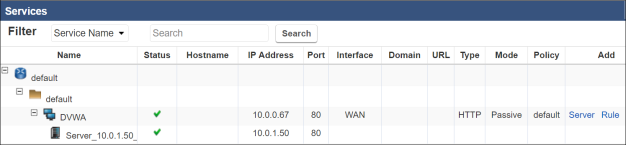
- After about 15 seconds the firewall will update and the Services pane will now look like below:
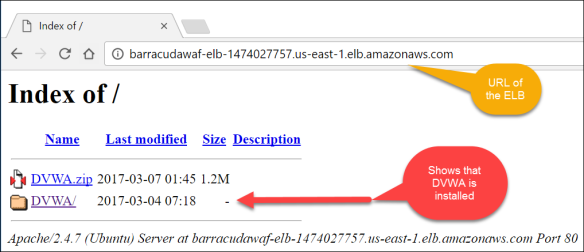
Open a new tab on the web browser and point it at the DNS name of the Elastic Load Balancer. This should be in the text file that you saved, or can be found on the ELB in the AWS Console. The DVWA server should load with the traffic flowing through the ELB and if the DVWA folder is on the server then it is installed.
Task 3: Configure the Damn Vulnerable Web App
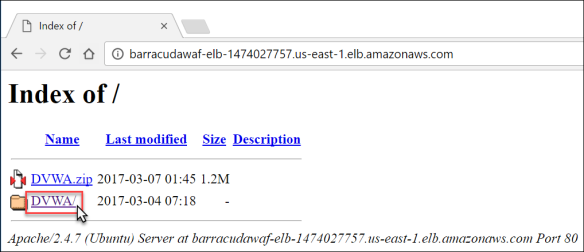
- From the connection to the DVWA server through the ELB, click the DVWA link to attach to DVWA and complete its configuration.
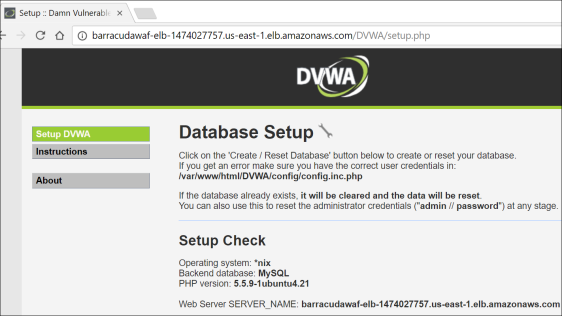
- This will load the DVWA web application and bring up the Database Setup page.
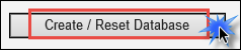
- Scroll down and click Create / Reset Database. You will briefly see an update that the database was created and then be redirected to a login page.
- Once at the login page use the following login information to test the application.
- Username –
admin - Password –
password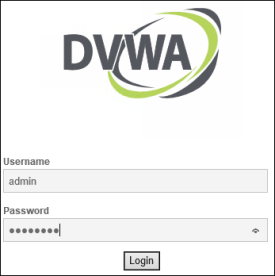
- Username –
- Click Logout.
Summary:
In this exercise, the Barracuda WAF appliance and the DVWA services were configured. The WAF was configured to connect to the DVWA, and then the DVWA application configuration was completed. This completed the necessary steps to allow for an end to end setup allowing for simulated attacks in the next exercise.
Exercise 3: Simulate Attacks and Secure the Environment using the WAF
In this exercise, attacks will be simulated against a website using the DVWA application. Using the tools of the WAF, fixes will be applied to avoid these attacks in the future.
Task 1: Command Injection Attack
Open a new tab on your local web browser and navigate to the public IP address of the ELB. The example here is at http://BarracudaWAF-ELB-1474027757.us-east-1.elb.amazonaws.com/DVWA (DVWA is case sensitive). This will load the DVWA application as published via the Barracuda Web Application Firewall.
- The login page of the DVWA website will appear. Use these credentials:
- Username –
admin - Password –
password
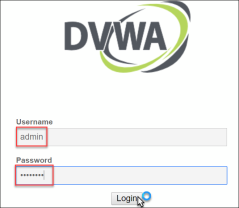
- Username –
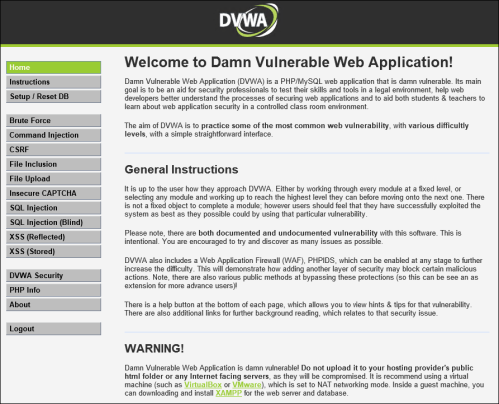
- The home page for DVWA will appear in the browser window.
- Once on the home page click on the Command Injection link. Next, type
8.8.8.8(this is the Google DNS server IP address), in the Enter an IP address box, and click Submit.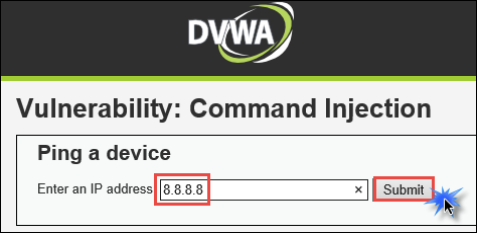
The page will take 10 seconds or so to run and the provide the following output.
- Now move back to the browser tab for the WAF and go to BASIC > Web Firewall Logs.

- On the Web Firewall Logs page, update the filter with the following details, and then click Apply Filter.
- Service IP
- is equal to
IP address of the WAF

Notice how the WAF has alerted at the attack.
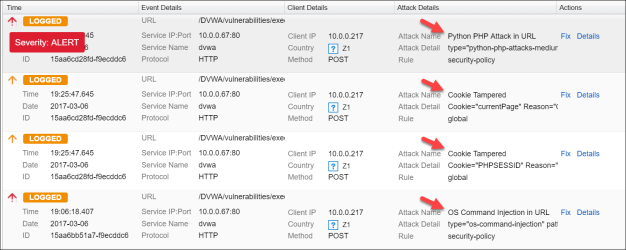
- Click Save Filter, this will open a new window. Type
myfilterinto the Filter Name box, and then click Save.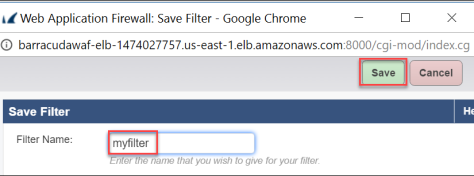
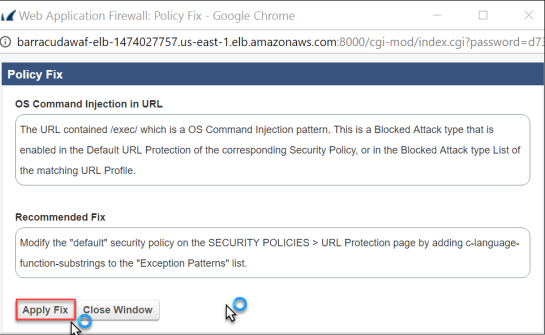
- Find the last logged with the attack name OS Command Injection in URL, and click Fix.

- This will open a Policy Fix window. Read the details and then click Apply Fix.
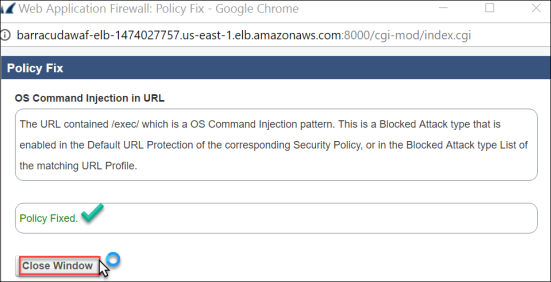
The window will update showing that the policy has been updated. - Click Close Window.
- Move back to the DVWA application and again launch the command injection attack by entering
8.8.8.8in the Ping a Device tool. - Once this is completed move back to the WAF tab and click Apply Filter. Notice that you no longer see the Attack Name OS Command Injection in URL, in the logs.
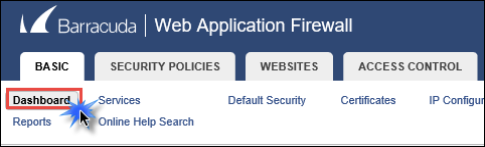
- Go to Basic > Dashboard.
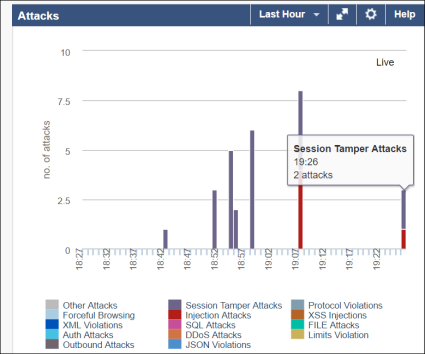
Once at the Dashboard, scroll down to the Attacks graphs. Change the time to Last Hour. It should then resemble the following showing attacks that you have made against the site.
- Move back to the DVWA application in your browser. Click through some of the other attacks. Once this is completed move on to the next task.
Task 2: Using Reporting
- On the BarracudaWAF management screen, click Reports.

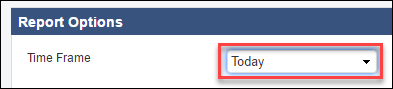
- In Report Options section, change the Time Frame to Today.
- Scroll down to the Security section, select the checkbox next to Attacks by Category, and then click Show Report.

- The report window will load showing the different attacks. Take the time to review the report.
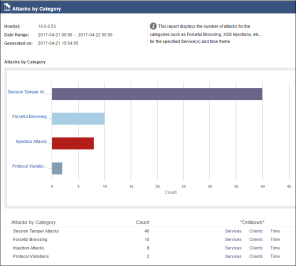
- In the drill down section, click on the different areas to better understand the information behind the report. Select Clients or Time.

- Close the report by hitting the X at the top of the window.
- Locate the Top Attacked URLs in the Security section, select the checkbox, and then click Show Report.
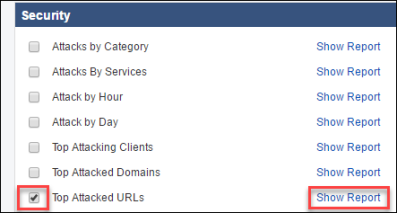
- Review the report and mouse over the charts to see the URLs.
