

This section walks you through steps of how to deploy the Barracuda Web Application Firewall (WAF) on Google Cloud Platform via the Google Launcher.
Before You Begin
Ensure that you have a Google account created.
Step 1. Create a Network in the Google Cloud
Create the virtual network you are deploying your firewall to
- Go to https://console.cloud.google.com.
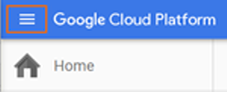
- Click the hamburger menu in the upper-left corner.
- From the Networking section, click VPC networks and then select VPC networks from the list.
- In the VPC networks window, click Create VPC Network.

- In the Name and Description boxes, specify a name for the network and its description.
- In the Subnetworks section, click Custom.
- Create the public subnet:
- Name - Enter public-subnet
- Region - Select your region.
- IP address range - Enter the network in CIDR format. If possible, do not use a network that overlaps with your on-premises network.
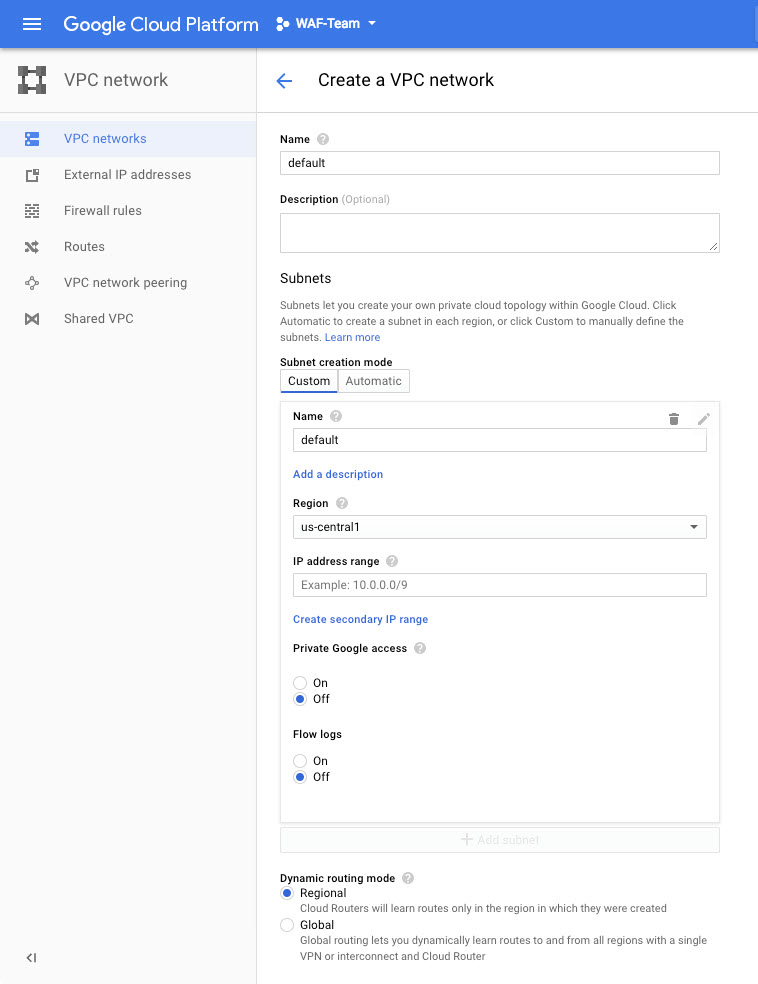
- Click Create . The network is now listed.

Step 2. Create the WAF Instance from Cloud Launcher
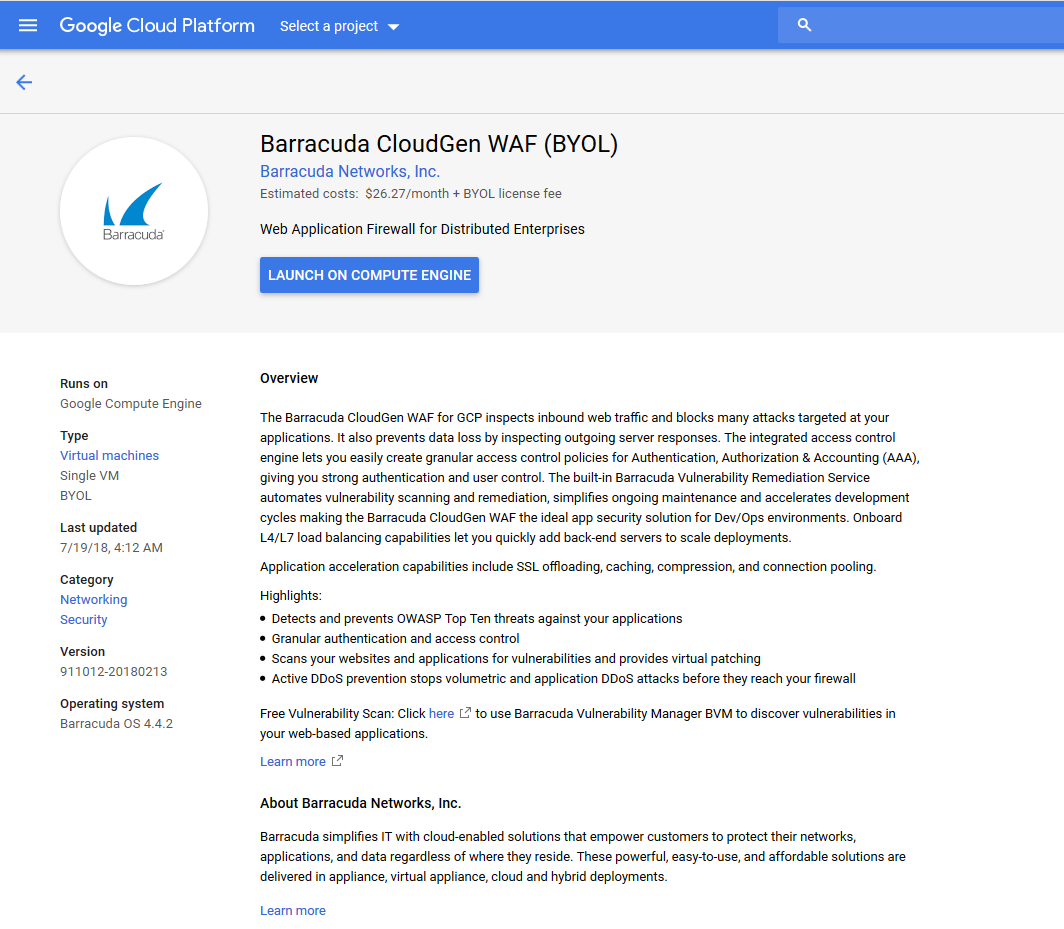
Deploy a new Barracuda Web Application Firewall (BYOL) instance from the Cloud Launcher image.
- Go to the Barracuda CloudGen WAF (BYOL) page.
- Click Launch on Compute Engine.
- Enter the Deployment name.
- From the Zone list, select the region for your new firewall instance.
- Select the Machine type with the number of vCPUs corresponding to your Barracuda WAF license and performance needs. For more information, see Public Cloud.
- Change Disk type to SSD if you plan to use IO-intensive features like WAN Opt, Malware Protection, or HTTP Proxy. Otherwise, leave the default setting to Standard Persistent Disk.
- In Networking, choose network and subnetwork names for the public subnet you created in Step 1.
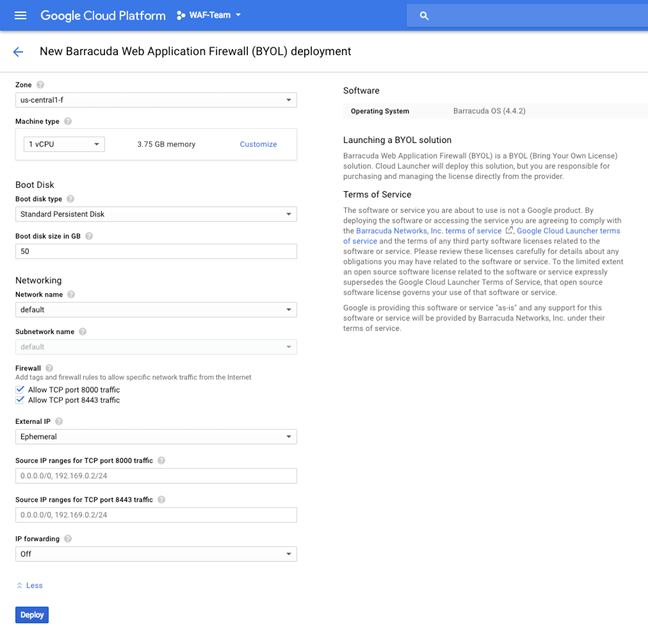
- Leave all the default firewall positions checked. You can add more ports, protocols, and IP addresses after deployment.
- (optional) If you want to use a reserved static address as created in Step 2:
- Click More to expand the advanced options.
- Select your External IP from the list.
- Click Create to start the deployment.
Step 3 - License the Barracuda Web Application Firewall
If you have deployed the Barracuda Web Application Firewall with BYOL, complete the licensing and provisioning of your system.
- Go to https://console.cloud.google.com.
- Click the hamburger menu in the upper-left corner.
- From the Tools section, click Deployment Manager and then select Deployment from the list.
- In the left pane, click the deployment that you have just created.
In the right pane, click Log into the admin panel.
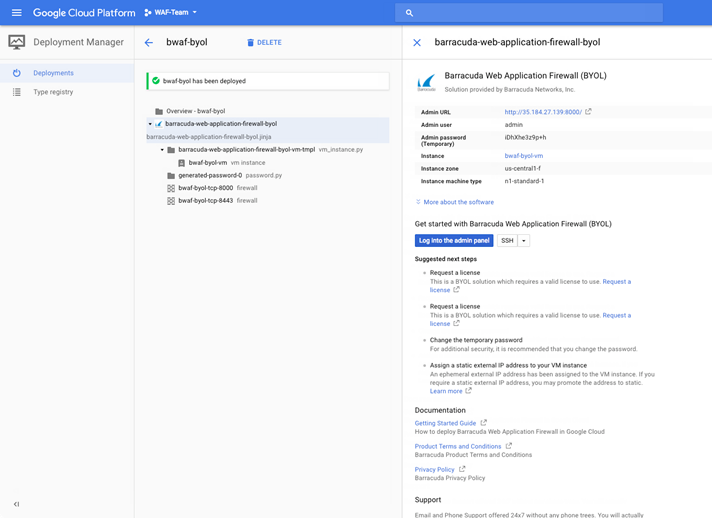
- After the boot process is complete, the Licensing page displays the following options (This step is skipped in case of PAYG instances)
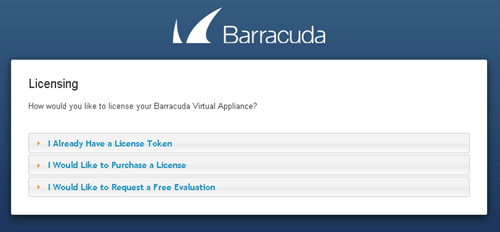
- I Already Have a License Token – Use this option to provision your Barracuda Web Application Firewall with the license token you have already obtained from Barracuda Networks. Enter your Barracuda Networks Token and Default Domain to complete licensing, and then click Provision.
The Barracuda Web Application Firewall connects to the Barracuda Update Server to get the required information based on your license and then reboots automatically. Allow a few minutes for the reboot process. Once the instance is provisioned, you are redirected to the login page. - I Would Like to Purchase a License – Use this option to purchase the license token for the Barracuda Web Application Firewall. Provide the required information in the form, accept the terms and conditions, and click Purchase.
The Barracuda Web Application Firewall connects to the Barracuda Update Server to get the required information based on your license and then reboots automatically. Allow a few minutes for the reboot process. Once the instance is provisioned, you are redirected to the login page. - I Would Like to Request a Free Evaluation – Use this option to get 30 day free evaluation of the Barracuda Web Application Firewall. Provide the required information in the form, accept the terms and conditions, and click Evaluate.
The Barracuda Web Application Firewall connects to the Barracuda Update Server to get the required information based on your license and then reboots automatically. Allow a few minutes for the reboot process. Once the instance is provisioned, you are redirected to the login page.
- I Already Have a License Token – Use this option to provision your Barracuda Web Application Firewall with the license token you have already obtained from Barracuda Networks. Enter your Barracuda Networks Token and Default Domain to complete licensing, and then click Provision.
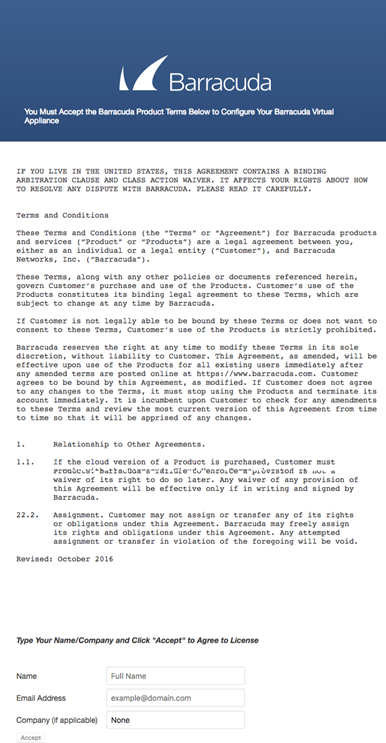
After you provide the license key, the Barracuda Web Application Firewall takes some time to be provisioned- typically, within 10 minutes. After the provisioning is complete, fill-in your details to accept the EULA.
Step 4. Log into Barracuda Web Application Firewall
- Log into the Barracuda Web Application Firewall using the following credentials.
- Username – admin
- Password – Use the temporary password displayed on the launch page.
- The Welcome screen appears after you log in. If you want to configure your first application, click Create your first Service. Otherwise, click Do it later if you prefer to familiarize yourself with the user interface. For more information on how to create a Service, refer to Step 6.
Step 5 - Open Network Address Ranges on Firewall
For more information on the list of Open Network Address ranges required for the firewall, refer to the
Step 6 - Verify Configuration and Change the Password
- Either log into the Barracuda Web Application Firewall as an administrator using the Admin URL or click the Log into the admin panel button. See Step 4 - Log into Barracuda Web Application Firewall for more information.
- Navigate to the BASIC > Administration page and enter your old password, new password, and re-enter the new password.
- Click Save Password.
Step 7 - Configuring the Service(s) on the Barracuda Web Application Firewall
You can configure the services on the BASIC > Services page. In Google Cloud Platform, the services can be created using the System (WAN) IP address of the instance.
For more information on services, see Configuring a Service. For adding a service, click the Help button.