

Before deploying the Barracuda Web Application Firewall VMSS template for PAYG/BYOL instance, do the following:
- Step 1. Create a Resource Group - Required for deploying the Barracuda Web Application Firewall VMSS template for PAYG/BYOL instance.
- Step 2. Create a Storage Account - Required for deploying the Barracuda Web Application Firewall VMSS template for PAYG/BYOL instance.
- Step 3. Create and upload license file - Required for deploying the Barracuda Web Application Firewall VMSS template for BYOL instance.
Step 1. Create a Resource Group
To create a resource group, perform the following steps:
- Log into the Microsoft Azure Portal.
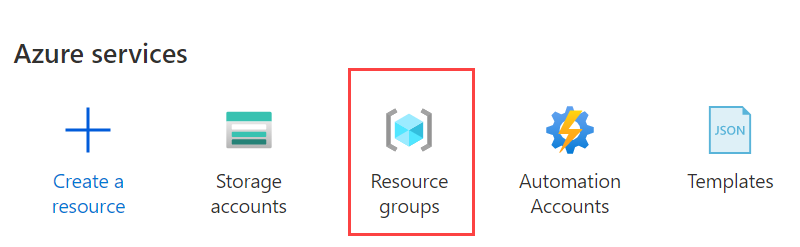
- Click Resource groups under Azure services.
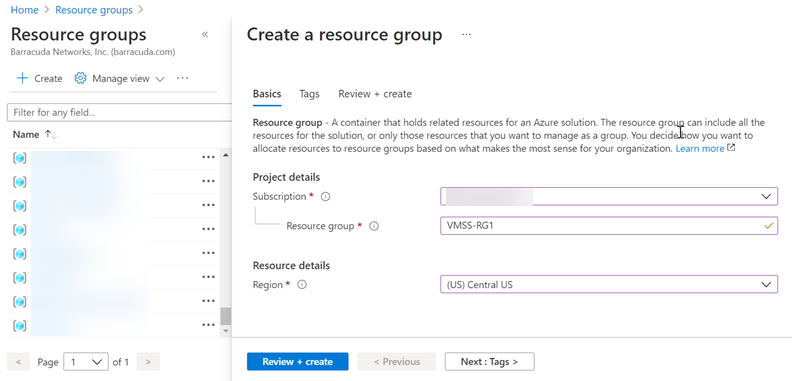
- In the Resource groups page, click Create and specify values for the following:
- Resource group name: Enter a name for the resource group.
- Subscription: Select the subscription in which you want to create the resource group.
- Resource group location: Select a location for the resource group.
- Click Review + create.
- Review the resource group details and click Create.
Step 2. Create a Storage Account
Perform the following steps to create a storage account:
- Log into the Microsoft Azure Portal.
- Click Storage accounts under Azure services.
- Click Create.
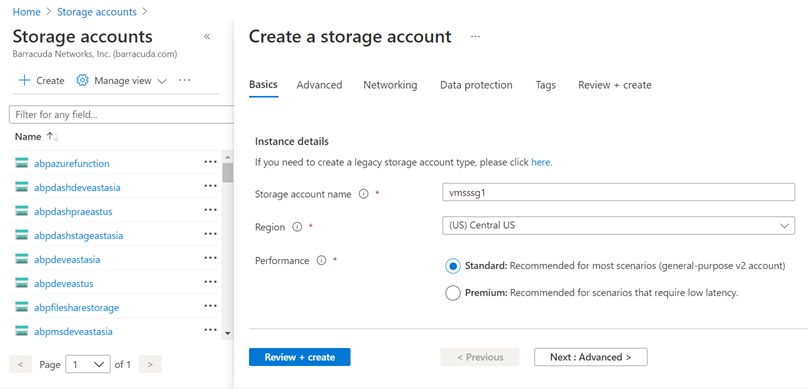
- In the Create storage account page, specify values for the following:
- Subscription: Select the subscription in which you want to create the storage account. Note: Ensure that the subscription for the storage account and the resource group are same.
- Resource group: Select the resource group created in "Step 1. Create a Resource Group".
- Deployment model : Ensure the deployment model is set to Resource Manager.
- Storage account name: Enter a name for the storage account.
- Location : Select the location for the storage account. Note: Ensure that the location for the storage account and the resource group are same.
- Performance : Select the performance tier as required.
- Account kind: Select the type of storage account that needs to be created. Default: General purpose
- Replication: Select the replication option for the storage account.
- Secure transfer required: Select Enabled if you want to transfer the data into or out of storage account. Default: Disabled.
- Click Review + create.
- Review the storage accounts details and click Create.
Step 3. Create and Upload License File
Perform the following steps to create and upload a license file:
Create a container
- Click the storage account that you have created.
- Under Properties, click Blob service.
- Click + Container..
In the New Container window, specify values for the following:
Name: Enter a name for the container. The container name must be lowercase and must start with a letter or a number. They must contain only letters, numbers, and the dash (-) character.
- Public access level: Set the level of public access to the container. The default level is Private (no anonymous access) and it is recommended to use the default level.
- Click Create to create the container.
Create a License File
A license file contains licenses that can be used. This file should be created in the valid JSON format and should be saved in the name “barracuda-byol-license-list.json”.
Open Notepad or any text editor. Type the licenses in the format illustrated below.
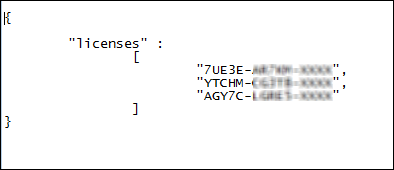
- Save the license file. Note that you save the file with the name "barracuda-byol-license-list.json" as mentioned earlier.
Upload the License File
- To upload a license file, select the container you created.
- Click Upload.
- In the right pane, click the browse button and select the license file you created.
- Click Upload to upload the license file to the container.
Deploying the Barracuda Web Application Firewall for Azure Templates - BYOL
Perform the following steps to deploy the Barracuda Web Application Firewall instance:
- Log into the Microsoft Azure Portal.
- On the Home page, click Create a resource.
- In the Search services and marketplace text box, type and search Barracuda Web Application Firewall for Azure Template.
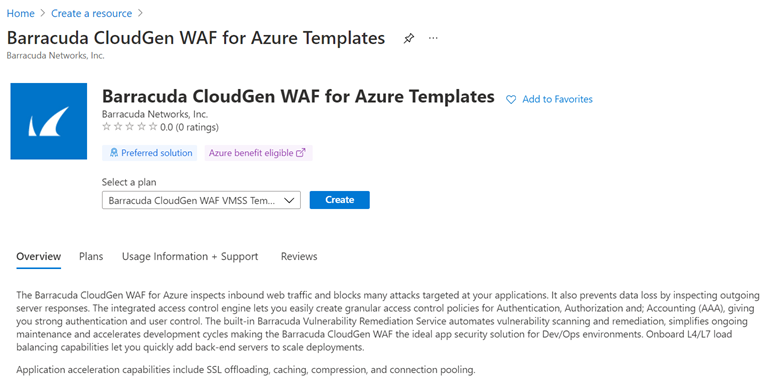
- On the Barracuda Web Application Firewall for Azure Templates page:
- Select Barracuda Web Application Firewall VMSS Template (PAYG/BYOL) from the Select a plan drop-down list.
- Read the product overview and click Create.
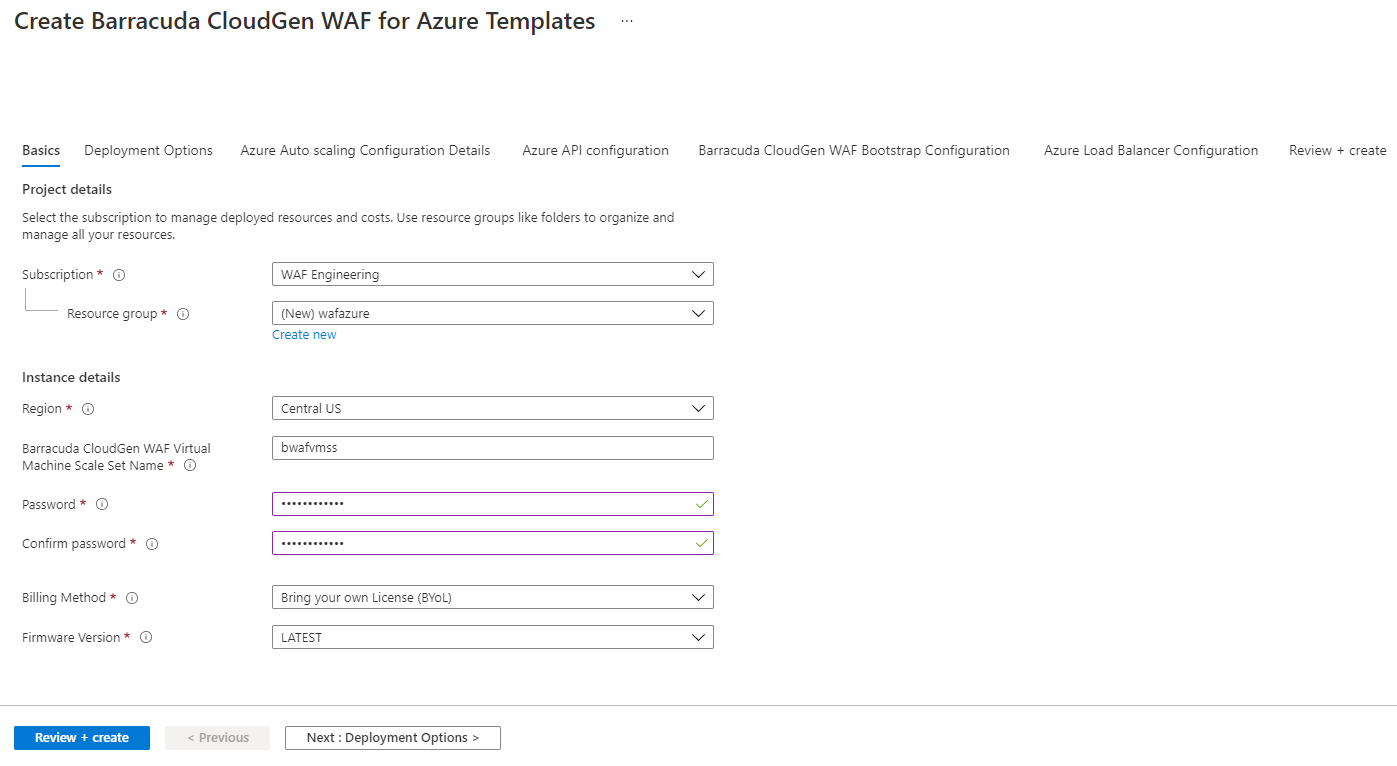
- In the Create Barracuda Web Application Firewall for Azure Templates page, Basics tab:
- Project details
- Subscription: Select the subscription from the drop-down list.
- Resource group: Create a new resource group, or select a resource group that is empty from the existing Resource group list.
- Instance details
- Region: Select a region for the Barracuda Web Application Firewall for Azure Template.
- Barracuda Web Application Firewall Virtual Machine Scale Set Name: Enter a name for the Barracuda Web Application Firewall.
- Password: Enter a password for authentication. This will be your password to access the Barracuda Web Application Firewall web interface.
- Confirm Password: Re-enter the password for confirmation.
- Billing Method: Select Bring your own License (BYOL) from the drop-down list as your billing method.
- Firmware Version: From the drop-down list, select the firmware version on which your instance is deployed.
- Project details
- Click Next Deployment Options.
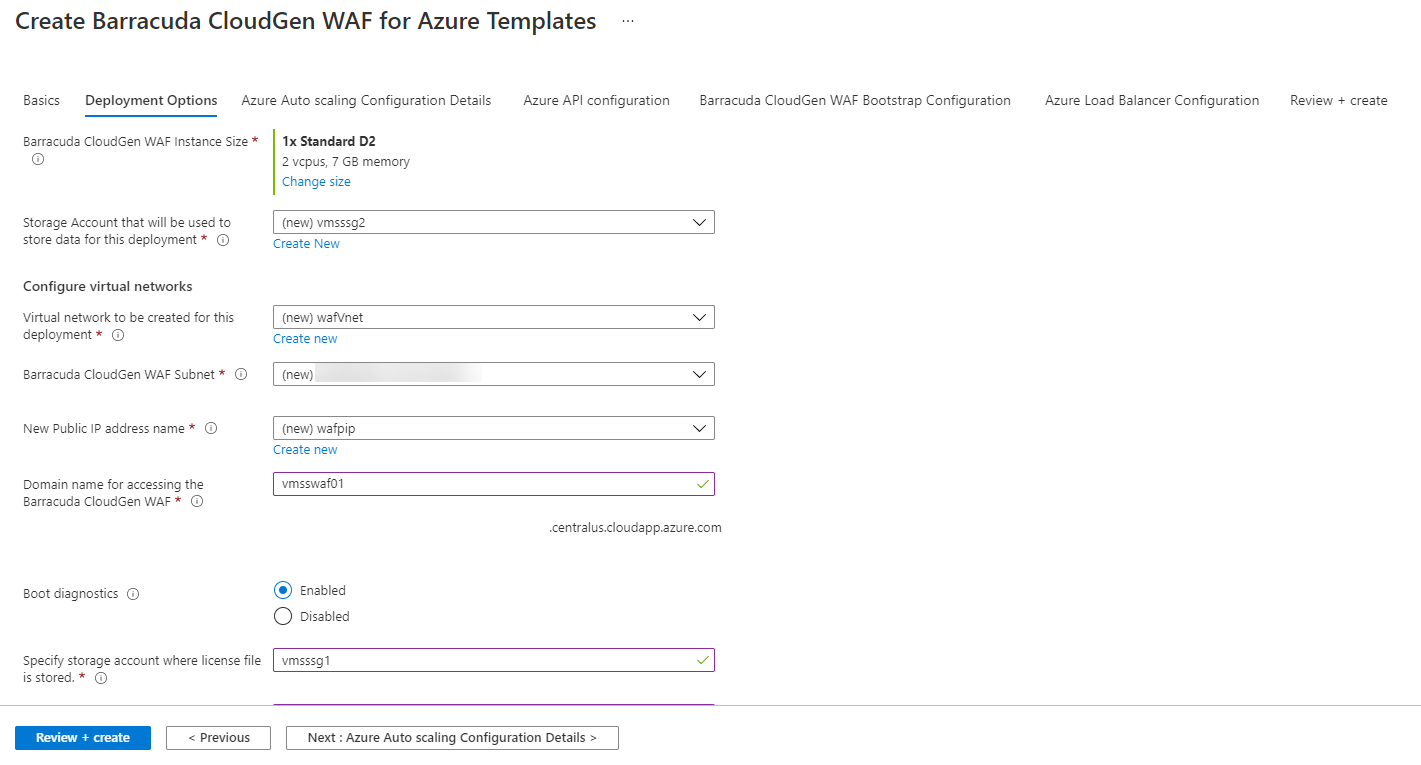
- In the Create Barracuda Web Application Firewall for Azure Templates page, Deployment Options tab:
- Barracuda Web Application Firewall Instance Size: Select a size for the instance.
Storage Account that will be used to store data for this deployment: Create a new storage account, or select a storage account from the existing Storage account list.
- Virtual network to be created for this deployment: Create a new virtual network, or select a virtual network from the existing Virtual network list in which you want to deploy the Barracuda Web Application Firewall VMSS.
- Barracuda Web Application Firewall Subnet: Review the subnet configuration and modify if required.
- New Public IP address name: Enter a name for the public IP address associated with the Barracuda Web Application Firewall.
- Domain name for accessing the Barracuda Web Application Firewall: Enter the domain for the Barracuda Web Application Firewall.
- Boot diagnostics: When Enabled, the bootup debug logs get saved in the specified storage account.
Specify storage account where license file is stored: Enter the name of the storage account where your license file is stored.
- License Storage Account Key: Enter the account key for your storage account. The key is available in the path - "Storage account" > Access keys > Key1, Key2. You are provided with two access keys so that you can maintain connections using one key while regenerating the other.
License Storage Blob Name: Enter the path of the storage Blob where the license file is stored.
- Click Next : Azure Auto scaling Configuration Details.
- In the Create Barracuda Web Application Firewall for Azure Templates page, Azure Auto scaling Configuration Details tab:
- Instance Count
- Initial Instances: Enter the number of instances to be deployed initially to serve the traffic. Default: 2
- Maximum Instances: Enter the maximum number of instances to be scaled up to handle the traffic when required. Default: 5
Minimum Instances: Enter the minimum number of instances to be scaled down when the traffic is less. Default: 2
- Scale Up Thresholds
- CPU%: Enter the scale up threshold for CPU utilization. Default: 85%
- Network In: Enter the scale up threshold for NetworkIn throughput. Default: 9175040
- Network Out: Enter the scale up threshold for NetworkOut throughput. Default: 9175040
- Scale Down Thresholds
- CPU%: Enter the scale down threshold for SPU utilization. Default: 60%
- Network In: Enter the scale down threshold for NetworkIn throughput. Default: 5242880
- Network Out: Enter the scale down threshold for NetworkOut throughput. Default: 5242880
- Notification Email ID(s) in CSV Format: Enter the email address to which the auto scaling event notification emails needs to be sent.
- Instance Count
- Click Next : Azure API configuration.

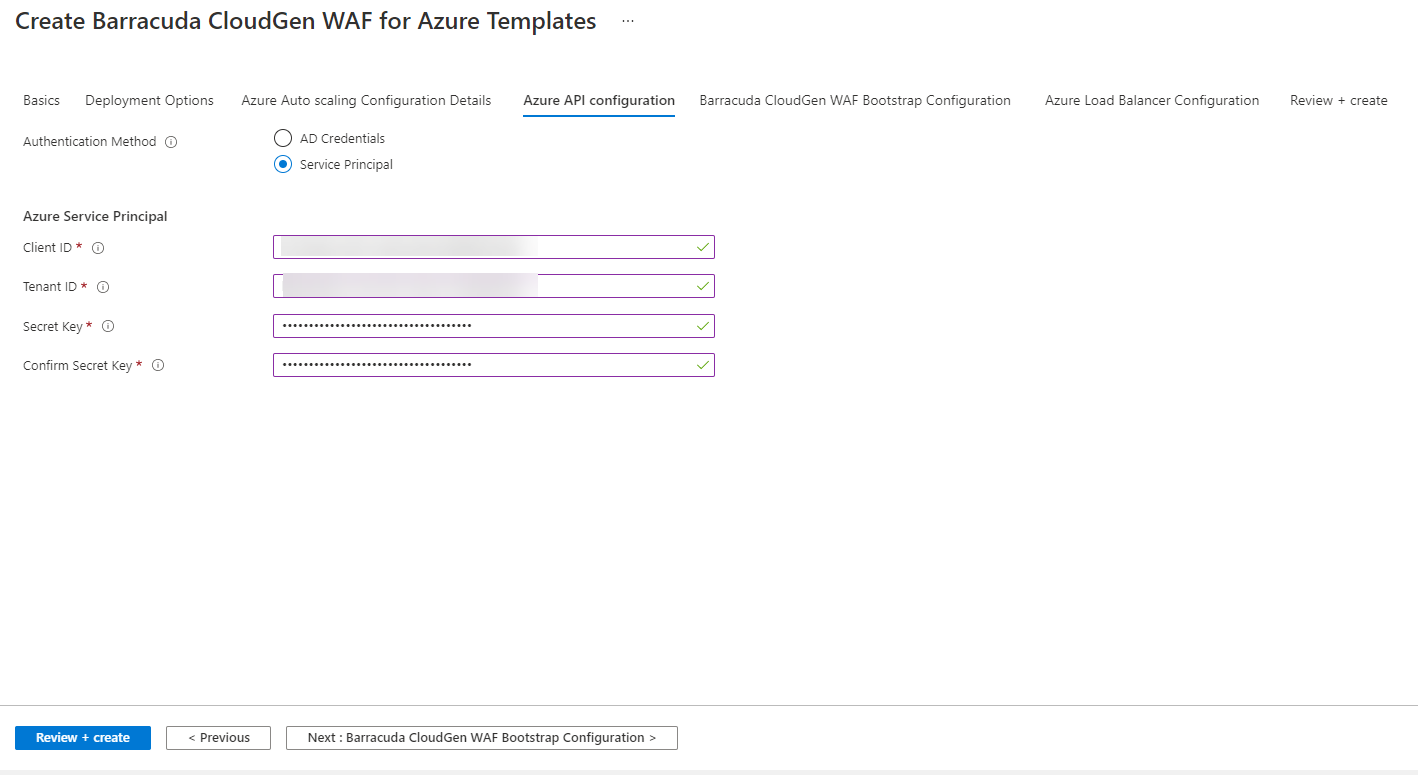
- In the Create Barracuda Web Application Firewall for Azure Templates page, Azure API Configuration tab:
Authentication Method: Select the authentication method to authenticate to Azure Active Directory.
- Azure AD Credentials
- Azure User ID: Enter the user name to authenticate to the Azure Active Directory.
- Client ID: Enter the ID of the application in the Azure Active Directory.
- Azure User Password: Enter the password associated with user.
- Confirm Password: Re-enter the password to confirm.
- Azure Service Principal
- Client ID: Enter the ID of the application in Azure Active Directory.
- Tenant ID: Enter the ID of the Active Directory tenant.
- Secret Key: Enter the secret key generated.
- Confirm Secret Key: Re-enter the secret key to confirm.
- Azure AD Credentials
- Click Next : Barracuda Web Application Firewall Bootstrap Configuration.
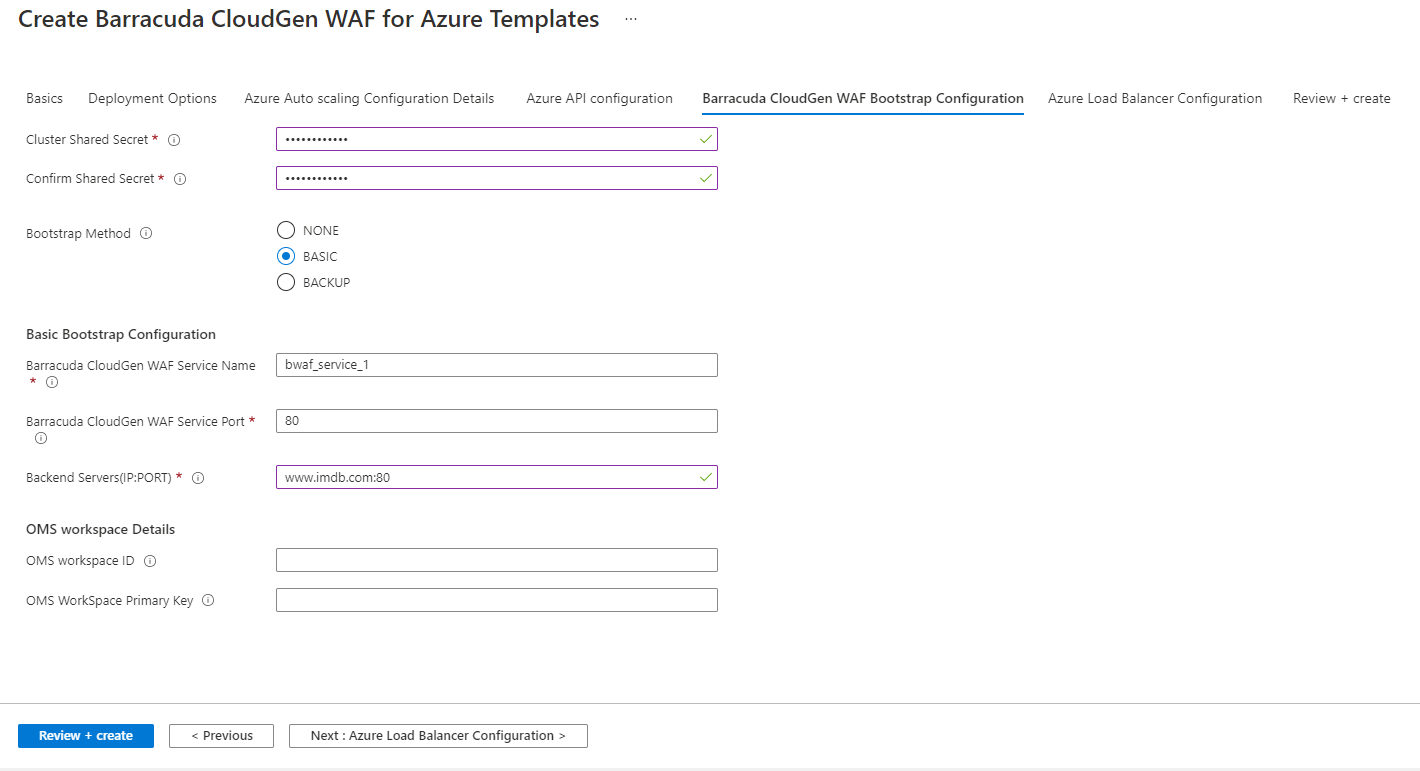
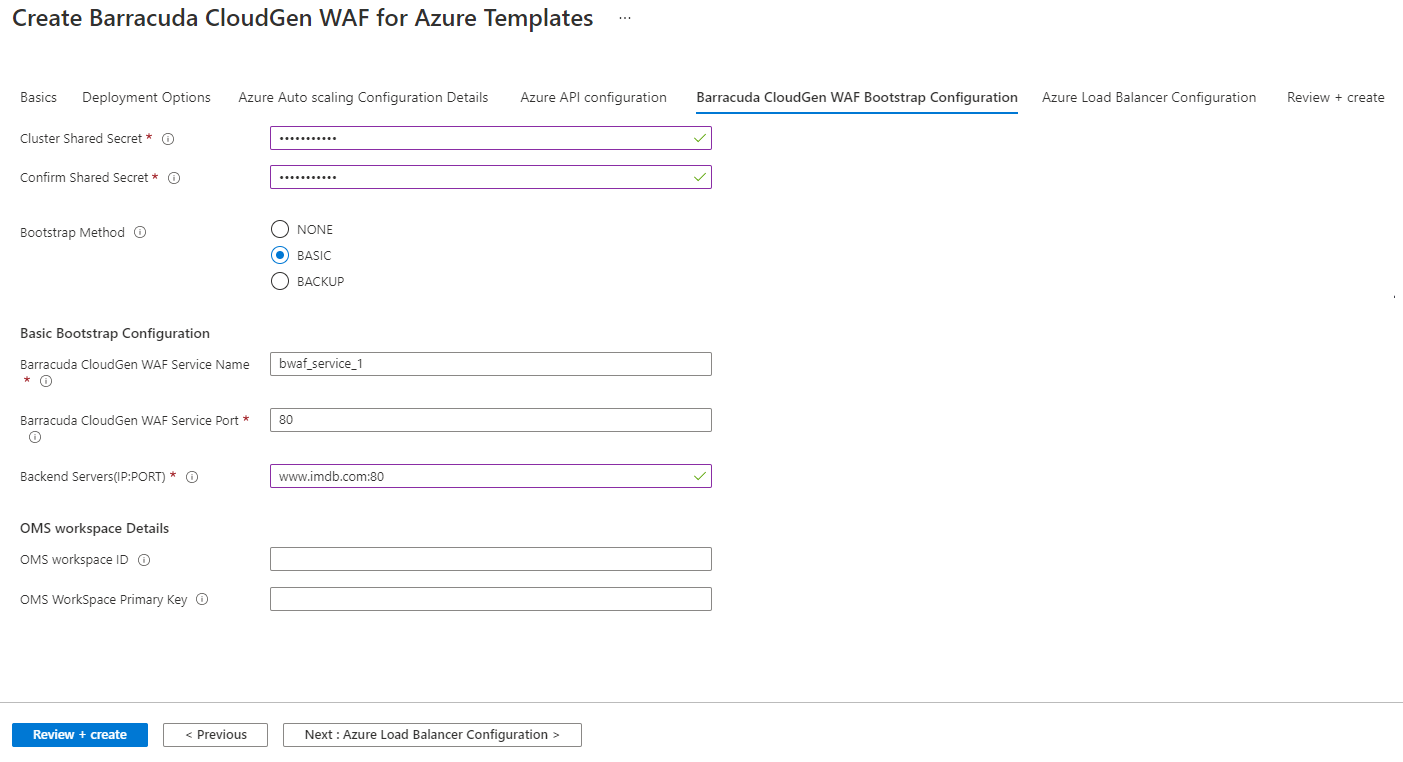
- In the Create Barracuda Web Application Firewall for Azure Templates page, Barracuda Web Application Firewall Bootstrap Configuration tab:
- Cluster Shared Secret: Enter a password to be used by the Barracuda Web Application Firewall instances in the VMSS group.
- Confirm Shared Secret: Re-type the shared secret password.
- Bootstrap Method: Select the method (NONE, BASIC or BACKUP) for bootstrapping.
- Basic Bootstrap Configuration
- Barracuda Web Application Firewall Service Name: Enter a name for the service that needs to be created on the Barracuda Web Application Firewall instances.
- Barracuda Web Application Firewall Service Port: Enter the port number on which the service is listening to.
- Backend Servers (IP:PORT): Enter the IP address of the server followed by the port that needs to be protected by the Barracuda Web Application Firewall. Use comma (,) as a separator to specify multiple server IP addresses.
- Backup Bootstrap Configuration
- Azure Storage Account Name: Enter the name of the storage account.
- Azure Storage Account Key: Enter the key of the storage account.
- Azure Storage Blob Name: Enter the name of the blob configured in the storage account.
- Type of Backup File: Select the appropriate backup file from the drop-down list
- Barracuda Web Application Firewall Backup File Name: Enter the name of the backup file that you want to use for bootstrapping the instances.
- OMS Workspace Details
- OMS Workspace ID: Enter the workspace ID of the OMS server (if any).
- OMS Workspace Primary Key: Enter the primary key of the OMS server.
- Click Next : Azure Load Balancer Configuration.
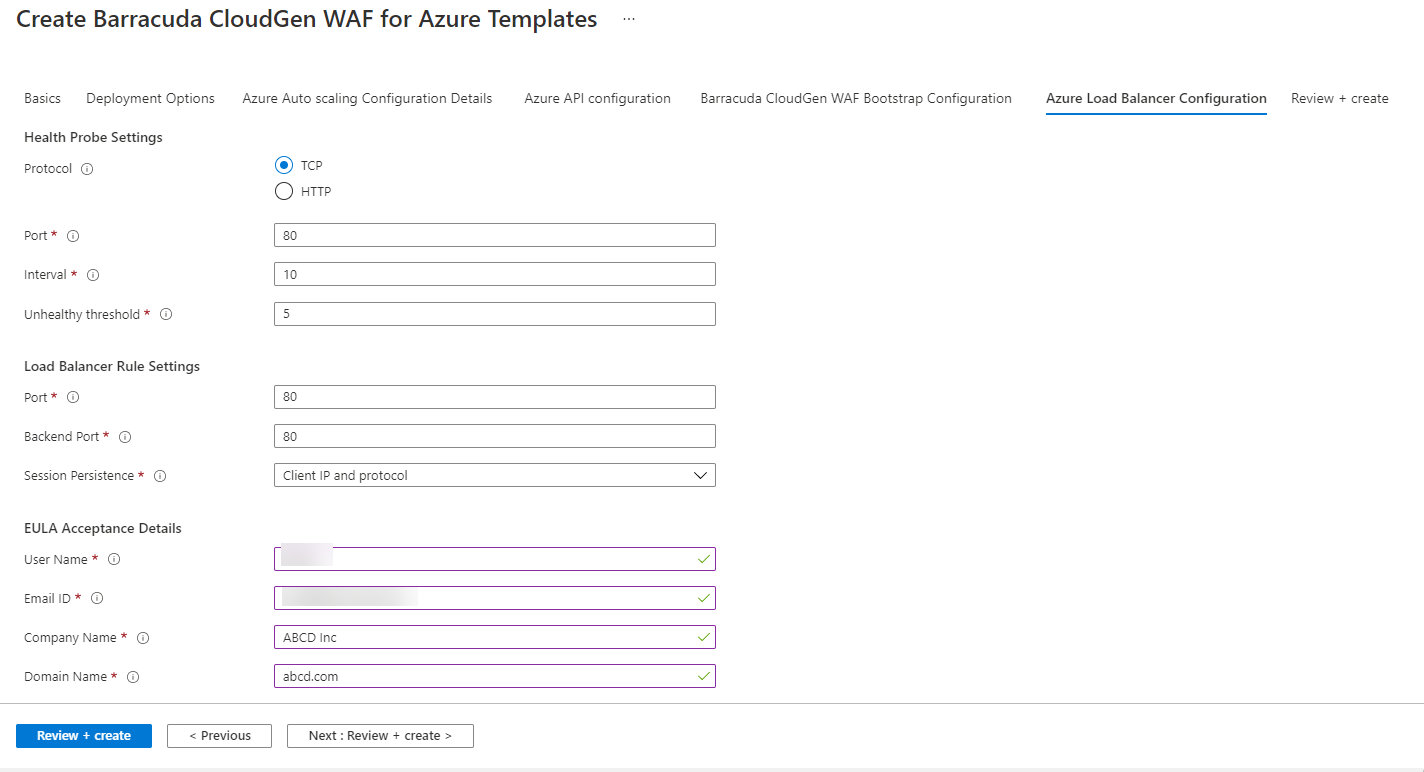
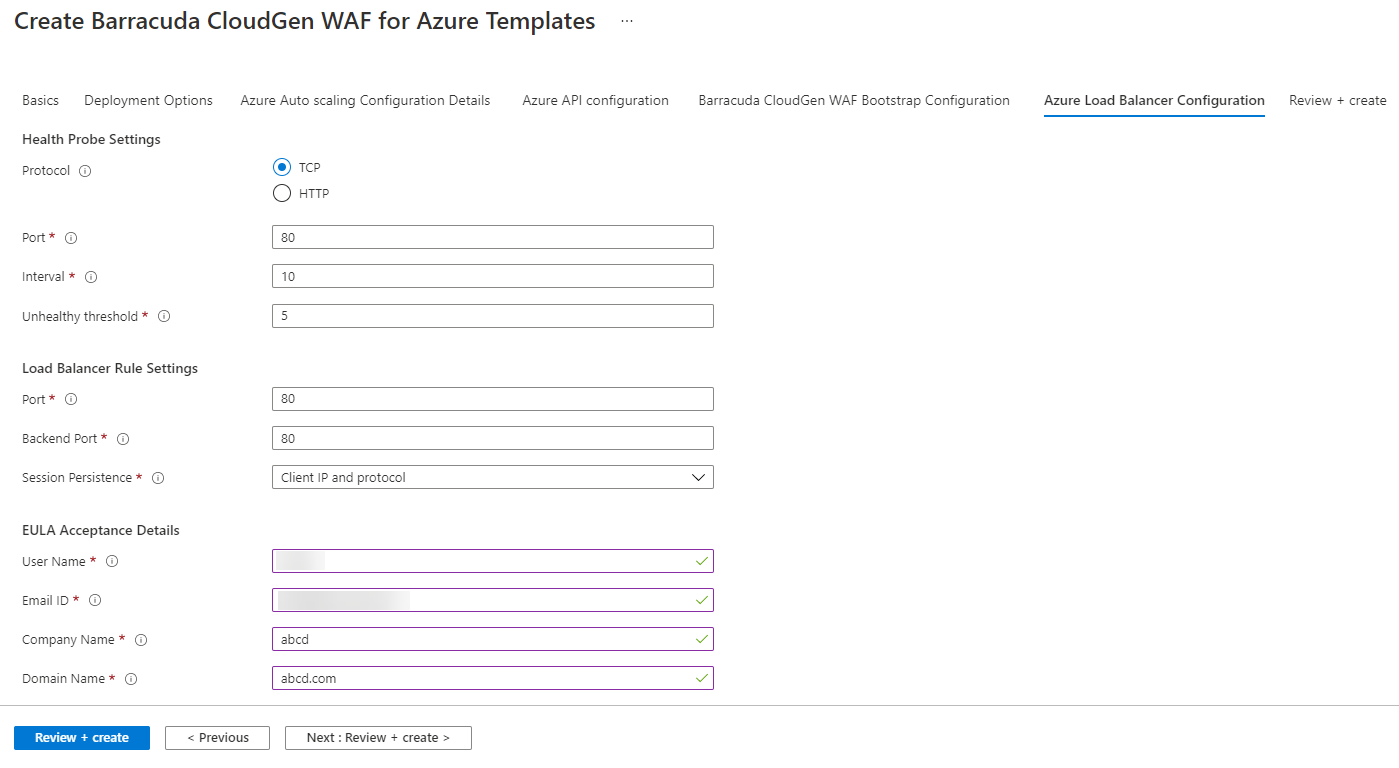
- In the Create Barracuda Web Application Firewall for Azure Templates page, Azure Load Balancer Configuration tab:
- Health Probe Settings
- Protocol: Select TCP or HTTP. Recommended: TCP.
- Port: Enter the port to be used when probing the instance.
- Interval: Enter the interval time to probe the instance.
- Unhealthy threshold: Enter how many attempts can fail before the backend instance is marked as unhealthy.
- Load Balancer Rule Settings
- Port: Enter the port on which the load balancer is listening.
- Backend Port: Enter the port on which the Barracuda Web Application Firewall is listening.
- Session Persistence: Select the persistence type.
- EULA Acceptance Details
- User Name: Enter the username of the user signing the EULA agreement.
- Email ID: Enter the email ID of the user signing the EULA agreement.
- Company Name: Enter the user's company name.
- Domain Name: Enter the domain name for the Barracuda Web Application Firewall VMSS.
- Health Probe Settings
- Click Next : Review + create.
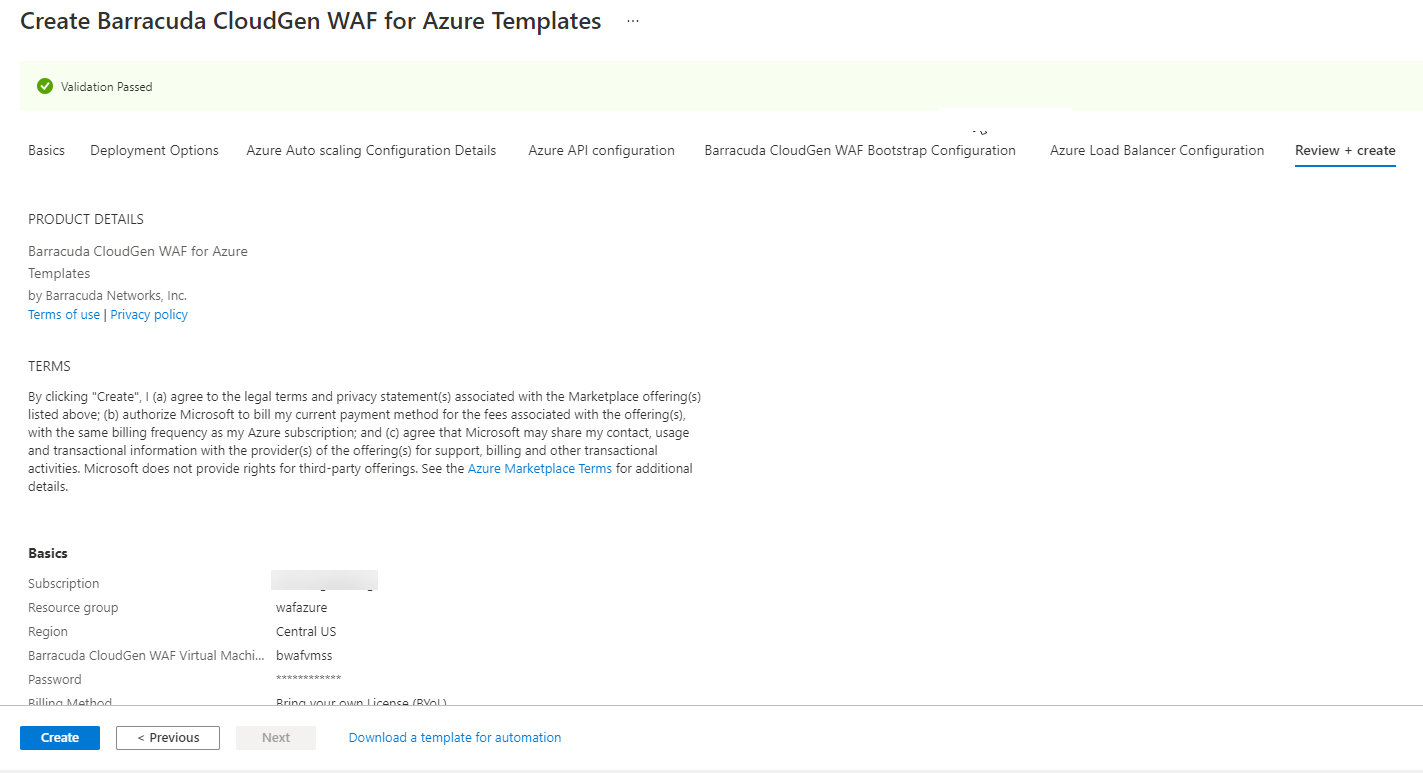
- In the Create Barracuda Web Application Firewall for Azure Templates page, Review + create tab, verify the values you entered and click Create.
Deploying the Barracuda Web Application Firewall for Azure Templates - PAYG
Perform the following steps to deploy the Barracuda Web Application Firewall instance:
- Log into the Microsoft Azure Portal .
- On the Home page, click Create a resource.
- In the Search services and marketplace text box, type and search Barracuda Web Application Firewall for Azure Templates.
- On the Barracuda Web Application Firewall for Azure Templates page:
- Select Barracuda Web Application Firewall VMSS Template (PAYG/BYOL) from the Select a plan drop-down list.
- Read the product overview and click Create.
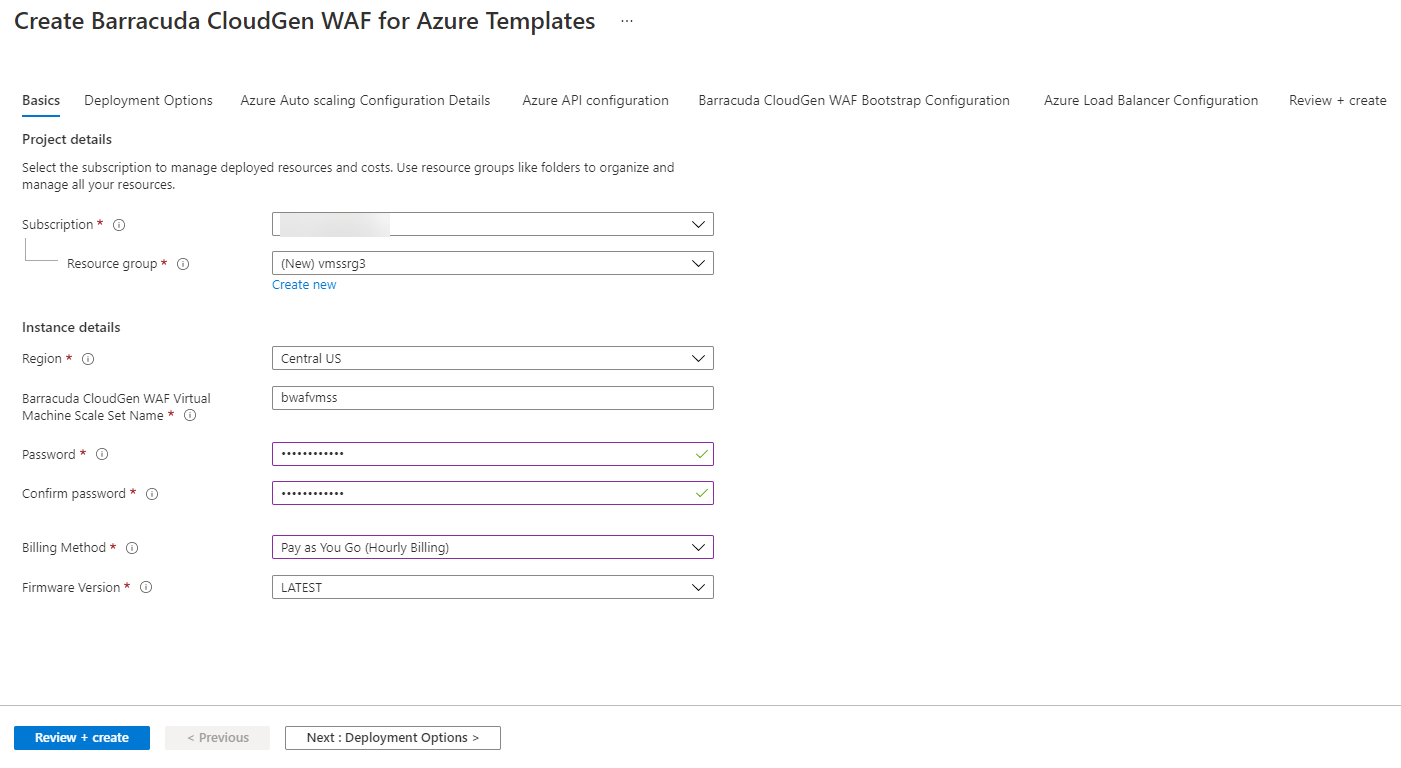
- In the Barracuda Web Application Firewall for Azure Templates page, Basics tab:
- Project details
- Subscription : Select the subscription from the drop-down list.
- Resource group : Create a new resource group, or select a resource group that is empty from the existing Resource group list.
- Instance details
- Region: Select a location for the Barracuda Web Application Firewall VMSS.
- Barracuda Web Application Firewall Virtual Machine Scale Set Name: Enter a name for the Barracuda Web Application Firewall VMSS.
- Password: Enter a password for authentication. This will be your password to access the Barracuda Web Application Firewall web interface.
- Confirm Password : Re-enter the password for confirmation.
- Billing Method : Select Pay as You Go (Hourly Billing) from the drop-down list as your billing method.
- Firmware Version : From the drop-down list, select the firmware version on which your instance is deployed.
- Project details
- Click Next : Deployment Options .
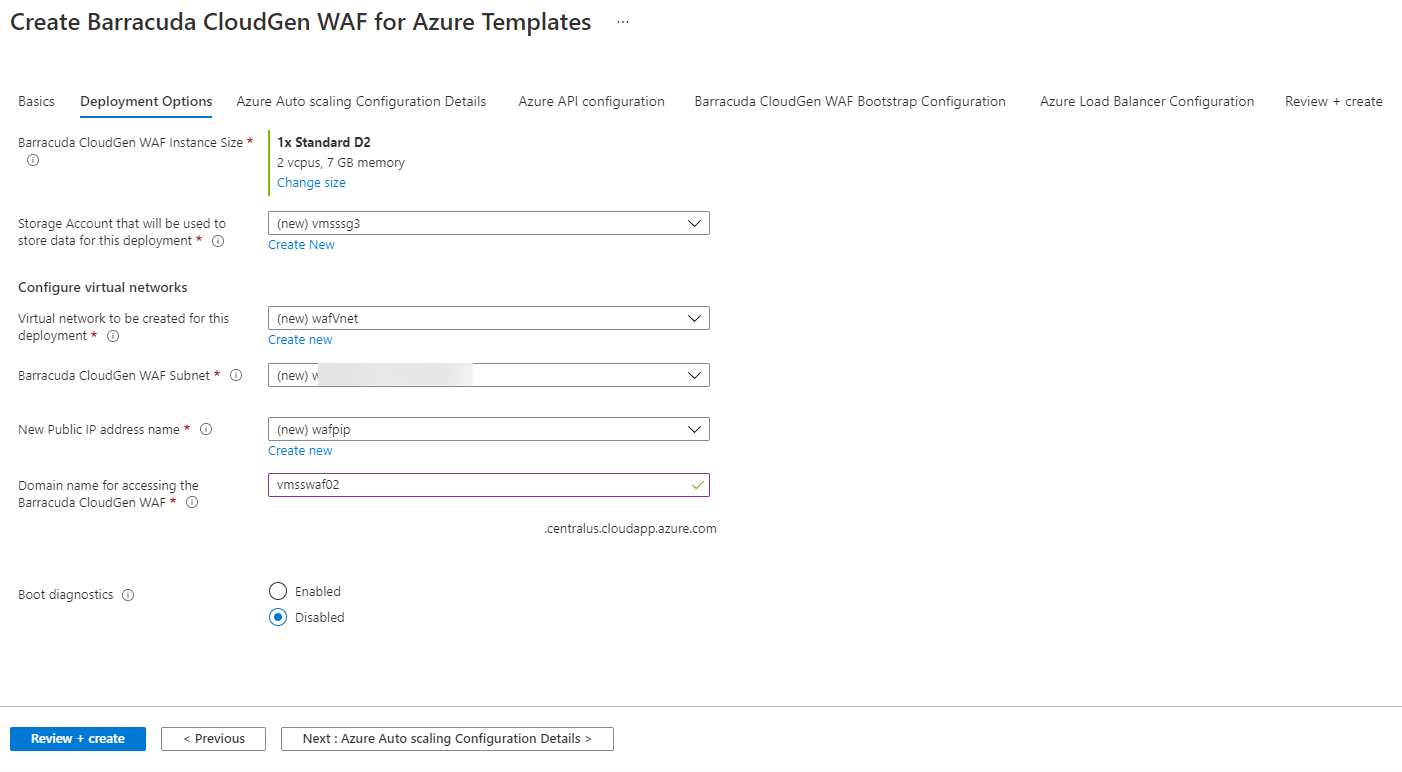
In the Create Barracuda Web Application Firewall for Azure Templates page, Deployment Options tab:
- Barracuda Web Application Firewall Instance Size : Select a size for the instance.
Storage Account that will be used to store data for this deployment : Create a new storage account or select a storage account from the existing Storage account .
- Configure virtual networks
- Virtual network to be created for this deployment : Create a new virtual network, or select a virtual network from the existing Virtual network list in which you want to deploy the Barracuda Web Application Firewall VMSS.
- Subnets : Review the subnet configuration and modify if required.
- New Public IP address name: Enter a name for the public IP address associated with the Barracuda Web Application Firewall Firewall VMSS.
- Domain name for accessing the Barracuda Web Application Firewall: Enter the domain for the Barracuda Web Application Firewall VMSS.
- Boot diagnostics: When Enabled, the bootup debug logs get saved in the specified storage account.
- Click Next : Azure Auto scaling Configuration Details.
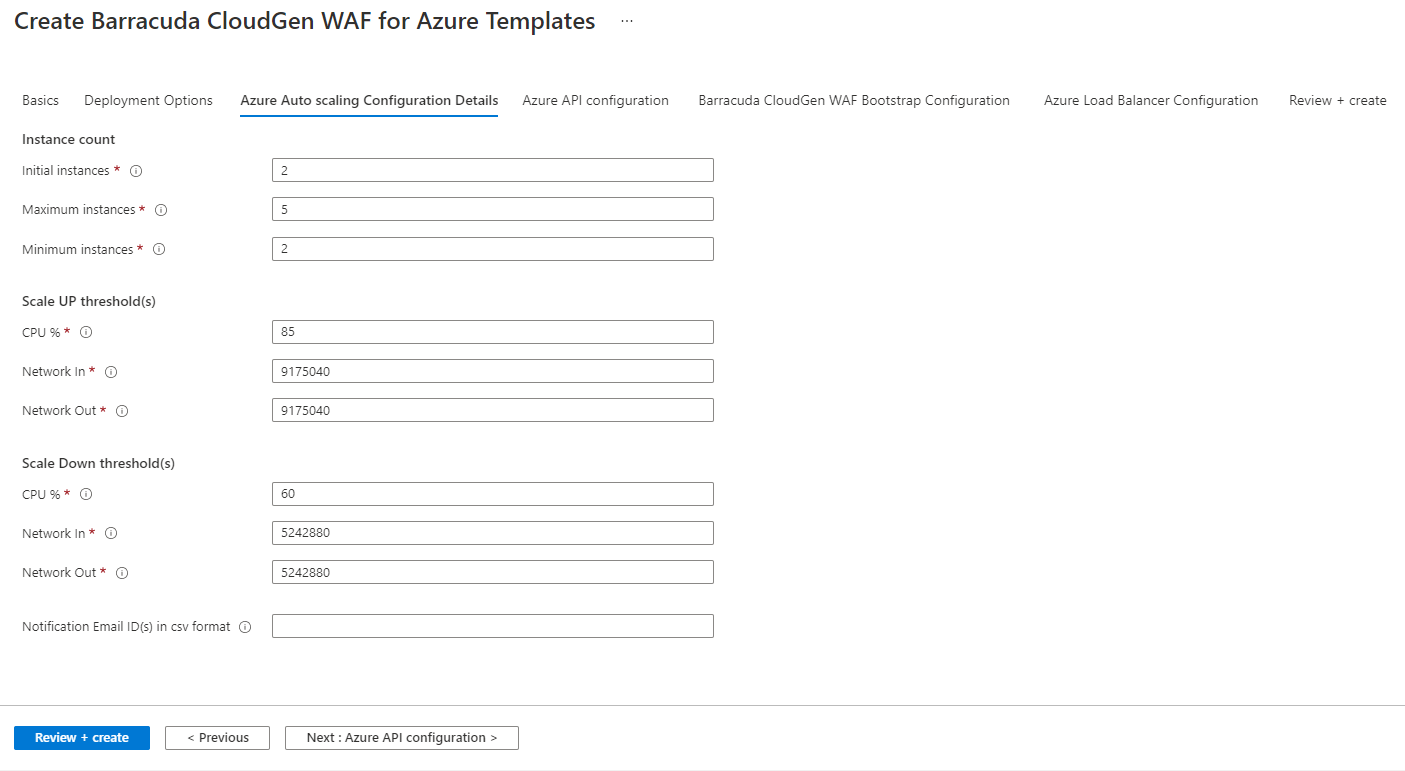
- In the Create Barracuda Web Application Firewall for Azure Templates page, Azure Auto Scaling Configuration tab:
- Instance Count
- Initial Instances: Enter the number of instances to be deployed initially to serve the traffic. Default: 2
- Maximum Instances: Enter the maximum number of instances to be scaled up to handle the traffic when required. Default: 5
Minimum Instances: Enter the minimum number of instances to be scaled down when the traffic is less. Default: 2
Overprovisioning: When set to Enable, the VMSS spins up a greater number of virtual machines than what is required to handle the traffic.
- Scale Up Thresholds
- CPU%: Enter the scale up threshold for CPU utilization. Default: 85%
- Network In: Enter the scale up threshold for NetworkIn throughput. Default: 9175040
- Network Out: Enter the scale up threshold for NetworkOut throughput. Default: 9175040
- Scale Down Thresholds
- CPU%: Enter the scale down threshold for SPU utilization. Default: 60%
- Network In: Enter the scale down threshold for NetworkIn throughput. Default: 5242880
- Network Out: Enter the scale down threshold for NetworkOut throughput. Default: 5242880
- Notification Email ID(s) in CSV Format: Enter the email address to which the auto scaling event notification emails needs to be sent.
- Instance Count
- Click Next : Azure API configuration.
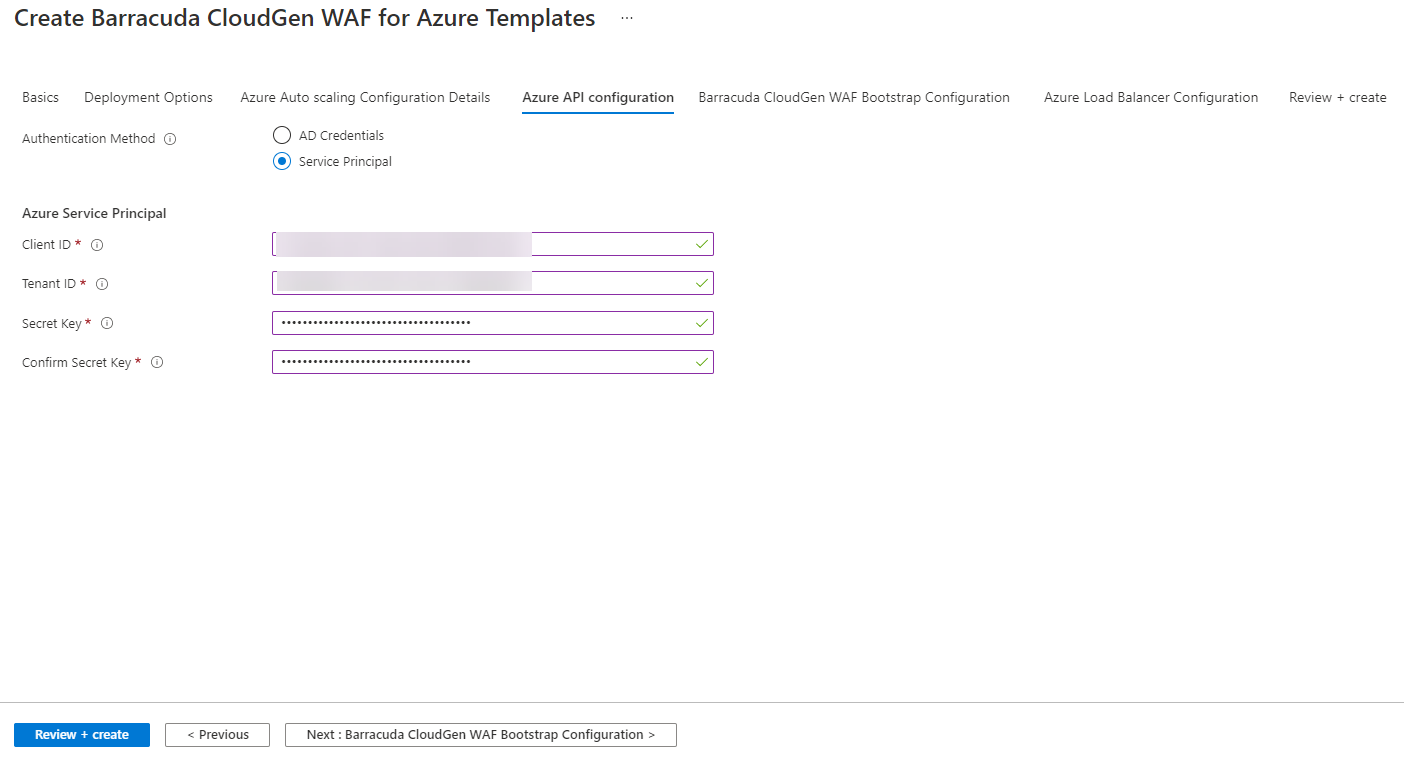
- In the Create Barracuda Web Application Firewall for Azure Templates page, Azure API Configuration tab:
Authentication Method: Select the authentication method to authenticate to Azure Active Directory.
- Azure AD Credentials
- Azure User ID: Enter the user name to authenticate to the Azure Active Directory.
- Client ID: Enter the ID of the application in the Azure Active Directory.
- Azure User Password: Enter the password associated with user.
- Confirm Password: Re-enter the password to confirm.
- Azure Service Principal
- Client ID: Enter the ID of the application in Azure Active Directory.
- Tenant ID: Enter the ID of the Active Directory tenant.
- Azure Secret Key: Enter the secret key generated.
- Click Next : Barracuda Web Application Firewall Bootstrap Configuration.
- In the Create Barracuda Web Application Firewall for Azure Templates page, Barracuda Web Application Firewall Bootstrap Configuration tab:
- Cluster Shared Secret: Enter a password to be used by the Barracuda Web Application Firewall instances in the VMSS group.
- Confirm Shared Secret: Re-type the shared secret password.
- Bootstrap Method: Select the method (NONE, BASIC or BACKUP) for bootstrapping.
- Basic Bootstrap Configuration
- Barracuda Web Application Firewall Service Name: Enter a name for the service that needs to be created on the Barracuda Web Application Firewall instances.
- Barracuda Web Application Firewall Service Port: Enter the port number on which the service is listening to.
- Backend Servers (IP:PORT): Enter the IP address of the server followed by the port that needs to be protected by the Barracuda Web Application Firewall. Use comma (,) as a separator to specify multiple server IP addresses.
- Backup Bootstrap Configuration
- Azure Storage Account Name: Enter the name of the storage account.
- Azure Storage Account Key: Enter the key of the storage account.
- Azure Storage Blob Name: Enter the name of the blob configured in the storage account.
- Type of Backup file: Select the type of the backup file that you want to use for bootstrapping the instances.
- Barracuda Web Application Firewall Backup file Name: Enter the name of the backup file.
- OMS Workspace Details
- OMS Workspace Primary Key: Enter the primary key of the OMS server.
- OMS Workspace Primary Key: Enter the primary key of the OMS server.
- Click Next : Azure Load Balancer Configuration.
- In the Create Barracuda Web Application Firewall for Azure Templates page, Azure Load Balancer Configuration tab:
- Health Probe Settings
- Protocol: Select TCP or HTTP. Recommended: TCP.
- Port: Enter the port to be used when probing the instance.
- Interval: Enter the interval time to probe the instance.
- Unhealthy threshold: Enter how many attempts can fail before the backend instance is marked as unhealthy.
- Load Balancer Rule Settings
- Port: Enter the port on which the load balancer is listening.
- Backend Port: Enter the port on which the Barracuda Web Application Firewall is listening.
- Session Persistence: Select the persistence type.
- EULA Acceptance Details
- User Name: Enter your user name.
- Email ID: Enter your Email address.
- Company Name: Enter your company name.
- Domain Name: Enter the domain name.
- Health Probe Settings
- Click Next : Review + create.
- In the Create Barracuda WAF for Azure Templates page, Review + create tab verify the values you entered and click Create.
