

This template can be used to deploy single BYOL or PAYG instances that have either single NICs or multiple NICs with single or multiple IP addresses. This template replaces the following legacy templates:
- Deploying Single Instance with Single NIC and IP - BYOL and PAYG
- Deploying Single Instance with Multi NIC/ Multi IP - BYOL and PAYG
Deploying Single Instance with Single NIC and IP - BYOL and PAYG
Perform the following steps to deploy the Barracuda Web Application Firewall Single NIC instance:
- Log into the Microsoft Azure Portal .
Click Create a resource under Azure services.
In the Search services and marketplace text field, type
Barracuda Web Application Firewall for Azure Templatesand click Enter.In the Barracuda Web Application Firewall for Azure Templates page, select Barracuda Web Application Firewall Template (PAYG/BYOL) and click Create.
- In the Create Barracuda Web Application Firewall for Azure Templates > Basics page:
- Project details
Subscription: Select the subscription from the drop-down list.
Instance details
Region: Select the region where you want to deploy the virtual machine.
Barracuda Web Application Firewall Instance Host Name: Enter a name for the Barracuda Web Application Firewall instance.
Password: Enter a password for authentication. This will be your password to access the Barracuda Web Application Firewall web interface.
Confirm Password: Re-enter the password for confirmation.
Billing Method: Select the billing method (BYOL or PAYG) for the Barracuda Web Application Firewall instance deployment.
Firmware Version: Select the firmware version for the Barracuda Web Application Firewall instance.
Number of interfaces for the instance: Select Single NIC from the drop-down list.
- Project details
Click Next: Deployment Options.

In the Create Barracuda Web Application Firewall for Azure Templates, Deployment Options page:
Barracuda Web Application Firewall Instance Size: Select a size for the instance.
Storage Account that will be used to store data for this deployment: Create a new storage account or select a storage account from the existing storage account list.
Configure virtual networks
Virtual network to be created for this deployment: Create a new virtual network, or select a virtual network from the existing virtual network list in which you want to deploy the Barracuda Web Application Firewall.
WAN NIC: Select the WAN-side subnet range. WAN NIC is the subnet that is created for the WAN side.
New Public IP address name: Enter a name for the public IP address associated with the Barracuda Web Application Firewall.
Domain name for accessing the Barracuda Web Application Firewall: Enter the domain name for the Barracuda Web Application Firewall.
Boot Diagnostics: When enabled, the boot-up debug logs get saved in the specified storage account.
- Click Review + create.
- In the Create Barracuda Web Application Firewall for Azure Templates, Review + create page, review the configuration settings and click Create.
Deploying Single Instance with Multi NIC and IP - BYOL and PAYG
Perform the following steps to deploy the Barracuda Web Application Firewall Multi NIC instance:
- Log into the Microsoft Azure Portal .
Click Create a resource under Azure services.
In the Search services and marketplace text field, type
Barracuda Web Application Firewall for Azure Templatesand click Enter.In the Barracuda Web Application Firewall for Azure Templates page, select Barracuda Web Application Firewall Template (PAYG/BYOL) and click Create.
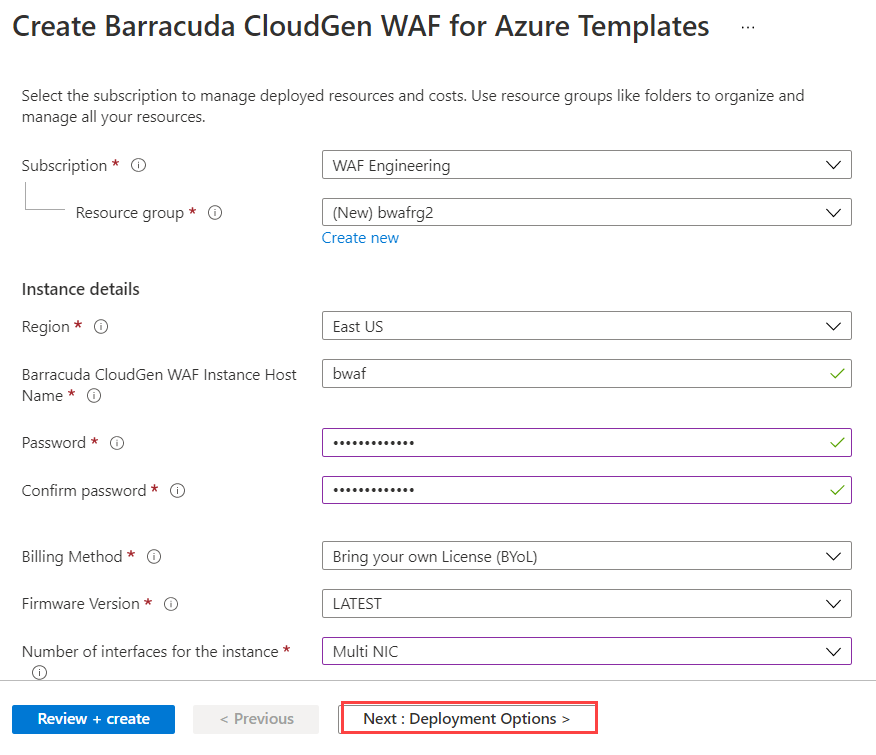
- In the Create Barracuda Web Application Firewall for Azure Templates > Basics page:
- Project details
Subscription: Select the subscription from the drop-down list.
Instance details
Region: Select the region where you want to deploy the virtual machine.
Barracuda Web Application Firewall Instance Host Name: Enter a name for the Barracuda Web Application Firewall instance.
Password: Enter a password for authentication. This will be your password to access the Barracuda Web Application Firewall web interface.
Confirm Password: Re-enter the password for confirmation.
Billing Method: Select the billing method (BYOL or PAYG) for the Barracuda Web Application Firewall instance deployment.
Firmware Version: Select the firmware version for the Barracuda Web Application Firewall instance.
Number of interfaces for the instance: Select Single NIC from the drop-down list.
- Project details
Click Next: Deployment Options.
In the Create Barracuda Web Application Firewall for Azure Templates, Deployment Options page:
Barracuda Web Application Firewall Instance Size: Select a size for the instance.
Storage Account that will be used to store data for this deployment: Create a new storage account or select a storage account from the existing storage account list.
Configure virtual networks
Virtual network to be created for this deployment: Create a new virtual network, or select a virtual network from the existing virtual network list in which you want to deploy the Barracuda Web Application Firewall.
WAN NIC: Select the WAN-side subnet range. WAN NIC is the subnet that is created for the WAN side.
- LAN NIC: Select the Servers-side subnet range. LAN NIC is the subnet that is created for the LAN side,
New Public IP address name: Enter a name for the public IP address associated with the Barracuda Web Application Firewall.
Domain name for accessing the Barracuda Web Application Firewall: Enter the domain name for the Barracuda Web Application Firewall.
Boot Diagnostics: When enabled, the boot-up debug logs get saved in the specified storage account.
- Click Review + create.
- In the Create Barracuda Web Application Firewall for Azure Templates, Review + create page, review the configuration settings and click Create.