

If you did not deploy the Barracuda Web Application Firewall from the marketplace with Azure Accelerated Networking initially enabled, perform the following steps to enable Accelerated Networking.
Enable Accelerated Networking
- Go to the Azure portal.
- Shut down the Barracuda Web Application Firewall virtual machine. If the machine was created in an availability set, all machines in this set must be shut down.
- Open Azure CloudShell.
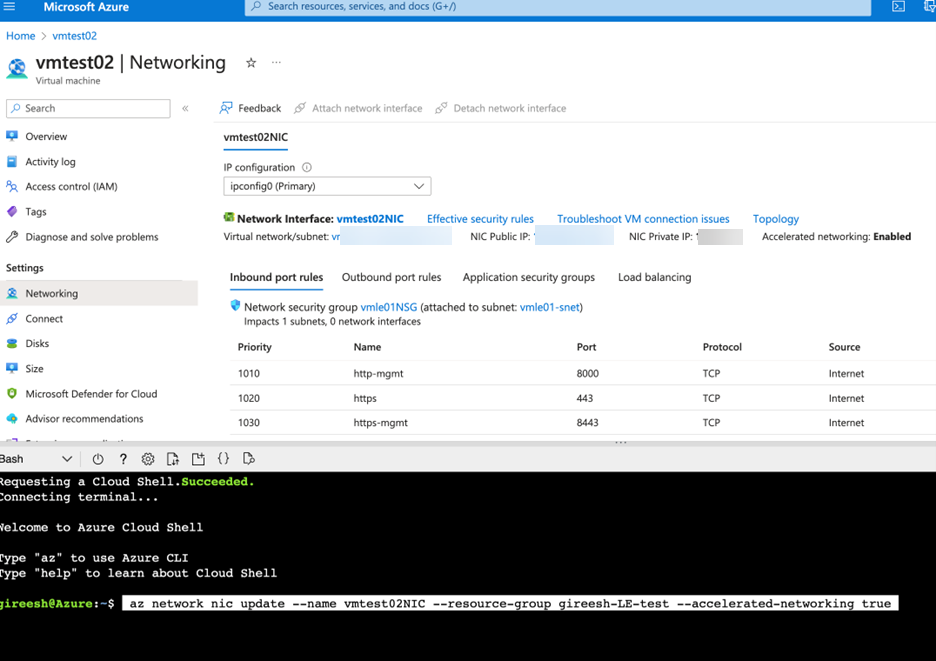
Enter the following commands. Replace your network interface card and resource group name:
az network nic update --name <name_of_NIC> --resource-group <resource_group_name> --accelerated-networking true- Press Enter to run the command.
- On the virtual machine page, select Networking under Settings and check if Accelerated Networking is enabled.

- Start the Barracuda Web Application Firewall virtual machine.