

This feature is available for the Barracuda Web Security Gateway 410 and 410 Vx and higher, running version 11.0 and above. Note that the Barracuda Chromebook Security Extension does not support user/device pairing; it should be installed in any Chrome browser that a user logins into which is tied to their Google domain. The extension will be disabled if it detects that the device it was installed on is not running a Chrome OS.
With the Barracuda Chromebook Security Extension installed on Chromebooks, users are identified and policy is applied based on the user whether they are inside your network or accessing the Internet from a public or private network. For example, this feature provides security for students, even when they take their Chromebooks home. Additionally, user generated traffic is logged and recorded for reporting purposes, providing administrators insight into all user activity.
The extension provides:
Enforcing of security policies provided by the Barracuda Web Security Gateway
Control and visibility over both HTTP and HTTPS traffic, without sending any user generated traffic through the Barracuda Web Security Gateway
Synchronizing of policy and report data between the Chromebook and the Barracuda Web Security Gateway
Note that the extension, not the Barracuda Web Security Gateway, applies block/allow policies for admin.google.com on the Chromebook.
The Barracuda Chromebook Security Extension is available from the Google Chrome Web Store at no cost, and can be configured in the Google Admin console. Follow the instructions below to get and configure the Barracuda Chromebook Security Extension.
Features supported on the Barracuda Web Security Gateway
In addition to the ability to block HTTPS sites, the extension supports these features:
With the Barracuda Web Security Gateway version 11.x:
Content Filtering
Domain Filtering
Custom Categories
Web Logs
Exceptions (Limited to Content Filtering and Domain filtering)
Reporting, limited to features listed here
Note that application blocking is supported through Chromebook Management (admin.google.com). The following do not apply for Chromebook web traffic with the extension installed:
Settings on the BLOCK/ACCEPT > Web App Control page; i.e. block/allow for applications listed on the page.
Settings on the BLOCK/ACCEPT > Web App Monitor page; i.e. social media content monitoring and suspicious keyword alerts.
Interactive block pages, which allow for login bypass or temporary access tokens, for example.
With the Barracuda Web Security Gateway version 12.x:
All the features supported by the Barracuda Web Security Gateway 11.x
Chromebook Granular Controls:
Option to set the frequency with which the extension attempts to sync traffic log data with the Barracuda Web Security Gateway.
Option to set the frequency with which the extension attempts to fetch and sync policy changes made by the administrator.
Option to configure Request Types to Filter - For example, not filtering stylesheets, images, or other object types reduces the processing load on the Chromebook.
Time based policies
Temporary Access Token features
Google Directory Services
The following do not apply for Chromebook web traffic with the extension installed:
Settings on the BLOCK/ACCEPT > Web App Control page; i.e. block/allow for applications listed on the page.
Settings on the BLOCK/ACCEPT > Web App Monitor page; i.e. social media content monitoring and suspicious keyword alerts.
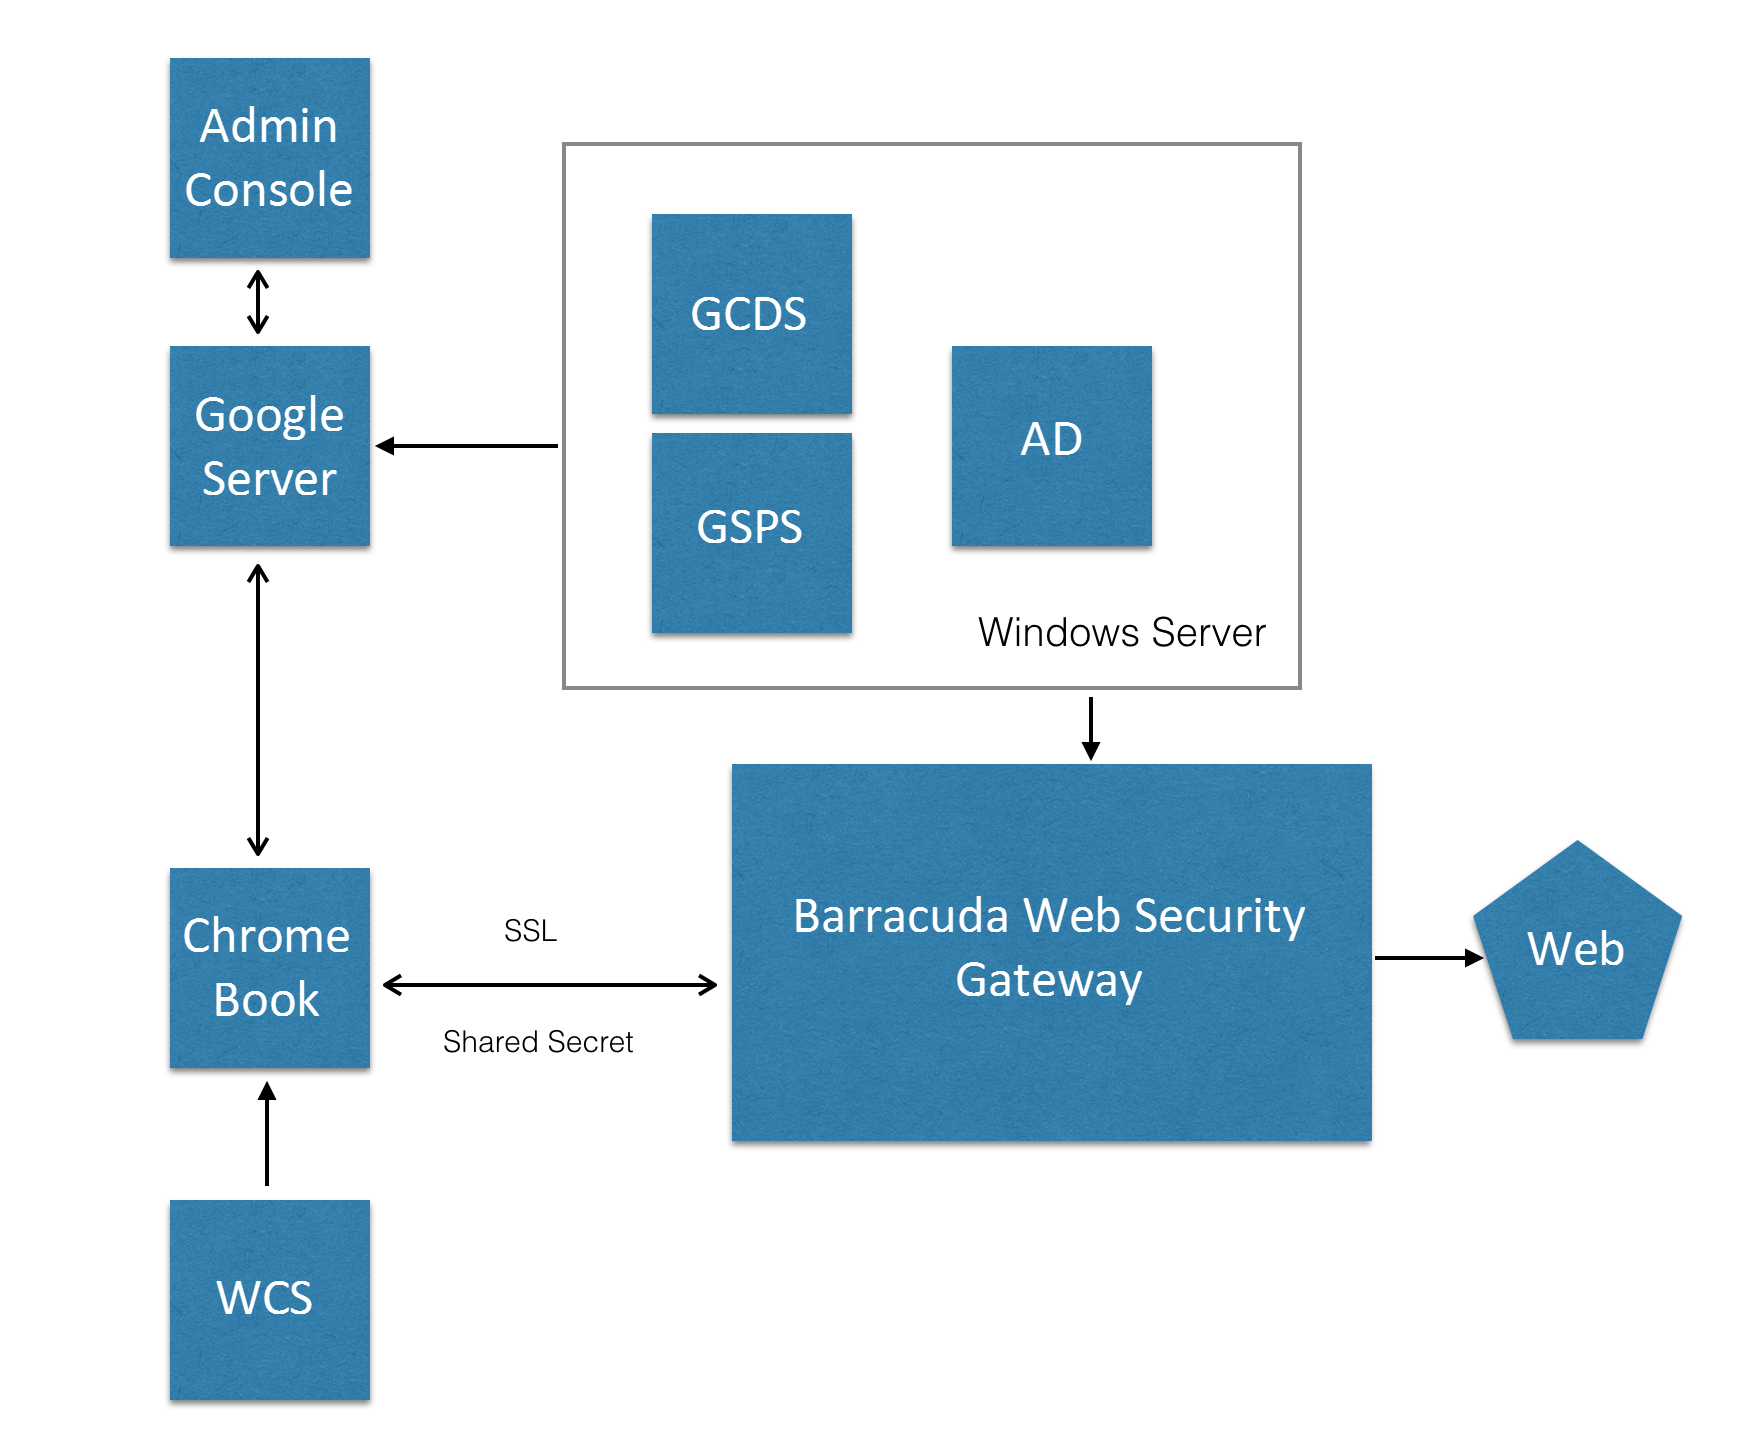
How the Barracuda Chromebook Security Extension Works
When installed on a Chromebook, the Barracuda Chromebook Security Extension queries the Barracuda Web Security Gateway for block/accept policies and applies them to all Chromebook web traffic. The extension is configured using the Google Admin console and can optionally use the Google Cloud Directory Sync (GCDS) and Google Workspace Password Sync (GSPS) to synchronize Chromebook user logins with the Barracuda Web Security Gateway for user-based exception policies.
If you do not configure GCDS/SSO, you can create local users with matching usernames, which will automatically match users coming from the google domains.
Authentication for Chromebook Users
For all Chromebook deployments, when using the Barracuda Chromebook Security Extension, configure Google Directory Services as the authentication service the Barracuda Web Security Gateway will use to apply policies to Chromebook users and groups. See How to Configure Google Directory Services for instructions.
How to Download and Use the Barracuda Chromebook Security Extension
Step 1. Prepare the Chromebook configuration file using the Barracuda Web Security Gateway.
Start by generating a text file that specifies the Barracuda Web Security Gateway you want your Chromebooks to sync with for security policies. To create the file:
Log into the Barracuda Web Security Gateway web interface as admin and go to the ADVANCED > Remote Filtering page.
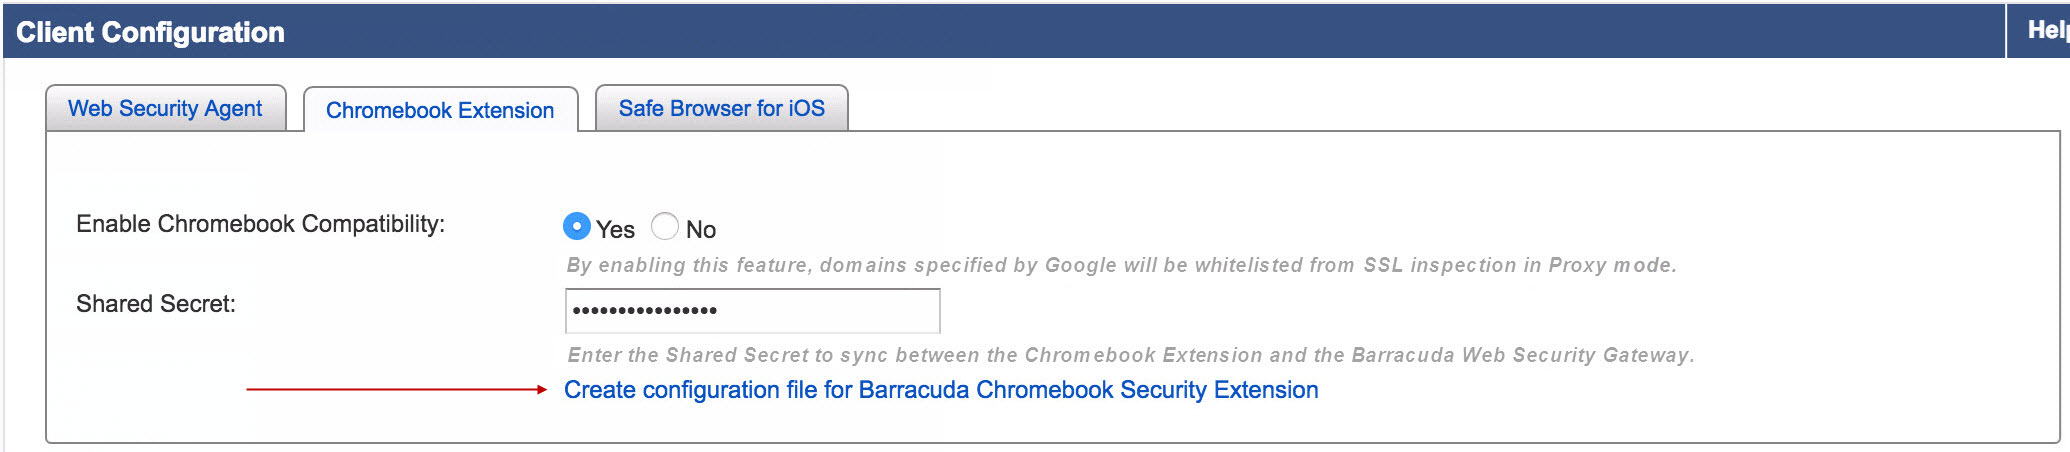
In the Client Configuration section, click the Chromebook Extension tab and configure the following:
Set Enable Chromebook Compatibility to Yes. Port 3128 is opened by default when this option is set to Yes.
Create a shared secret, or password, which is used by the Barracuda Chromebook Security Extension on the Chromebook to communicate with this Barracuda Web Security Gateway. Do not use the "/" or "\" slash characters in the shared secret. It is important to use a text editor, such as Notepad, that does not add any markup to the text.
For example: 17$k2Y4! Enter in the Shared Secret field. Click Save.Click Create configuration file for Barracuda Chromebook Security Extension as shown below.
You will see a popup with the required fields to generate the configuration file:
With the Barracuda Web Security Gateway version 11.0, the fields are as follows:IP Address - This is the same as the IP Address on the BASIC > IP Configuration page.
Web Interface HTTPS/SSL Port - This is the same as the Web Interface HTTPS/SSLPort setting on the ADVANCED > Secure Administration page.
Shared Secret - Re-enter the shared secret you created on the ADVANCED > Remote Filtering page. Click Generate.
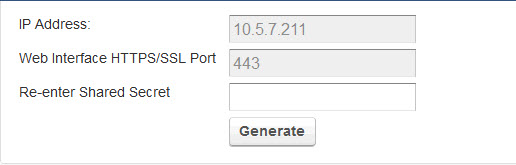
Save the chromebook_config.txt file on your local system or network.
With the Barracuda Web Security Gateway version 12.x, the fields are as follows:
IP Address - This is the same as the IP Address on the BASIC > IP Configuration page.
Web Interface HTTPS/SSL Port - This is the same as the Web Interface HTTPS/SSLPort setting on the ADVANCED > Secure Administration page.
Log Sync Frequency (minutes) - Frequency with which the extension attempts to sync traffic log data with the Barracuda Web Security Gateway. Minimum setting should be 15.
Policy Sync Frequency(minutes) - Frequency with which the extension attempts to fetch and sync policy changes made by the administrator. Minimum setting should be 15.
Request Types to Filter - If you click Select, you will see options you can check for the extension to filter or not filter. For example, not filtering stylesheets or other object types reduces the processing load on the Chromebook.
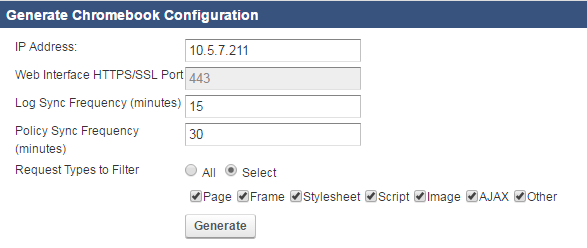
Click Generate to create the configuration file, and save the chromebook_config.txt file on your local system or network.
Step 2. Configure the Barracuda Chromebook Security Extension in the Google Admin console.
Log into Google Admin console as an administrator and add all managed devices per Google instructions here: Enroll Chrome devices.
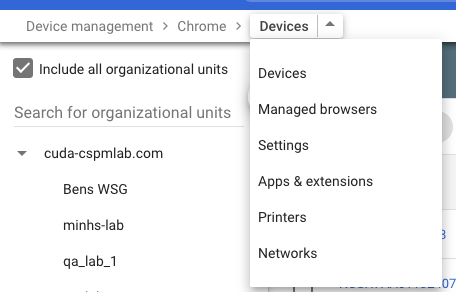
Go to Devices > Chrome Devices and, using the Devices drop-down, select Apps & extensions.
Click on Barracuda Chromebook Security Extension on the Apps & extensions page to configure the extension in the Google Admin console.
Click on the Users & Browsers tab. Modify the settings for: Allow install , Force install , and Pin to taskbar based on your setup requirements. Add Barracuda Chromebook Security Extension.

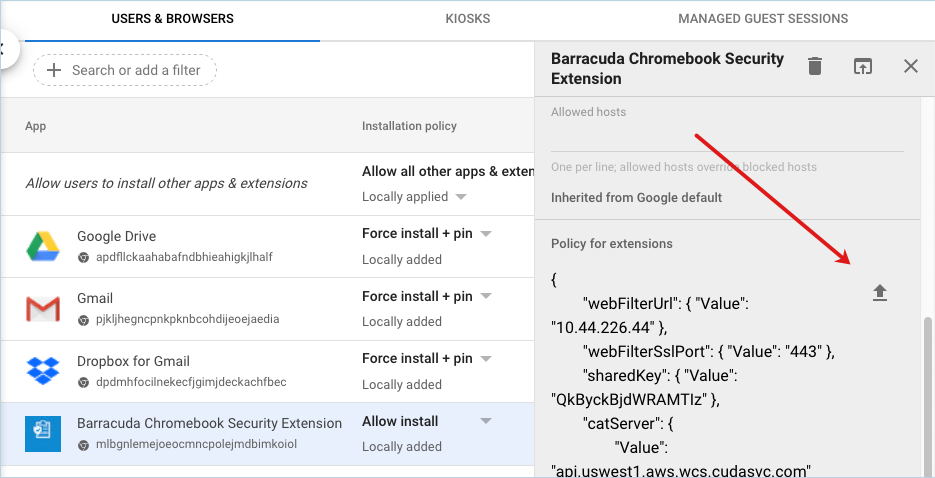
Upload the chromebook_config.txt file you created in Step 1 above (if you had saved the file with a '.json' extension, change the file extension to '.txt') to the Google Admin console. In the Users & Browsers window, in the right navigation window, click the icon to upload the file as shown below. You'll be prompted to select the text file that you created.
Go to Devices > Chrome > Apps & extensions . In the Apps & extensions drop-down, click Settings . Scroll down to the Content section and, in the URL Blocking section, add these URLs to the URL Blocklist:
chrome://policy
chrome://extensions
chrome://indexeddb-internals/
Click SAVE in the upper right of the page.
Go to Devices > Chrome > Apps & extensions. Use Search to find the correct organization. Click on Barracuda Chromebook Security Extension. Under Policy for extensions, add the following:
"blockUnknown": { "Value": "<0 or 1>" }
Note:If the
blockUnknownconfig is set to false (0), requests will be allowed the first time and the category will be queried and cached for subsequent requests.If the
blockUnknownconfig setting is set to true (1), the request will be blocked the first time, but the category will be queried and cached for subsequent requests. This will likely break most pages the first time they are visited, but a refresh should load it correctly.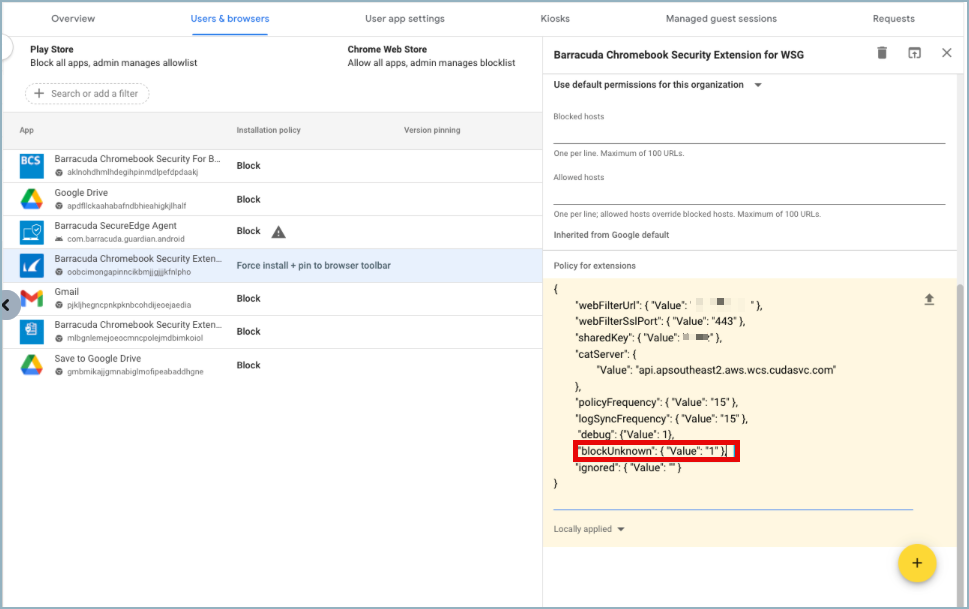
Click SAVE.
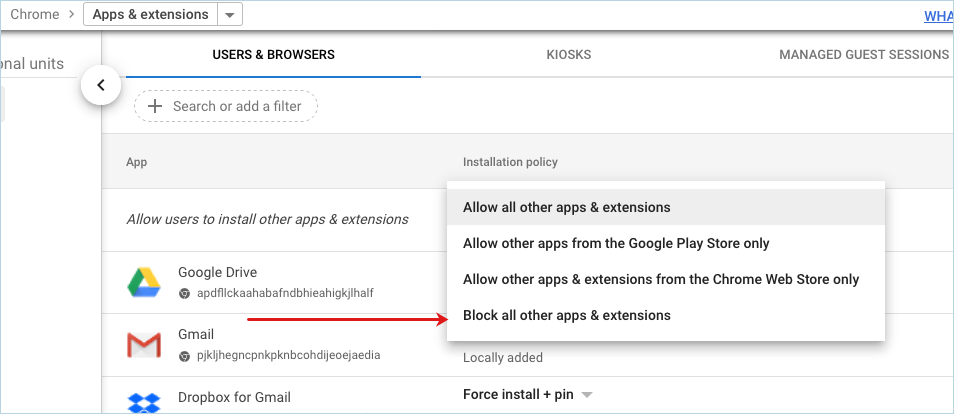
Go to Devices > Chrome > Users & Browsers, and select Apps & extensions from the drop-down. Use the drop-down for Allow all other apps & extensions and disable options for the user to install extensions by selecting Block all other apps & extensions.
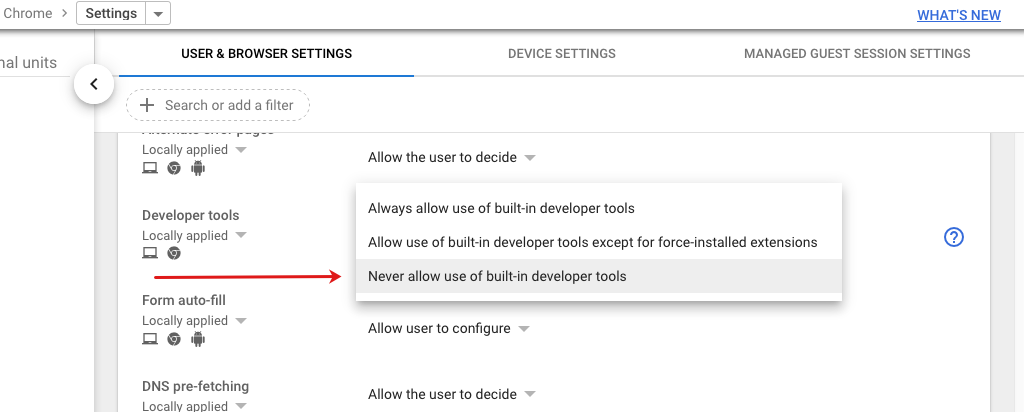
Go to Devices > Chrome > User & Browser Settings. Scroll down to the User Experience section and, next to Developer Tools, use the drop-down to select Never allow use of built-in developer tools.
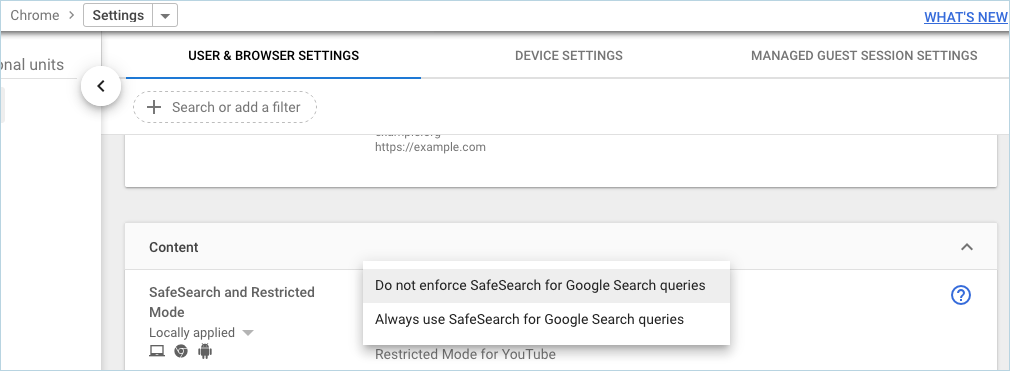
Go to Devices > Chrome > User & Browser Settings and scroll down to the Content section. Next to Safe Search and Restricted Mode, enable Safe Search by selecting Always use Safe Search for Google Search queries.
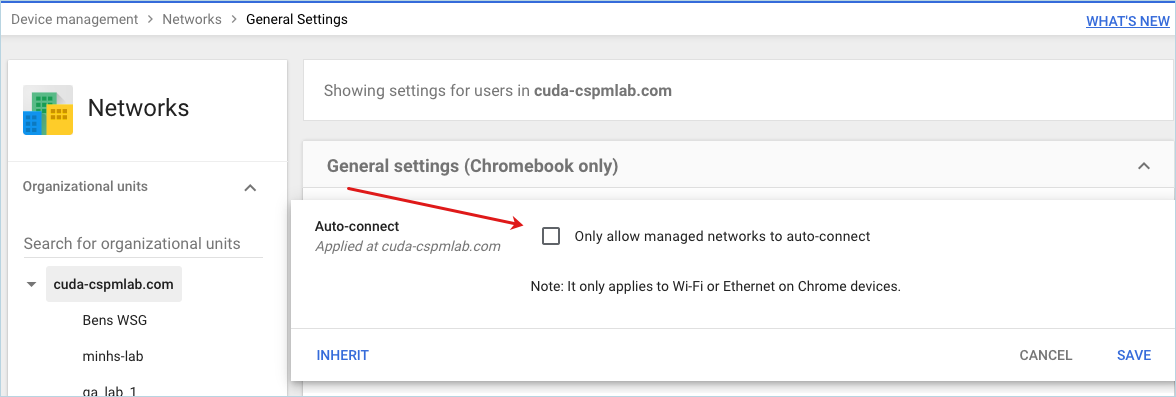
Go to Device Management > Network > General Settings and make sure that Auto-connect is not checked.
Step 3. Configure a Secure Administration certificate on the Barracuda Web Security Gateway.
On the Barracuda Web Security Gateway, go to the ADVANCED > Secure Administration page. On this page, you can create or upload an SSL certificate. Click Help on that page to read more about using SSL certificates.
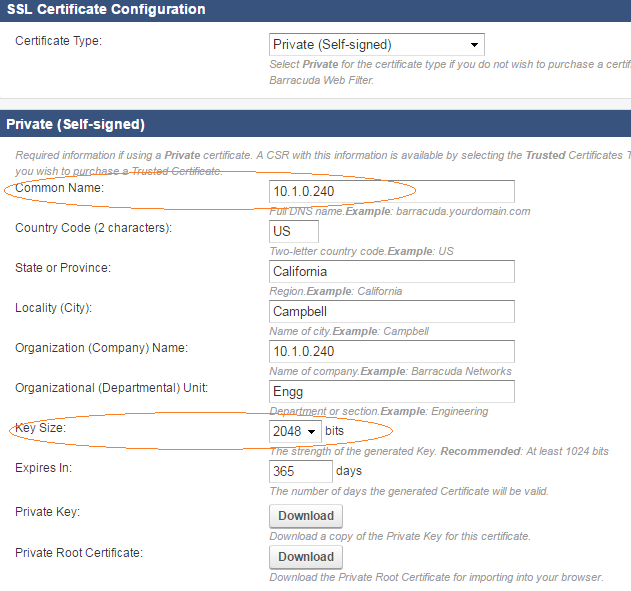
In the SSL Certificate Configuration section, select the Certificate Type as Private(Self-Signed) and fill in the details with the Common Name as the Barracuda Web Security Gateway IP address (or a hostname that resolves to that IP address) , and Key Size as 2048. Click Save.
Reload the page, and then download the Private Root Certificate.
On the Google Admin console, go to Device Management > Network > Certificates. Click Add Certificate and upload the certificate.

Select Use this certificate as an HTTPS certificate authority. Click Save.
Step 4. Proxy web traffic to the Barracuda Web Security Gateway
Each SSID that is known to be behind the Barracuda Web Security Gateway that the Barracuda Chromebook Security Extension will connect to needs to be defined in admin.google.com with proxy settings as shown in the following steps. This step prevents inline SSL Inspection Barracuda Web Security Gateway deployments from blocking Chromebooks from authentication with Google on the Chromebook login screen. For proxy deployments or non-SSL Inspection deployments, this step is not necessary, but recommended as it will avoid any deployment related issues in case deployment is switched at some point from proxy deployment to inline.
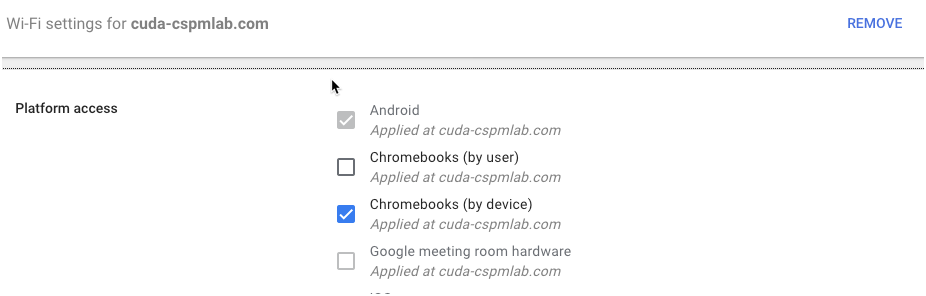
Log into Google Admin console as an administrator and go to Device Management > Networks > Wi-Fi. Select the Wi-Fi network to manage.
Make sure that, in the Platform Access section, Chromebooks (By Device) is checked, not Chromebooks (By User).
Change Proxy Settings to Manual Proxy Configuration.
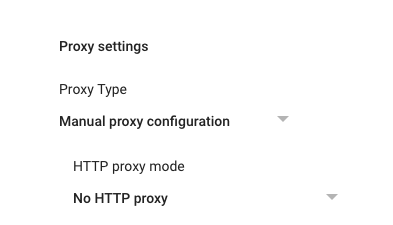
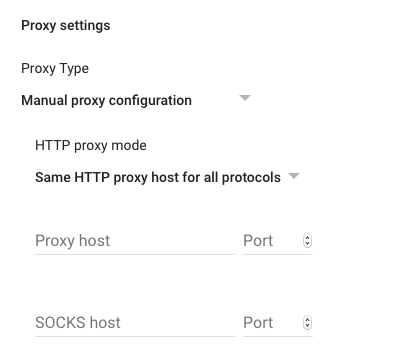
Under HTTP proxy mode, select Same HTTP proxy host for all protocols.
Enter the host IP address or hostname for Proxy host and the Proxy Port configured on the ADVANCED > Proxy page for the Port.
Click Save.
Set Up Single Sign-on for Active Directory (AD) to Sync With Google Accounts
This setup is optional.
Download the Google Cloud Directory Sync (GCDS) https://support.google.com/a/answer/6120989?hl=en
In the Google Admin console, go to Domains > Add/remove Domains and enter your public domain name into your admin.google.com account.
Follow instructions at https://support.google.com/a/answer/6123891 to configure GCDS to sync your user configuration for LDAP.
Follow instructions at https://support.google.com/a/answer/2611842?hl=en to use Google Workspace Password Sync (GSPS) to sync user passwords with your LDAP.`
When Using SSL Inspection
If you enable the SSL Inspection feature on the Barracuda Web Security Gateway (set to 'On' on the ADVANCED > SSL Inspection page), be sure to do the following:
Download a client certificate from the Advanced > SSL Inspection page.
On the Google Admin console, go to Devices > Network > Certificates. Click Add Certificate and upload the certificate.
Select Use this certificate as an HTTPS certificate authority. Click Save.
Next, add the domains listed by Google: Set Up a Hostname Allow List to the Exempted Domains section of the page. This step prevents inline Barracuda Web Security Gateway deployments from blocking Chromebooks from authentication with Google on the Chromebook login screen.
How to Update the Barracuda Chromebook Security Extension
When there is a new version of the extension available, the user must log out of the Chromebook and log in again to get the latest version. Any time the user logs in, the latest version of the extension is in place.